Free tools Windows power users keep installed
One-click scans. No signup required.
The right way to patch a drywall hole depends on the size of the damage and what is behind it. A nail hole is a quick spackle repair. A doorknob-size hole usually needs a reinforced patch, a California patch, or backing. A large opening should be squared off, supported with framing or furring strips, covered with matching drywall thickness, taped, coated in thin passes, sanded, primed, textured if needed, and painted.
That sounds simple until the repair is on a ceiling, in a garage separation wall, on a pre-1978 painted surface, under old water damage, or in a room with knockdown texture and low-angle natural light. On our job sites, the patch itself is rarely the expensive part. The real work is protecting the space, cutting cleanly, supporting the patch, controlling dust, matching the surrounding finish, and knowing when the wall is part of a code-required assembly instead of just a painted surface.
This guide walks through drywall hole repair the way a builder looks at it: size first, risk second, finish quality third. If you want the short version, small holes can be filled; medium holes need reinforcement; large holes need a real piece of drywall mechanically fastened to something solid.
Start With the Size of the Hole
Before you buy a patch kit, measure the damaged area across its widest point. Include broken paper, cracked gypsum, soft edges, and any area that moves when you press it. Do not size the repair by the clean-looking center hole only.
Do these 3 things before closing this tab:
1Clear out junk files and repair common Windows errors2Fix the driver behind crashes, sound loss and screen glitches3Repair Windows errors before they cause bigger problems#1 Best Overall

- Complete Repair Kit: Contains 1 pieces repair putty(8.5oz), 2 inch wall repair patches(2pcs), 4 inch wall repair patches(1pcs), 2 pieces of sandpaper, and 4 plastic scrapers.
- Waterproof Formula: The drywall repair kit contains a waterproof wall mending agent that dries quickly and leaves no residue.
- Strong Adhesion: Drywall repair patches are made from quality aluminum, making them lightweight yet strong and durable for long-lasting performance.
- Multipurpose: Wall repair patch is suitable for repairing most damaged surfaces around the home, kitchen, or office building, as well as factories and other industrial facilities.
- Ideal for DIY home renovations: Whether you're an experienced pro or a beginner, our wall patch repair kit makes wall repair a breeze, enhancing the beauty of your home.
| Hole size | Best repair method | Typical materials | DIY time | DIY material cost |
|---|---|---|---|---|
| Nail holes, screw holes, small dents under 1/2 inch | Fill and sand | Lightweight spackle, putty knife, sanding sponge, primer | 30 to 60 minutes active time, often with overnight dry time | $10 to $25 if you already have primer and paint |
| Small holes up to about 4 inches | Mesh patch, patch kit, or California patch | Reinforced patch, joint compound, 6 inch knife, sanding sponge | 1 to 2 hours active time over 1 to 2 days | $10 to $55 for a basic kit and supplies |
| Medium holes about 4 to 12 inches | Drywall patch with wood backing or repair clips | Drywall piece, 1×3 or 1×4 backing, screws, tape, compound | 2 to 4 hours active time over 1 to 3 days | $25 to $80 depending on tools and paint |
| Large holes over about 12 inches | Cut-in drywall piece fastened to studs or backers | Matching drywall panel, backing or framing, tape, compound, primer, texture and paint | 3 to 6+ hours active time over 2 to 4 days | $30 to $120+ before specialty texture, paint, or dust control |
These size breaks match the practical approach used by most drywall trades and home center repair guides, including guidance from Lowe’s drywall repair instructions. The exact cutoff is not magic. A 3 inch hole in a low-traffic closet can be handled differently than a 3 inch doorknob hole in a hallway that gets hit every week. Strength matters where the wall gets bumped.
Tools and Materials You Actually Need
For small repairs, keep it simple. You need lightweight spackle or all-purpose joint compound, a 2 to 4 inch putty knife, a sanding sponge around 180 to 220 grit, primer, and touch-up paint. For a few nail holes, that may be a $10 to $25 supply run.
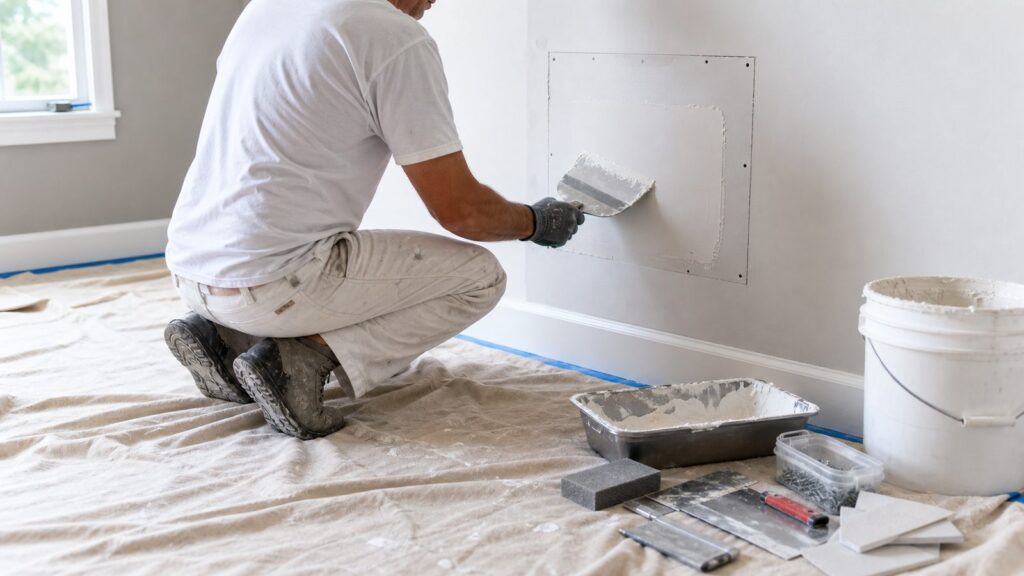
For anything larger than a small dent, step up to drywall repair materials. A useful homeowner kit includes a utility knife with sharp blades, drywall saw, 6 inch taping knife, 10 or 12 inch finishing knife, joint tape, joint compound, sanding sponge, drop cloth, shop vacuum with a good filter, dust mask or respirator, primer, and paint. For large holes, add a drywall repair panel, wood backing strips, and drywall screws.
Spackle vs. joint compound
Use spackle for tiny holes and shallow dents. It dries quickly, shrinks less in small fills, and sands easily. Do not use spackle to bridge a large void. It has no real backing strength, and a thick blob will crack or pop loose.
Use joint compound for taped repairs, skim coats, and patches that need feathering. Premixed all-purpose compound is easy to work with but dries slowly. Setting-type compound, often sold in 20, 45, or 90 minute versions, hardens by chemical set and is useful for stronger first coats and faster turnarounds. On larger patches, many pros use setting compound for the first coat and easier-sanding topping or all-purpose compound for the final coat.
Match the drywall thickness
Do not guess at panel thickness. Cut a small inspection edge or measure at the damaged opening. Common residential walls are often 1/2 inch drywall. Many garages, mechanical rooms, rated corridors, stairwells, and separation walls use 5/8 inch Type X or layered gypsum systems. USG repair panels, for example, are commonly sold in 1/2 inch and 5/8 inch thicknesses for this reason.
If the patch is thinner than the wall, you will create a hollow depression that takes too much compound to hide. If it is thicker, you will create a hump that catches light after paint. A clean patch starts flush with the existing wall surface before the first coat of mud goes on.
How to Patch Nail Holes, Screw Holes, and Small Dents
For nail holes, picture-hanger holes, anchor holes, and small dents, the goal is to fill only the void and leave as little extra material as possible on the surrounding wall.
What’s actually slowing this PC down?
Pick the symptom - the matching free tool is one click away.
- Remove loose paint, paper, or raised gypsum with a utility knife.
- If the hole has a raised rim, press it gently flat or shave it flush.
- Apply lightweight spackle with a 2 to 4 inch knife, pressing across the hole in two directions.
- Scrape the knife nearly flat against the wall so the fill is slightly proud, not mounded.
- Let it dry. Many small fills dry in 30 minutes to a few hours, but deeper anchor holes may need overnight.
- Sand lightly with 180 to 220 grit until the repair feels flush under your fingertips.
- Spot prime before painting, especially on eggshell, satin, semi-gloss, or darker colors.
The common mistake is overfilling. A nail hole does not need a 10 inch smear of compound. The second mistake is skipping primer. Bare spackle and joint compound absorb paint differently than painted drywall, which causes flashing: a dull or shiny spot that shows even when the surface is smooth.
For popped screws or nail pops, do not just smear compound over the bump. Drive the loose fastener slightly below the paper, add a new drywall screw 1 to 2 inches above or below it into the same framing member, then fill both dimples. The screw head should dimple the paper without tearing through it.
How to Patch Small Holes Up to About 4 Inches
Small holes from wall anchors, towel bars, doorknobs, and accidental impacts need reinforcement if the gypsum is broken through. You have two practical options: a peel-and-stick mesh patch or a California patch. A mesh patch is faster. A California patch usually finishes flatter because the paper flange becomes the tape.
Rank #2

- Drywall repair kit can be used for repairing interior or exterior surfaces like drywall, plaster, wood, brick and stone
- Color indicator spackle goes on pink and dries white providing confirmation the product is dry within 1 to 5 hours
- Wall patch dries within 1 hour for repairs 1/8" in depth; for repairs deeper than 1/8" apply two or more layers and allow spackle to dry between applications
- Durable spackling will not crack, crumble, flake or shrink and creates professional looking wall repairs that last
- No priming required when used indoors, kit contains: spackle, 5x5 fiber tough patch, 4x3 100 grit sandpaper and putty knife
Using a mesh patch
A mesh patch is acceptable for small holes, especially in low-impact areas. Trim broken drywall back to a stable edge. Sand the surrounding paint so compound can bond. Center the patch over the hole, press it flat, and apply joint compound with a 6 inch knife. The first coat should cover the mesh and extend 2 to 3 inches beyond it. Let it dry or set, scrape ridges, then apply a second coat 8 to 10 inches wide. A third thin skim may be needed if the patch edge still telegraphs.
Mesh patches have one drawback: they sit on the face of the wall. If you leave the compound too tight to the patch, the repair becomes a visible raised island. Feather wide and keep the coats thin.
Using a California patch
A California patch works well for holes roughly 2 to 6 inches when the surrounding drywall is sound. Cut a square drywall piece several inches larger than the hole. On the back side of the patch, score and remove the gypsum around the center square, leaving the face paper intact as a wide flange. The center gypsum fills the hole; the paper flange becomes built-in tape.
Apply joint compound around the hole, press the patch into place, embed the paper flange, and knife it flat from the center outward. Cover with two or three thin coats, feathering wider each time. This method takes a little more handwork than a peel-and-stick patch, but it avoids the thick metal or mesh edge that can show under paint.
For doorknob holes, add a doorstop after the repair. A $5 to $15 bumper is cheaper than repairing the same wall twice.
How to Patch Medium Holes, About 4 to 12 Inches
Once a hole is too large for a surface patch, install backing. Backing gives the patch something to screw into and keeps the repaired area from flexing. Flex is what cracks the joint line later.
- Use a stud finder and careful probing to check for wiring, plumbing, low-voltage cable, ducts, or blocking behind the damaged area.
- Mark a square or rectangle around the damage. Keep the lines plumb and level so the patch is easy to cut.
- Cut the opening with a utility knife and drywall saw. Stop if you feel resistance that is not drywall.
- Cut two 1×3 or 1×4 wood backers 4 to 6 inches longer than the opening height.
- Slip the backers inside the wall and fasten them through the existing drywall with drywall screws. Keep screw heads slightly dimpled.
- Cut a drywall patch about 1/8 inch smaller than the opening in each direction so it fits without forcing.
- Screw the patch to the backers every 6 to 8 inches around the perimeter.
- Tape the seams with paper tape or fiberglass mesh, then apply compound in thin coats.
Paper tape is strong and finishes flat, but it takes a little skill to embed without bubbles. Mesh tape is easier to place, but it should be used with the right compound system because it can crack if the joint moves. For a medium repair in a busy hallway, we prefer wood backing, screws, tape, and several thin coats over a one-piece stick-on patch.
Do not leave crumbly edges. If the drywall paper is torn, fuzzy, or delaminated, trim it back to sound material. If the gypsum core is soft from moisture, expand the cut until you reach dry, firm board.
How to Patch a Large Drywall Hole Over 12 Inches
A large drywall hole should be treated like a small drywall installation, not a cosmetic fill. The patch needs framing support, matching board, correct fasteners, taped seams, and enough finishing width to disappear.
Quick wins for a faster PC:
Clear out junk files and repair common Windows errorsFree Scan →Fix the driver behind crashes, sound loss and screen glitchesFind Drivers →Repair Windows errors before they cause bigger problemsFix Now →Start by opening the wall neatly. If the hole spans one stud bay, cut a rectangle that exposes the center of the studs on the left and right sides, or install solid backers behind the existing wall. If the damage is between studs and you do not want to enlarge to studs, use 1×3 or 1×4 backers at the vertical edges and horizontal backers at the top and bottom. The patch should be supported on all edges.
Rank #3

- The drywall repair kit includes 2x Wall mending agent (100g), 2x Nozzle Extender, 1x Scrapers, and 2x Sandpaper.
- This drywall patch repair kit Easily and quickly repair the damaged wall.Just gently squeeze out and use a spatula to smooth. spackle wall repair kit can be reused, Meet your various repair needs.
- The new upgrade wall patch repair kit is very safe, it does not contain formaldehyde. It is highly resistant to breakage, streak-free and waterproof.And the mending will be virtually invisible, then giving you professional-looking results.
- BONCART wall repair kit can solve all kinds of wall damage.Drywall cracks,wall stains,nail holes,wall peeling,wall stains,wall graffiti.Let your walls a new look.
- Best Service:Fast pre-sale and after-sale response, any questions about the product are welcome to contact us at any time.
Cut the new drywall from the same thickness as the existing wall. Standard 1/2 inch drywall is common inside living areas. Use 5/8 inch where the original wall uses 5/8 inch, and do not downgrade Type X or layered assemblies in a garage, multifamily separation, utility room, stairwell, or rated corridor.
Set the patch with a small gap, usually about 1/8 inch, rather than forcing it tight. Fasten with drywall screws long enough to bite the wood securely; 1-1/4 inch coarse-thread screws are common for 1/2 inch drywall over wood backing. Keep screws back from fragile edges, generally 3/8 inch or more, and space them about 6 to 8 inches around the patch unless an assembly detail requires something different.
Tape all seams. Apply the first coat to embed the tape and cover fasteners. Scrape ridges after it sets or dries. Apply a second coat wider than the first. Apply a third coat wider again. A large patch may need compound feathered 16 to 24 inches or more beyond the seam on each side. That wide blend is not wasted work. A small hump is visible; a broad, thin transition disappears.
Plan the schedule realistically. A homeowner can cut, back, hang, and first-coat a patch in one afternoon. Finishing usually stretches over 2 to 4 days because compound needs drying time before sanding, priming, texturing, and painting. Setting compound can shorten the early coats, but final appearance still depends on dry, smooth, properly primed surfaces.
Finishing, Sanding, Priming, and Paint Matching
A drywall patch is judged after paint, not after sanding. Under job lights, a patch can look perfect and still flash once primer and finish paint hit the wall. Good finishing is patient, thin, and wide.
Use thin coats
Thick compound shrinks, cracks, and takes too long to dry. Thin coats dry cleaner and sand faster. After each coat, use the knife to scrape off ridges before applying the next coat. Scraping saves more time than sanding.
For small repairs, a 6 inch knife may be enough. For medium repairs, use a 10 or 12 inch knife on the second and third coats. For large repairs, a broad finishing knife helps flatten the transition. Hold the knife tight on the outside edge and slightly lifted over the patch so the compound feathers away from the repair.
Sand without damaging the wall
Use 150 to 180 grit for shaping high spots and 220 grit for final smoothing. Sand lightly. If you expose or fuzz the drywall paper, stop and seal it before applying more compound or primer. Torn paper absorbs moisture and can bubble under mud.
Drywall dust travels fast. Close the room off, cover floors and furniture, and vacuum frequently with a HEPA-rated setup where possible. For professional work, OSHA guidance on drywall sanding recognizes that exposure conditions vary, and contractors still need to control dust and follow applicable worker-safety rules. The relevant OSHA interpretation is available here.
Prime before paint
Always prime the repaired area. Primer seals the compound so finish paint absorbs evenly. If the wall is flat white in a closet, a small touch-up may blend. If the wall has sheen, age, sunlight exposure, or a custom color, repainting from corner to corner gives the best result. That is why professional estimates often include more paint labor than homeowners expect.
Rank #4
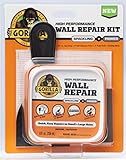
- ALL IN ONE WALL REPAIR KIT: Contains all of the tools you need to complete strong, durable repairs on walls, ceilings and both small and large holes for a fast, professional-looking finish
- KIT INCLUDES EVERYTHING NEEDED: 8 ounce tub of Spackling plus Primer, 4 in self-adhesive patch, 3 in putty knife and sanding block for complete drywall, plaster and ceiling repair projects
- SPACKLING AND PRIMER IN ONE: Paints like drywall with a heavy duty, lightweight, no sag formula that is shrink and crack proof for clean, professional looking finished wall and ceiling repairs
- FAST DRYING EASY TO SPREAD: Paintable in 15 minutes, with dry time assuming a hole 1/2 in diameter by 1/8 in deep, varying with temperature and humidity, and a smooth finish that does not require sanding
- INDOOR OUTDOOR DIY READY: Designed for interior and exterior wall fixes including nail holes, doorknob dents, hairline cracks and large holes, with exterior paint required outdoors and not for continuous water submersion
Match texture before final paint
A flat patch on a textured wall will stand out. Orange peel, knockdown, skip trowel, and popcorn all require matching. For orange peel, aerosol texture can work for small areas, but nozzle setting, distance, and speed matter. For knockdown, spray or apply the texture, wait until it partially sets, then flatten it lightly with a wide knife. For popcorn ceilings, matching is messy and usually more visible than people expect.
The Tool Desk
Outbyte Driver Updater FREEFix the driver behind crashes, sound loss and screen glitchesFind Drivers →Outbyte PC Repair FREERepair Windows errors before they cause bigger problemsFix Now →Practice texture on cardboard first. Prime the patch before judging the texture because raw compound and texture material look different from painted wall. When the texture is close, prime again if needed, then paint the full visual area.
2026 Drywall Repair Costs: DIY and Professional Pricing
Drywall materials are inexpensive. Labor, setup, finish quality, access, return trips, and paint matching drive the bill. In 2026, national repair averages vary because a small patch still requires a contractor to schedule the job, protect the room, make the repair, wait on compound, sand, prime, and often come back.
| Repair scope | Typical 2026 cost | What is usually included |
|---|---|---|
| DIY nail holes or small dents | $10 to $25 if paint is on hand | Spackle, sanding sponge, small knife, spot primer |
| DIY small hole patch kit | $10 to $55 | Mesh or patch kit, compound, sanding supplies; primer and paint may add cost |
| DIY large hole materials | $30 to $120+ | Repair panel or partial sheet, backing strips, tape, compound, screws, sandpaper, primer, texture or paint supplies |
| Simple local handyman-style patch | $120 to $300 per patch in some markets | Often excludes full-wall painting, difficult texture, moisture repair, utility work, and multiple return trips |
| Typical professional drywall repair | Common national averages cluster around $350 to $612 | Small to moderate repairs, labor, basic materials, sanding; paint may or may not be included |
| Broad professional range | About $150 to $2,000 | Varies by hole size, number of patches, wall vs. ceiling, finish level, water damage, access, and local labor |
| Large hole repair | Often $500 to $800+ | Cut-in drywall piece, backing or framing, tape, compound, sanding, possible texture and paint |
| Ceiling drywall repair | About $350 to $1,500+ | Overhead labor, dust protection, possible water-damage investigation, texture matching, repainting |
Published 2026 pricing lines up with what we see in the field. Angi reports an average drywall repair cost around $612, with a typical range of $150 to $2,000. HomeAdvisor lists an average wall repair cost around $906, with many projects between $380 and $1,436 and simpler drywall labor around $60 to $80 per hour. Fixr places many drywall repair jobs between $200 and $550, with an average around $350. HomeGuide lists small hole repairs commonly at $300 to $500, large holes at $500 to $800+, and ceiling repairs at $350 to $1,500+.
The lowest quote is not automatically the best value. Ask whether the price includes dust protection, texture matching, primer, paint, and return trips. A wall patch that is structurally sound but visible under afternoon light is not finished work.
PC Slower Than It Used to Be?
A free scan shows the junk files, broken settings and background clutter dragging Windows down - then fixes them in one click.Free scan · Windows 10 & 11Outdated Drivers Are Slowing You Down
One free scan finds every outdated or missing driver and matches the right update for your exact hardware.Free scan · exact hardware matchWhen to DIY and When to Hire a Professional
DIY is reasonable when the hole is small, the wall is not fire-rated, the surface is not suspected lead paint, there is no water damage, and you already have matching paint. Nail holes, shallow dents, small anchor holes, and a simple 2 to 4 inch patch in a low-visibility area are fair homeowner projects.
Hire a pro when the repair affects a ceiling, covers a large or highly visible wall, includes heavy texture, exposes wiring or plumbing, follows a leak, involves mold, or sits in a garage or multifamily separation wall. Also hire a qualified contractor when you need the repair to blend into a finished living space where sunlight will rake across the wall. Smooth drywall is unforgiving under side lighting.
Pre-1978 homes deserve extra caution. A homeowner working on their own home should still test painted surfaces and use lead-safe containment. Paid contractors working in pre-1978 housing or child-occupied facilities can trigger EPA Renovation, Repair and Painting requirements. EPA’s program information is posted at the EPA RRP page, and the rule generally requires certified firms and trained renovators when regulated painted surfaces are disturbed.
A good drywall repair contractor should be able to explain how they will support the patch, what compound system they will use, how many coats are included, whether paint is included, how they will control dust, and what happens if texture match needs adjustment after primer.
Recommended Free Tools
Safety, Lead Paint, Moisture, Fire-Rated Walls, and Permits
Before cutting drywall, assume there may be something behind it. Use a stud finder with electrical detection if available, look for outlets and switches in the same stud bay, check the opposite side of the wall, and cut shallow at first. A drywall saw can puncture plumbing, thermostat wire, security wire, or electrical cable if you push blindly.
Best Value

- Package includes 12 pieces of drywall repair patch in three different sizes (8 pieces of 4-inch, 2 pieces of 6-inch and 2 pieces of 8-inch), 2 pieces of sandpaper (240 grit), and 2 plastic scrapers.
- Bates drywall repair patches are made from quality aluminum, making them lightweight yet strong and durable for long-lasting performance.
- The self-adhesive backing makes it easy to apply the patch to the wall, ensuring good adhesion to nearly any kind of surface.
- Bates wall repair patch is suitable for repairing most damaged surfaces around the home, kitchen, or office building, as well as factories and other industrial facilities.
- To use this product effectively, first clean and dry out the hole you want to patch before peeling back the backing and applying the drywall patch. Evenly spread out plaster with a scraper afterwards for a more seamless look.
Moisture damage should not be patched until the source is fixed. If the drywall is swollen, soft, stained from an active leak, moldy, or delaminated, remove damaged board back to dry, solid material. Patching over wet gypsum traps the problem and usually leads to stains, odor, failed paint, or mold growth.
Fire-rated assemblies are not cosmetic walls. Garages attached to living space, multifamily party walls, rated corridors, stairwells, utility rooms, and some mechanical spaces may rely on gypsum board thickness, type, layers, fastener spacing, joint treatment, and penetrations to maintain a required rating. The Gypsum Association’s GA-225 repair guidance addresses restoring damaged fire-resistance-rated gypsum systems to their original fire-resistant condition. In plain terms, do not replace 5/8 inch Type X with 1/2 inch scrap board and call it done.
Most small cosmetic drywall patches do not require a building permit, but local rules control. As of July 31, 2026, San Antonio lists sheet rock repair such as patching holes as no-permit work, and Chicago describes limited nonstructural repairs and minor alterations as work that may not require a permit. Those examples are useful, but they are not a substitute for your local building department. If the work changes framing, affects electrical or plumbing, repairs storm damage, alters a rated assembly, or involves a commercial or multifamily property, check first.
The Tool Desk
Outbyte PC Repair FREERepair Windows errors before they cause bigger problemsFix Now →Outbyte Driver Updater FREEScan for outdated or missing drivers - takes under a minuteDriver Scan →Quality Checklist Before You Call It Done
A finished drywall patch should be solid when pressed, flush with the surrounding wall, free of tape bubbles, and invisible under normal room lighting after primer and paint. Before you clean up, check the repair from three angles: straight on, from the left, and from the right. Low-angle light will show humps, ridges, sanding scratches, and texture mismatch.
Run your hand over the patch with your eyes closed. Your fingers will catch ridges that your eyes miss. Look for pinholes in the compound, paper fuzz, raised tape edges, visible fastener dimples, and texture that stops abruptly at the patch. Fix those before paint. Paint makes small defects more obvious, not less.
The best drywall repairs are not rushed. Cut to sound material, support the patch, match the board, tape the seams, build several thin coats, feather wider than seems necessary, sand lightly, prime, match texture, and paint enough of the wall for the repair to disappear. That process is slower than smearing compound over a hole, but it is the difference between a patch and a repair.
Frequently Asked Questions
How do you patch a small hole in drywall?
Clean loose paper, fill tiny holes with lightweight spackle, let it dry, sand lightly, prime, and paint. For holes up to about 4 inches, use a mesh patch or California patch with joint compound feathered 6 to 12 inches wide.
What is the best way to repair a large drywall hole?
Cut the damage into a clean square or rectangle, add wood backing or expose studs, install matching drywall thickness, screw it securely, tape the seams, apply several thin coats of compound, sand, prime, texture, and paint.
When should I use spackle versus joint compound?
Use spackle for nail holes, screw holes, and shallow dents. Use joint compound for taped seams, mesh patches, California patches, medium holes, large holes, skim coats, and repairs that need wide feathering.
How much does drywall repair cost in 2026?
DIY small-hole materials commonly run $10 to $55. DIY large-hole materials often run $30 to $120+. Professional repairs commonly land around $350 to $612 on average, with broad ranges from about $150 to $2,000 depending on scope.
Do I need a permit to repair drywall?
Most small cosmetic drywall patches do not require a permit, but local rules vary. Check first when work affects framing, electrical, plumbing, fire-rated walls, multifamily buildings, commercial spaces, or storm and water-damage repairs.
Recommended Free Tools
When should I hire a professional for drywall repair?
Hire a pro for ceiling patches, large holes, heavy texture matching, moisture or mold damage, exposed utilities, pre-1978 painted surfaces, garage separation walls, multifamily walls, and any repair that must preserve a fire-rated assembly.
Quick Recap
Product prices and availability are accurate as of the date/time indicated and are subject to change. Any price and availability information displayed on Amazon at the time of purchase will apply.