There is no universal patch for a crack in a 3D-printed concrete wall. The safe sequence is to identify the wall system, document the crack, determine whether it is moving or leaking, establish the likely cause, and have a qualified structural professional select the repair. Epoxy injection, flexible sealant, grout, reinforcement, and surface treatments solve different problems; using the wrong one can conceal movement or leave water and deterioration untreated.
Do not choose a material from the crack’s appearance alone. A 3D-printed wall may be load-bearing, non-load-bearing, or part of a shear system, with performance dependent on printed layers, interlayer bonding, reinforcement, connections, and the specified material. Those details must be checked against the project design and applicable requirements before repair work begins.
As an Amazon Associate I earn from qualifying purchases.
Why a 3D-printed wall needs a system-specific assessment
Conventional concrete crack advice cannot automatically be transferred to a printed wall. Automated construction creates bead-shaped layers and interfaces whose orientation, bond, reinforcement, and connection details are part of the wall’s structural behavior. A crack that appears to be a surface defect may follow a printed layer, cross several beads, pass through a reinforced zone, or coincide with a connection. The repair must preserve the wall’s intended load path and durability, not merely improve its appearance.
ICC 1150-2026, Standard for Automated Construction Technology for 3D Printing Walls, addresses interior and exterior printed wall systems, including load-bearing, non-load-bearing, and shear walls. It also covers material qualification, structural design, inspection and construction quality assurance, interlayer bonding, reinforcement, and wall connections. ICC reported publication on March 28, 2026, and ANSI approval on July 15, 2026. Whether it governs a particular project depends on local adoption, the project’s approval documents, and the wall’s design basis.
#1 Best Overall

- FIX FOUNDATION WALL CRACKS EASILY: Our Concrete Crack Repair Kit offers a reliable solution for foundation crack repair injection kit and concrete crack repair. Homeowners can address concrete cracks and cement crack filler issues efficiently, preventing water infiltration and protecting the basement from potential water damage. Whether you’re facing rainstorms or just trying to maintain your basement, it provides a hassle-free solution, saving you the cost and trouble of hiring professionals.
- LONG-LASTING WATERPROOF PROTECTION AND SEALING: Our Hydra Stop 300 Polyurethane Foam expands to fill cracks, acting as a concrete crack filler that creates a durable, waterproof concrete sealer barrier. This foam sealant gap filler helps prevent moisture entry, providing long-lasting protection concrete patch to your basement and foundation. Homeowners worried about water damage and basement flooding can rely on this effective solution.
- PRESERVE YOUR HOME’S VALUE AND STRUCTURAL INTEGRITY: In addition to offering a practical foundation cement crack filler solution, our kit helps maintain the structural integrity of your foundation. Sealing cracks with concrete crack sealer reduces the risk of foundation cement crack repair issues, helping to protect your home from further damage and providing lasting concrete crack repair. With an easy-to-apply system, this kit allows DIY homeowners to feel confident in their repair work.
- INCLUDES COMPLETE REPAIR SOLUTION: Our concrete crack filler and sealer kit includes 2-Hydra Stop 300 Polyurethane Foam, 2-Poxy Paste crack sealant, 15-surface ports, caulk gun, 2 pairs nitrile gloves, safety glasses, drop cloth, 10-wooden sticks, 10-corner ports, wire brush and a flexible injection hose assembly. This simplifies foundation cement crack filler repairs, making it easy for DIY homeowners to handle large cracks with the help of clear instructions and video tutorials.
- WHY CHOOSE APPLIED TECHNOLOGIES: Applied Technologies has been a trusted name in waterproofing and foundation repair solutions for over two decades. Our Hydra Stop 300 Polyurethane Foam provides effective foundation crack repair and concrete crack filler performance, ensuring a reliable seal. With easy-to-follow instructions for concrete crack sealer application and durable cement crack filler materials, we offer products designed to help protect your home and provide lasting results.
Gather the project drawings, structural calculations, mix or material submittals, reinforcement layout, printer and builder information, construction records, inspection reports, and details of any previous repair. If those records are unavailable, tell the professional before an inspection; missing information can affect the testing and the repair specification.
ACI CODE-562-25 covers assessment, repair, and rehabilitation of existing structural concrete and is intended for use with the International Existing Building Code or as a standalone code. It is a professional reference, not permission to prescribe a repair without evaluating the actual wall.
When a crack needs prompt professional review
Arrange a prompt assessment by a qualified structural engineer or other professional authorized for the work when any of the following is present:
- The crack is widening, lengthening, recurring after patching, or changing noticeably between observations.
- One side of the crack is displaced, the wall is bowing, or the crack is associated with sagging, instability, or a change in alignment.
- Water is entering, staining, pooling, or appearing at the crack, especially after rain or changes in groundwater.
- Concrete is spalling, delaminating, softening, or exposing reinforcement, or there is rust staining or another sign of deterioration.
- The crack crosses a joint, connection, opening, support, reinforced area, or printed-layer interface in a way that could affect load transfer.
- The wall carries floors, a roof, soil, equipment, or other significant loads, or forms part of a shear or retaining system.
- A previous repair failed, detached, reopened, or caused water to emerge elsewhere.
These signs do not establish a universal danger threshold. The available guidance does not provide a single crack-width number that can be applied to every printed wall. If there is an immediate concern about collapse or falling material, keep people away from the area and contact the responsible building professional or emergency service rather than attempting a patch.
Document the crack before anyone repairs it
Documentation gives the assessor a starting record and helps distinguish a stable defect from active movement. Do not grind, fill, paint, or pressure-wash the area before it has been recorded unless a professional directs you to do so.
- Map the location. Mark the wall elevation, room or exterior face, distance from corners and openings, and whether the crack is on one side or passes through the wall.
- Describe the pattern. Record whether it is vertical, horizontal, diagonal, stepped, branching, isolated, or part of a network. Note whether it follows a printed bead, runs along an interlayer interface, or crosses multiple layers.
- Check displacement without forcing the wall. Photograph the crack straight on and obliquely with a scale and a date. Record any offset, bulge, lip, or change in plane visible at the crack.
- Record width consistently. Use the same measurement method and locations on every visit. A single reading does not establish that a crack is stable or active.
- Record moisture conditions. Note whether the crack is dry, damp, actively leaking, stained, or affected by weather, plumbing, condensation, or groundwater.
- Start a time history. Repeat photographs and observations at intervals chosen with the professional. Marking or installing monitoring equipment should follow the assessor’s instructions so it does not damage the wall or invalidate the observations.
- Collect project information. Provide plans, material and reinforcement details, construction dates, printer or contractor records, environmental events, settlement history, and previous repair invoices or photographs.
ACI guidance identifies cause, movement, size, orientation, crack network, substrate, location, and evidence of water transmission as factors in repair selection. Appearance alone cannot supply all of that information.
Determine what may be causing the crack
A crack can have more than one cause. The categories below help organize an inspection; they are not a diagnosis based on a photograph.
Rank #2
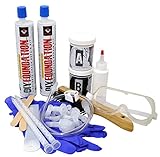
- Drill-Free Injection: Repair basement wall cracks effortlessly without drilling, ensuring minimal disruption to your home's structure.
- Simple Application: Use a standard caulking gun to inject the low-viscosity, 2-component urethane, making the process accessible for any homeowner.
- Effective Hairline Crack Repair: Seal even the smallest cracks permanently with the specialized urethane, preventing further water seepage and damage.
- Interior Repair Advantage: Save on costly excavation by repairing cracks from inside your basement, maintaining exterior aesthetics and structural integrity.
- Comprehensive Protection: This solution not only protects against water but also acts as a barrier against radon and soil gases, safeguarding your basement environment.
Shrinkage and temperature change
Loss of moisture, temperature variation, and restraint can produce cracking as the material changes volume. A surface treatment may reduce water entry or improve appearance, but it will not stop a crack that continues to move because the underlying restraint or environmental condition remains.
Settlement or movement of the support
Foundation or supporting-frame movement can create diagonal, stepped, or displaced cracks. If the support continues to move, a rigid filler or brittle coating may reopen. The assessment should consider the ground, footing, slab, adjacent construction, drainage, and any change in elevation or alignment.
Overload or altered use
New equipment, stored materials, removed walls, changed roof loads, impact, or other alterations can change stresses. A repair should not be specified until the load path and current use have been checked.
Restraint, joints, and connections
A crack may be acting as an unintended movement joint or may be concentrated at a planned joint, opening, or wall connection. In a printed wall, the location relative to beads, interfaces, reinforcement, and connectors is especially important.
The Tool Desk
Outbyte PC Repair FREEClear out junk files and repair common Windows errorsFree Scan →Outbyte Driver Updater FREEScan for outdated or missing drivers - takes under a minuteDriver Scan →Corrosion, chemical action, or ongoing deterioration
Water and harmful substances entering a crack can reach reinforcement or the wall interior. Rust staining, delamination, spalling, soft material, or recurring dampness can indicate a durability problem. A rigid injection that closes the visible line does not, by itself, remove corrosion or another continuing reaction.
Construction or interlayer defects
Uneven curing, inadequate interlayer bonding, material inconsistency, contamination, or a defect at a connection can produce cracks that are specific to the printing process. The professional may need project records, targeted testing, or inspection of comparable areas to understand the pattern.
Match the repair to the crack’s function and cause
ACI describes several repair families. The correct choice depends on whether the crack is active, whether it leaks, whether the purpose is structural restoration or water exclusion, and what the investigation finds about the wall and its materials.
Rank #3

- FAST & EASY CRACK REPAIR: Quickly seal leaks with this advanced 10' foundation crack repair injection kit designed for fast results and minimal effort. Sets rapidly and helps homeowners fix structural cracks in minutes without waiting hours or calling professionals
- COMPLETE ALL-IN-ONE REPAIR KIT: This premium concrete crack filler includes everything you need, such as urethane foam, injection ports, adhesive, gloves, and tools, so you can start immediately. Offers more material than standard kits for better coverage and value
- NO SPECIAL TOOLS REQUIRED: Designed for easy DIY foundation repair, this system works with a standard caulking gun; no drilling or special equipment needed. Quick and effective concrete crack repair, making it a hassle-free solution for homeowners
- DURABLE WATERPROOF SEAL: The expanding urethane creates a durable barrier that blocks water intrusion and prevents future damage. Excellent for foundation leak repair and reliable concrete wall leak repair, ensuring your basement stays dry and protected over time
- FIX, SEAL & PREVENT FUTURE DAMAGE: Engineered to restore structural integrity, this solution seals existing cracks and helps prevent future leaks, protecting your home's foundation for the long term
| Method | When it may be considered | What it is intended to do | Important limitation |
|---|---|---|---|
| Epoxy injection | Selected structural cracks that are sufficiently stable for the specified system | Bond and seal a crack as part of a designed structural repair | It is not a generic solution for active movement, active corrosion, or alkali-aggregate reaction unless additional measures address the cause |
| Elastomeric sealant or flexible sealing | Cracks that act like joints or remain active, when the design calls for movement accommodation or water exclusion | Provide a flexible seal that can tolerate expected movement | A flexible seal does not by itself establish or restore structural capacity |
| Grout repair | Water-leakage cracks and related concrete defects selected under the site conditions | Control leakage through a grout system chosen for the water and substrate conditions | ISO/TR 16475:2020 addresses water-leakage crack repair and explicitly excludes dry-crack repair and investigation of crack causes |
| Routing and sealing | Cracks for which removing a narrow surface strip and installing a specified seal is compatible with the diagnosis | Create a sealed surface recess for movement or protection | It does not correct an underlying structural movement or deterioration mechanism |
| Near-surface reinforcement, pinning, or additional reinforcement | Cracks where the engineer determines that reinforcement or load-transfer measures are needed | Modify the force path or restrain a designed crack pattern | Placement, anchorage, corrosion protection, and compatibility must be designed for the printed wall |
| Drilling and plugging, gravity filling, drypacking, crack arrest, polymer impregnation, overlays, or other surface treatments | Specific diagnoses and exposure conditions identified by the repair designer | Provide a selected structural, water-control, void-filling, or surface-protection function | These are application-specific options, not interchangeable patches |
ACI’s field guide, Structural Crack Repair by Epoxy Injection, describes epoxy injection as voluntary guidance and says it does not relieve the user of responsibility for condition assessment, structural evaluation, and a repair specification by an experienced engineer or designer. A consumer injection kit may be appropriate only if that professional specifies the material, preparation, placement, curing, and verification for the actual wall. No generic kit has established compatibility with every 3D-printed concrete mix or layer configuration.
Do these 3 things before closing this tab:
1Clear out junk files and repair common Windows errors2Scan for outdated or missing drivers - takes under a minute3Repair Windows errors before they cause bigger problemsUse these questions to compare candidate repairs
When the assessment identifies more than one plausible method, compare the options against the same decision axes:
- Activity: Is the crack dormant for the relevant design period, or is it expected to open, close, or slip?
- Leakage: Is the primary problem water transmission, and is the water pressure or source still present?
- Purpose: Is the repair intended to restore structural continuity, exclude water, protect the surface, or combine those functions?
- Cause: Has the source of movement, restraint, settlement, overload, corrosion, or chemical deterioration been addressed?
- Printed-wall configuration: Where are the beads, interlayer interfaces, reinforcement, anchors, openings, and connections relative to the crack?
- Compatibility: Will the repair material bond to the substrate, tolerate the exposure and movement, and avoid trapping damaging moisture or accelerating deterioration?
- Verification: How will installation quality, water control, structural performance, and future movement be checked?
- Monitoring: What observations or instruments will show whether the repair remains effective?
A method that performs well on a stable, dry, isolated crack can be unsuitable for a leaking crack or one that continues to move. The comparison should be written into the repair specification rather than left to an installer’s product choice.
A professional repair workflow
A project-specific repair normally follows a sequence like this. The exact inspections, tests, and acceptance criteria vary by wall and jurisdiction.
- Confirm responsibility and scope. Identify the owner, designer, builder, inspection authority, and professional responsible for evaluating the condition. A report from the U.S. Department of Housing and Urban Development on 3D concrete construction highlights unresolved responsibilities for defective printed walls and questions around nondestructive assessment; the project should establish those responsibilities before work starts.
- Review the design and construction record. Confirm the wall’s structural function, materials, reinforcement, printed geometry, connections, exposure, curing history, and approved changes.
- Inspect and classify the crack. Record location, orientation, dimensions, displacement, moisture, network pattern, relation to printed layers, and nearby deterioration. The professional decides whether monitoring, sampling, imaging, or other testing is needed.
- Identify and address the cause. Correct drainage, leaks, loading, support movement, restraint, corrosion, or other continuing mechanisms where feasible. A repair that leaves the cause active may fail even when installation is flawless.
- Select the repair function and materials. The repair designer specifies whether the work is injection, flexible sealing, grout, reinforcement, surface treatment, or a combination, along with substrate preparation, material compatibility, access, curing, and environmental limits.
- Prepare and execute under the specification. The installer follows the approved sequence and protects adjacent printed surfaces, reinforcement, joints, and finishes. Injection locations, pressures, sealants, grout properties, and curing requirements must come from the project specification, not a generic internet recipe.
- Verify the result. Inspection may include records of materials and batches, preparation, placement, curing, water testing, visual checks, or other tests selected by the engineer. Acceptance should address the intended function, not only whether the line is no longer visible.
- Monitor after repair. Continue the documented observations for the period set by the professional. Reopening, new cracks, renewed dampness, displacement, or deterioration requires reassessment rather than repeated cosmetic filling.
How to handle common situations
A thin, dry crack with no visible displacement
Do not assume that a thin crack is harmless or that it needs epoxy. Record it, compare it with the wall drawings and printed-layer pattern, and have the professional decide whether observation, sealing, injection, or no immediate repair is appropriate. ACI commentary has stated: “Not all cracks need to be repaired, however, all cracks have the potential to become active cracks.” That wording comes from the 2016 provisional ACI 562 commentary, so it should be treated as historical commentary rather than a current code requirement.
Quick wins for a faster PC:
Clear out junk files and repair common Windows errorsFree Scan →Fix the driver behind crashes, sound loss and screen glitchesFind Drivers →A crack that follows an interlayer interface
Ask the assessor to examine interlayer bonding, the orientation of the printed beads, reinforcement, and nearby connections. A surface coating may hide the interface without restoring its intended performance. The wall qualification and inspection provisions in ICC 1150-2026 are relevant to understanding what was designed and constructed, subject to local adoption and project applicability.
A crack that leaks after rain or groundwater changes
First identify and control the water source where possible. A grout system may be considered under ISO/TR 16475:2020, but that document guides selection and execution for leakage; it does not diagnose dry cracks or their causes. If the water is carrying contaminants or reaching reinforcement, the durability implications should be part of the repair design.
Rank #4
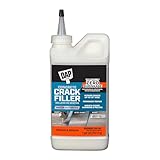
- Concrete crack filler repairs horizontal cracks in concrete, stone and other masonry materials
- Water activated dry powder repairs cracks up to 1/2”W x 1/2”D a single pass
- Ready for light foot traffc in 4 hours, return to full service (including vehicles) within 48 hours
- Ready to use formula, no shaking or mixing: prep surface, fill crack and mist
- DAP Concrete Crack Filler resists shrinkage, UV fading, and cracking
A crack that reopens after a rigid patch
Reopening suggests that movement, restraint, settlement, or another active mechanism may remain. Remove or investigate the failed repair as directed, document the timing and conditions, and have the professional reassess whether a flexible detail, structural intervention, or correction of the underlying cause is required.
Several cracks forming a network
A network can indicate shrinkage, thermal effects, restraint, material behavior, or deterioration rather than one isolated defect. Map the full pattern and inspect surrounding areas. Treating only the most visible line can leave the mechanism and water paths untouched.
What’s actually slowing this PC down?
Pick the symptom - the matching free tool is one click away.
What not to do
- Do not select an injection pressure, resin, grout, sealant, or crack-width cutoff from a generic chart.
- Do not inject epoxy into a crack that is actively moving, leaking, corroding, or affected by a continuing chemical reaction without a designed strategy for that condition.
- Do not seal a wet crack and assume the water source or structural significance has been solved.
- Do not chip, widen, drill, or pin a printed wall before the reinforcement, layer geometry, and load path have been reviewed.
- Do not use a surface patch to conceal displacement, bulging, spalling, rust staining, or recurring moisture.
- Do not treat the absence of a visible crack as proof that the wall is sound after a repair; verification and monitoring are separate requirements.
- Do not assume that a standard written for conventional cast concrete automatically governs a printed wall without checking the project documents and jurisdiction.
Technical references to discuss with the project professional
ICC 1150-2026
This standard is specifically titled Standard for Automated Construction Technology for 3D Printing Walls. Its scope includes wall types, material qualification, structural design, inspection and construction quality assurance, interlayer bonding, reinforcement, and connections. Confirm whether the jurisdiction has adopted it and whether the project’s approval documents use it.
ACI CODE-562-25
This code addresses assessment, repair, and rehabilitation of existing structural concrete. It can be used with the International Existing Building Code or as a standalone code, but the engineer still has to evaluate the specific printed construction and governing requirements.
ACI PRC-224.1-07
This ACI guide discusses causes, evaluation, and repair methods, including epoxy injection and routing and sealing. Its listed publication is from 2007, so the professional should confirm current ACI references and how the guidance applies to the project.
ACI Committee E706 field guide
Structural Crack Repair by Epoxy Injection explains a recognized repair method for selected structural cracks and emphasizes that condition assessment, structural evaluation, and a specification by an experienced engineer or designer remain the user’s responsibility.
PC Slower Than It Used to Be?
A free scan shows the junk files, broken settings and background clutter dragging Windows down - then fixes them in one click.Free scan · Windows 10 & 11Outdated Drivers Are Slowing You Down
One free scan finds every outdated or missing driver and matches the right update for your exact hardware.Free scan · exact hardware matchISO/TR 16475:2020
This technical report focuses on selecting and executing grout repairs for water-leakage cracks and other concrete defects. It explicitly excludes dry-crack repair and the causes of cracks, so it cannot replace a condition assessment.
The practical answer
Repairing a crack in a 3D-printed concrete wall starts with assessment, not a product. Document the crack and its history, establish the wall’s printed configuration and structural role, escalate signs of movement, displacement, water entry, or deterioration, and have a qualified professional diagnose the cause. The selected repair may be epoxy injection, flexible sealing, grout, reinforcement, or another method, but only after its purpose, compatibility, execution, verification, and monitoring have been defined for that wall.
Quick Recap
Product prices and availability are accurate as of the date/time indicated and are subject to change. Any price and availability information displayed on Amazon at the time of purchase will apply.

