Protecting wood framing is a water-management job first, a drying-and-maintenance job second, and a pest-control job throughout the building’s life. Keep bulk rain and ground water outside the wall, drain any water that gets behind the cladding, interrupt capillary wicking at the foundation, and preserve a safe path for the assembly to dry. Then inspect for leaks, condensation, decay, and termites before damage becomes concealed or structural.
The correct details depend on local climate, rainfall and sun exposure, foundation type, wall and roof assembly, termite pressure, and the code adopted where the building is located. A moisture-meter number is useful evidence, but it is not a universal pass/fail rule and cannot prove that framing is sound.
As an Amazon Associate I earn from qualifying purchases.
Think of the wall as a water-management system
No siding or exterior coating keeps every drop of wind-driven rain out forever. A durable wall assumes that some water will pass the cladding and gives that water a controlled route back outside.
- Cladding sheds most rain.
- The water-control layer catches water that gets past the cladding.
- A drainage space allows water to move downward instead of remaining against wood sheathing and studs.
- Flashing collects water at openings, joints, roof-to-wall intersections, and penetrations and directs it to the exterior.
- Drying paths let assemblies release moisture by air movement or vapor diffusion when the design permits.
Wood studs, plates, headers, and wood-based sheathing are moisture-sensitive. Treat the exterior wall, roof, foundation, and plumbing as one drainage problem rather than relying on a single “waterproof” product. The U.S. Environmental Protection Agency’s moisture-control guidance covers site drainage, foundations, walls, roofs, plumbing, construction, and maintenance because a failure in one area can wet framing in another.
#1 Best Overall
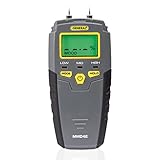
- HUMIDITY SENSOR: Our handy meter tool can quickly determine what level of remediation is needed to keep your family safe from black mold. High levels of dampness that go untreated are the leading cause of harmful fungus growth in the home.
- WATER LEAK DETECTOR: Finding the moisture content in your wood or drywall is the first step in early prevention. Continuously check and test suspicious water stains around the house so you can determine whether the area is wet or has already dried. Low, medium and high moisture tones and on-screen icons, Reading HOLD button
- MOISTURE READER: The mold test features large 0.3" high digits in a backlit LCD for quick and easy detecting. Our mildew scanner includes extra 8mm stainless steel pins, a protective cap that doubles as a calibration checker, and a “9V” battery.
- MOLD TESTER: For an accurate test read, stick the stainless steel pins into the surface of what you're measuring. The gauge has a broad range of 5 - 50% for wood and 1.5 - 33% for building materials such as concrete and drywall.
- GENERAL TOOLS: We're a recognized leader in designing and developing specialized precision tools dedicated to delivering exceptional customer service. We encourage artisans and DIYers to work smarter, measure better, and repair more productively.
Inspect the places where rain commonly bypasses the cladding
- Roof edges, valleys, and gutters that overflow onto walls.
- Downspouts that discharge beside the foundation rather than away from it.
- Roof-to-wall intersections, step flashing, kick-out flashing, and wall penetrations.
- Window and door head, jamb, and sill flashing, including the transition to the wall water-control layer.
- Deck ledgers, hose bibs, electrical penetrations, vents, and other openings.
- Low siding clearances, ledges, and horizontal surfaces where water can collect.
- Reverse-lapped membranes, torn wraps, unsealed transitions, and blocked drainage paths.
Correct the missing or damaged drainage detail, not merely the stain on the interior finish. A new bead of sealant can hide a failed flashing system while water continues to enter behind it.
Keep roof and site water away from the foundation
Surface water should move away from the building, and below-grade drainage should carry water away from foundation materials. Confirm the required slopes, drains, waterproofing, and discharge locations against the current local code and the actual foundation design; one dimension is not a universal rule for every site.
Grade and roof drainage
- Walk the perimeter during or shortly after rain and identify ponding, erosion channels, and places where water flows toward the wall.
- Keep gutters clear and repair sagging sections or leaking joints.
- Extend downspouts so roof water discharges well away from the foundation or into an approved drainage system.
- Regrade settled soil and repair hardscape that directs runoff toward the structure.
- Check window wells, area drains, sump discharge, and retaining walls for overflow or blockage.
These measures reduce the amount of water available to leak through cracks and joints, but they do not replace foundation waterproofing, perimeter drainage, or repairs to a leaking foundation.
Interrupt capillary movement
Concrete, masonry, and soil can supply moisture to wood by capillary action even when no visible leak exists. Keep untreated wood out of direct soil contact. At the foundation-to-sill connection, an appropriate sill gasket or other capillary-break membrane can reduce wicking; the material, continuity, fastening, and compatibility with the foundation depend on the foundation type and adopted code. DOE Building Science Education identifies a protective membrane and sill gasket as general moisture-management measures.
Rank #2

- FIND HIDDEN WALL MOISTURE EARLY — Check suspicious drywall and building surfaces after a leak, water stain, or other moisture concern. Detect abnormal moisture before a small issue develops into more extensive damage and costly repairs
- CHECK BEFORE YOU REPAIR — Don't rely on a wall looking or feeling dry. Use the moisture meter to check questionable areas before painting, repairing, or covering the surface, helping you make decisions based on actual moisture readings.
- CHECK FIREWOOD BEFORE YOU BURN — Test firewood before placing it in your fireplace or wood stove. Knowing the moisture level of your firewood helps you choose wood that is ready for burning and avoid relying on appearance alone.
- PIN-TYPE TESTING FOR DIRECT MEASUREMENTS — The contact pins penetrate the material to measure moisture inside wood and building materials. This makes it useful for checking areas where surface conditions may not tell the whole story.
- ONE TOOL FOR TWO IMPORTANT HOME CHECKS — Keep it ready for two practical jobs: checking walls for hidden moisture and checking firewood before burning. A simple way to make informed decisions before a moisture problem becomes expensive or wood goes into the fireplace.
Do not bridge a capillary break with mortar droppings, soil, debris, or an unsealed penetration. Where a crawlspace or basement is damp, investigate bulk water, vapor from exposed soil, ventilation, drainage, and mechanical-system condensation rather than assuming the sill gasket alone will solve the problem.
Build wall details that drain and dry
At every opening or transition, water-control layers must overlap in a way that sends water outward and downward. The upper layer should shed onto the lower layer, and flashing should terminate where water can exit rather than into a cavity or onto the top of a wall plate.
Openings and penetrations
- Integrate window and door flashing with the wall water-control layer.
- Provide a sill pan or equivalent drainage detail where the opening design requires one.
- Flash the head so water cannot run behind the jambs.
- Use compatible materials around pipes, cables, vents, and exterior fixtures.
- Preserve a visible or otherwise functional drainage outlet at the bottom of the wall.
A membrane, tape, or sealant is not interchangeable with flashing or a drainage gap. Compare any proposed material by the job it performs, its compatibility with adjacent materials, its exposure to sunlight and water, and its ability to be repaired and inspected.
The Tool Desk
Outbyte PC Repair FREEClear out junk files and repair common Windows errorsFree Scan →Outbyte Driver Updater FREEFix the driver behind crashes, sound loss and screen glitchesFind Drivers →Cladding clearances and drainage space
Maintain the clearances required by the cladding manufacturer and local code at roofs, decks, grade, windows, doors, and other horizontal surfaces. Where the wall design uses a rainscreen or other drainage cavity, keep that cavity continuous and free of mortar, insulation, insect nests, and sealant that blocks the outlet. A drainage space is useful only if water can enter the space where intended and leave it at the bottom.
Rank #3
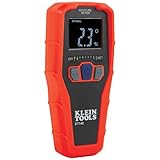
- WATER LEAK DETECTOR detects relative moisture content from leaks and flooding
- PINLESS MOISTURE METER measures relative moisture content in building materials
- NONDESRUCTIVE DETECTION up to 3/4-Inch deep using Electromagnetic field (EMF) technology
- USE ON DRYWALL, MASONRY, HARDWOOD, AND SOFTWOOD; calibrated for these materials only
- REVERSE-CONTRAST DISPLAY for easy viewing of reading and nine LED bars to indicate moisture range
Control air leakage and vapor diffusion separately
Air and vapor are different moisture-transport mechanisms. DOE explains that an air barrier limits moisture carried by moving air, while a vapor retarder slows diffusion through materials. A small air leak can transport far more moisture than diffusion under some conditions, so an assembly needs a continuous air-control strategy as well as an appropriate vapor-control strategy.
Why climate and assembly matter
The location and permeance of vapor control depend on climate, insulation, cladding, interior finishes, and the direction of the dominant vapor drive. Building Science Corporation notes that placing a low-permeance layer on the wrong side can trap moisture or contribute to enclosure failure in some hot-humid assemblies. Do not apply a blanket rule to install interior polyethylene or one vapor-retarder class in every climate.
Before adding an interior vapor-impermeable coating, sheet, or foam layer, identify the existing layers and ask where the assembly can dry. High-R walls, adhered masonry, and walls that already contain impermeable materials deserve project-specific building-science review. Do not seal a wet wall between two vapor-impermeable layers and assume the problem has been fixed.
Windows Errors? Fix Them Before They Spread
Repair common Windows errors and clear accumulated junk for a smoother, more stable PC - no reinstall needed.Free scan · no reinstallOutdated Drivers Are Slowing You Down
One free scan finds every outdated or missing driver and matches the right update for your exact hardware.Free scan · exact hardware matchUnderstand what wood-moisture readings actually mean
Decay conditions are not a single meter threshold
The USDA Forest Products Laboratory’s Wood Handbook (2010) describes wood decay as generally requiring moisture at or above fiber saturation, usually about 30%, together with temperatures of 10–43°C (50–100°F). Those are generalized conditions under which decay can develop; they are not a guarantee that wood below one reading is safe, nor proof that a brief reading above it means decay is established.
Rank #4

- 🌲【Accurate and fast measurements reveal hidden water leaks】: It has 2 high-precision pins that can penetrate the surface to be tested and quickly measure moisture content to estimate potential moisture increase throughout the home. COCZOW moisture meter is the ideal tool for measuring moisture.
- 🌲【Professional Wood Moisture Meter】: 6 calibrated scales. Our moisture meter is a great tool for manufacturers, floorers, inspectors and wood suppliers to quickly and easily measure moisture content (% Mc). You can quickly determine if the moisture content is low (5-12%), medium (12-17%) or high (17-60%). Checking moisture content prevents wood from cracking and warping.
- 🌲【Widely Used】: PM6811A moisture meter is ideal for carpentry, building construction, agricultural restoration and floor laying. Measure moisture content of wood products such as hardwood floors, cabinets, furniture, lumber, lath, beams, plywood, panels, composite boards, window frames, forestry wood, coils, building materials, etc.
- 🌲【User-friendly】: With LCD backlight, the backlight color is divided into three types of green, yellow and red, or display the moisture content of different measurement types. Hold function, maximum/minimum moisture measurement function and 5-minute automatic shutdown function (no power supply required).
- 🌲【Why choose COCZOW Wood Moisture Meter】: LED display function, large measuring range (wood: 2.0%-75.0%. Building materials: 1.5-30%), durable stainless steel needle, heat insulation, light weight and easy to carry. Get professional and accurate results with Peakmeter Wood Moisture Tester.
Construction storage has a different benchmark
The same body of USDA guidance warns that extended storage of lumber at moisture contents greater than 20% without drying can allow decay to develop. Keep delivered lumber covered from rain but ventilated so trapped moisture can escape. Do not close a wall around visibly wet framing simply because the calendar says construction is on schedule.
Use a moisture meter as an investigation tool
EPA identifies direct-reading electronic meters for wood. Readings vary with species, temperature, meter type, calibration, fasteners, depth, and the location measured. EPA’s guide cites USDA recommendations of an average of 15% or less and maximum readings of 19% or less in the context of limiting dimensional-change problems. Those figures are not an official rot threshold.
Take readings in a pattern: compare suspected wet areas with nearby unaffected framing, record the date and conditions, and repeat measurements as the assembly dries. A meter can show where to look and whether a drying effort is changing conditions; it cannot identify the leak, reveal every concealed wet area, or establish structural capacity.
A practical protection plan for new or existing framing
- Map the building’s water paths. Note roof drainage, wall openings, grade, foundation joints, plumbing routes, crawlspaces, bathrooms, kitchens, and mechanical equipment that can leak or condense.
- Correct bulk-water defects first. Repair roof leaks, failed flashing, overflowing gutters, poor grading, foundation leaks, and plumbing leaks before adding interior finishes or insulation.
- Verify the wall drainage sequence. Confirm that the cladding, water-control layer, drainage space, and flashing overlap so water exits to the exterior.
- Protect the sill and lower wall. Keep wood out of soil contact, install the specified sill gasket or capillary break, and keep the base-of-wall drainage outlet open.
- Seal air-control transitions. Connect the air barrier at the foundation, windows, doors, penetrations, top plates, and ceiling plane without blocking designed drainage.
- Choose vapor control for the actual assembly. Account for climate zone, insulation position, cladding, interior finishes, and existing low-permeance layers. Obtain a qualified review when the assembly is unusual or already wet.
- Store and install lumber correctly. Keep lumber off the ground, protected from precipitation, and ventilated. Allow wet framing to dry before enclosing it.
- Document moisture patterns. Record meter readings, locations, weather, and visible conditions. Look for trends rather than relying on one number.
- Reduce pest access. Keep soil and mulch away from the structure as required, remove wood debris, maintain clear vents, close utility-entry gaps, and keep the foundation perimeter dry.
- Schedule inspection. Recheck high-risk areas after major storms, plumbing work, renovations, and periods of unusual humidity; obtain professional help when decay or termites may be concealed.
Reduce termite and other wood-pest risk
Moisture control makes conditions less favorable for many wood-damaging pests, but it does not replace termite inspection or treatment. EPA recommends keeping soil around the foundation dry through drainage and gutter maintenance, fixing leaks, reducing cracks and utility-entry gaps, maintaining clear vents, keeping shrubs and wood debris away from the structure, and inspecting periodically.
Best Value

- Easy to Read with Large LCD Screen: This wood moisture meter is easy to get an accurate reading from the surface of materials and displays accurate moisture readings on the 2.25" big screen. Use this handheld meter to check the moisture content in firewood or drywall, it can stand up on the table, the moisture content is displayed with a bar graph and percentage (_%RH) on the screen. Date Hold and Max/Min function is used to freezes readings, useful for writing down data
- Tricolor Backlight Display, Easy to Use: TopTes Moisture Meter TS-630 features an HD tri-color backlight to easily know if the wood/wall humidity is Dry, Moist, or Wet. Green backlight for Low moisture, orange backlight for middle moisture, and red moisture for high moisture. After selecting the mode, and putting pins into the firewood, easy and quick to get a visible alert from the clear screen
- Seven Calibration Scales, Two Material Mode: It is designed with built-in characteristic parameters of 7 calibration scales for wood and building material, ranging from 0.0% to 57%. This humidity meter is perfect for woodworking, water damage restoration, building construction, and home renovation. Easily Check and test suspicious water leaks around the wall/floor so you can quickly determine what level of remediation is needed
- Pin Type & Battery Operated: TopTes TS-630 moisture meter is a pin-type moisture meter and operates on batteries. With a high precision multi-material sensor, DON’T need calibration. It’ll support an accurate reading after inserting the stainless steel pins into the surface of the wood or building materials. It will auto shut off after 10 minutes of non-use to help save energy. A low-battery indicator will appear on the screen when the battery is running out
- What's in the Box: One TS-630 Moisture Meter, three AAA Batteries, one User Manual, one Carry Pouch, one Pair of Test Pins, one Mini Wrench
What to look for
- Mud tubes, shelter tubes, or soil packed into cracks and joints.
- Hollow-sounding or blistered wood, soft spots, and galleries in concealed areas.
- Discarded wings or repeated insect activity near windows, foundations, crawlspaces, and sill areas.
- Persistent dampness, fungal growth, or wood-to-soil contact that gives pests a concealed route.
These signs are reasons to investigate, not a basis for guessing the species or treatment. Termite pressure varies by region and by construction type.
Barriers and chemical treatment
EPA describes physical barriers and registered chemical treatments as termite-management approaches. Many soil-applied termiticide treatments should be performed by trained pest-management professionals. Improper application can contaminate a home or well and still fail to protect the structure. Use only a product registered for the intended site, follow its label, and comply with local licensing and application rules. A locally licensed inspector or treatment professional is appropriate when there are signs of activity, inaccessible areas, or elevated regional risk.
Independent reader supportYour contribution helps us test, update, and keep practical guides available for everyone.Compare protection components by function, not by marketing name
| Component | Primary job | What it does not solve | Questions before selection |
|---|---|---|---|
| Cladding | Sheds most rain and sunlight. | It is not the sole water seal; water can pass joints and openings. | Are laps, joints, clearances, and drainage outlets correct? |
| Water-control layer | Catches water behind cladding and directs it downward. | It does not replace opening flashing or a drainage path. | Is it continuous, correctly lapped, durable, and compatible? |
| Drainage cavity | Provides space for water to move and air to circulate. | It cannot drain if blocked or if the bottom outlet is sealed. | Is the cavity continuous, screened where needed, and open at the base? |
| Flashing | Collects and redirects water at openings and transitions. | Sealant alone cannot recreate a missing flashing sequence. | Does each upper layer shed onto the lower one and discharge outward? |
| Sill gasket or capillary break | Limits moisture wicking between foundation materials and wood. | It does not stop roof leaks, groundwater, or condensation. | Is the product suited to the foundation, continuous, and code-compliant? |
| Air barrier | Limits moisture carried by air leakage. | It does not automatically provide the correct vapor-control location. | Is it continuous at joints, penetrations, and transitions? |
| Vapor retarder | Slows vapor diffusion where the assembly requires it. | It can trap moisture if placed incorrectly for the climate and wall. | What are the climate, insulation, cladding, and existing permeance layers? |
| Pressure-treated or naturally durable wood | Improves resistance in locations specified for exposure. | It does not make poor drainage, soil contact, or trapped water acceptable. | Is the treatment suitable for the exposure and compatible with fasteners? |
When comparing two proposed wall strategies, use five tests: climate and rain exposure; ability to drain and dry; compatibility with cladding, insulation, and existing vapor-control layers; foundation and termite conditions; and local code and inspection requirements. A membrane, housewrap, drainage gap, treated member, and pest barrier perform different jobs and should not be ranked as interchangeable products.
Quick wins for a faster PC:
Repair Windows errors before they cause bigger problemsFix Now →Fix the driver behind crashes, sound loss and screen glitchesFind Drivers →What to do when framing is already wet
Stop the source before trying to dry the wood
Start with the likely source: roof or plumbing leakage, failed flashing, poor grading, groundwater, condensation, or wet construction materials. Drying without source correction is temporary and can conceal continuing damage.
- Protect occupants and shut off leaking plumbing or equipment where necessary.
- Trace water upward and outward; the visible stain is often below the entry point.
- Open or remove finishes only as needed to determine whether cavities, sheathing, plates, and adjacent rooms are wet.
- Use ventilation, dehumidification, or controlled heat appropriate to the assembly, while avoiding rapid or uneven drying that damages finishes or drives moisture deeper.
- Measure several locations and keep a dated record of readings and observations.
- Do not close the cavity until the source is corrected, affected materials are dry enough for the planned finish, and hidden damage has been assessed.
Recognize when wet wood may also be damaged
Soft or crumbling fibers, persistent musty odor, fungal growth, distorted members, open joints, termite evidence, and recurring wetting warrant a qualified building professional. Get prompt evaluation when a load-bearing stud, post, beam, joist, sill, or header is involved. The presence of a dry surface does not prove that concealed wood is sound, and a moisture meter cannot determine remaining structural capacity.
Maintenance schedule that catches problems early
| Timing | Checks |
|---|---|
| After heavy rain or wind | Look for overflowing gutters, displaced flashing, ponding, wet crawlspaces, interior stains, and blocked drainage outlets. |
| Seasonally | Clean gutters, verify downspout discharge, inspect siding and sealant joints, check foundation perimeter and vents, and remove wood debris or dense vegetation touching the structure. |
| After plumbing, roof, window, or cladding work | Inspect the repaired area and adjacent framing for wetting; confirm that new penetrations are integrated with the water- and air-control layers. |
| Periodically according to local pest risk | Inspect sill areas, crawlspaces, utility entries, and concealed routes for termite evidence or other wood-destroying pests. |
| Before enclosing new construction | Check that lumber has been protected and allowed to dry, drainage paths are open, flashing is correctly lapped, and the selected vapor-control strategy matches the assembly and climate. |
Common mistakes that shorten framing life
- Relying on siding or caulk as the entire rain-control system.
- Allowing downspouts to discharge at the foundation.
- Leaving untreated wood in soil contact or allowing mulch and debris to bridge the clearance.
- Blocking a drainage cavity or sealing its bottom outlet.
- Installing interior polyethylene or another low-permeance layer without checking climate and existing layers.
- Enclosing lumber that is visibly wet or has been stored above 20% moisture for an extended period without drying.
- Interpreting a 15%, 19%, or 30% reading as a universal definition of safe or rotten wood.
- Applying termite chemicals without the required training, label compliance, or local authorization.
- Repairing an interior stain while leaving the roof, plumbing, grading, or flashing source active.
The durable approach is systematic: keep bulk water out, drain what gets behind the exterior, interrupt capillary movement at the foundation, design air and vapor control for the climate, allow wet materials to dry, and inspect for pests and hidden damage. Local code, site conditions, and the complete assembly determine the final detail.
Quick Recap
Product prices and availability are accurate as of the date/time indicated and are subject to change. Any price and availability information displayed on Amazon at the time of purchase will apply.
Do these 3 things before closing this tab:
1Scan for outdated or missing drivers - takes under a minute2Clear out junk files and repair common Windows errors3Fix the driver behind crashes, sound loss and screen glitches
