The Tool Desk
Outbyte PC Repair FREEClear out junk files and repair common Windows errorsFree Scan →Outbyte Driver Updater FREEFix the driver behind crashes, sound loss and screen glitchesFind Drivers →Protecting a 3D-printed concrete wall requires two coordinated but separate controls: prevent early moisture loss and movement that cause cracking, then design a waterproofing assembly for the wall’s actual exposure. Start with a qualified printable mix, controlled printing and curing immediately after extrusion. For groundwater or persistent exterior water, specify a positive-side barrier based on hydrostatic pressure, crack movement, substrate bond, chemical exposure and the construction sequence. Do not choose a curing compound, sealer, membrane or crack repair from a photograph alone; the mix, wall geometry, exposure and finish system determine compatibility.
Why printed concrete needs a different protection plan
Conventional cast concrete is often protected by formwork while it gains early strength. An extruded wall is exposed to air as soon as each bead is placed. Wind, low relative humidity, high temperature and direct sunlight can pull water from the surface before hydration and interlayer bonding are sufficiently advanced. That early exposure makes environmental control and prompt curing central to crack prevention.
As an Amazon Associate I earn from qualifying purchases.
Waterproofing is a separate assembly decision. A curing treatment is intended to retain moisture during early hardening; it is not automatically a barrier against groundwater or wind-driven rain after the wall is complete. A finished wall may need a positive-side membrane, drainage layer, flashing, joint treatment or another coordinated system, depending on whether water is above grade, below grade, intermittent or under pressure.
PC Slower Than It Used to Be?
A free scan shows the junk files, broken settings and background clutter dragging Windows down - then fixes them in one click.Free scan · Windows 10 & 11Crashes, No Sound, or Screen Glitches?
Random freezes, missing sound and display glitches usually trace back to one bad driver. Find and replace yours safely.Free scan · under a minuteUnderstand what is causing the crack
“Cracking” is a symptom, not a diagnosis. The 2025 review of printed concrete identifies several mechanisms that require different controls:
#1 Best Overall

- Advanced Moisture Retention Formula - This professional concrete curing compound acts as an effective moisture barrier for fresh concrete. Our curing and sealing liquid locks in water to ensure proper hydration, maximize strength development, and prevent early cracking on new slabs and driveways.
- Dual-Action Cure & Seal Protection - Apply this efficient cure and seal for concrete to new surfaces. It forms a protective concrete curing membrane that retains crucial moisture while providing a temporary sealing layer to shield against stains and weather during the critical initial curing period.
- Integrates Corrosion Inhibiting Benefits - Formulated with a built-in corrosion inhibitor, this concrete treatment helps protect embedded steel rebar and metal from rust. This contributes to longer-lasting durability for your concrete structures, driveways, and patios.
- Easy Spray-On Application & Coverage - This ready-to-use liquid concrete sealer is designed for easy spray or roller application. One gallon covers approximately 50-80 sq ft, making it a user-friendly solution for DIY projects and professional concrete finishing alike.
- Promotes Optimal Strength & Durability - By significantly reducing moisture loss, this concrete curing aid promotes proper cement hydration. This results in a harder, more durable concrete surface with increased abrasion resistance and reduced dusting for a superior final finish.
- Plastic and drying shrinkage: water leaves the fresh surface faster than the interior can accommodate, producing early cracks.
- Autogenous shrinkage: internal chemical reactions consume water and reduce volume even when external evaporation is limited.
- Chemical and carbonation shrinkage: reactions within the cementitious matrix create dimensional change over time.
- Thermal shrinkage: hydration heat can create temperature gradients, while day-to-night temperature swings can move the wall after it hardens.
- Interlayer or connection problems: inadequate bond between printed courses, poorly detailed reinforcement or movement at openings and connections can create preferential crack paths.
This distinction matters because sealing the surface cannot correct a mix that is losing water too quickly, a weak interlayer, restrained thermal movement or a structural connection problem.
Timing is an important diagnostic clue. Fine, shallow cracks that appear while the wall is still fresh are more consistent with rapid plastic moisture loss. Cracks that develop as the wall dries may reflect drying or autogenous shrinkage. Cracks aligned with openings, corners, penetrations or course interfaces point toward restraint, detailing or bond. A crack that widens with temperature, load or moisture is active and must be treated differently from a stable surface craze.
Control the mix, printer and site before printing
Qualify the printable material
Use a mix that has been qualified for the printer, nozzle, layer interval and required strength and durability. Record fresh properties, open time, pumpability, buildability and interlayer bond under the expected temperature and humidity. ICC 1150-2026 addresses material qualification, curing, testing, interlayer bonding, reinforcement, connections and quality assurance for 3D Automated Construction Technology wall systems. Confirm that this edition is adopted or referenced by the authority having jurisdiction before using it as the project requirement; ICC reports publication of the first edition in March 2026 and ANSI approval on July 15, 2026.
Quick wins for a faster PC:
Scan for outdated or missing drivers - takes under a minuteDriver Scan →Repair Windows errors before they cause bigger problemsFix Now →Fix the driver behind crashes, sound loss and screen glitchesFind Drivers →Qualification should represent the actual production sequence, not only a laboratory batch. A change in water addition, admixture dosage, aggregate moisture, nozzle size, pumping time or layer delay can alter slump, green strength and bond. Establish who may approve a batch adjustment and how the adjustment will be recorded. If a trial wall is printed, expose it to conditions representative of production and inspect the restart zones, corners, openings and top course rather than evaluating only a flat mid-wall area.
Plan for environmental exposure
- Measure air temperature, relative humidity, wind and direct-sun exposure during the print.
- Provide wind breaks or temporary shading where they will not obstruct safe machine operation.
- Coordinate print speed and layer intervals so lower courses are not left exposed longer than the qualified process allows.
- Protect fresh work from rain, freezing conditions and abrupt temperature changes.
- Agree in advance on the curing method, application equipment, inspection points and the conditions that trigger a pause.
A pause plan is especially important. If printing stops, define how the exposed edge will be protected, how a restart surface will be prepared and when the designer must inspect the interface. Do not allow an unplanned long delay to become an unrecorded construction joint.
Consider reinforcement and movement details
Openings, corners, changes in wall thickness, penetrations and connections concentrate stress. Detail reinforcement and joints for the design loads and expected movement rather than relying on a continuous printed surface to remain crack-free. The design team should verify connection capacity, reinforcement placement and tolerances as part of the project’s structural documentation.
Rank #2

- Mix with water at a 9:1 ratio; Covers 2000-4000 sq ft per gallon after mixing
- Reduces surface moisture loss by approximately 80% in windy conditions and 40% in direct sunlight
- Keeps surface plastic and "finishable" for a longer time
- Will not interfere with the adhesion of subsequent curing and sealing compounds
- Leaves no surface finish
Apply curing as soon as practicable after extrusion
Sika’s method statement recommends beginning the selected curing method as soon as possible after printing, particularly where airflow or direct sunlight is drying the element. It cautions that high-temperature, low-humidity conditions can cause cracking and notes that strength development depends on both water content and temperature.
- Inspect the fresh surface. Look for rapid dulling, crazing, edge curling or visible evaporation. Record the weather and the time each area was printed.
- Start the approved curing method promptly. Follow the material supplier’s written instructions for timing, coverage, equipment and reapplication. Do not improvise a misting interval or compound dosage without confirming compatibility with the print mix.
- Maintain a stable environment. Reduce wind and direct solar loading, and avoid conditions that produce a hot, dry surface over a cooler interior.
- Protect interlayer and finish adhesion. Verify that the curing treatment will not leave a film that prevents bonding of plaster, coating, render, membrane or other specified finishes.
- Document the result. Record batch, application time, coverage, weather, operator and any interruption. Retain photographs and inspection records with the quality-assurance file.
Do not wait for visible cracks before starting curing. Once a surface has dried and plastic cracks have formed, later wetting may not restore the lost performance. Conversely, uncontrolled spraying can erode a fresh bead, wash fines from the surface or create runoff at the base. The method, pressure, timing and water quality therefore need approval for the particular mix.
Choose a curing approach by evidence, not habit
Compare curing options for moisture retention in the actual mix, environmental conditions, buildability, surface bond and later coatings. ASTM C156 is a laboratory method for measuring how a liquid membrane-forming curing compound limits water loss from mortar specimens during early hardening. It does not demonstrate that a compound is suitable for every printed mix or that it waterproofs a completed wall. ASTM explains the consequence this way: “Since it is desirable to retain water in fresh concrete to promote the hydration process, failure of the product to minimize the escape of water may lead to loss of strength, cracking, shrinkage, or low abrasion resistance of the hardened concrete, or a combination thereof.”
| Approach or evidence | What it can address | Limits to verify |
|---|---|---|
| Liquid membrane-forming curing compound | Early moisture retention when applied at the specified time and rate | Must be compatible with the printed mix, texture, interlayer surface and any later coating or membrane; ASTM C156 is a test method, not a universal approval. |
| Water misting or wet curing | Replaces surface moisture during early hardening when consistently controlled | Inconsistent application, runoff, erosion or rapid re-drying can undermine the result; the required schedule is mix- and weather-specific. |
| Short polypropylene microfibres | May restrain early plastic cracking in a qualified mix | A 2022 Cement and Concrete Research study reported elimination of early-age cracking with a low dosage in its tested mixture; that result is not a guaranteed dosage or outcome for another wall. |
| Superabsorbent polymers | Reduced autogenous shrinkage in the cited 2022 study | They were less effective against the study’s plastic cracks; performance depends on formulation and dosage. |
| Shrinkage-reducing admixture | May alter shrinkage behavior in some formulations | The cited study found its tested dosage relatively ineffective for crack mitigation; do not generalize that result to every product. |
In the same 2022 study, an external curing agent and repeated water misting were less effective than the tested low-dose microfibre treatment against early plastic cracks. Treat this as mixture-specific evidence, not a product prescription. Fibre length, dosage, dispersion and pumping behavior must be checked because a change can affect finish quality, nozzle operation and bond.
Design waterproofing for the actual water exposure
For groundwater and persistent external water
Evaluate a positive-side, exterior barrier for the water pressure and environment. ISO/TS 18734:2026 distinguishes pre-applied barriers, installed before concrete placement, from post-applied barriers, installed after the concrete has cured. Its selection factors include hydrostatic pressure, groundwater chemistry, physical exposure, crack-movement resistance, bond to the substrate, lateral water migration and long-term durability.
Do these 3 things before closing this tab:
1Repair Windows errors before they cause bigger problems2Scan for outdated or missing drivers - takes under a minute3Clear out junk files and repair common Windows errorsPre-applied systems can be integrated into a foundation sequence, but the installer must protect laps, joints and penetrations while printing or placing adjacent work. Post-applied systems permit inspection of the cured wall, yet they depend on access, surface preparation and reliable treatment of the bead profile. Neither timing is automatically better. The choice should follow the drainage plan, reinforcement and foundation sequence, access for installation, and the manufacturer’s tested details.
Rank #3
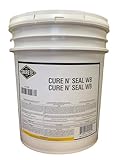
- Cure and seal surfaces
- Interior or exterior applications, new or existing applications
- Concrete, masonry, terrazzo, brick, stone, masonry, and other cementitious materials
- Commercial and residential applications
- Seal many types of resilient floor coverings and porous ceramic tile
For a printed wall, add the realities of the surface: bead geometry, surface laitance or fines, open pores, dimensional tolerances, construction joints, penetrations, corners and access for rolling, spraying or sheet installation. Require the membrane manufacturer’s written limits for substrate moisture, profile, primer, temperature, detailing and repair. A below-grade specification should not be transferred casually to an above-grade façade.
For above-grade rain and weather
Confirm that the selected coating or membrane is rated for ultraviolet exposure, wetting and drying cycles, thermal movement and the intended finish. Detail flashings, sills, parapets, roof-to-wall transitions, openings and penetrations so water is shed rather than trapped behind the barrier. Check compatibility with paint, render, insulation adhesives and sealants before installation.
Water management also includes the details outside the wall coating. Gutters, downspouts, grading, drainage planes and sill pans should direct water away from the printed substrate. A sound membrane can still leak if a termination dumps water behind it or if a penetration is sealed only on the interior face.
What’s actually slowing this PC down?
Pick the symptom - the matching free tool is one click away.
Compare systems on these questions
- What hydrostatic pressure and water chemistry can the system resist?
- How much crack movement can it bridge, and what happens at a moving joint?
- Does it bond to the actual printed substrate, including its roughness and curing history?
- Can water migrate laterally behind a defect, and how is that path stopped?
- Is the system pre-applied or post-applied, and does that fit the print and foundation sequence?
- How are corners, penetrations, terminations and transitions detailed and inspected?
- What durability, UV, chemical and temperature limits apply?
- Will later coatings or finishes remain bonded to the cured barrier?
A sealer is not the same as waterproofing
A concrete sealer may reduce surface absorption or dusting, but the available evidence does not establish a universal sealer for 3D-printed walls or show that a sealer resists groundwater pressure. Before specifying one, identify the water source, crack behavior, surface preparation, vapor conditions and finish sequence. For a wall that must exclude pressurized water, use a documented waterproofing assembly rather than treating a curing compound or decorative sealer as the primary barrier.
Ask for the complete system documentation, not only a product data sheet. It should identify primer, membrane or coating, reinforcement at details, compatible sealants, required thickness, cure windows, inspection method and approved repair materials. A product that performs on a smooth cast panel may not wet the valleys between printed beads or remain bonded over a curing film.
Inspect and test the printed wall
Use project-specific quality assurance
ICC 1150-2026 includes requirements and guidance areas for fresh-property qualification, strength, durability and fire performance where applicable, curing, interlayer bonding, reinforcement, connections, inspection and structural design. The project designer and authority having jurisdiction must determine which provisions apply and which edition is legally adopted.
Rank #4

- Spray or roller applied***
- Eliminating the need for water curing***
- Ready-to-use, milky white color dries to clear satin finish***
Recognize the limits of current testing
NIST reports that reliable test methods for additively constructed structures are lagging behind the technology and that conventional methods may not apply directly. Printing companion walls for destructive testing can be costly. NIST describes research toward a candidate four-point-bending method using sections cut from printed walls; that is a research program, not an adopted standard test method. Plan any acceptance testing with the engineer, testing laboratory and code official rather than assuming a cast-concrete test automatically represents the printed assembly.
Recommended Free Tools
Acceptance criteria should be written before production. Define allowable geometric tolerance, visible surface defects, crack width and location, interlayer appearance, membrane coverage and water-test duration. A visual walk-through alone cannot establish structural capacity or resistance to pressure-driven leakage.
Keep records that explain future leaks
- Mix formulation, batch numbers, admixture and fibre dosage, water additions and temperature.
- Printer settings, nozzle size, layer interval, travel speed, stoppages and restart locations.
- Weather readings and curing start time, method, coverage and interruptions.
- Interlayer, reinforcement, connection, penetration and membrane inspections.
- Crack maps with width, length, orientation, location, date and whether the crack changes.
- Water tests, drainage observations and photographs before finishes conceal the wall.
Diagnose an existing crack before repairing it
Do not prescribe a repair product from a crack photograph. Establish four facts first: whether the crack is active, whether it is structural, whether it passes through the wall, and whether it is associated with leakage. Measure and monitor it, inspect both faces where accessible, and check nearby joints, openings, penetrations, drainage and membrane terminations.
Questions that change the repair decision
- Active or stable? A gauge or dated measurements can show whether width is changing with temperature, load or moisture.
- Surface or through-wall? A shallow craze may need a different treatment from a path that reaches the interior face.
- Structural or non-structural? Movement, displaced courses, reinforcement distress or connection damage requires engineering assessment.
- Leaking or merely visible? If water is entering, trace the complete path, including joints and penetrations, not just the visible interior stain.
Common repair mistakes include sealing only the room-side face while water continues behind the wall, filling an active crack with a rigid material, and coating over a damp or contaminated substrate. Repairs can also fail when a membrane termination is left unbonded or when the chosen sealant is incompatible with the existing barrier. Correct the water-management path and movement detail as well as the visible opening.
Only after that diagnosis should the designer select an injection, flexible seal, surface treatment, local removal and replacement, or a membrane repair compatible with the wall mix and existing waterproofing assembly. The available standards and studies do not establish one universal repair specification.
Construction and handover checklist
Use this sequence for a new project:
- Confirm jurisdictional requirements, the adopted code and whether ICC 1150-2026 applies.
- Qualify the printable mix, including fresh properties, strength, durability, interlayer bond and intended curing process.
- Review environmental limits and prepare wind, sun, rain and temperature controls.
- Print trial panels or companion walls when testing is required, and define acceptance criteria before production.
- Print with documented layer intervals, restart procedures, reinforcement and connection details.
- Begin the approved curing method as soon as practicable and record its application.
- Inspect cracks, geometry, penetrations and joints before covering the wall.
- Select a positive-side or weather-exposed barrier for the measured water exposure, pressure and movement.
- Prepare the substrate exactly as the system documentation requires; detail transitions and terminations.
- Test drainage and water-management details, then retain the complete quality file for future maintenance.
Bottom line
Crack prevention begins before the nozzle starts: qualify the mix, control drying, accommodate movement and cure promptly. Water protection then requires its own engineered assembly, selected for pressure, movement, bond, durability and construction sequence. A curing compound or sealer can support early moisture control or surface protection, but neither should be treated as a universal waterproofing membrane. When cracking or leakage appears, diagnose its mechanism and activity first, then repair it with a system proven compatible with the printed wall and its barrier.
Best Value

- Great tools at a great price
Frequently Asked Questions
How do I stop 3D-printed concrete walls from cracking?
Control the process before and immediately after extrusion: qualify the mix and interlayer bond, limit wind and direct sun, manage temperature and humidity, keep layer intervals within the qualified range, accommodate movement at openings and connections, and begin the approved curing method as soon as practicable. A crack still requires diagnosis because plastic, drying, autogenous, thermal and connection-related cracks have different remedies.
How do you waterproof a 3D-printed concrete house?
Treat waterproofing as a separate engineered assembly. For groundwater or persistent external water, evaluate a positive-side barrier for hydrostatic pressure, crack movement, chemistry, bond, lateral water migration and durability. Decide between a pre-applied and post-applied system based on the construction sequence, then detail corners, joints, penetrations, drainage and terminations using the manufacturer’s substrate and installation requirements.
Can I use a concrete sealer on a 3D-printed wall?
A sealer may reduce absorption or dusting, but it is not automatically a waterproofing membrane and should not be assumed to resist groundwater pressure. Verify substrate preparation, curing history, vapor conditions, crack movement and compatibility with later coatings. Use a documented waterproofing system where the wall must exclude pressurized water.
Is misting better than a curing compound?
Neither is universally better. Compare moisture retention, timing, weather, buildability, surface bond and finish compatibility for the actual mix. Misting can be inconsistent or erode fresh material if poorly controlled, while a curing compound can leave a film that interferes with later coatings. ASTM C156 evaluates moisture loss from mortar specimens; it does not approve a compound for every printed wall.
What should I do when a printed wall already has a crack?
First determine whether it is active, structural, through-wall and associated with leakage. Measure it over time, inspect both faces where possible, and check nearby joints, openings, penetrations, drainage and membrane terminations. Only then should an engineer or qualified designer select a flexible seal, injection, surface treatment, local replacement or membrane repair compatible with the wall and existing barrier.
Does ICC 1150-2026 apply to every 3D-printed concrete project?
ICC 1150-2026 covers material qualification, curing, testing, interlayer bonding, reinforcement, connections, inspection and structural design for 3D Automated Construction Technology wall systems. The authority having jurisdiction and project design team must confirm whether it is adopted or referenced locally and which provisions apply. ICC reports the first edition was published in March 2026 and ANSI-approved July 15, 2026.
Quick Recap
Product prices and availability are accurate as of the date/time indicated and are subject to change. Any price and availability information displayed on Amazon at the time of purchase will apply.

