Quick wins for a faster PC:
Repair Windows errors before they cause bigger problemsFix Now →Fix the driver behind crashes, sound loss and screen glitchesFind Drivers →Plan a kitchen remodel in a fixed order: define the problems and scope, measure the room, set a complete budget, lock the layout and appliance dimensions, obtain permit guidance, document comparable bids, order long-lead items, and then build through a controlled trade sequence. The layout and appliances must be settled before cabinet drawings are final because they determine electrical circuits, plumbing, ventilation, clearances, storage, and circulation.
Before demolition, arrange a temporary kitchen, protect adjoining rooms, confirm inspections, and record every decision in writing. A remodel is easier to control when drawings, specifications, allowances, exclusions, schedule assumptions, and change-order rules are agreed before materials arrive.
As an Amazon Associate I earn from qualifying purchases.
1. Define the remodel before choosing finishes
Start with the outcome you need, not a cabinet color. Decide whether the project is a cosmetic refresh or a layout-changing remodel. A refresh might retain the existing walls and utility locations while replacing finishes, lighting, hardware, or appliances. A layout-changing project may remove walls, move plumbing, add circuits, reroute a hood, alter windows, or change the floor plan. Those differences affect design fees, permits, engineering, labor, schedule, and contingency.
Outdated Drivers Are Slowing You Down
One free scan finds every outdated or missing driver and matches the right update for your exact hardware.Free scan · exact hardware matchWindows Errors? Fix Them Before They Spread
Repair common Windows errors and clear accumulated junk for a smoother, more stable PC - no reinstall needed.Free scan · no reinstallWrite a project brief
Record the conditions that will determine design decisions:
#1 Best Overall
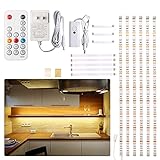
- DIY LED light strip: 6 PCS pre-cut strips, total 9.8 ft,many kinds of connection option,Great way to upgrade your cabinets,closet,desk,bookshelf,bed,wardrobe,display case,bedroom,workbench etc
- Super Bright & Brightness adjustable:Super bright LED cabinet lights delivers total 1500 lumen,Came with RF dimmer to adjust the brightness. LED's CRI is greater than 82,providing high-quality lighting
- RF Wireless remote control: 17 Key RF remote has timing off,dimming,hot buttons,rematch and dynamic function,60 feet control distance
- Reliable kit: High quality adapter and strip light,The LED tape light working voltage is DC12 V,extremely Low voltage and heat.24W adapter can be Max connected to a total of 14PCS (22.96ft )WOBANE LED light bar
- Easy installation: All installation accessories are included. No tools required. Install light bars by yourself in minutes, just Clean - stick on -connect. Backed with strong adhesive tape, screw-free to protect your furniture
- The problems to solve, such as inadequate storage, poor lighting, an unsafe work triangle, insufficient outlets, difficult appliance access, or lack of seating.
- How many people cook, eat, and gather in the room, including children, guests, and anyone who needs accessible clearances or reachable controls.
- Your cooking habits: batch cooking, baking, entertaining, use of small appliances, refrigeration needs, and whether more than one person works at the counters at once.
- The desired completion date and any immovable events that affect procurement or construction.
- Which tasks you will do yourself and which require a designer, general contractor, licensed tradesperson, fabricator, or installer.
- Items you intend to keep, such as a range, refrigerator, flooring, windows, or lighting, and the condition and dimensions of each retained item.
Photograph every wall, ceiling, floor, cabinet interior, plumbing connection, electrical panel, vent termination, and appliance label. Photos help the designer and bidders understand concealed constraints that a plan view may miss.
2. Build a complete budget before approving a design
A useful budget is a list of installed project costs, not a cabinet price. Create a spreadsheet with a separate line for every scope that could affect the final bill. Include design and engineering, permits and fees, demolition, structural work, plumbing, electrical, ventilation, cabinets, countertops, appliances, flooring, backsplash, lighting, fixtures, delivery, installation, disposal, taxes, and a contingency for unknown conditions and approved changes.
Use a benchmark carefully
Renology reports that the 2025 Cost vs Value Report defines a national midrange major kitchen remodel at $82,793. The same report lists $86,214 in Los Angeles and $97,667 in San Francisco. These figures describe one defined scope and location set; they are benchmarks, not a quote for your house. Local labor, access, structural conditions, finish level, permitting, and the amount of work you perform yourself can move the actual total substantially.
Separate fixed selections from allowances
Ask each bidder to label every line as included, excluded, or an allowance. An allowance is a placeholder amount for an item that has not yet been selected, such as tile, a sink, or a light fixture. If the actual item costs more, the contract price normally changes; if it costs less, the credit and markup treatment should be written down. Require the bid to state whether delivery, installation, trim, taxes, disposal, and trade coordination are included.
Hold a separate change-order reserve rather than treating contingency as money available for upgrades. A written change order should identify the requested change, material and labor cost, schedule effect, and any permit or inspection consequence before the work begins.
3. Measure the existing kitchen and document its constraints
Measure the room in the field before drawing a final plan. Capture overall wall lengths, ceiling height, soffits, windows, doors, casing, radiators, vents, columns, outlets, switches, gas connections, water and drain locations, and the electrical service capacity. Measure from more than one reference point because older rooms are rarely perfectly square. Note which walls may be structural, but have a qualified professional verify that assumption before removal.
Rank #2
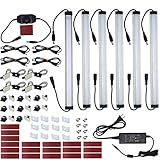
- 【Super Bright】 ---31W bright warm white cabinet lighting kit. No LED dots. No light glaring.
- 【Easy to Install】---Sufficient self-adhesive pads, mounting clips, wire clips, extension cords will help you to install this under cabinet led lighting kit quickly and easily.
- 【Dimmable ONLY by included LED dimmer】---Rotary switch dimmer included for 0%~100% stepless dimming. NOT compatible with existing Wall Dimmers.
- 【Premium Quality】 ---Premium higher quality certified power supply included with US plug with 115CM cable. Licensed electricians can cut off the US plug and hardwire it to an ON/OFF switch.
- 【Reliable & Long Lifespan】--24-Months Warranty when they are installed and used as per the User Manual.
What to record for each appliance
- Opening width, height, and depth, including trim and filler space.
- Door or drawer swing and the space required to stand in front of it.
- Electrical voltage, amperage, plug location, and whether a dedicated circuit is present.
- Water, drain, gas, and ventilation connections.
- Manufacturer-required clearances to cabinets, walls, combustible surfaces, and overhead ventilation.
Do not rely on an old appliance model number or a retailer’s generic dimension. Use the current manufacturer’s installation sheet for the exact model, then verify the rough opening again after framing and before ordering cabinets.
Do these 3 things before closing this tab:
1Clear out junk files and repair common Windows errors2Fix the driver behind crashes, sound loss and screen glitches3Repair Windows errors before they cause bigger problems4. Design the layout around work zones and movement
Evaluate each possible plan on function, circulation, storage, structural work, total installed cost, and code implications. A visually attractive island can make the kitchen worse if doors collide, two cooks cannot pass, or a required walkway becomes a bottleneck.
Map the work zones
- Receiving and storage: refrigerator, pantry, dry goods, and landing space for groceries.
- Preparation: uninterrupted counter area near knives, utensils, waste, recycling, and small appliances.
- Cooking: range or cooktop, oven access, heat-safe landing space, ventilation, and nearby cookware.
- Cleaning: sink, dishwasher, waste, dish storage, and a route that does not cut through the cooking position.
- Serving and gathering: seating, clear circulation, and separation between guests and hot equipment.
Draw appliance-door swings, cabinet-door arcs, drawer extensions, seating overhangs, and the path to every doorway. Check that a person can open the refrigerator, oven, dishwasher, and trash pullout without blocking another essential route. Confirm the final clearances against applicable local code and each appliance’s installation instructions rather than relying on a generic “work triangle.”
Compare layout options explicitly
| Decision factor | Questions to ask |
|---|---|
| Scope and layout impact | Does the option retain walls and utility locations, or require framing, new plumbing, circuits, or a vent route? |
| Installed cost | What demolition, labor, materials, permits, delivery, and finish work are added or removed? |
| Durability and maintenance | Will the selected surfaces tolerate heat, moisture, abrasion, staining, and the household’s cleaning routine? |
| Lead time and complexity | Which components are made to order, and how many trades must coordinate around them? |
| Code and permit implications | Does the option alter structure, plumbing, electrical service, gas, or mechanical ventilation? |
| Energy and operating needs | Will appliance loads, lighting controls, ventilation, and hot-water demand fit the home’s systems? |
| Storage and household fit | Does the plan store the actual cookware, food, waste containers, and small appliances used every day? |
5. Choose appliances and infrastructure before final cabinet drawings
Appliance categories and dimensions should be selected before the cabinet layout is finalized. Appliance decisions determine opening sizes, fillers, panel details, countertop cutouts, circuit requirements, water and drain locations, gas or induction provisions, and hood-vent routing. Homes & Gardens quotes Shae Wilder, manager of designer relations at BlueStar, advising homeowners not to wait until the end of the project to select appliances because they should be an early decision.
Confirm the technical requirements
- Dedicated circuits, voltage, amperage, disconnects, and receptacle locations for ranges, ovens, dishwashers, disposals, refrigerators, microwaves, and other fixed equipment.
- Water supply, shutoff access, drain connection, filtration, ice-maker line, and dishwasher loop or air-gap requirements where applicable.
- Gas pipe size and shutoff location, or induction electrical capacity, as appropriate.
- Hood capture area, makeup-air requirements where applicable, duct size, route, termination, and manufacturer clearances.
- Floor protection and finished-floor height beneath appliances so doors, panels, and toe-kicks align.
Give the designer and electrician the current appliance schedule and installation manuals. If a model changes, update the drawings and rough-ins before ordering cabinets; a substitute with a different depth or electrical load can create expensive rework.
Free tools Windows power users keep installed
One-click scans. No signup required.
6. Finalize cabinets, countertops, and finish selections
Cabinets
Specify cabinet construction, box material, door and drawer style, finish, dimensions, fillers, toe-kicks, end panels, crown or other trim, hardware, and storage accessories. Check that every item has a home: trays, baking sheets, spices, waste and recycling, cookware, pantry goods, small appliances, and cleaning supplies. Confirm which panels are finished and how exposed sides, refrigerator surrounds, and island backs will be treated.
Rank #3

- Voice Control: Hands-free Alexa and Google Assistant voice commands to control lights on and off, change colors, adjust brightness
- DIY Lighting: 10 pre-cut 20-inch light strips and 9 connectors for flexible under-cabinet lighting installation
- Four Control Methods: Voice, app, remote, and control box for on/off, color changes, brightness adjustments
- Easy Installation: No tools required, adhesive tape backing for quick and simple mounting
- Perfect for Home: Suitable for lighting kitchen cabinets, shelves, TV backs, displays, stairs, bookcases, beds, closets
Countertops and sink
Select the countertop material, thickness, edge profile, backsplash relationship, sink type, faucet, soap dispenser, filtration tap, and any seams or overhangs. Cabinets establish the countertop template. Do not order stone or another custom countertop from plan dimensions alone. The cabinets must be installed, leveled, secured, and field-measured before fabrication so walls, fillers, appliance panels, and sink cutouts are captured accurately.
Flooring, backsplash, lighting, and paint
Decide whether flooring runs beneath cabinets and appliances or terminates at them. That choice affects finished height, appliance fit, future replacement, and the order of work. Choose backsplash material and grout, under-cabinet and ceiling lighting, switches and dimmers, outlet locations, hardware, and paint before installation begins. For under-cabinet LED lighting, verify voltage, dimming compatibility, color temperature, driver location, wire path, and the installation method for the particular kit; it is both a task-lighting and an electrical decision.
7. Confirm permits, inspections, and the project team
Ask the local building department or authority having jurisdiction which permits and inspections apply before demolition. Rules vary by jurisdiction, but structural changes and new or relocated plumbing, electrical, and ventilation commonly trigger review. A project that appears cosmetic may still require permits if circuits, gas, mechanical exhaust, walls, windows, or plumbing are altered.
Questions for the building department
- Which portions of the proposed work require building, electrical, plumbing, mechanical, or gas permits?
- Are plan drawings, structural calculations, energy documentation, or appliance specifications required?
- Which inspections occur before walls close, and who schedules them?
- Are there local rules for hood discharge, makeup air, GFCI protection, receptacle spacing, lighting, or accessibility?
- What documents prove final approval and permit sign-off at closeout?
Use licensed and insured professionals where your jurisdiction requires them. Establish who obtains permits, coordinates inspections, communicates with the building department, and corrects failed work. A designer may produce the plan, while a general contractor coordinates trades; in a design-build arrangement, one firm may carry both responsibilities. Put those responsibilities in the contract.
Make contractor bids comparable
Give every bidder the same drawings, appliance schedule, cabinet assumptions, countertop basis, finish schedule, and requested completion date. Compare:
- Demolition, protection, disposal, and structural scope.
- Plumbing, electrical, ventilation, drywall, flooring, painting, and finish installation.
- Permit fees, inspection attendance, engineering, delivery, storage, and cleanup.
- Allowances, exclusions, taxes, markup, payment schedule, and warranty.
- Estimated start and completion windows, long-lead assumptions, and the process for delays.
- Change-order pricing, approval requirements, and how hidden conditions are documented.
The lowest initial number is not necessarily the lowest final cost if it omits demolition, installation, permits, trim, or realistic allowances.
Rank #4

- DIY Design: 8 pcs 20inches light strips(L:20in, W: 0.3in), 4 pcs 5.9inches connectors and 4 pcs 2.8inches connectors available, many kinds of connection options. 8 pcs connectors are designed to bend and fold around corners and they can freely combine to cross different gaps.
- Adjustable Brightness: 2700k warm white, super bright, 6 levels of brightness, control your brightness level with the remote or dimmer easily.
- Dual Control: Cabinet lights can be controlled by wireless remote and mini dimmer. Remote has turn on/off, 6 levels of brightness, 2 light modes and 5 timing off option function, mini dimmer can control on/off and brightness.
- Timer and Memory Function: 30 minutes, 1/2/3/4 hours timing off available, choose a time to turn off your lights if you need. Under cabinet light can save personal settings to ensure that it has the same brightness each time it is activated.
- Widely Used: With strong self adhesive, just clean the place to be installed and paste it. Only take few minutes to install by yourself, then you can enjoy the lighting for a super long time. Suitable for kitchen, cabinet, closet, counter, shelf, desk, TV back, showcase and corner.
8. Order materials and schedule the work
Order long-lead cabinets, appliances, windows, lighting, and specialty materials only after dimensions, finishes, and specifications have been checked. Confirm lead times in writing and coordinate delivery dates with a secure, dry storage area. Inspect deliveries promptly for damage, wrong colors, missing parts, and incorrect models; report discrepancies before installation.
What’s actually slowing this PC down?
Pick the symptom - the matching free tool is one click away.
Create a decision and delivery log
Keep one shared record of approved drawings, appliance models, finish selections, dimensions, orders, invoices, delivery dates, inspection dates, questions, and decisions. Mark superseded drawings clearly so installers do not work from an obsolete plan. Track every change against the remaining contingency and schedule.
Prepare a temporary kitchen
Set up a safe substitute before demolition with a microwave or portable cooking appliance, refrigerator access, drinking water, food storage, dishwashing supplies, a work surface, and a way to manage waste. Protect occupied rooms with floor covering, dust barriers, sealed vents where appropriate, and a defined path for workers and material handling. Remove valuables and fragile items from adjacent spaces.
9. Follow the construction sequence
The exact sequence can change for a particular building, but the following order keeps concealed work accessible and reduces rework.
- Finalize design, approvals, procurement, and permits. Confirm issued drawings, appliance specifications, cabinet order, finish schedule, contract scope, inspection plan, and temporary-kitchen arrangements.
- Protect adjacent rooms and demolish. Isolate dust, protect floors and circulation routes, disconnect utilities safely, remove cabinets and finishes, and expose conditions that must be verified.
- Complete structural framing or wall changes. Install required beams, posts, headers, blocking, or framing changes and obtain any required structural approval.
- Perform rough plumbing, electrical, and ventilation. Place supply and drain lines, circuits, boxes, gas work where applicable, lighting wiring, hood ducting, and any required makeup-air components to the approved plan.
- Complete required inspections. Do not cover rough work until the authority having jurisdiction has approved it. Photograph concealed lines and cables for the project record.
- Close walls and prepare surfaces. Install insulation where required, drywall, patching, primer, and a level substrate for cabinets and finishes.
- Install flooring according to the cabinet and appliance plan. Account for finished thickness, transitions, toe-kicks, and appliance removal or replacement.
- Install, level, and secure cabinets. Verify wall dimensions, corner conditions, appliance openings, filler sizes, panel alignment, and attachment before releasing the countertop template.
- Template, fabricate, and install countertops. Confirm sink and faucet positions, seams, overhang support, backsplash dimensions, and appliance clearances at the template stage.
- Install backsplash and complete finishes. Set tile or other backsplash material, grout and seal as specified, finish paint, and install trim, fillers, and hardware.
- Complete finish electrical and plumbing. Install receptacles, switches, lights, faucets, sinks, disposal, dishwasher connections, and other fixtures; test each circuit and connection.
- Install and commission appliances and hood. Confirm level, anti-tip or other required restraints, clearances, water and drain connections, electrical operation, gas or induction setup, and hood discharge.
- Complete final inspection, punch list, cleanup, and handover. Resolve defects, obtain permit sign-off, remove protection, collect manuals and warranties, and record the final condition.
10. Inspect the finished kitchen before final payment
Use a room-by-room punch list rather than relying on a quick visual walk-through. Test systems under normal use and record unresolved work with an owner, location, description, responsible party, and target completion date.
Cabinets and countertops
- Cabinets are level, plumb, securely attached, and aligned across runs.
- Doors and drawers open without collisions, bind-free, and have consistent reveals.
- Panels, fillers, toe-kicks, trim, and hardware are complete and undamaged.
- Countertop seams are acceptable, overhangs have required support, sink cutouts are properly finished, and caulk is continuous.
Utilities and appliances
- GFCI-protected outlets and dedicated circuits operate as intended, and switches control the correct lights.
- Sinks, faucets, supply lines, drains, dishwasher, filtration, and disposal have no leaks under use.
- Refrigerator water and ice connections are dry and accessible for service.
- Oven, cooktop, range, microwave, and hood operate correctly; hood discharge follows the approved route.
- Appliance doors, drawers, handles, ventilation gaps, and clearances match the installation instructions.
Finishes and documentation
- Backsplash is sealed where specified, grout is sound, paint touchups are complete, and transitions are secure.
- Flooring, caulk, lighting lenses, and hardware are clean and free of construction damage.
- Manuals, model numbers, warranties, spare materials, inspection records, and permit sign-off are handed over.
- All punch-list items and retainage or final-payment conditions are written down before the account is closed.
Common planning failures and how to prevent them
Ordering cabinets before confirming appliances
A refrigerator, range, or hood that changes depth, opening width, or electrical load can force cabinet modifications and rough-in changes. Freeze the appliance schedule and installation sheets before releasing cabinet drawings.
Best Value

- DIY Design. 6 pcs 12 inches rigid LED strips with easy connectors. Power splitter and extension cables included for different layouts. This under cabinet light set is perfect to work as undercabinet lighting, above kitchen counter lights, or any other cabinet lighting, shelf lighting, cupboard lighting, closet lighting, gun safe lights, display cabinet light, bookcase lights, TV back lighting, gun safe light, etc.
- Firm Installation Design. Those LED light strips are rigid with screw holes. They can be installed firmly by those screws easily and quickly. Self-adhesive pads of high bond are included too. Free from the usual problem of “constant falling off” with many other LED strips.
- Easy Installation. The screws, high bond self-adhesive pads, small extension cables and connectors, cable tiers will help you to install those very slim rigid LED strip quickly. And all the parts can be well hided easily.
- DIY & Extendable. Following the “Recommended Layout” , add-on LED light strips can be added into this under cabinet lighting. You can also purchase other compatible extra parts, i.e, motion-activated switch or door-open-switch, for DIY.
- Super Bright & Dimmable & Relaible. Super bright LED light strips with aluminum back. 0~100% stepless dimming dimmer included for you to get any brightness level you prefer. Reliable branded LEDs, high quality Class-2 certified power adapter.
Pricing only visible finishes
Demolition, disposal, permits, electrical capacity, ductwork, wall repair, delivery, and installation can exceed the cost of the decorative items. Require a complete written scope and explicit exclusions.
Templating countertops from the drawing
Walls, fillers, cabinet leveling, and sink positions vary in the field. Template after cabinets are installed and verified.
Closing walls before inspections
Covering rough plumbing, electrical, or ventilation before approval can require destructive opening and delay the project. Schedule inspections as a construction milestone.
Ignoring occupied-space logistics
Dust, noise, blocked routes, and unavailable refrigeration affect daily life. Plan protection, access hours, material storage, and the temporary kitchen before demolition starts.
Assuming one schedule or budget applies everywhere
Permit rules, labor rates, material prices, lead times, and inspection availability depend on location and date. No single duration or budget is universally valid; use local quotes and the authority having jurisdiction for project-specific decisions.
Quick Recap
A practical planning checklist
- Scope, goals, household needs, accessibility requirements, retained items, and DIY responsibilities are written down.
- Existing conditions, dimensions, utilities, structural questions, and appliance data are documented.
- Budget lines, contingency, allowances, exclusions, taxes, delivery, and installation are visible.
- Layout, appliance schedule, clearances, storage, lighting, outlets, plumbing, and ventilation are coordinated.
- Cabinet, countertop, sink, flooring, backsplash, hardware, lighting, and paint selections are specified.
- Permit requirements, inspection points, licensed-trade responsibilities, and final sign-off are confirmed.
- Comparable bids use the same plans and define scope, schedule, warranty, and change orders.
- Long-lead orders, delivery inspection, storage, temporary kitchen, and room protection are arranged.
- Construction follows rough-in, inspection, wall closure, flooring, cabinets, template, countertop, finish, and commissioning milestones.
- Punch-list testing covers structure, cabinets, countertops, utilities, appliances, finishes, manuals, warranties, and permits.
Product prices and availability are accurate as of the date/time indicated and are subject to change. Any price and availability information displayed on Amazon at the time of purchase will apply.

