Measure two separate things before you shop: the cabinet’s narrowest clear opening and the usable interior where the mop organizer will sit. Record width, depth and height around every fixed obstruction, then compare those measurements with the exact organizer model’s current dimensions and installation instructions. A cabinet label or outside measurement cannot prove that an organizer will fit.
Why one cabinet measurement is not enough
An organizer has to pass through the cabinet opening before it can occupy the interior. Those are different geometric checks. A cabinet can have a roomy interior but a narrower face frame, hinge projection or door opening that blocks the product on the way in. Conversely, an organizer may pass the opening yet fail to fit around plumbing, a shelf support or another fixed fitting once it is inside.
As an Amazon Associate I earn from qualifying purchases.
Measure the opening and the storage space as separate zones. The opening check establishes whether the organizer can enter. The interior check establishes whether it can sit in the intended position. If the organizer slides out, add a movement check: it must enter, rest in place and travel through its full operating path without hitting a door, hinge, pipe or frame. Measurement guides from Rev-A-Shelf and Slide-A-Shelf use this distinction for cabinet-fit planning.
What’s actually slowing this PC down?
Pick the symptom - the matching free tool is one click away.
Prepare the cabinet and your measuring kit
Do the measuring when you can see the cabinet floor, opening and permanent hardware. You need a tape measure, paper and pen or a notes app, and a flashlight if the cabinet is dark. The preparation list is also recommended by this under-sink measurement guide.
#1 Best Overall

- 13 ft. Of reach*: allows for easy measurements when working alone (*based on maximum extension of average professional user)
- Compact size: easy to grip and store in any tool belt
- Easy grip design: extensive rubber overmold provides a comfortable grip and impact resistance
- Easy read fractions: fractions printed on the blade in alternating colors and heights for quick, easy measurements
- Includes: (1) CMHT37443S Tape Measure
- Empty the intended storage area. Remove bottles, cleaning tools and loose trays so they do not hide the floor or change where you place the tape.
- Leave fixed parts in place. Pipes, valves, hinges, cabinet frames, shelf pins and built-in hardware are part of the space the organizer must use. Do not measure as though they can be removed.
- Open every door fully. A partially open door can make the clear opening look wider or narrower than it is during installation and daily use.
- Keep the tape straight. A diagonal measurement can overstate usable width or depth.
- Photograph or sketch as you go. A quick plan view and front view make it easier to match each number to the obstruction that created it.
Measure the cabinet opening first
The opening is the passage from the room into the cabinet. Measure the narrowest relevant clear width, not merely the distance between the outside edges of the cabinet box.
- Identify the entry route. With the doors open as far as they normally can go, look for the tightest point created by the face frame, door edge, hinge arm or another projection.
- Measure at multiple heights. Take a width near the bottom, middle and top of the opening when the frame or hinges change shape. Record the smallest clear width that the organizer must pass.
- Check the depth of the threshold. Note anything that projects into the opening and could catch the organizer as it is pushed inward.
- Record door and hinge positions. A hinged door can reduce the usable passage even when the cabinet box itself is wide enough.
- Write the result as a clear-opening measurement. Label it “opening width” in your notes so it is not confused with interior width.
Manufacturer guides emphasize measuring the actual entry path and accounting for frame and hinge projections. The practical question is not “How wide is the cabinet?” but “What is the narrowest unobstructed route through which this organizer must pass?”
Measure the usable interior in the organizer’s storage zone
After recording the opening, measure the place where the organizer will remain. Measure width, depth and height independently; a single overall cabinet dimension hides local restrictions.
Crashes, No Sound, or Screen Glitches?
Random freezes, missing sound and display glitches usually trace back to one bad driver. Find and replace yours safely.Free scan · under a minuteWindows Errors? Fix Them Before They Spread
Repair common Windows errors and clear accumulated junk for a smoother, more stable PC - no reinstall needed.Free scan · no reinstallUsable width
Measure between the surfaces that will actually contain the organizer. If a pipe, valve, shelf support or side panel narrows one section, measure on both sides of that feature and record the smaller usable width for the organizer’s footprint. When the cabinet is irregular, create separate zones instead of averaging the widths. For example, label a left zone, a right zone and a center zone around the plumbing, then note the width available in each.
Usable depth
Measure from the front plane that the organizer must clear to the rearmost usable surface. Do not push the tape through a pipe loop or behind a valve and call that hidden distance available. If the organizer will sit beside plumbing, measure the unobstructed route to the back of that particular zone.
Rank #2

- 20% more compact grip**: For improved ergonomics and control
- Integrated finger brake: For improved blade control
- Fractional blade graphics for quick and easy measuring
- Durable blade coating for longer blade life
Usable height
Measure from the cabinet floor or the surface supporting the organizer to the lowest fixed obstruction above it. Check several points if the underside of a sink, a shelf or a crosspiece changes height from one side to the other. Record the height in each zone where the organizer could be placed.
This three-dimensional map follows the approach in the bathroom cabinet measurement guide: capture the dimensions that remain after permanent features are excluded, rather than relying on nominal cabinet size.
Free tools Windows power users keep installed
One-click scans. No signup required.
Map plumbing, hinges and other permanent obstructions
Draw a simple plan-view sketch with the cabinet doors at the front and the back wall at the rear. Add every fixed item that can divide the floor or restrict height:
- Supply and drain pipes, traps, shut-off valves and their joints.
- Door hinges, hinge plates and any arm that swings into the cabinet.
- Face frames, center stiles, side panels and shelf supports.
- Fixed shelves, braces, rails or hardware attached to the cabinet.
- The underside of the sink or any other component that lowers the available height.
Mark each obstruction’s position and approximate envelope on the sketch, then measure the clear space around it. Plumbing can split the cabinet into usable pockets, so an organizer that matches the largest open rectangle may still collide with a pipe while being installed or operated. Treat the obstruction as fixed unless the cabinet’s installer or the product instructions explicitly provide a safe, intended modification. Do not assume that moving a pipe, hinge or support is part of the organizer purchase.
Trace the full path for a pull-out organizer
A pull-out organizer needs more than a suitable resting footprint. Its shelves, frame and slides must enter through the opening and move to the position where you can use them.
Rank #3

- 16-foot retractable measuring tape for personal or professional use
- Provides both SAE and metric measurements
- Wide 3/4-inch blade with easy readability
- Convenient belt clip and lanyard for easy access
- Molded, impact-resistant case with easy grip-ability
- Model the closed position. Confirm that the organizer’s outside width, depth and height can occupy the intended interior zone without touching plumbing or the door.
- Model the entry position. Follow the same orientation required by the product instructions as you bring it through the opening. Check the narrowest point at the face frame and hinges.
- Model the extended position. With the organizer pulled out, check whether its front edge, handle or shelves strike the open door, hinge arms or adjacent fixed parts.
- Check the door swing. Open the door to the position you will use in practice and verify that the organizer can travel without the door pressing against it.
- Check the slide direction. The clear space needed in front of or beside the cabinet depends on how the organizer is designed to move; use the exact instructions for that model.
Fit at rest does not establish usable fit. The organizer must complete the entire motion without binding, scraping or forcing a door. The manufacturer measurement documents above and the September 7, 2026 organizer guide both treat door and hinge clearance as part of the measurement task.
Turn the cabinet into a measurement worksheet
Use one line for each distinct restriction rather than one optimistic cabinet number. This format keeps the dimensions tied to the decision they support.
| Record | What to measure | Why it matters |
|---|---|---|
| Clear opening width | Narrowest passage through the frame, doors and hinge projections | Determines whether the organizer can enter the cabinet |
| Interior width by zone | Clear side-to-side space in each area where the organizer could sit | Reveals restrictions created by pipes, supports or uneven side panels |
| Interior depth by zone | Unobstructed front-to-back distance to the usable back surface | Shows whether the organizer’s body and slides can reach their intended position |
| Interior height by zone | Floor-to-lowest-obstruction height at each candidate position | Prevents contact with a sink underside, shelf or brace |
| Obstruction map | Location and shape of plumbing, valves, hinges, frames and fixed hardware | Allows the product footprint and movement path to be compared with real obstacles |
| Pull-out travel | Clear route from closed to fully extended, including door and hinge clearance | Determines whether the organizer can be operated after installation |
Write the date beside your notes and keep the product listing or instruction sheet with them. If the cabinet changes later, you can tell which measurements need to be repeated.
Compare your notes with the exact organizer model
Do not shop from a product photograph or a generic category size. Find the current specification and installation instructions for the exact model and compare its exterior dimensions with each measurement in your worksheet. The relevant product dimensions are the organizer’s outside width, outside depth and outside height, plus any slide, handle or mounting dimensions specified by the manufacturer.
Make two separate comparisons:
- Entry comparison: the organizer’s required passage must correspond to the narrowest clear opening, including the orientation required by the instructions.
- Storage comparison: the organizer’s body and hardware must fit the usable width, depth and height of the selected zone after obstructions are excluded.
For a pull-out design, add the travel and door-clearance requirements stated in the instructions. If a listing gives only a nominal cabinet size, that is not a substitute for the organizer’s actual exterior dimensions. The available guides advise checking the current specifications for the exact product; this measurement process does not establish dimensions for any particular mop organizer.
The Tool Desk
Outbyte Driver Updater FREEFix the driver behind crashes, sound loss and screen glitchesFind Drivers →Outbyte PC Repair FREEClear out junk files and repair common Windows errorsFree Scan →Rank #4

- QUICK & EASY MEASUREMENTS: Fractions printed on the blade
- ADDED GRIP: Rubber overmold for added grip
How to handle an irregular cabinet
One pipe divides the floor
Measure the left and right pockets separately, including their individual depths and heights. Choose a location only if the organizer’s complete footprint and movement path stay within that pocket. Do not add the two widths together when the organizer cannot pass across the pipe.
A center frame narrows the entrance
Use the frame’s narrowest clear passage as the opening measurement, even if the cabinet interior widens behind it. Check whether the organizer can be turned or oriented as the instructions require without striking the frame.
Hinges project into the cabinet
Measure around the hinge at the height where the organizer’s body, slides or handle will pass. Repeat the check with the door open to its practical position. A hinge that is clear at floor level can still block a taller organizer.
Height changes from front to back
Record the lower height at every point the organizer occupies or crosses. If a sink underside slopes or a brace spans only part of the cabinet, sketch the change rather than reducing it to one average height.
Do these 3 things before closing this tab:
1Fix the driver behind crashes, sound loss and screen glitches2Repair Windows errors before they cause bigger problems3Scan for outdated or missing drivers - takes under a minuteThe cabinet has a fixed shelf
Measure the vertical opening below the shelf and the horizontal passage around its supports. If the organizer must be inserted below the shelf, the shelf opening becomes another entry restriction in addition to the cabinet door opening.
Best Value
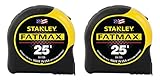
- 11-foot Standout; 16-inch and 19.2-Inch stud center markings simplify framing jobs
- Blade arm our coating on the first 3" maximizes durability of the blade
- Mylar polyester film extends life of entire blade
- Top-forward blade lock makes locking and unlocking easy
- High-impact ABS case with durable rubber-holds up to heavy use
Common measuring mistakes and their fixes
- Measuring the outside of the cabinet: Outside dimensions include material that the organizer cannot occupy. Re-measure the clear opening and usable interior.
- Measuring only the interior: A product can fit once inside but fail at the doorway. Record the narrowest entry width separately.
- Taking one width at one height: Frames and hinges can change the passage. Measure every height where the shape changes and use the narrowest relevant point.
- Ignoring plumbing: A pipe or valve can split a seemingly large rectangle. Map its position and measure the remaining zones.
- Using a diagonal tape line: Diagonals exaggerate the available side-to-side or front-to-back distance. Keep each measurement perpendicular to the surfaces being compared.
- Checking only the closed position: Pull-outs need room to travel and for the door to remain open. Trace the full path.
- Trusting a photo: Perspective hides projections and does not provide reliable scale. Use the manufacturer’s current dimensions and instructions.
- Adding an invented clearance allowance: No universal mop-organizer margin was established. Follow the exact product instructions and account for the actual cabinet construction instead of applying a made-up number.
A final fit check before ordering
Before placing an order, read your worksheet aloud against the product page or instruction sheet. Confirm that you have an opening width, a usable width, depth and height for the selected zone, and an obstruction sketch. Then verify that the model’s outside dimensions and required movement match those records.
- Highlight the smallest opening measurement.
- Circle the candidate interior zone and its three usable dimensions.
- Mark every pipe, hinge, frame and fixed fitting that the organizer could contact.
- Follow the organizer’s entry orientation and pull-out path on your sketch.
- Resolve any missing product dimension from the manufacturer’s current specifications or instructions before buying.
If any one of these checks cannot be completed, the fit has not been established. Re-measure the cabinet or obtain the missing model dimension rather than inferring it from a cabinet label, category name or photograph.
When the cabinet or product changes
Repeat the relevant measurements if a shelf, hinge, plumbing connection or door is altered. Also recheck the product specification if the manufacturer updates the model or listing. The comparison is specific to the cabinet as measured and the organizer version whose dimensions you used; a similar-looking model can have a different footprint or travel requirement.
Keep the sketch with the organizer’s instructions after purchase. It provides a practical reference during installation: the opening check explains how the unit should enter, the zone measurements identify its intended position and the obstruction map shows which parts must remain clear.
Quick Recap
Sources for the measurement method
- Rev-A-Shelf, “Measuring Guide – All Products”
- Small Space Buyer, “How to measure for an under-sink organizer,” reviewed September 7, 2026
- Slide-A-Shelf, “Measuring Guide – All Products”
- Small Bathroom Storage, “How to Measure Under-Sink Bathroom Space”
Product prices and availability are accurate as of the date/time indicated and are subject to change. Any price and availability information displayed on Amazon at the time of purchase will apply.

