A tenoning jig holds a board upright against your table-saw fence so the blade can cut straight, repeatable tenon cheeks and end cuts. The safest useful design is one that fits your rip fence without wobble, keeps the work face square to the blade, clamps the stock securely, and leaves the saw’s guard, riving knife or spreader, and anti-kickback equipment usable whenever the operation allows.
There is no universal outside dimension. Measure your fence and the largest stock you intend to cut, then build and tune the jig around those measurements.
As an Amazon Associate I earn from qualifying purchases.
Choose a jig layout before cutting plywood
Two layouts cover most shop-built tenoning jigs. Select the one that matches your fence, the capacity you need, and the safety equipment on your saw.
The Tool Desk
Outbyte Driver Updater FREEScan for outdated or missing drivers - takes under a minuteDriver Scan →Outbyte PC Repair FREERepair Windows errors before they cause bigger problemsFix Now →| Layout | How it fits | Strengths | Limitations |
|---|---|---|---|
| Fence-straddling | Two face panels and end panels wrap around a conventional rip fence; a square fence block carries the work. | Simple, rigid, and easy to slide on a Biesemeyer-style fence; a sacrificial fence can be replaced after kerf damage. | Must be measured closely to the actual fence; a fixed 90-degree block is less convenient for angled tenons. |
| Bridge or guide-bar | A multi-layer plywood bridge spans the rip fence, with a guide bar or low-friction surface controlling the fit. | Width can be tailored to fence, guide-bar, and dado clearances; shims or tape allow fine fitting. | More layout and fitting work; any error in the bridge or work face transfers directly to the tenon. |
| Compact clamp-on | A smaller plywood body uses several clamps to hold the board against a square work face. | Light, repeatable, and convenient for shorter stock. | Less support for long or tall workpieces; the face may need shimming to be square to the blade. |
For a first jig, the fence-straddling arrangement is usually the most forgiving. A bridge design is useful when your fence shape or required capacity makes a wraparound body impractical.
#1 Best Overall

- 【Durable Metal Construction】Crafted from high-quality metal, this tenoning jig ensures a secure and stable grip on your workpiece, enhancing safety and reducing the risk of injury during operation
- 【Technical Specifications】Chute width: 19.05 mm; Chute depth: 9.525 mm; Guide rod size: 265*19*9.5 mm; Maximum grip: 82.5 mm; Net weight of the whole machine: 8.7 KG
- 【Adjustable Clamping Angle】The angle of the rear pallet can be adjusted between 0-45°; The angle of the backing can be adjusted between 0-15°
- 【Efficient & User-Friendly Design】Our table saw accessories have multi-position control levers for easy adjustment and better locking leverage, making it a versatile choice for many woodworkers
- 【Precision Cutting】Compatible with most table saws, this jig ensures accurate cuts with a chute center-to-saw blade distance ranging from 95 -170 mm/3.74-6.7 in.
Measure the saw and define capacity
Measure the rip fence
Record the fence’s actual height, width, and any steps, rails, or protrusions. Measure at several points rather than relying on a catalog dimension. Add only enough running clearance for a smooth slide; excessive clearance produces a wandering tenon.
Set the work envelope
Decide the maximum board thickness, width, length, and tenon angle before drawing parts. A Canadian Woodworking plan uses a 6- to 8-inch jig length and 14-inch height for stock up to about 32 inches, but those are plan-specific values, not universal capacities. Increase support for longer or heavier work and verify that the jig cannot contact the blade, guard, or table edge.
Plan safety-device clearance
Check the guard, riving knife or spreader, and anti-kickback devices with the proposed jig installed. If the fixture blocks a device that your operation could otherwise use, redesign the fixture or choose another method.
Materials and tools
- 3/4-inch MDF or stable hardwood/Baltic-birch plywood for the faces, bridge, and end panels.
- A straight, carefully milled square fence block.
- A replaceable sacrificial fence or backer.
- Screws, pilot and clearance bits, countersink bit, clamps, and a drill press or accurate drilling setup.
- UHMW low-friction tape or a guide-bar material for a controlled fit.
- A sharp table-saw blade; use a dado set only when it is compatible with your saw, guard arrangement, and manufacturer instructions.
MDF machines easily and adds weight, while plywood holds screws better and resists damage at edges. Whichever you choose, reject panels that are warped or have unreliable edges.
Build the jig
-
Cut flat, parallel panels
Cut the two face panels (or the bridge layers) and end panels from stable sheet stock. Joint or trim mating edges so they are straight and parallel. A bowed face will make the workpiece rock and will show up as a tapered tenon.
Rank #2
 Maisutseb Tenon Jig for Table Saw, Tenon and Mortise Jig, Multi-functional Fixture Tenoners for Woodworking Table Clamps for Wood Working
- 【Multi-functional woodworking clamps】 This table saw jig for woodworking is a quick tightening device, use the collet to quickly clamp the wood and start working, suitable for table saws, greatly improving your work efficiency.Table Saw Chute Standard 19.05mm T-Type Chute.
- 【Important parameter】 Distance from chute center to saw blade:Minimum -----95MM.Maximum -----170MM.Chute width:19.05mm.Chute depth:9.525mm.
- 【Adjustable clamping angle】 The angle of the rear pallet can be adjusted from 0 to 45 degrees, and the angle of the back plate can be adjusted from 0 to 15 degrees, which can realize a variety of sawing methods.
- 【Metal material】 The tenon jig for table saw is made of metal, which is strong and durable, not easy to be damaged and has a long service life.
- 【Note】 Measure your table saw T-slot before buying please.
-
Dry-fit over the fence
Assemble the panels around the unplugged saw’s fence and slide the body along its full travel. It should move smoothly without binding, lifting, or side-to-side wobble. Fine Woodworking’s bridge approach bases finished width on fence width plus guide-bar and dado allowances, with a small fitting allowance; use that as a starting method, then tune to your machine. If the fit is loose, apply UHMW tape in small strips or adjust the guide bar rather than accepting play.
-
Lay out the fence block
Mill the work-support block square on all relevant faces. Mark the screw locations, drill pilot holes, and make clearance holes where adjustment is needed. One Woodcraft-style design uses a clearance hole about 1/32 inch oversize so the block can be nudged before final tightening. Keep every screw head below the surface so it cannot touch the saw table or stock.
Do these 3 things before closing this tab:
1Scan for outdated or missing drivers - takes under a minute2Clear out junk files and repair common Windows errors3Fix the driver behind crashes, sound loss and screen glitchesSpecial offer. See more information about Outbyte and uninstall instructions. Please review EULA and Privacy policy. -
Assemble square
With the body on the fence, align the top edges and fasten the panels with screws. Attach the block so its work face is 90 degrees to the saw table and parallel to the blade’s intended cut. Tighten gradually while checking that the body has not twisted.
-
True the running surfaces
Place the jig on the saw and check the bottom edges. Trim or plane high spots until the body sits consistently. One plan specifies the stock-support arm at least 1/4 inch above maximum blade height and a 1/16-inch gap above the table; treat those as starting clearances and verify them against your blade and saw.
-
Add the sacrificial fence
Fasten a replaceable backer to the work face. It supports fibers at the cut and records the blade’s kerf without damaging the structural fence block. Leave enough material for several future kerfs and replace it when it becomes split or too close to the blade path.
Rank #3
 THUXEON Woodworking Tenoning Fixture for Table Saws, Woodworking Table Saw Dedicated Tenoning Jig, Multi-angle Cutting, Fits 19mm T-Slot, 82.5mm Max Clamp Width, for Precision Tenoning & Crosscutting
- 【Universal Compatibility】Designed to fit table saws featuring a standard 19.05mm T-type chute, this clamp suit works seamlessly when the distance from the chute center to the saw blade ranges between 95mm (minimum) and 170mm (maximum). Please measure your table saw's T-slot prior to purchase.
- 【Quick Clamping】Equipped with a user-friendly collet, this clamp enables rapid and secure clamping of wood materials. Spend less time on setup and more on crafting—simply fasten the wood firmly with the collet and start your sawing tasks immediately.
- 【Multi-Angle Adjustment】The rear pallet adjusts from 0 to 45 degrees, while the backing tilts from 0 to 15 degrees. This wide range of angle options allows you to achieve various sawing styles and meet diverse woodworking needs, from straight cuts to angled finishes.
- 【Robust Construction】Boasting a guide rod size of 265*19*9.5mm and a maximum grip capacity of 82.5mm, this clamp offers stable and reliable performance for handling different wood sizes.
- 【Precision-Engineered Design】Crafted with attention to detail, the clamp features a chute depth of 9.53mm that enhances stability during clamping and sawing. Its structured design ensures consistent pressure distribution, minimizing wood movement and delivering precise, clean cuts—ideal for woodworking projects requiring accuracy and uniformity.
-
Test and tune
Cut scrap of the same thickness and species as the project stock. Measure cheek thickness, shoulder position, and squareness against the mating mortise. Shim the work face or loosen and reset the adjustable block if the test is not correct. Do not cut project parts until the test tenon fits as intended.
What’s actually slowing this PC down?
Pick the symptom - the matching free tool is one click away.
Special offer. See more information about Outbyte and uninstall instructions. Please review EULA and Privacy policy.
Use the tenoning jig
-
Prepare the stock
Flatten the face that will bear against the jig and square the end. Remove knots, splits, and other defects that could let clamps slip.
-
Install and inspect
With the saw unplugged, slide the jig on the fence and confirm a no-wobble fit. Check screw heads, the sacrificial backer, blade clearance, and the operation of all available safety devices.
-
Clamp the board
Keep the reference face against the jig’s work face and clamp the board firmly. Use toggle or hold-down clamps positioned so they cannot touch the blade, guard, or fence during the entire stroke. Support long stock at both the cut and uncut sides.
-
Set blade height
Set the blade just under the full shoulder depth for the joint. Make a shallow test pass and verify the shoulder location before committing to the full cut.
PerformancePC Slower Than It Used to Be?DriversCrashes, No Sound, or Screen Glitches?PerformanceWindows Errors? Fix Them Before They SpreadSpecial offer. See more information about Outbyte and uninstall instructions. Please review EULA and Privacy policy.Rank #4
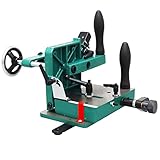 TECHTONGDA Tenon Jig Woodworking Clamps Woodworking Tenoning Machine Mortise Joinery Tool
- 【High Work Efficiency】This multifunctional woodworking clamps is a quick clamping device. Use the chuck to clamp the wood quickly for work. Work is very efficient. Reduce time cost for you
- 【Strong Applicability】Our tenoning clamps slide rails are set according to American regulations. Fits most American table saws. But not all American table saws. Our woodworking clamps' table saw chute is standard 19.05mm T-Type chute. Distance from chute center to saw blade: Minimum -95MM; Maximum-170MM. So a friendly reminder, please measure the size of your own table saw T-slot before buying
- 【Adjustable Clamping Angle】The angle of the rear pallet can be adjusted between 0-45 degrees; The angle of the backing can be adjusted between 0-15 degrees. Therefore, a variety of sawing methods can be realized
- 【Parameters】Chute width:19.05mm; Chute depth:9.525mm; Guide rod size:265*19*9.5mm; The minimum distance from the center of the chute to the saw blade: 95mm; The maximum distance from the center of the chute to the saw blade:170mm; Maximum grip.:82.5mm; Net weight of the whole machine:8.7KG
- 【Strong and Durable】This tenon jig is made of high quality metal material. Every part of the product is produced by meticulous workmanship. Strong and durable, long service life. It can make satisfactory wooden handicrafts for you
-
Make controlled passes
Feed the jig steadily, keeping both hands away from the blade line. Follow the layout required by your jig to cut the opposite cheek—this may involve flipping or repositioning the workpiece. Remove most cheek waste on a bandsaw when practical; the lighter table-saw cut reduces flying offcuts and load on the blade.
-
Fit gradually
Use additional test cuts to sneak up on the mortise fit. Tune tenon thickness, shoulder location, and squareness to the actual mating part, not to a generic plan dimension.
Angled tenons and adjustments
A fixed 90-degree fence block is intended for square tenons. For an angled tenon, use a jig specifically designed with an adjustable or tilting work face, or make a secure angled auxiliary fence that preserves full clamping and blade clearance. Mark the angle on both the jig and stock, lock the setting before cutting, and verify it with scrap. Never rely on a loose shim or a single clamp to hold an angled board.
Safety rules that govern every cut
- Follow the saw manufacturer’s instructions and keep the blade guard, riving knife or spreader, and anti-kickback devices in service whenever the setup permits.
- Use a push stick for small pieces and when pushing stock past the blade, as OSHA advises.
- Keep hands out of the cut line and stand out of the blade’s kickback path.
- Support both the cut-off and the remaining stock; do not let a falling offcut twist the jig or pinch the blade.
- Never clear scraps by hand while the saw is running. Stop the blade and disconnect power before reaching near the kerf.
- Use a sharp, correctly installed blade. Remove cracked, badly set, or otherwise damaged blades from service.
- Before every use, inspect the fence fit, clamp clearance, screw heads, sacrificial backer, and complete blade path. A shop-made jig is not automatically safe.
Troubleshooting common problems
The jig binds or wobbles
Find high spots or a twisted panel, then true the running edges. Add small UHMW-tape strips or tune the guide bar until the jig slides freely with no perceptible side play.
The tenon is tapered
Check that the reference face is flat, the fence block is square, and the body is not lifting on the rip fence. Recut a test piece after correcting the support surfaces.
The shoulders are uneven
Verify blade height, stock squareness, and clamp pressure. A sacrificial backer that has been cut away too far may no longer support the fibers; replace it.
Clamps or the jig contact the blade
Stop immediately, unplug the saw, and redesign the clamp locations or body clearance. Do not shorten the guard or continue with a compromised setup.
Quick Recap
Product prices and availability are accurate as of the date/time indicated and are subject to change. Any price and availability information displayed on Amazon at the time of purchase will apply.

