The Tool Desk
Outbyte PC Repair FREEClear out junk files and repair common Windows errorsFree Scan →Outbyte Driver Updater FREEScan for outdated or missing drivers - takes under a minuteDriver Scan →An electric fireplace insert can usually sit inside an existing masonry firebox without chimney venting, but it is not a universal drop-in appliance. The safe installation depends on three checks made before you move the unit: the selected model must approve installation in a masonry fireplace, the opening must meet that model’s dimensions and clearance rules, and the electrical supply must comply with the manufacturer’s instructions and local code.
Measure the opening, depth, and planned trim configuration first. Then read the current installation manual for the exact insert. A licensed electrician should install any new receptacle, circuit, or hardwired connection. The physical placement may be straightforward; the electrical, support, masonry, and inspection details are where installations commonly go wrong.
As an Amazon Associate I earn from qualifying purchases.
Confirm that the insert and fireplace are compatible
Start with the exact model number, not a generic product category. Installation requirements differ between manufacturers and can change with a faceplate, surround, or trim option. The manual should explicitly cover an existing masonry fireplace and identify the required opening, depth, support surface, clearances, electrical method, and finishing parts.
- Keep the complete installation manual at the job site. Owner’s manuals often cover operation and electrical warnings, while a separate installation or specification manual contains dimensions and clearances.
- Verify whether the appliance is designed to be placed on the firebox floor, on a raised hearth, or on a manufacturer-specified platform.
- Check whether the selected faceplate or surround changes the opening dimensions. Regency’s Ei29LCD documentation, for example, notes that opening dimensions vary with faceplate options.
- Confirm whether the model uses a plug, permits hardwiring, or requires a particular receptacle location. Do not assume that a method used by one insert is allowed for another.
If the manual does not clearly approve the intended masonry-fireplace installation, stop and obtain written guidance from the manufacturer or choose a model with explicit instructions. Do not force an appliance into an opening simply because its visible front appears to fit.
#1 Best Overall

- Overall dimensions: 35 1/16" W x 26 31/32" H x 8 25/32" D. Firebox dimensions: 32 1/8" W x 25 9/16" H x 7 51/64" D. Please contact before ordering if you are not sure about if it will suit your opening.
- 3 flame intensity can be used with or without heat all year long; 100% energy saving LED technology. A sleek look with three-sided interior brick wall and clean glass front trim design, without the hassle of cleaning dust or ashes.
- Life-like resin log which is 11 13/16" high sitting on the grate above ember bed, that's just what a wood burning fireplace looks like.
- Adjustable thermostat; A supplemental heat for up to 400 sq. ft. NOT a MAIN heat source; Remote control provided for easy operation.
- Easy to install and uninstall. With flat bottom, the insert can just sit on the floor directly; Plug in and use under a voltage of 120, CANNOT be hard wired. Customer service is always ready for help whenever you need.
Measure the masonry opening before ordering
Measure before selecting the insert. Record the opening’s width, height, and depth at the locations specified by the model manual, rather than relying on one measurement at the front edge. Masonry can be out of square, the rear of the firebox may taper, and a lintel or raised hearth can reduce usable space.
Take the three essential measurements
- Width: Measure the clear opening at the front and at any narrower point identified by the manual. Note irregular stone, mortar joints, or a lintel that could interfere with the cabinet or trim.
- Height: Measure from the actual support surface to the lowest obstruction. If the insert will sit on a hearth or platform, measure from that finished surface, not from the room floor.
- Depth: Measure from the face of the fireplace to the back of the usable firebox. Account for a sloping back wall, protruding masonry, and the space needed for the cord or wiring arrangement.
Write the measurements down and compare them with the dimensions for the exact faceplate or surround. A surround can be intended to cover a gap between the appliance and the masonry opening, but it cannot correct an opening that is too shallow or a support surface that cannot carry the appliance.
Example dimensions are not universal
Regency’s Ei29LCD instructions give one model-specific masonry-opening example: at least 29¾ inches wide, 20 9/16 inches high, and 12⅝ inches deep. Those figures belong to that appliance and its stated configuration; they are not a general sizing rule for electric inserts. The same documentation warns that the opening can change with faceplate choices. Use your model’s own table instead of applying these numbers to another product.
| Measurement or feature | What to verify | Why it matters |
|---|---|---|
| Width | Clear width for the cabinet and the selected trim | Prevents the insert or faceplate from binding against masonry |
| Height | Opening height from the finished support surface | Determines whether the unit and top trim can be installed without obstruction |
| Depth | Usable firebox depth at the required height | Allows the cabinet, plug or wiring route, and airflow space to fit |
| Faceplate or surround | Model-specific minimum opening and overlap | Controls how gaps are covered and whether dimensions change |
| Support surface | Continuous, level bearing area under the appliance | Prevents rocking, distortion, and unsafe loading of the cabinet |
Plan the electrical connection before placement
Electrical planning should happen before the insert is slid into the firebox. Confirm the required voltage, frequency, amperage, grounding, outlet location, cord path, and any hardwire procedure in the selected model’s current manual. A receptacle that is physically convenient may still be prohibited by local rules when it is inside a masonry fireplace or enclosure.
Use the model’s rating, not a generic assumption
For one SimpliFire example, Heat & Glo specifies a grounded 15-amp, 120-volt, 60-Hz outlet. That rating applies to the cited product line and is not a universal requirement. The selected insert may have different electrical specifications or an approved hardwire arrangement.
Rank #2
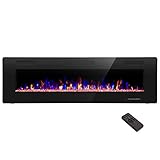
- Attractive and Practical Design: 3.86"D x 60"W x 18.11"H,The thickness of the new style is only 3.86 inches while the old one is 6 inches. And it operates the same as the old one. Also we redesign the location of main power and power cable, which makes the new fireplace more attractive and practical.
- Multi Operation Modes: Touch screen and remote control;12 flame & LED flame bed color modes;5 flame speed modes;5 flame brightness levels; Specially automatic flame design(the flame color and brightness changed
- Energy Saving: 750W & 1500W modes can be adjusted accordingly for both warm and energy saving purpose. The supplemental zone heating is for up to 400 square feet.
- Safety and Comfort: ETL Certificate Approved. It also has auto-heat kill safety to avoid the superheating. The heat is good for maintaining the natural humidity within the air without making the room too dry.
- Let R.W.FLAME electric fireplace warm your home and life.
| Electrical question | Action before installation |
|---|---|
| Voltage, frequency, and circuit rating | Copy the values from the exact model’s specification plate and manual; do not infer them from another insert |
| Grounding | Use a properly grounded connection in accordance with local code and the manufacturer’s instructions |
| Receptacle location | Confirm that the proposed location is permitted by the manual and the local inspector |
| Plug route | Follow the approved path; protect the cord from sharp edges, pinching, and heat |
| New outlet, circuit, or hardwire | Have a licensed electrician perform the work and arrange any required inspection |
Some manufacturer instructions describe either a receptacle in the fireplace or routing the cord through a lower corner of the surround to a nearby outlet. That option is not automatically legal in every jurisdiction. Regency specifically tells installers to check with the local inspector because some jurisdictions may not permit a receptacle inside the masonry fireplace or enclosure.
Do not install a new outlet or circuit yourself. Dimplex’s BLF3451 owner’s manual requires grounding and directs users to a licensed electrician for new outlets or circuits. Follow the same conservative approach for any insert: an electrician should evaluate circuit capacity, grounding, cable protection, connection type, and inspection requirements.
What’s actually slowing this PC down?
Pick the symptom - the matching free tool is one click away.
Inspect and prepare the fireplace
Remove loose ash, debris, and obstructions from the firebox. Check the masonry, hearth, lintel, and side walls for conditions that could prevent a level, continuous support or damage the appliance. The insert should not rest on loose brick, a cracked hearth, or an improvised stack of materials unless the model manual specifically approves the support arrangement.
Address chimney drafts only when the model calls for it
An electric insert does not use a combustion flue, but an open chimney can still allow rain, cold air, dust, or debris into the firebox. Heat & Glo’s installation guidance advises sealing drafts with non-fibrous installation material and closing or sealing the flue and damper against rain infiltration. Treat that as model-specific direction: confirm the approved material and method for your insert and fireplace before sealing anything.
Do not block required ventilation openings in the insert, surround, or room. A seal intended to stop chimney drafts must not cover an appliance air inlet, outlet, control, or electrical access point.
Rank #3

- FEATURES: The Sideline features an unmatched flame. Friends will be nervous to touch realistic flame behind the glass. The Sideline includes faux-fire logs & crystals to create an authentic feel, as well as a wireless remote to control flame color & intensity, the heater and shut-off timer. Front facing heater vents allow you to position the Sideline just 8” under a flat screen TV. The Sideline can be hardwired or plugged in to an outlet.
Gather equipment and establish a safe work area
The exact tools depend on the model and the condition of the fireplace. Typical preparation includes a tape measure, level, suitable shims or leveling hardware specified by the manual, a vacuum or brush for loose debris, and protective equipment for handling masonry and glass. Use only hardware supplied or approved by the manufacturer.
Outdated Drivers Are Slowing You Down
One free scan finds every outdated or missing driver and matches the right update for your exact hardware.Free scan · exact hardware matchWindows Errors? Fix Them Before They Spread
Repair common Windows errors and clear accumulated junk for a smoother, more stable PC - no reinstall needed.Free scan · no reinstall- Protect the finished hearth and floor before moving the cabinet.
- Have a second person available if the appliance is heavy or awkward to hold while aligning it.
- Keep the glass, log set, trim, and remote control in a protected area until the manual calls for installation.
- Turn off power at the relevant breaker before an electrician works on the connection.
- Keep the cord away from sharp masonry edges and any point where the cabinet or trim could pinch it.
Step-by-step installation procedure
The sequence below is a planning framework. The exact model manual controls the order, fasteners, clearances, and electrical method. Regency’s Ei29LCD sequence, for example, includes removing the glass, fitting optional leveling legs or a faceplate, completing hardwiring before placement when applicable, sliding the level appliance into position, installing the log set, and replacing the glass.
1. Read the installation section and mark the finished position
Identify the front plane of the finished trim, the centerline of the opening, the support surface, and the intended cord or wiring route. Confirm that the required clearances and airflow paths remain available after the surround is fitted.
2. Verify the opening one more time
Compare the measured width, height, and depth with the manual for the exact configuration you purchased. Check the measurement again after removing any loose material or adding an approved hearth or platform. If the opening is short in any dimension, do not shave, compress, or force the cabinet unless the manufacturer expressly permits that adjustment.
3. Complete approved electrical work before final placement
If the model requires hardwiring or a new receptacle, have the electrician complete that work in the accessible position specified by the manual. Confirm grounding and inspection requirements. For a plug-in arrangement, verify that the approved outlet is available and that the cord can reach it without an unsafe route.
Free tools Windows power users keep installed
One-click scans. No signup required.
Rank #4

- 【Wall Mount& Recessed Electric Fireplace】This electric fireplace is designed for both Wall Mounted and Recessed build in wall installation, fit for 2 x 4 and 2 x 6 Stud wall, flush mounted, to meet various home remodeling needs.Overall dimension:50’’(W) x 18.11’’(H) x 3.86’’(H); Recess Box Dimension:30.35’’(W) x 16.54’’(H) x 3.86’’(D)
- 【Ultra Thin Lightweight Design】3.86 inch thickness and 39.4lbs weight design, one person can easily hang it on the wall. With Lightweight Feature, this fireplace is also safer to mount on the wall for it takes less risk to drop out from the wall; 3.86 inch Ultra Thin fireplace box can also offered a more aesthetic sideline mounting effect which other fireplace can’t provide
- 【Realistic Flame Effect】 Amaze your guests with lifelike flames of this electric fireplace! Ultra High Intensity LED lights provide realistic flame effect:12 LED flame & crystal hearth color modes and 5 flame speed & brightness levels by Touch Screen Panel or Remote Control; Different flame settings can cater to your different desired ambience. Flame effect can be operated with or without heat for year-round ambience.
- 【Safe&Energy Saving Fireplace Heater】750W-1500W heating modes, 5100BTUS,12.5AMPS,plug-in 120v outlet, heating area up to 400sq.ft. This fireplace can be adjusted according to your preference making it a practical fixture. Using LED technology instead of gas or oil, ETL certified, save energy as this fireplace produces no messy or harmful by product, safe for both people and pets.While safety features include overheat protection and timer.
- 【Modern Home Décor Fireplace】 Fill in your big blank wall with a touch of modernity and elegance. This electric fireplace will serve as a functional décor in your bedroom, living room, office, or family room. Dual-mode function flame effects can operate with or without heat for year-round ambience; Free replacement for installation problems; Damage and missing parts within 1 year.Replace & refund within 1 month
4. Install model-specific leveling legs or trim
Fit optional leveling legs, brackets, or a faceplate at the stage directed by the manual. Some units require these parts before sliding into the opening; others use a different sequence. Do not drill the cabinet or masonry for unapproved fasteners.
5. Set the insert on a continuous support
Regency requires a solid, continuous support surface spanning the appliance’s full width and depth. Place the insert only on a surface that meets the selected model’s requirements. A support that contacts only a few points can leave the cabinet unstable or unsupported.
6. Level and center the appliance
Use the approved legs, brackets, or shims to make the unit level and flush with the intended finished plane. Heat & Glo’s example calls for adjusting leveling brackets or shims until the unit is flush and level. Check both side-to-side and front-to-back level, and confirm that trim will sit evenly against the masonry.
7. Slide the unit into its final position
Move the insert slowly so the cord, wiring, trim, and masonry are not damaged. Keep required clearances and every ventilation opening unobstructed. Stop if the cabinet contacts masonry where the manual requires space or if the cord becomes pinched.
Recommended Free Tools
8. Install decorative components
Install the log set, ember material, glass, faceplate, surround, and other decorative parts in the order and orientation shown in the manual. Glass is a safety component; handle it as directed and replace any damaged panel before operating the appliance.
Best Value
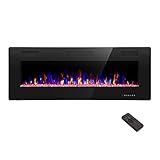
- Attractive and Practical Design:3.86"D x 50"W x 18.11"H ,The thickness of the new style is only 3.86 inches while the old one is 6 inches. And it opearates the same as the old one. Also we redesign the location of main power and power cable, which makes the new fireplace more attractive and practical.
- Multi Operation Modes:Touch screen and remote control;12 flame & LED flame bed color modes;5 flame speed modes;5 flame brightness levels; Specially automatic flame design(the flame color and brightness changed.
- Energy Saving: 750W & 1500W modes can be adjusted accordingly for both warm and energy saving purpose. The supplemental zone heating is for up to 400 square feet.
- Safety and comfort: ETL Certificate Approved. It also has auto-heat kill safety to avoid the super heating. The heat is good for maintaining the natural humidity within the air without making the room too dry.
- Let R.W.FLAME electric fireplace warm your home and life.
9. Connect power and perform the manufacturer’s startup check
Once the electrical connection and physical installation are complete, restore power as directed. Heat & Glo describes starting its appliance with the remote or manual controls. Use the selected model’s startup procedure, verify that controls respond, and stop immediately if the breaker trips, a cord or connection heats abnormally, the fan is obstructed, or the unit shows damage.
Independent reader supportYour contribution helps us test, update, and keep practical guides available for everyone.Clearances, airflow, and support: the checks that prevent unsafe fit-ups
Never publish or rely on one universal clearance number for all electric inserts. Clearances vary by model, trim, and installation configuration; even one manufacturer’s dimensions can change with a faceplate. Use the clearance diagram in the exact manual and preserve every stated air inlet and outlet.
- Top and side clearances: Keep the distances specified for the cabinet and selected trim from combustible or obstructing materials.
- Front clearance: Ensure furniture, curtains, decorations, and other items do not block the discharge area or sit where the manual prohibits them.
- Airflow: Do not cover grilles with surround material, mortar, decorative objects, or an oversized hearth extension.
- Base support: Maintain the required continuous bearing area across the full appliance width and depth.
- Electrical access: Leave the approved plug, junction, or service area accessible as the manual requires; never bury a connection in masonry or trim without explicit approval.
Common installation problems and corrective actions
| Symptom | Likely issue | Correct response |
|---|---|---|
| The insert will not slide fully into the opening | The opening is undersized, out of square, or obstructed by masonry or trim | Stop; remeasure against the exact manual and resolve the obstruction only by an approved method |
| The faceplate sits unevenly | The appliance or support is not level, or the selected trim does not match the opening | Remove pressure from the trim, adjust approved leveling hardware, and verify the faceplate dimensions |
| The cabinet rocks | The support is discontinuous, cracked, or improperly shimmed | Provide the solid, continuous support required by the manual; do not rely on loose packing materials |
| The cord is too short or pinched | The outlet route was planned after placement or passes over a sharp edge | De-energize the circuit and have the route corrected to the manufacturer’s approved arrangement |
| A proposed fireplace receptacle is rejected | Local rules do not permit a receptacle inside the masonry enclosure | Ask the electrician and local inspector for a compliant alternative before proceeding |
| The breaker trips during startup | Incorrect circuit, wiring fault, overload, or appliance fault | Turn the unit off and have a qualified electrician diagnose the circuit; do not repeatedly reset the breaker |
| Dust or water enters from the chimney | The flue or damper remains open, or the draft-sealing method is unsuitable | Follow the selected model’s approved chimney and draft-preparation instructions |
When to hire a professional
Use a licensed electrician whenever the installation involves a new outlet, a new circuit, hardwiring, changes to grounding, or any uncertainty about code compliance. Arrange inspection where local rules require it.
Quick wins for a faster PC:
Scan for outdated or missing drivers - takes under a minuteDriver Scan →Clear out junk files and repair common Windows errorsFree Scan →Fix the driver behind crashes, sound loss and screen glitchesFind Drivers →Obtain qualified masonry or fireplace help if the hearth is cracked, the opening needs structural alteration, the lintel is damaged, the firebox is unstable, or sealing the chimney requires work beyond the product manual. An insert should not be used to conceal a structural or moisture problem in the fireplace.
A homeowner may be able to measure, clean, position, level, and finish an approved plug-in installation, but that does not make every installation a DIY project. The model’s electrical method, local code, support requirements, and masonry condition determine the appropriate division of work.
How to choose between inserts that appear to fit
If two or more models fit the measured opening, compare installation feasibility before appearance or advertised features. The available manufacturer information supports three practical comparison axes:
| Comparison axis | Questions to ask |
|---|---|
| Opening fit | Does the exact faceplate or surround fit the measured width, height, and depth without blocking airflow? |
| Electrical arrangement | Can the required outlet, plug route, or hardwire connection be installed legally and safely in this fireplace? |
| Installation requirements | Does the model require a particular support, leveling system, clearance, trim sequence, or chimney-preparation method? |
The cited installation materials do not establish a ranking for heating performance, reliability, or value. Choose the model whose documented fit and installation requirements can be met in your fireplace, rather than assuming a larger or more heavily trimmed unit is automatically better.
Documents to keep after installation
Save the model number, installation manual, owner’s manual, electrical inspection record, and any written manufacturer guidance with the property records. Photograph the completed outlet or hardwire arrangement and the support and trim before access is closed, provided doing so does not expose energized parts. These records help an electrician, inspector, or future owner identify the approved installation configuration.
Quick Recap
Product prices and availability are accurate as of the date/time indicated and are subject to change. Any price and availability information displayed on Amazon at the time of purchase will apply.

