The Tool Desk
Outbyte PC Repair FREERepair Windows errors before they cause bigger problemsFix Now →Outbyte Driver Updater FREEScan for outdated or missing drivers - takes under a minuteDriver Scan →Yes—you can build a convincing fiber-optic starfield ceiling with foam insulation panels, black felt, plastic optical fiber, and a concealed LED illuminator. The method documented by Aron Hoekstra for Make: used six 4-by-8-foot foam boards to cover a tray ceiling measuring approximately 6.5 by 26 feet—about 169 square feet. It used 600 fibers, three fiber diameters, and a modular panel system mounted roughly 1/2 inch below the existing ceiling.
Plan for a full weekend at minimum. Although the original project header estimated 8–16 hours, Hoekstra later reported approximately 30–40 hours of actual hands-on work. His 2015 estimate was $500–$550, including a $369 fiber kit; those prices are historical and should not be used as a current budget.
As an Amazon Associate I earn from qualifying purchases.
How the system works
A fiber-optic star ceiling has two separate parts:
- Plastic optical fibers: Each strand passes through a tiny hole in the visible ceiling surface and carries light from its common end to the star point.
- An illuminator: A concealed light engine shines into the bundled fiber ends. Modern systems commonly use LEDs because they produce less heat and usually operate from low-voltage power.
The illuminator does not need to sit directly above the visible panel. The fibers can run through the concealed space behind the panel, but the kit must provide enough length to reach the light engine without sharp bends or excessive slack. PMMA plastic fiber is common in star ceilings, with multiple diameters used to produce different apparent star sizes. See Fiberoptics Technology Inc.’s star-ceiling guidance for the system-level design considerations.
Choose the layout before buying materials
Estimate the number of stars
A useful current rule of thumb from Fiberoptics Technology Inc. is approximately three to four stars per square foot for a night-sky effect. On a 169-square-foot ceiling, that implies roughly 507–676 visible points, so a 600-strand kit is directionally appropriate.
#1 Best Overall
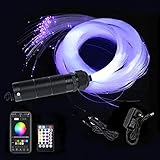
- 【RGBW 6W starlight Engine】: compact size 6W light source with RGBW lamp beads, have PURE WHITE (the most suitable light),no turntable to shade in led port, making great Brightness,premium flexible transparent plastic excellent light-guiding 200pcs 0.75mm/0.03in 2meter/6.5ft end glow fiber optic strands
- 【Multicolor Lights & Dynamic Mode】: the fiber optic light can emit multicolor lights including 16 static colors and dynamic mode by remote, 16 million colors combining with static, dynamic(fade/jump/flash/breath), sound control by APP or Bluetooth control
- 【Sound Actived】:The 6W fiber optic lights engine with SOUND MODE, the fiber optic strands would like dancing with the rhythm in the music mode(sound activated/music sync/Mic mode in APP),making it more romantic and unique with beat in car especially colors.
- 【Widely Application】:our starlight headliner kits is widely used in car, KTVs, Sauna, Sitting Room, Living Room, Bedroom, Kitchen, Dining Room, Home, Pools. Perfect for make curtain, screen, ceiling sky decoration, Christmas, birthday party to make shinning stars
- 【 APP/Bluetooth& Remote Control】:: it is so much convenience to control light engine by supporting Android and iOS System “My SmartLED” APP device , Bluetooth Wireless Control and 28 Key remote control, and 16 million colors combining with static, dynamic, sound control by APP control via Bluetooth, offering light source Two year guarantee to satisfy your need!
That is an estimate, not a coverage guarantee. Actual results depend on fiber length, routing losses, dead or damaged strands, the panel layout, room brightness, viewing distance, and how many fibers are assigned to each panel. A denser galaxy effect may require more strands.
For a small ceiling, a fiber optic star ceiling kit is generally the simplest starting point. Compare more than strand count: check fiber length, the included illuminator, fiber diameters, voltage and power requirements, coupler capacity, remote or app controls, and whether the kit offers twinkle or shooting-star effects. Current listings and availability change, so do not assume that a modern kit has the same specifications as the historical kit used in the original project.
Use an irregular star pattern
Do not divide the ceiling into a perfectly even grid. Natural-looking fields have clusters, isolated points, and large areas with relatively few stars. Hoekstra considered projecting a Milky Way pattern and generating a digital random layout, but ultimately placed the points manually.
Do these 3 things before closing this tab:
1Fix the driver behind crashes, sound loss and screen glitches2Repair Windows errors before they cause bigger problems3Scan for outdated or missing drivers - takes under a minuteBefore piercing the felt, lightly mark a few dense clusters and leave some deliberate gaps. Mix the three fiber sizes throughout the field rather than concentrating every large point in one area. The variation makes the ceiling look less like a regular lighting panel.
Materials and tools
The following list is based on the documented 169-square-foot installation. Scale it to the actual ceiling rather than copying the quantities blindly.
Core materials
- Fiber-optic star-ceiling kit sized for the room; the documented installation used 600 strands in three sizes.
- Six 4-by-8-foot foam insulation boards, or an equivalent quantity after measuring the ceiling.
- Approximately 13 yards of black felt.
- Foam-compatible spray adhesive. The original project specified 3M 78 spray adhesive; 3M identifies this formulation as intended for polystyrene foam. Confirm the current label and compatibility with the exact board you purchase.
- Black screws long enough to pass through the panel and engage the concealed washers or framing; the original build used 3.5-inch black screws.
- Gorilla Tape or similar strong repair tape for a partial panel extension.
- Small amounts of glue for securing individual fibers at their entry holes.
- Cable staples or other supports suitable for holding fiber bundles without crushing them.
- Zip ties for organizing the bundles.
- Fabric fire-retardant treatment selected for the specific felt. A fabric fire retardant spray is a safety treatment to investigate, not proof that the finished assembly is code-compliant.
Tools
- Tape measure and pencil
- Table saw or another accurate foam-cutting method
- Utility knife
- Small screwdriver or nail for making the fiber holes
- Drill and appropriate driver bit
- Scissors
- Flush cutters or a dedicated fiber-trimming tool
- Spray-adhesive protection, ventilation, gloves, and eye protection
- A second person for lifting and aligning large panels
Step-by-step installation
1. Measure every section of the ceiling
Do not assume that the room, tray, or soffit is square. Measure each panel location independently, including the width at both ends, obstructions, corners, access points, and the location of the illuminator.
Hoekstra found that dimensions could vary by approximately 1/4 to 1/2 inch across the room. Record the measurements on a sketch and label each panel. A small numbering system—P1, P2, P3 and so on—will prevent you from installing a carefully patterned panel in the wrong position.
Also determine how the panels will be supported. The documented method left approximately a 1/2-inch gap behind the foam so the fiber bundles could pass between the new surface and the existing ceiling. Do not close off access to junction boxes, HVAC components, structural connections, or other items that require service.
Rank #2

- 【Dual Port Engine Version】Dual head 32W light engine have great brightness to make shining twinkle stars, 1000pcs 13.1ft Fiber Optics ,creating a high dense Starry-Sky Effect.Tips: The more optical fibers are numbers, realistic starlight effect will be.Not a dual color engine .
- 【Unique Twinkle effect】Star effect with PURE WHITE (the most suitable light for starry sky light for ceiling) more realistic, elegant, and captivating starry effect compared to RGB mixed white.Upgrade version for twinkle effect that means the dual port twinke function but not a different color control the same time.
- 【Sound Activated+ Dynamic Mode】:The stars for ceiling car follows the beat when in sound mode, more romantic with music!7 static colors via remote,select any color by 16 million color wheel on APP, including Pure white, fade/jump/flash /breath mode and adjustable brightness/speed, creating your twinkle starlight ceiling.
- 【Widely used star headliner kit】: Decorate anywhere you want to spend a warm and romantic evening with your friends or family. More suitable for car, cinema, boys and girls bedroom, dining room, parties or festival gifts.Use a measuring tape to measure your car's ceiling from front to back before install in order to achieve a stunning interior headliner stars .
- [2-Year Product Service and Warranty] The product warranty period is 2 years. Before installing the starlight headliner kit, please connect it to a power source to test for power. If you have any questions, please feel free to contact us. Our professional customer service and technical teams are always here to assist you.
2. Cut and test-fit the foam panels
Cut each board to its measured opening. Test-fit it before wrapping it. If a panel needs a partial extension, reinforce the joint with strong tape, as the original builder did with Gorilla Tape.
Foam is lightweight, but large sheets can flex and twist. Handle them carefully so the final panel remains flat. Mark the front and rear of every panel and keep the labels until installation is complete.
3. Wrap each panel in black felt
Cut the felt with approximately 2 inches of extra material on the rear of the panel. Apply the adhesive evenly and use a helper to lower the felt onto the foam gradually. Working from one edge rather than dropping the entire sheet at once makes it easier to avoid wrinkles, trapped air, and misalignment.
Use only an adhesive that the manufacturer identifies as compatible with your foam. The original project specifically called for 3M 78 because some aerosol adhesives contain solvents that attack polystyrene. Follow the product’s ventilation, flammability, surface-preparation, and application instructions; a product being sold as a spray adhesive does not make it foam-safe.
Fold and secure the excess felt on the back. Keep the visible face smooth because every wrinkle will be apparent when the stars are illuminated.
4. Divide the fiber bundles among the panels
Separating hundreds of long strands is one of the most time-consuming parts of the project. The documented 600-strand installation divided approximately 95 fibers among five panels and approximately 125 fibers among the larger panel.
Do not pull the fibers apart randomly. Work slowly from the bundle end, separating a manageable group and temporarily tying it together. Zip ties placed every 8–12 inches helped maintain order and reduced tangling. Avoid tight ties or sharp bends that could pinch or damage the fiber.
Fiber lengths in the original kit were reported at approximately 12–17 feet, depending on the kit. Confirm the length of the kit you are buying and measure the path to the illuminator before committing to a panel layout. Leave usable slack—Hoekstra allowed at least 1 foot near the illuminator—so the final connection is not under tension.
Rank #3
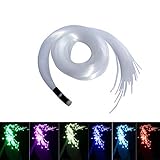
- PMMA fiber optic cable transmits visible and soft light so no risk of heat damage and can be apply to heat allergic occasions. Can be cut to any length you need to transmit light.
- No electrical hazard at the point of illumination. No UV rays or IR Energy. Perfect for making the star ceiling sky light in the museum, children’s room and art exhibitions, car roof starlight headliner or home star ceiling light. (Need to buy light engine to use together to provide light)
- The waterproof optical fiber strands is not charged so no risk of electric shock and fit for many environments. Such as swimming pool, steam showers, saunas and so on.
- Specification of fiber optic strands: diameter - 0.03in/0.75mm, length - 6.5ft/2m, quantity - 1bundle(100pcs). This package WITHOUT any light source.
- Long lifespan and low maintenance. Suitable for items such as model, art crafts that you need to add lighting elements. (Need to buy light source to use together to provide light)
5. Mark an irregular starfield on the felt
Work on the visible face of each panel. Place the fibers in a pattern that connects logically across panel seams, but do not make the spacing uniform. Use a mixture of:
- Small clusters of two or three points
- Occasional close pairs
- Individual isolated points
- Large, relatively empty areas
- A few brighter-looking points created with larger-diameter fiber
Stand back periodically and view the marked panels from the direction in which people will normally look at the ceiling. The goal is not mathematical randomness; it is an uneven distribution that feels intentional without looking repetitive.
6. Insert and secure each fiber
Use a small screwdriver or nail to puncture each marked location. Feed the fiber from the rear of the panel toward the felt face. During assembly, leave approximately 4 inches protruding from the front so the strand cannot slip back through the hole.
Windows Errors? Fix Them Before They Spread
Repair common Windows errors and clear accumulated junk for a smoother, more stable PC - no reinstall needed.Free scan · no reinstallCrashes, No Sound, or Screen Glitches?
Random freezes, missing sound and display glitches usually trace back to one bad driver. Find and replace yours safely.Free scan · under a minuteApply a small amount of glue at the entry point and use tape on the rear where it helps hold the routing in place. Avoid flooding the hole with adhesive or creating a hard, sharp bend immediately behind the panel.
Keep the fibers organized by panel. If a strand is assigned to P4, route and bundle it with P4’s fibers all the way to the panel edge. This makes later installation and illuminator connection substantially easier.
7. Locate the support points and mount the panels
Before driving screws, identify the hidden washers or other support points beneath the felt. Slit the felt at each screw location instead of forcing the screw through an uncut layer; this reduces tearing and helps the screw seat cleanly.
Lift each panel with a helper, route the fiber bundles behind it, and align the panel without crushing the fibers. The documented build used 3.5-inch black screws and cable staples, while preserving roughly a 1/2-inch rear gap.
Do not rely on foam alone as a structural support. The mounting method must engage suitable framing, furring, washers, or another support system appropriate to the panel weight and ceiling construction. Large panels can be awkward overhead, so temporarily supporting or bracing them while aligning the fasteners is safer than trying to hold everything in place with one hand.
Rank #4

- Create a Realistic Starry Sky Inside Your Car – 500 Starlight Fiber Optics Transform your vehicle interior into a luxury stars with this 500 starlight headliner kit featuring 500pcs high-quality fiber optic strands. The dense star arrangement creates a realistic star light headliner effect, bringing an elegant and immersive atmosphere to your car roof, perfect for upgrading your driving experience.
- Powerful 16W Light Engine with Twinkle Effect – Premium Starlight Experience Equipped with a powerful 16W LED light engine, this starlight kit delivers bright and stable illumination while the built-in twinkle function creates a natural sparkling star effect.
- APP & Remote Control with Music Sync – Customize Your Car Atmosphere Adjustable brightness, dynamic mode speed, twinkle speed and sound sensitivity,bring you a romantic starry sky! Tips: The more optical fibers are numbers, the brighter and more dazzling the starlight effect will be.
- Designed for Compact Vehicles – Perfect Fit for Small Cars & Coupes This star headliner kit is specially designed for compact cars, subcompact cars, small hatchbacks, and small 2-door coupes. The 6.5ft/2m fiber optic cables , allowing you to create a personalized star ceiling without taking up excessive interior space.
- 2-Year Warranty Support – Enjoy Worry-Free Upgrade Upgrade your vehicle interior with confidence. Our starlight headliner kit includes reliable components and professional customer support. If you experience any installation questions or product issues, our team provides assistance to help you complete your custom star light headliner installation smoothly.
8. Route and connect the fibers to the illuminator
Install the illuminator in a concealed but reachable location. In the original project it was placed in a tray-ceiling soffit. Keep the unit accessible for replacement, cleaning, troubleshooting, and control access; permanently burying the power supply or light engine makes future maintenance difficult.
A 600-strand configuration may require splitting the fibers between two couplers rated for approximately 300 strands each. Hoekstra divided the strands, trimmed the common ends flush, and connected the couplers to the illuminator.
Follow the current kit’s coupler and termination instructions rather than assuming every 600-strand kit uses the same arrangement. Check that:
Free tools Windows power users keep installed
One-click scans. No signup required.
- Each coupler is within its specified strand capacity.
- The common fiber ends are cut cleanly and squarely.
- The fiber bundle is not kinked near the coupler.
- The illuminator has adequate ventilation.
- The power supply remains accessible.
- The total electrical load and voltage match the installed supply.
Any new outlet, concealed wiring, low-voltage power installation, or alteration to a finished ceiling should comply with applicable electrical and building requirements. If the project involves mains-voltage work, use a qualified electrician where required.
9. Treat the felt and finish the star points
Felt is combustible. The original project recommends applying fabric fire-retardant spray. Select a product whose current label covers the exact felt material, follow the application and drying instructions, provide ventilation, and verify any local requirements for an overhead finish.
Do not describe a treated felt assembly as fire-rated or code-compliant unless the complete assembly has the required documentation. A personal burn demonstration, including the one described in the original project, is not an independent fire classification or an approval from a building authority.
After the panels are secured and the illuminator is operating, trim the protruding fibers to approximately 1/16–1/8 inch above the felt. Slightly varying the angle of some cuts can give the field a more dimensional appearance, but keep the majority of points short and clean so they do not snag clothing or collect excessive dust.
Recommended Free Tools
What tends to go wrong
| Problem | Likely cause | Correction |
|---|---|---|
| Foam melts or becomes soft | Adhesive solvents are incompatible with the board. | Stop using the product, ventilate the area, and verify adhesive compatibility with the board manufacturer and adhesive label. Do not assume a generic spray adhesive is safe. |
| Fibers keep tangling | Too many long strands were separated at once. | Work in small groups, use temporary ties every 8–12 inches, and label each panel’s bundle. |
| Dark or weak stars | Damaged fibers, dirty or uneven common ends, excessive bends, or an overloaded coupler. | Inspect the route, straighten bends, recut the common end if the kit permits, clean the termination as directed, and confirm coupler capacity. |
| Visible panel seams | Ceiling measurements were assumed rather than individually checked, or panels shifted during mounting. | Measure both ends of every opening, test-fit before wrapping, and use a helper during final alignment. |
| Uniform, artificial-looking sky | Stars were spaced on a grid or distributed too evenly. | Add clusters, isolated points, and deliberate gaps; vary fiber diameters and avoid repeating the same pattern on adjacent panels. |
| Illuminator overheats or cannot be serviced | The unit was enclosed without ventilation or installed beyond reach. | Follow the illuminator’s clearance requirements and relocate it to a concealed but accessible position. |
| Panels sag or pull away | Fasteners do not engage adequate support, or the panel span is too large. | Rework the support system using suitable framing or furring. Foam should be treated as a facing substrate, not as the sole structural member. |
When the foam-panel method is not the best choice
The modular foam-and-felt approach is attractive because each panel can be built on the floor, tested, and lifted into place. It is less attractive for very large, irregular, commercial, or heavily serviced ceilings.
Best Value
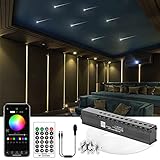
- 【Fiber Optics Size】 96pcs *0.03in*9.8ft Optical Fiber. //[Length]:9.8ft/3m. //[Diameter]:0.03in. End glow fiber optic cable, which is made of good PMMA plastic, safety, non-conductive, waterproof, flexible, color rendering effect is highly impressive. Durable, ensuring long-lasting color performance. Working temperature: -58°F - 167°F
- 【Super Meteor Effect】Pure White Meteor effect, brings you a romantic Meteor shower! 3w 12LEDs meteor motor, each LED comes equipped with 8pcs fiber optic cable ,create short meteors or long meteors as you like. Comes with a DC 1 Female to 2 Male Power Splitter Cable, used to connect with other Star Ceiling Lights Kit.(*LED Motor is not waterproof)
- 【Upgraded Bluetooth APP】Fiber optic light is controlled by cellphone (Android / iPhone), just download the APP and turn on Bluetooth. No worries about remote missed or broken. 20 meteor modes for you to choose. Speed are adjustable. The ceiling starlight is suitable for cars, home theaters, bedrooms, interior roof, restaurants, bars, hotels, resorts, museums, planetariums, KTV, lobbies etc.
- 【Package Included】3w Meteor LED motor*1, Fiber Optic bundle*1,Power Splitter Cable*1, Remote*1, Drill*5 (*AC plug and cigarette lighter are NOT included in package)
- 【100% SATISFACTION SERVICE】2-year Service. No matter what reason cause dissatisfaction, we would love to provide you with a satisfactory solution with the car shooting star lights! Think about the effect it will have on your car or room. Consider the impact it will have on your car or room. Would you like to create a meteor shower inside your car? Transform your vehicle with this starlight headliner today!
Pre-made kits can also impose limits on fiber length, strand count, and coverage. For a large area, a custom harness, separate fiber bundles, pre-populated acoustic panels, or a professionally designed system may produce a cleaner result and simplify structural and electrical coordination. Fiberoptics Technology Inc. describes alternatives including custom systems, panels, twinkle effects, shooting-star effects, and installer resources.
If you are not comfortable designing the support, routing concealed power, or coordinating an overhead assembly, investigate custom fiber optic star ceiling design and installation instead. This is particularly sensible for commercial spaces, irregular ceilings, large rooms, and projects where fire documentation or inspection is important.
For a complex custom build, a fiber optic star ceiling installation guide or the selected manufacturer’s current installation manual can be useful. Treat the manual for the exact kit as authoritative for its couplers, illuminator, termination method, controls, and electrical requirements; there is no universal procedure for every current kit.
What’s actually slowing this PC down?
Pick the symptom - the matching free tool is one click away.
Planning checklist
- Measure every panel opening, including both ends and all obstructions.
- Confirm that the selected kit’s strand length reaches the illuminator with routing slack.
- Compare strand count, fiber diameters, coupler capacity, illuminator type, voltage, and effects.
- Decide where the illuminator will go and how it will remain accessible.
- Design the support and rear gap before cutting foam.
- Use only foam-compatible adhesive verified for the specific board.
- Label panels and divide fiber bundles before inserting the strands.
- Use an irregular pattern with clusters and gaps.
- Plan for a second person when mounting large panels.
- Check local electrical, fire, and building requirements before closing the ceiling.
- Treat felt only with a product labeled for the exact fabric, and do not confuse treatment with code compliance.
- Test the illuminator and all panels before final trimming.
Frequently Asked Questions
How many fiber-optic strands do I need for a star ceiling?
A commonly cited rule of thumb is approximately three to four visible stars per square foot for a night-sky effect. A 169-square-foot ceiling would therefore suggest roughly 507–676 points, making 600 strands a reasonable starting point. It is not a guarantee: fiber length, routing losses, dead strands, room brightness, viewing distance, and the desired density all affect the result.
How long does a fiber-optic star ceiling take to install?
The original project header estimated 8–16 hours or one weekend, but its builder later reported approximately 30–40 hours of actual work. Separating and routing hundreds of fibers, wrapping panels, and mounting them overhead are the steps most likely to extend the schedule.
Can I glue felt to foam insulation board?
Only with an adhesive confirmed compatible with the specific foam. The documented project used 3M 78 spray adhesive because incompatible aerosol adhesives can dissolve polystyrene. Follow the current adhesive label, provide ventilation, and test a scrap before covering all the panels.
Is a fiber-optic star ceiling safe?
The fibers themselves carry light rather than mains voltage, but the complete assembly still requires attention to combustible felt, foam, adhesive, illuminator heat, power supplies, concealed wiring, and structural support. Follow product instructions and applicable local requirements. Fire-retardant fabric treatment is not automatically a fire rating or code approval.
Quick wins for a faster PC:
Clear out junk files and repair common Windows errorsFree Scan →Fix the driver behind crashes, sound loss and screen glitchesFind Drivers →The Bottom Line
The most reliable DIY route is to build accurately measured, felt-wrapped foam panels on the floor, distribute the fibers irregularly, leave a serviceable gap behind the panels, and use a low-heat illuminator with adequate coupler capacity. The original 600-strand installation is a useful case study for a roughly 169-square-foot tray ceiling—not a universal specification. Verify every current kit, adhesive, fire-treatment product, mounting detail, and electrical requirement before installation.
Quick Recap
Product prices and availability are accurate as of the date/time indicated and are subject to change. Any price and availability information displayed on Amazon at the time of purchase will apply.

