Horizontal lines on a TV screen are not automatically a failed panel. First check whether they appear on the TV’s own menu or built-in picture test: that single distinction separates likely TV hardware faults from HDMI, antenna, source-device, and settings problems.
Horizontal lines on a TV screen are not always a failed panel. They can come from an HDMI cable, external device, antenna signal, input setting, power problem, or the TV’s internal display hardware. The fastest way to narrow it down is to check whether the lines appear on the TV’s own menu or built-in picture test.

As an Amazon Associate I earn from qualifying purchases.
Start here: the two-minute diagnosis
- Lines appear on the TV menu or Picture Test: the television’s display hardware or internal signal path is probably involved.
- The menu and Picture Test are clean: investigate the HDMI cable, connected device, antenna, broadcast signal, streaming source, or picture settings.
- Lines appear only on one HDMI device: test the cable, HDMI input, and external device before considering TV repair.
- Lines began after impact, pressure, or twisting: treat possible panel damage as a hardware fault and avoid pressing the screen.
1. Check whether the lines appear on the TV menu
Press Home or Menu on the TV remote while the lines are visible. Move through a menu with a plain background if possible.
- If the lines remain visible over the menu, the problem is probably inside the TV or its display path.
- If the menu is clean but a program, game, or streaming picture has lines, continue with source and connection checks.
This simple test prevents a common mistake: replacing a TV panel when the defect is actually coming from one cable box, game console, streaming player, or broadcast signal.
#1 Best Overall

- It is imperative to purchase by PART number ONLY (NOT TV model number). The listed TV model number is a reference only and should not be used to make a purchase decision. The reason is that there can be several different parts that go into the same TV model. These different parts are NOT interchangeable.
- If you are not sure how to check and match your PART number (NOT TV model number), please contact us first so that we can help you save time and money.
2. Run the built-in picture test
Most modern TVs include an internal diagnostic image. The exact label depends on the brand and model. Look for Picture Test, Screen Self-Diagnosis, or Self Diagnosis in the support or settings menu.
Typical paths vary, but may resemble:
- Settings > Support > Self Diagnosis > Picture Test
- Settings > Support > Screen Self-Diagnosis
- Settings > Picture > Picture Test
Use the exact path shown for your model. If the test image also contains the lines, the TV itself becomes the leading suspect. If the test image is clean, troubleshoot the external source, HDMI connection, antenna, or delivered content.
3. Perform a full power reset
A normal press of the power button may leave parts of a smart TV in standby. Perform a complete reset:
Outdated Drivers Are Slowing You Down
One free scan finds every outdated or missing driver and matches the right update for your exact hardware.Free scan · exact hardware matchWindows Errors? Fix Them Before They Spread
Repair common Windows errors and clear accumulated junk for a smoother, more stable PC - no reinstall needed.Free scan · no reinstall- Turn the TV off.
- Unplug it from the wall outlet.
- Wait at least 60 seconds. Some Android TV and Google TV procedures specify waiting two minutes.
- Reconnect the TV and turn it on.
- Check the menu, built-in picture test, and the affected source again.
This can clear a temporary processing or communication fault. It will not repair a cracked panel, failed panel connection, or permanently damaged display electronics.
4. Temporarily bypass the power strip or extension cord
For testing, connect the TV directly to a known-good wall outlet if that is safe and practical. A defective power strip, surge protector, extension cord, outlet, or electrical interference can contribute to picture problems.
Do not defeat grounding, overload an outlet, or use an unsafe adapter. If other appliances also flicker or behave abnormally, stop troubleshooting the TV and have the electrical issue assessed.
5. Reseat the HDMI cable
If the lines occur with a cable box, console, Blu-ray player, streaming stick, or computer, turn off the relevant equipment and disconnect the HDMI cable at both ends. Reconnect it firmly to the correct ports.
Recommended Free Tools
Rank #2

- GuuYebe Television Replacement Parts Tools Kit Applications: TV Repair Tools help to repair the LED backlight strip must-have tools for opening the TV and moving the screen to keep safety and protect the TV. Pry Tools help to open the TV panel or other parts, Heavy Duty Suction Cup helps to move the screen to protect screen safely and Avoid moving the screen with bare hands and causing it to slip and damage the screen, Led TV Backlight Tester helps to test each led bars or led strips is work.
- Suction cup Application: vacuum suction cups work on any clean, non-porous surface. It can move smooth flat objects, Such as an LCD LED TV Screen Panel or Mirror, Window Shower Glass, Granite Tiles, and Car windshields. vacuum plate puller suitable for fixing cracked laminate floors or home garages. Also, the Dent Repair Puller suction cup helps remove car dents, the car dent puller just fixes the flat surface on your car and the dent repair puller is only for the flat surface.
- Pry Tools Application: GuuYebe Pry Tools kit is designed for all models of TVs screens cars laptops door automotive electronics devices cell Phone boats repair and installer and trimming jobs with a variety of shapes and sizes. The spudger is easy to hold in hand and has access to some hard-to-reach spaces and crevices. Help to easier Open tv back panel
- LED Tester Capacity: With the help of Test Light tools to get quickly to know the TV LED backlight strip Bars or LED light Beads issue, the Light Tester check LED TV backlight strips or each bead or Led light bulb situation, electric testers to check for power and High brightness for Easy Replacement Television Parts or Other maintain. Safety and Save Time and Money.
- 24 X 7 After-Sales Service: Our team Provides 7 X 24 Online Service for our Customers, If you have any issues, we will provide online Tools kit installation services for you privately, Meanwhile Tools kits Provides a warranty for 1 Year more. if you get any issues with the Tools kit, we provide a free return by Amazon service. our Slogan is to let every customer become our loyal brand Customer.
Then confirm that the TV is set to the matching HDMI input. A partially inserted connector or loose connection can produce intermittent lines, sparkles, dropouts, or other image abnormalities.
Inspect the plugs and cable for bent parts, crushed sections, fraying, or sharp kinks. Do not force a connector into the port.
6. Test with a replacement HDMI cable
When the lines appear only on one HDMI-connected source—or disappear during the TV’s Picture Test—a replacement HDMI cable is a sensible diagnostic substitute. Use a cable with the correct connector type and enough length for the installation, and verify that it supports the video format used by the device.
Replace the cable rather than buying a TV panel or internal board at this stage. If the new cable eliminates the lines, the original cable or its connectors were likely the problem. If the lines remain on the same source, continue testing the input and device.
Free tools Windows power users keep installed
One-click scans. No signup required.
A new HDMI cable cannot repair lines that remain on the TV menu or built-in test image.
7. Try another HDMI input
Move the same external device and the same cable to a different HDMI input on the TV. Select that input and compare the picture.
- Lines disappear on the second input: the original HDMI port or its connection may be faulty.
- Lines remain: the cable or source device is still more likely than one defective input.
- Every input shows lines, including the menu: investigate the TV itself rather than repeatedly changing cables.
Label names and capabilities can differ—for example, one port may support a different resolution or refresh rate—so use the input recommended for the device in the TV’s manual.
Rank #3

- It is imperative to purchase by PART number ONLY (NOT TV model number). The listed TV model number is a reference only and should not be used to make a purchase decision. The reason is that there can be several different parts that go into the same TV model. These different parts are NOT interchangeable.
- If you are not sure how to check and match your PART number (NOT TV model number), please contact us first so that we can help you save time and money.
8. Test another source device
Connect a known-good device to the same HDMI input. For example, compare a game console with a streaming player, or a Blu-ray player with a cable box.
If only one device produces horizontal lines, focus on that device, its output resolution, its cable, or its software. If multiple devices produce the same lines but the TV menu and Picture Test remain clean, investigate the TV’s inputs or signal-processing settings.
Do not assume that a source-specific defect means the TV panel has failed.
9. Check the antenna or coaxial connection
If the lines occur only with over-the-air broadcasts or a cable feed, inspect the coaxial cable and its connectors:
- Disconnect and firmly reconnect the coaxial cable at the TV, wall plate, splitter, antenna, or receiver.
- Look for a loose threaded connector, crushed cable, corrosion, or a damaged center pin.
- If there is a splitter, temporarily test without it where possible.
- Check another broadcast channel and another source.
Weak reception, interference, antenna placement, nearby structures, and broadcaster or service-provider problems can affect the picture. If the TV’s internal test is clean, do not begin with panel replacement.
The Tool Desk
Outbyte Driver Updater FREEFix the driver behind crashes, sound loss and screen glitchesFind Drivers →Outbyte PC Repair FREEClear out junk files and repair common Windows errorsFree Scan →10. Check aspect ratio and screen-size settings
Incorrect screen presentation settings can make an image appear improperly scaled or expose a source-format problem. Open the picture or display settings and check options such as:
- Aspect Ratio
- Screen Size
- 16:9
- Just Scan, Original, or Fit to Screen
Names and locations differ by TV brand, model, input type, and software version. Restore the normal setting for the source and compare the picture again. These settings generally do not fix physical lines drawn across the TV’s own menus, but they can correct abnormalities caused by how an external signal is presented.
Rank #4
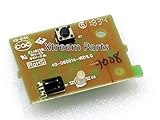
- It is imperative to purchase by PART number ONLY, if applicable. The listed TV model number is a reference only and should not be used to make a purchase decision. The reason is that there can be several different parts that go into the same TV model. These different parts are NOT interchangeable.
- If you are not sure how to check and match your PART number (NOT TV model number), please contact us first so that we can help you save time and money.
11. Check model-specific HDMI settings
Some TVs have enhanced HDMI options that must match the connected device. On certain LG models, for example, HDMI Ultra HD Deep Color can cause abnormalities when enabled with an incompatible device or combination. Turning it off for that input may resolve the problem.
Do not apply this advice universally. The setting name, location, supported formats, and correct value depend on the exact TV model and connected equipment. Change one setting at a time, record the original value, and test the affected input after each change.
12. Inspect internal ribbon connections only if you are qualified
If horizontal lines remain on the TV menu and built-in picture test, an internal connection or display component may be involved. An advanced repair diagnosis may include inspecting or reseating ribbon cables, but this is not a safe first step for most owners.
Safety warning: Never open an energized television. Unplug the TV before disconnecting or reconnecting internal cables. TVs can contain fragile ribbon connectors, sharp metal edges, and components that may retain hazardous voltage. If you are not trained to work on television electronics, use professional service instead.
Do not press, twist, tap, or tape the panel to make the lines disappear. A temporary change after pressure can indicate a damaged panel-edge bond; it is not a dependable repair and can make the damage worse.
Independent reader supportYour contribution helps us test, update, and keep practical guides available for everyone.13. Escalate persistent panel-wide defects
When lines remain visible on the TV’s own menu and Picture Test, especially across multiple inputs, a panel fault or another internal display failure is plausible. One or two stable horizontal lines can point toward a panel-edge bond or panel defect. Many horizontal lines across the image also make a panel problem more likely.
Do these 3 things before closing this tab:
1Clear out junk files and repair common Windows errors2Scan for outdated or missing drivers - takes under a minute3Repair Windows errors before they cause bigger problemsDo not assume that a generic T-Con board will solve horizontal lines. Independent repair diagnosis commonly associates vertical-line patterns more strongly with T-Con investigation, while persistent horizontal lines more often implicate the panel. Some models combine T-Con functions with the main board, and exact board layouts vary.
Before purchasing any board or panel, record the complete TV model number and obtain a diagnosis. Compare an authorized TV repair or local electronics repair service quote with the TV’s age, current replacement cost, warranty status, and availability of parts. Panel failures are often not economical to repair outside warranty.
Symptom-to-cause decision table
| What you see | More likely direction | Best next step |
|---|---|---|
| Lines appear only on one HDMI device | Cable, source device, input, or signal path | Reseat or replace the HDMI cable, change inputs, and test another device. |
| Lines disappear during Picture Test | External device, cable, broadcast, or delivered signal | Troubleshoot the source and connection before considering TV hardware. |
| Lines appear on menus and Picture Test | Internal display hardware or signal path | Power-reset once, then seek model-specific support or repair. |
| One or two stable horizontal lines | Possible panel-edge bond or panel fault | Avoid pressing or taping the screen; obtain a repair assessment. |
| Many horizontal lines across the image | Panel or another internal display fault | Do not assume a generic T-Con replacement will work; compare repair and replacement costs. |
| Lines began after impact or physical stress | Panel damage or disturbed internal connection | Stop force-based troubleshooting and arrange an assessment. |
| Lines occur only with antenna or broadcast content | Antenna cable, reception, interference, or service issue | Check the coaxial connection, reception, and another source. |
| OLED lines or persistent marks across channels | Input/settings issue or OLED-specific display fault | Run the appropriate model-specific screen test; do not apply LCD assumptions. |
What not to do
- Do not assume a factory reset will repair the panel. It may help with software or settings, but it is not a hardware repair.
- Do not treat a firmware update as a guaranteed fix. Install updates only through the TV maker’s supported process and only when the symptom points toward software or compatibility.
- Do not press, massage, twist, or tape the screen. These methods can damage the panel and do not restore a failed panel connection.
- Do not buy a T-Con board solely because a TV has horizontal lines. Confirm the symptom pattern and exact model first.
- Do not buy a generic panel or board without the exact part number. Display assemblies, board layouts, firmware, and connectors vary.
- Do not clean inside an energized TV. A cleaning kit can help with careful external or qualified bench work, but cleaning is not evidence that a panel fault will be fixed.
When to stop troubleshooting
Stop and arrange professional assessment when the lines are present on the menu and Picture Test, appeared after impact, are spreading, are accompanied by flickering or a burning smell, or persist after the basic source-isolation checks.
Keep the TV unplugged if there is smoke, unusual heat, arcing, a damaged power cord, or a burning odor. For a set still under warranty, contact the manufacturer or retailer before opening it or paying for parts; unauthorized disassembly may affect warranty coverage.
Best repair decision
Use the TV menu and built-in picture test to classify the fault first. If the test is clean, work through the source: power connection, HDMI cable, input, second device, antenna, aspect ratio, and model-specific HDMI settings. If the lines remain on the menu or test image, treat them as a likely TV hardware problem and get a model-specific repair assessment rather than endlessly buying accessories.
Frequently Asked Questions
What does it mean if horizontal lines appear on the TV menu?
If the lines appear on the TV menu and Picture Test, the TV’s internal display hardware or signal path is probably involved. Power-reset it once, then check warranty coverage and arrange model-specific support or repair.
Can a new HDMI cable fix horizontal lines on a TV?
Yes, but only when the problem is limited to an HDMI-connected source or disappears during the TV’s built-in picture test. A new cable cannot repair lines caused by the TV panel or internal electronics.
Will replacing the T-Con board fix horizontal lines?
Do not assume so. Horizontal lines are more suggestive of a panel fault than a routine T-Con problem in the cited repair diagnosis. Confirm the exact model and symptom pattern before buying any board.
What’s actually slowing this PC down?
Pick the symptom - the matching free tool is one click away.
Should I press or tape the screen to remove the lines?
Avoid pressing, twisting, tapping, or taping the screen. If the lines change when the panel is pressed, that may indicate a damaged panel-edge connection, and force can make the defect worse.
The Bottom Line
Bottom line: Lines that disappear during the TV’s Picture Test usually justify troubleshooting the cable, input, antenna, or external device. Lines that remain on the menu and test image are more likely an internal display fault—often a panel problem—so warranty service or a repair-versus-replacement comparison is the sensible next step.
Quick Recap
Product prices and availability are accurate as of the date/time indicated and are subject to change. Any price and availability information displayed on Amazon at the time of purchase will apply.

