Recommended Free Tools
Reclaimed lumber is suitable for a project only when its current condition, moisture history, insect evidence, and remaining section are understood. Inspect every face in strong light, probe suspicious areas, record defects, and measure moisture at multiple points. Dry wood with hard fibers and only shallow, noncritical blemishes is generally a reasonable candidate for nonstructural work. Soft or hollow wood, active insect evidence, persistent dampness, major section loss, critical splits, or altered load paths require quarantine, rejection, or review by the appropriate specialist. No consumer inspection can certify hidden load-bearing capacity without engineering assessment.
What an inspection can—and cannot—establish
An inspection can reveal visible decay, water damage, mechanical damage, insect activity, failed fastener areas, holes, and changes in a member’s usable dimensions. The Federal Highway Administration (FHWA) identifies these as conditions that visual inspection may find. It can also show whether a board is dry and sound enough for a proposed nonstructural use.
As an Amazon Associate I earn from qualifying purchases.
It cannot prove that an apparently sound beam will carry a specified load. Hidden voids, concealed splits, unknown species or grade, previous overloading, and changes made to the member may require engineering judgment. The USDA Wood Condition Assessment Manual directs evaluators to consider how important the member is to structural integrity and to take a conservative approach. Treat a field check as screening, not as a substitute for a design professional when failure could injure people or damage a building.
Establish the lumber’s history before you inspect it
Condition makes sense only in context. Ask the seller or salvage source what the member was, where it was used, and what happened to it after removal. Record answers rather than relying on a verbal description such as “barn wood” or “old-growth timber.”
#1 Best Overall
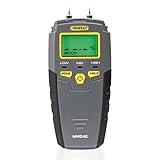
- HUMIDITY SENSOR: Our handy meter tool can quickly determine what level of remediation is needed to keep your family safe from black mold. High levels of dampness that go untreated are the leading cause of harmful fungus growth in the home.
- WATER LEAK DETECTOR: Finding the moisture content in your wood or drywall is the first step in early prevention. Continuously check and test suspicious water stains around the house so you can determine whether the area is wet or has already dried. Low, medium and high moisture tones and on-screen icons, Reading HOLD button
- MOISTURE READER: The mold test features large 0.3" high digits in a backlit LCD for quick and easy detecting. Our mildew scanner includes extra 8mm stainless steel pins, a protective cap that doubles as a calibration checker, and a “9V” battery.
- MOLD TESTER: For an accurate test read, stick the stainless steel pins into the surface of what you're measuring. The gauge has a broad range of 5 - 50% for wood and 1.5 - 33% for building materials such as concrete and drywall.
- GENERAL TOOLS: We're a recognized leader in designing and developing specialized precision tools dedicated to delivering exceptional customer service. We encourage artisans and DIYers to work smarter, measure better, and repair more productively.
Confirm the former exposure
- Was the piece indoors, under a roof, outdoors, in contact with soil, or exposed to repeated wetting?
- Was it near a roof leak, plumbing, a foundation, or a ventilated exterior wall?
- Was it stored covered and raised off the ground after removal, or left in weather?
- Has it been treated, painted, stained, fumigated, or exposed to an unknown chemical?
Former exposure helps explain staining, checks, corrosion around fasteners, and the likelihood that decay began before salvage. It does not by itself prove that the wood is unsafe or safe; current moisture and remaining section still control the decision.
Identify the intended use
Write down whether the lumber will be decorative, non-load-bearing, or load-bearing. A shallow nail hole may be acceptable on a wall finish but irrelevant to a beam calculation; a deep notch that is tolerable in trim can remove critical material from a joist. If the use may change later, assess the piece for the more demanding structural role now.
Find out what is known about species and grade
Species, original grade, dimensions, and any available drawings or inspection records affect engineering decisions. If this information is unknown, do not silently assign a modern grade or assume that large dimensions compensate for defects. Measure the actual section that remains after damaged material would be removed.
Free tools Windows power users keep installed
One-click scans. No signup required.
Prepare a repeatable inspection
Inspect in a dry, well-lit area where all faces and ends are accessible. A consistent process prevents a clean-looking presentation face from hiding damage on the back or at a bearing point.
Useful tools
- A bright movable light and a camera or phone for close photographs.
- A tape measure, straightedge, pencil or marker, and a simple sketch sheet for locating defects.
- A wood moisture meter. Federal construction-inspection guidance and EPA material identify field moisture meters as appropriate tools for lumber.
- An awl or screwdriver for limited probing. This is a supplementary screening tool, not a standardized pass/fail instrument.
- Clean gloves and eye protection appropriate to the work, especially when handling rough surfaces, old fasteners, dust, or coatings.
Label each member and each face (for example, A, B, C, and D) before recording observations. Note the distance of every defect from an end, bearing, joint, hole, or fastener line. Photographs without a location reference are difficult to use when a structural professional later reviews the piece.
Step-by-step inspection procedure
1. Look at every face, edge, and end
Use the light at a low angle as well as straight on. Examine broad faces, narrow edges, end grain, checks, old cuts, and areas that were hidden against another member. Record soft spots, punky or crumbly fibers, cavities, splits, checks, shake, wane, knots, warp, notches, drilled holes, and failed fastener areas. A defect that appears minor on one face may open into a cavity or split on the opposite face.
Rank #2

- FIND HIDDEN WALL MOISTURE EARLY — Check suspicious drywall and building surfaces after a leak, water stain, or other moisture concern. Detect abnormal moisture before a small issue develops into more extensive damage and costly repairs
- CHECK BEFORE YOU REPAIR — Don't rely on a wall looking or feeling dry. Use the moisture meter to check questionable areas before painting, repairing, or covering the surface, helping you make decisions based on actual moisture readings.
- CHECK FIREWOOD BEFORE YOU BURN — Test firewood before placing it in your fireplace or wood stove. Knowing the moisture level of your firewood helps you choose wood that is ready for burning and avoid relying on appearance alone.
- PIN-TYPE TESTING FOR DIRECT MEASUREMENTS — The contact pins penetrate the material to measure moisture inside wood and building materials. This makes it useful for checking areas where surface conditions may not tell the whole story.
- ONE TOOL FOR TWO IMPORTANT HOME CHECKS — Keep it ready for two practical jobs: checking walls for hidden moisture and checking firewood before burning. A simple way to make informed decisions before a moisture problem becomes expensive or wood goes into the fireplace.
Pay particular attention to ends and bearing zones. Water commonly enters through end grain, while crushing, old cuts, and failed fasteners can reduce the section where a member transfers load. Do not fill, paint, or sand a questionable area before it is documented.
What’s actually slowing this PC down?
Pick the symptom - the matching free tool is one click away.
2. Separate surface appearance from lost wood
Weathered lumber can be gray, rough, and marked by old saw cuts or nail holes while retaining hard fibers underneath. Those surface characteristics are not automatically decay. Structural loss is different: the wood is missing, crushed, delaminated, deeply checked, or soft enough that the remaining section cannot be confidently measured.
FHWA cautions that defects deep enough to reach inner untreated wood can promote moisture absorption and fungal decay. A shallow check confined to a noncritical surface may be a finish issue; a long split that runs through a connection or critical zone is a structural concern.
3. Probe suspicious areas carefully
Press an awl or screwdriver into sound-looking wood adjacent to the suspect spot, then compare the resistance and feel. Sound wood should feel hard and offer consistent resistance. A tool that sinks easily, encounters a hollow space, or brings out crumbly fibers indicates that further investigation is needed. Probe from more than one direction around a cavity or split, but do not enlarge damage unnecessarily.
Probing tells you that a change exists; it does not establish its full depth, cause, or load capacity. Mark the deepest known penetration and have an engineer assess a member whose importance, defect depth, or remaining section is uncertain. The USDA manual’s conservative approach is especially important for beams, posts, joists, trusses, and connection zones.
Do these 3 things before closing this tab:
1Clear out junk files and repair common Windows errors2Scan for outdated or missing drivers - takes under a minute3Repair Windows errors before they cause bigger problems4. Measure moisture at several points
Use a wood moisture meter rather than judging dryness by touch. Take readings at both ends, inside checks, on shaded faces, near suspected leaks, around dark or stained areas, and wherever the member contacted masonry or soil. Record the location and conditions for each reading; one dry face does not describe an entire beam.
Rank #3
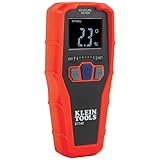
- WATER LEAK DETECTOR detects relative moisture content from leaks and flooding
- PINLESS MOISTURE METER measures relative moisture content in building materials
- NONDESRUCTIVE DETECTION up to 3/4-Inch deep using Electromagnetic field (EMF) technology
- USE ON DRYWALL, MASONRY, HARDWOOD, AND SOFTWOOD; calibrated for these materials only
- REVERSE-CONTRAST DISPLAY for easy viewing of reading and nine LED bars to indicate moisture range
EPA guidance reports a USDA Wood Handbook benchmark of an average moisture content of 15 percent or less, with maximum readings of 19 percent or less (USDA Wood Handbook, as reported by EPA, 2013). These are screening benchmarks, not universal pass/fail limits for every species, climate, assembly, or intended service. A project specification or engineer may require a different target.
A reading above the benchmark, a large spread between faces, or a damp area beside a leak means the moisture history needs attention. Correct the source of water and allow the member to equilibrate in the intended environment before making a final decision. Drying the surface without fixing persistent wetting does not stop decay.
5. Check for insects and their damage
Search faces, edges, end grain, and old bark inclusions for round or oval exit holes, fresh-looking frass, galleries, feeding trails, and weakened edges. APHIS describes frass as insect excrement that looks like sawdust and notes that inspectors may find feeding damage, trails, exit holes, and frass.
Quick wins for a faster PC:
Repair Windows errors before they cause bigger problemsFix Now →Scan for outdated or missing drivers - takes under a minuteDriver Scan →Clear out junk files and repair common Windows errorsFree Scan →Fresh, loose frass below a hole, cleanly cut galleries, or newly exposed damage suggests current or recent activity. Old, darkened holes in thoroughly dry wood may be inactive, but appearance alone cannot identify the insect or prove that no larvae remain. Isolate a piece with suspicious evidence from clean stock and obtain identification from a qualified wood-destroying-insect inspector or other appropriate specialist.
Reused wood that has stayed dry for years may present lower insect risk than damp, recently stored material, but dryness is not a guarantee. Treat visible evidence as a reason to investigate rather than as a cosmetic feature.
6. Map geometry and alterations
Measure width, depth, length, twist, bow, and any section removed by decay or cutting. Mark old notches, drilled holes, large knots, checks, shake, wane, and places where fasteners pulled out or crushed the fibers. Note whether an alteration lies near a support, connection, splice, or point where force enters the member.
Rank #4

- 🌲【Accurate and fast measurements reveal hidden water leaks】: It has 2 high-precision pins that can penetrate the surface to be tested and quickly measure moisture content to estimate potential moisture increase throughout the home. COCZOW moisture meter is the ideal tool for measuring moisture.
- 🌲【Professional Wood Moisture Meter】: 6 calibrated scales. Our moisture meter is a great tool for manufacturers, floorers, inspectors and wood suppliers to quickly and easily measure moisture content (% Mc). You can quickly determine if the moisture content is low (5-12%), medium (12-17%) or high (17-60%). Checking moisture content prevents wood from cracking and warping.
- 🌲【Widely Used】: PM6811A moisture meter is ideal for carpentry, building construction, agricultural restoration and floor laying. Measure moisture content of wood products such as hardwood floors, cabinets, furniture, lumber, lath, beams, plywood, panels, composite boards, window frames, forestry wood, coils, building materials, etc.
- 🌲【User-friendly】: With LCD backlight, the backlight color is divided into three types of green, yellow and red, or display the moisture content of different measurement types. Hold function, maximum/minimum moisture measurement function and 5-minute automatic shutdown function (no power supply required).
- 🌲【Why choose COCZOW Wood Moisture Meter】: LED display function, large measuring range (wood: 2.0%-75.0%. Building materials: 1.5-30%), durable stainless steel needle, heat insulation, light weight and easy to carry. Get professional and accurate results with Peakmeter Wood Moisture Tester.
Compare the actual remaining section with the section needed for the proposed use. A member can look massive yet have a serious reduction in effective area. FHWA warns that alterations can weaken members; a new hole or notch can change the load path even when the surrounding wood is hard.
The Tool Desk
Outbyte Driver Updater FREEFix the driver behind crashes, sound loss and screen glitchesFind Drivers →Outbyte PC Repair FREERepair Windows errors before they cause bigger problemsFix Now →7. Screen coatings and old paint
If lumber may have come from a building constructed before 1978, assume lead paint is possible until it has been tested. Do not casually sand, scrape, or cut a painted surface to reveal the wood. EPA states that testing is the only way to know for certain whether lead-based paint or lead hazards are present and recommends certified inspectors or risk assessors.
Arrange lead testing before disturbing suspect coatings and use lead-safe work practices required for your location and project. A clean visual appearance after sanding does not establish that dust or residue is safe.
How to interpret what you find
| Finding | What it may mean | Practical response |
|---|---|---|
| Gray surface, shallow checks, nail holes, or old saw marks with hard fibers | Weathering or prior use without demonstrated section loss | Usually acceptable for a nonstructural application after cleaning and stabilization, provided moisture and insects are not concerns. |
| Soft, punky, crumbly, or hollow area | Possible fungal decay or concealed void | Quarantine the piece, map the depth, correct any moisture source, and obtain professional judgment before structural use. |
| Persistent dampness, musty decay odor, or readings above the screening benchmark | Moisture conditions that can allow decay to continue | Keep the member out of service until the source is corrected and the wood has dried; reassess all affected areas. |
| Frass, fresh-looking exit holes, galleries, or feeding trails | Possible active or recent wood-boring-insect activity | Isolate the lumber and arrange identification and treatment advice from a qualified inspector. |
| Deep decay, major section loss, critical split, severe notch, large drilled hole, or failed member | Reduced capacity or an altered load path | Reject for structural use unless a licensed structural engineer evaluates and designs an appropriate remedy. |
| Unknown painted coating from a potentially pre-1978 building | Possible lead hazard | Test before sanding, cutting, or scraping; use certified lead professionals where required. |
Moisture decisions in more detail
The 15-percent average and 19-percent maximum figures are useful for screening a batch, not for declaring every reclaimed board safe. Species, local climate, indoor or outdoor service, ventilation, and the final assembly all affect the appropriate equilibrium moisture content. A board intended for a conditioned interior may need to acclimate differently from one exposed outdoors.
Take enough readings to reveal a pattern: ends versus center, sunny versus shaded faces, and sound versus suspect zones. A single low number can miss a wet pocket inside a check. Record the meter setting and species setting when the instrument provides them, because the reading is meaningful only in the context of how it was taken.
If a member has been wet, investigate why before drying it. Roof, plumbing, ground contact, condensation, and poor storage can all re-wet wood. Continued wetting can allow fungal decay to progress after the surface feels dry. Recheck after the source is corrected and before enclosing the lumber in a wall, floor, or roof assembly.
Best Value

- Easy to Read with Large LCD Screen: This wood moisture meter is easy to get an accurate reading from the surface of materials and displays accurate moisture readings on the 2.25" big screen. Use this handheld meter to check the moisture content in firewood or drywall, it can stand up on the table, the moisture content is displayed with a bar graph and percentage (_%RH) on the screen. Date Hold and Max/Min function is used to freezes readings, useful for writing down data
- Tricolor Backlight Display, Easy to Use: TopTes Moisture Meter TS-630 features an HD tri-color backlight to easily know if the wood/wall humidity is Dry, Moist, or Wet. Green backlight for Low moisture, orange backlight for middle moisture, and red moisture for high moisture. After selecting the mode, and putting pins into the firewood, easy and quick to get a visible alert from the clear screen
- Seven Calibration Scales, Two Material Mode: It is designed with built-in characteristic parameters of 7 calibration scales for wood and building material, ranging from 0.0% to 57%. This humidity meter is perfect for woodworking, water damage restoration, building construction, and home renovation. Easily Check and test suspicious water leaks around the wall/floor so you can quickly determine what level of remediation is needed
- Pin Type & Battery Operated: TopTes TS-630 moisture meter is a pin-type moisture meter and operates on batteries. With a high precision multi-material sensor, DON’T need calibration. It’ll support an accurate reading after inserting the stainless steel pins into the surface of the wood or building materials. It will auto shut off after 10 minutes of non-use to help save energy. A low-battery indicator will appear on the screen when the battery is running out
- What's in the Box: One TS-630 Moisture Meter, three AAA Batteries, one User Manual, one Carry Pouch, one Pair of Test Pins, one Mini Wrench
Decide whether the lumber is fit for the proposed role
Use the most conservative category supported by your observations. The decision is about this member in this application, not about reclaimed lumber as a class.
| Decision | Conditions supporting it | Next action |
|---|---|---|
| Use after cleaning and stabilization | Fibers remain hard; no progressive decay is evident; no active insect signs are present; defects are confined to noncritical surfaces; use is nonstructural. | Clean without hiding defects, stabilize the piece, document its condition, and keep moisture controlled in service. |
| Quarantine and investigate | Frass, fresh exit holes, galleries, persistent dampness, musty odor, or soft areas whose depth is unknown. | Separate from other stock, identify the cause, correct moisture, and obtain insect or structural advice as applicable. |
| Reject for structural use or obtain engineering review | Major section loss, deep decay, critical splits, large notches or holes, failed members, or any uncertainty about the load path. | Do not install on assumption. Have a licensed structural engineer evaluate the actual dimensions, defects, connections, and intended loads, or select another member. |
| Stop work for coating safety | Paint or coating may be from a pre-1978 building and has not been tested. | Arrange lead testing and lead-safe controls before disturbing the coating. |
What cleaning and stabilization can—and cannot—do
Cleaning can remove dirt that hides holes, frass, or checks, but it does not restore lost wood. Stabilization can protect a sound, nonstructural piece from handling or surface deterioration, but it does not increase a verified load capacity. Never use filler, paint, or a decorative coating to conceal a soft area or make a defect look resolved.
When damaged material is removed for a nonstructural project, remeasure the finished piece. Its usable dimensions may be smaller than the advertised dimensions, and the reduced section may change how it can be joined or supported. For a structural member, any removal, splice, reinforcement, or connection change belongs in an engineer’s design.
When to bring in a professional
Choose the specialist according to the uncertainty:
- Licensed structural engineer: load-bearing beams, posts, joists, trusses, critical connections, major section loss, deep decay, long splits, severe notches, drilled holes, or an uncertain load path.
- Certified wood-destroying-insect inspector: frass, exit holes, galleries, feeding trails, or a need to distinguish active from old insect damage.
- Certified lead inspector or risk assessor: suspect paint or coating that may originate from a pre-1978 building.
Verify local licensing, certification, and program availability before hiring. Give the professional your photographs, face map, moisture readings, dimensions, provenance, intended use, and a list of every alteration. That record is more useful than a general statement that the wood “looks good.”
How to compare reclaimed boards or suppliers
Price and appearance are poor substitutes for condition information. Compare candidates using the same inspection sheet and ask for evidence in each category.
| Comparison point | Questions to ask |
|---|---|
| Structural role | Is the piece decorative, non-load-bearing, or intended for a designed load? Does the seller make a structural claim? |
| Defect depth and location | Are soft spots, splits, holes, notches, and failed fasteners mapped on every face and end? How much section remains after defects are excluded? |
| Moisture and history | Where were readings taken, what were the average and highest values, and was the wood repeatedly exposed to water? |
| Insect evidence | Are holes, frass, galleries, or trails present? Has activity been identified or treated, and is the piece isolated from other stock? |
| Species and grade | Are species, original grade, dimensions, and prior engineering records known, or will they require professional determination? |
| Coatings and chemical exposure | Was the wood painted, treated, or exposed to unknown chemicals? Could a pre-1978 coating require lead testing? |
| Professional costs | Will testing, engineering, insect treatment, lead controls, cleaning, or repair cost more than choosing a sounder member? |
A supplier who can provide provenance, dimensions, moisture records, defect photographs, and treatment history reduces uncertainty. Missing information is not proof of damage, but it should make you more conservative—especially when the proposed use is structural.
A field checklist you can save with the project file
- Assign an identification number and label all four faces and both ends.
- Record former use, exposure, storage, species or grade information, coatings, and intended application.
- Photograph every face, edge, end, bearing area, fastener area, and visible defect.
- Map soft spots, cavities, checks, splits, shake, wane, knots, warp, old cuts, notches, holes, and section loss.
- Probe only suspicious areas and record the location and apparent depth.
- Measure moisture at ends, checks, shaded faces, suspected leak areas, and representative sound wood.
- Search for exit holes, frass, galleries, feeding trails, and weakened edges; isolate suspicious pieces.
- Screen unknown old paint before sanding, scraping, or cutting.
- Classify the member as acceptable for the stated nonstructural use, quarantine and investigate, or reject/obtain engineering review.
- Keep the completed record with the material until installation and, for structural work, provide it to the engineer.
Bottom line
Use reclaimed lumber structurally only when its history, moisture, insect condition, geometry, and remaining section have been documented and a qualified engineer accepts the member for the intended loads. For nonstructural work, hard dry fibers and defects limited to noncritical surfaces are the usual basis for acceptance. Soft or hollow wood, active insect evidence, persistent dampness, major section loss, critical splits, altered load paths, or untested suspect paint are stop signs—not details to hide with cleaning or finish.
Quick Recap
Product prices and availability are accurate as of the date/time indicated and are subject to change. Any price and availability information displayed on Amazon at the time of purchase will apply.

