Recommended Free Tools
Continuous insulation (CI) is an uninterrupted insulation layer that runs across structural members, reducing the heat-flow shortcuts created by studs, beams, shelf angles, clips and other conductive elements. It can be placed outside or inside the structure, or incorporated into an opaque panel, but it only performs as intended when the layer remains continuous through joints, edges and openings. The right material thickness is not universal: climate, the adopted energy code, structural attachments, windows and the rest of the air-, water- and vapor-control strategy determine the design.
What continuous insulation means
The U.S. Department of Energy (DOE) defines CI as “an uninterrupted layer of insulation that spans all structural support elements of a building (e.g. studs or beams) without thermal bridges.” In practical terms, the insulation is not stopped at every stud or metal component. Instead, a layer crosses over those members so heat has no easy, highly conductive route from the conditioned interior to the exterior.
As an Amazon Associate I earn from qualifying purchases.
CI is different from cavity insulation alone. Fiberglass, mineral wool or foam placed between studs can fill the cavities, yet the studs still bridge the wall. A CI layer addresses that parallel path. Fasteners and limited service penetrations still pass through an assembly, so “continuous” describes the design intent and the control of major bridges, not a wall with no penetrations at all.
Continuity must be considered in three dimensions. The insulation should connect at roof-to-wall and wall-to-foundation transitions, continue around corners, and be coordinated with parapets, balconies, canopies and structural shelf angles. A break at an edge can undermine an otherwise well-insulated field of wall.
#1 Best Overall

- Dual-Layer Insulation Design: Double-layer foam panels help reduce gaps around window vent openings and support airflow through the vent kit.
- Helps Limit Heat, Light and Noise: The 2-layer foam can help reduce heat transfer, reduce light entry, and lower outside noise.
- Adjustable Length up to 50 in: Includes 3 foam panels that can be combined up to 50 in, suitable for many sliding window vent panels
- Easy to Cut and Install: Trim the foam panels to match your window sealing plates; install using the included double-sided tape.
- Wide Compatibility: Works with many portable AC window vent kits, dryer vent kits, and other window ventilation systems for sealing around vent openings.
Why designers use CI to control thermal bridging
Framing members conduct heat more readily than most insulation. Steel studs and metal curtainwall components can dominate heat flow through an assembly. Building Science Corporation reported that, in the technical conditions discussed in its 2011 digest, failing to interrupt those bridges can reduce the effective R-value of insulating components by 50% to 80%; wood-framed walls commonly show reductions of 10% to 20%. Those are context-specific technical observations, not guaranteed losses for every wall.
Bridges also create colder interior surfaces. A cold spot can raise the chance of interior-surface condensation, damage finishes and reduce comfort near corners or window perimeters. On the exterior, temperature differences can contribute to moisture movement and durability problems. The larger and more conductive the bridge, the more important it becomes in the enclosure heat balance.
DOE describes continuous thermal insulation as “the backbone of a zero energy building’s envelope” and identifies continuous exterior insulation as a common way to reduce bridging. The appropriate insulation type and value still vary with climate and assembly; CI is a strategy, not a single prescriptive product.
Do these 3 things before closing this tab:
1Repair Windows errors before they cause bigger problems2Fix the driver behind crashes, sound loss and screen glitches3Clear out junk files and repair common Windows errorsHow CI fits with the other enclosure control layers
Thermal layer
First, draw the intended insulation line around the entire conditioned volume. Show where it crosses framing, slabs, parapets, foundations and roof interfaces. Then identify every location where a structural or service element interrupts that line and design a lower-bridge connection or supplemental insulation.
Rank #2

- Perfect design: The window air conditioner insulated foam panels board is designed with aluminum foil, which can reflect the sun and heat well, maintain the indoor temperature, and play a waterproof role at the same time.
- Quality materials: Window foam for air conditioner for window units made High quality EVA foam, It features great insulation and is dust-proof, environmentally friendly, and durable.
- Save energy noise reduction: Window air conditioner insulation keep cool air summer and keep warm air winter, help reduce noise, and eliminates cold drafts and light. improve comfort and energy efficiency.
- EASY install: Suitable for window air conditioner units from 5000 to 22000 btu.Measure the area you want to seal, cut the foam block according the size you need for better sealing.
- Satisfaction Guarantee: If you have any questions after receiving our products, please feel free to contact our customer service support, and we will give you a satisfactory solution.
Air barrier
Insulation does not automatically make a wall airtight. DOE guidance calls for a continuous air barrier surrounding the thermal envelope. It may be on the interior or exterior side of the insulation, but it must contact the insulation or another effective thermal barrier. Seal every seam, gap, penetration and change of plane. A high nominal R-value cannot compensate for uncontrolled air leakage.
Water and vapor control
Keep drainage and vapor control deliberate rather than assuming that a foam board or spray foam solves every moisture problem. Depending on the wall, rigid boards may be over or in place of plywood, oriented strand board or other sheathing, and may sit on either side of a housewrap. In some assemblies the board can serve as the drainage plane. The designer must still establish a water-shedding surface, flashing, drying direction and vapor-control strategy appropriate to the climate.
Material options and what the evidence supports
| Material or approach | Where it appears in the guidance | Information established | Design cautions |
|---|---|---|---|
| Expanded polystyrene (EPS) | Rigid exterior insulation | DOE gives a general rigid-foam range of 3.2–6.5 R per inch, depending on type. | Use the specific product’s labeled value, facer information and fastening requirements. |
| Extruded polystyrene (XPS) | Rigid exterior insulation | Included by DOE among rigid CI options; the same general 3.2–6.5 R-per-inch range applies across the types discussed. | Verify current manufacturer data and moisture compatibility for the assembly. |
| Polyisocyanurate (polyiso) | Rigid exterior insulation | Included by DOE among rigid CI options; product-specific labeled R-value is required for specification. | Account for facer, temperature and attachment details rather than applying a generic value. |
| Closed-cell spray foam | Exterior-wall CI in the Liberty University case study | The project story identifies MD-C-200 closed-cell spray foam applied by a licensed contractor; it does not provide an independently measured comparative result. | Design thickness, substrate preparation, fire protection and continuity at joints from the tested assembly and manufacturer requirements. |
The 3.2–6.5 R-per-inch figure is a general DOE range for rigid insulation, not a promise for every board, temperature or installation. Confirm the current labeled value before sizing a wall. EPS, XPS, polyiso and spray foam are not interchangeable: their facers, edge joints, water behavior, fire characteristics, fastening methods and vapor-control effects differ.
Choosing where to place the insulation
Exterior CI
Exterior insulation is a common approach because it places a thermal layer outside studs or backup walls and keeps those members warmer. It can reduce bridging through the framing, but it moves cladding support outward. Design longer fasteners, girts, clips, shelf angles and window attachments for the resulting offset and check their thermal contribution.
Rank #3
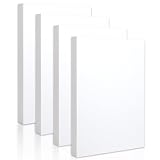
- High-Quality Material and Construction: The high-density white XPS foam is made of white pure polystyrene particles, free of impurities and pigments, non-toxic, peace lf mind to use,can be safely used for various applications.33kg/m3 density provides lightweight construction with excellent structural integrity, making it resistant to damage and easy to operate. Widely used in handicraft production, building insulation, plant cultivation, package applications and other fields
- Superior Rigidity and Durability: Our foam sheets feature excellent rigidity and thickness with pressure resistance up to 300kpa. Suitable for school DIY art projects, party decoration, cosplay props, building models, poster board, sculptures, pin board, and more to achieve your creative vision. This foam board is durable and does not deform, and unlike EPS foam, it will not produce particles that are easily broken and flying everywhere
- Waterproof and Thermal Insulation Properties: The foam board is waterproof closed cell foam with superior 034 level thermal insulation performance and can reduce certain noise effect. Very suitable for wall insulation and sound insulation, floor heating and attic. It can also be used as a moisture-proof backboard, leveling and height increasing, and for plant cultivation. You may also use it to make outdoor cabins and provide warm shelter for animals
- Easy to Customize and Paint: White polystyrene foam board with smooth surface can easily be painted in various colors. Free adhesion of various materials allows you to create your own designs, beautify your family spaces, and enhance party decorations to showcase your vision
- Simple Cutting and Shaping: You can easily cut the foam board with an art knife or a hot melt machine for your projects. Please pay attention to safety when working with cutting tools
Interior CI
Interior placement can be useful in renovations or when the exterior facade must remain unchanged. It requires careful continuity at floor lines, partitions, columns and window returns. The interior location can also alter vapor-drying potential and usable floor area, so the hygrothermal design must be checked rather than inferred from R-value alone.
Integral opaque panels
Some panels incorporate insulation as part of the opaque enclosure. Treat their joints, splines, fasteners and perimeter connections as part of the CI line. A panel’s advertised insulation value does not establish that adjacent structural connections are free of bridges.
Window and opening details require engineering
Windows interrupt every control layer. DOE research on CI walls has examined different window shapes, sizes, insulation thicknesses and installation methods, illustrating that attachment and opening details are structural as well as thermal questions.
- Set the control lines. Mark the insulation, air-barrier, drainage and vapor-control planes on the wall section before selecting a window position.
- Support the window independently. Design clips, brackets, bucks or other attachments for the window and cladding loads, including the increased stand-off created by exterior CI.
- Return insulation at the opening. Continue the CI around jambs, head and sill as far as the frame and flashing geometry allow; avoid leaving a bare strip of conductive backup wall.
- Integrate flashing and drainage. Connect sill flashing to the drainage plane and keep head and jamb protection continuous with adjacent weather control.
- Seal the air barrier. Use compatible membranes, tapes or sealants at the frame-to-wall transition and close fastener penetrations.
- Review the whole connection. Confirm structural capacity, condensation risk, fire requirements and installation tolerances with the project engineer and window manufacturer.
Installing rigid-board CI: a field sequence
DOE guidance allows rigid boards over or in place of structural sheathing and on either side of housewrap, depending on the assembly. The following sequence captures the general installation logic; project drawings and the board manufacturer’s instructions control the final method.
Rank #4

- Reflective Window Insulation: Our rv window insulation is well-made, which is weight of 200 g / 10.76 sqft. It is of good material and long-lasting
- Aluminum foil roll: Foil insulation roll is the ideal solution for you to beat the heat, reflective insulation roll can stay cool in summer heat and keep your house warm in winter, making you feel comfortable, available in multiple sizes to meet your all need
- Good Material: Reflective insulation roll is made of reflective double aluminum foil and bubble type material, its reflective surface helps to block out the sunshine effectively keep the heat out from the windows, insulation summer,not easily scratched, which can be used for a long time
- Good Performance: Window insulation kit for summer heat not only blocks the sun but it avoid heat loss window insulation summer,and keeps the room cool. This reflective insulation also acts as a barrier insulation summer heat and protects your privacy with its opaque foil surface
- Wide Application: Our insulation roll can be used for a variety of spaces, you can use aluminum insulation roll in windows insulation, garage insulation, rv window insulation,house insulation,roof insulation, window heat blocker, garage door and etc
- Confirm the approved wall build-up, board type, thickness, facer orientation, fastener type and required joint layout for the climate and code path.
- Prepare a sound, planar substrate. Resolve protruding fasteners, damaged sheathing, wet materials and transitions before covering them.
- Install boards with joints tightly fitted and staggered where the design calls for it. Keep the insulation line aligned at corners, floor bands and roof or foundation transitions.
- Fasten each board using the manufacturer’s schedule, including edge distances, washer or plate requirements and attachment spacing. Do not substitute a generic pattern.
- Seal board seams with compatible tape or the specified sealant. Treat corners, penetrations and changes of plane as part of the air and water detailing.
- Install housewrap, membranes, furring and cladding in the sequence shown on the approved details. If the board is intended to serve as a drainage plane, preserve its taped or sealed joints and provide the designed exit paths.
- Inspect before concealment. Check for open seams, crushed boards, missing fasteners, unsealed penetrations and breaks at windows, parapets and bases.
How to determine the required insulation level
Do not copy one CI thickness or R-value from another project and call it a code requirement. DOE notes that ideal insulation types and values differ by climate. The applicable energy-code edition, state or local amendments, occupancy, building height, construction type and compliance path all matter.
- Identify the project jurisdiction and the energy code it has adopted, including amendments and effective dates.
- Choose the permitted compliance path, such as prescriptive or performance-based compliance, and list its envelope criteria.
- Model or calculate the complete assembly, including framing fractions, fasteners, windows and major junctions where the chosen path requires them.
- Check condensation control and vapor behavior for the climate zone, interior humidity and cladding exposure.
- Coordinate the result with structural, fire, acoustical and constructability requirements. Increase or relocate insulation only when the full connection still works.
- Document product labels, installation tolerances and inspection requirements so the as-built wall matches the approved design.
An industry resource hub lists 2024 International Energy Conservation Code thermal-bridge and compliance materials, but that hub is not the governing code authority. Use it for navigation, then confirm requirements in the official code adopted for the project.
Liberty University Residential Commons I: what the case study actually shows
A June 18, 2015 Building Design + Construction case study describes a nine-story student residence hall at Liberty University. The building was completed for the 2014–2015 academic year as part of a broader campus rebuilding effort reported at $500 million. Residential Commons I was described as housing 1,200 students, while the university expected 13,200 resident students that academic year. Construction activity reportedly involved 60 to 100 contractors per day.
Crashes, No Sound, or Screen Glitches?
Random freezes, missing sound and display glitches usually trace back to one bad driver. Find and replace yours safely.Free scan · under a minuteWindows Errors? Fix Them Before They Spread
Repair common Windows errors and clear accumulated junk for a smoother, more stable PC - no reinstall needed.Free scan · no reinstallIn that project story, a licensed contractor applied MD-C-200 closed-cell spray foam to the exterior walls as continuous insulation. Those details demonstrate one way a large institutional wall can use spray foam as the CI layer. The article is manufacturer-associated, not an independent test report; it does not establish measured energy savings, payback, or a head-to-head result against rigid boards or other systems.
Common failure points and corrective actions
- Studs are insulated but still exposed to the exterior path: add a genuinely continuous layer across the framing or redesign the bridge at the connection.
- Window perimeters are left as thin strips: return insulation and redesign brackets, flashing and air seals together.
- Board seams are open or taped with incompatible products: use the specified compatible tape or sealant and inspect before cladding.
- The air barrier stops at a floor line or penetration: draw the air-control line continuously and assign each trade responsibility for its portion.
- A generic R-value is used for every climate: verify the adopted code, climate-specific assembly and current product label.
- Exterior insulation is added without checking attachments: recalculate fastener capacity, clip geometry, window support and cladding movement.
- Foam is treated as a complete moisture solution: provide flashing, drainage and vapor control suited to the wall and climate.
CI design checklist
- Thermal layer drawn continuously around the conditioned volume.
- Framing, shelf angles, clips, balconies and service penetrations reviewed as bridges.
- Air barrier connected and sealed at every seam, opening and transition.
- Drainage plane, flashing and vapor strategy coordinated with the insulation.
- Window support, perimeter insulation and installation tolerances engineered.
- Material, thickness, facer, fastener and seam-sealing products verified from current technical data.
- Climate, adopted code edition and compliance path documented.
- Inspection points scheduled before the enclosure is concealed.
The Bottom Line
Continuous insulation is a detailing discipline, not simply a thicker product. Use a layer that crosses structural members, then carry that continuity through windows, attachments and transitions while coordinating air, water, vapor, fire and code requirements for the project’s climate.
Quick Recap
Product prices and availability are accurate as of the date/time indicated and are subject to change. Any price and availability information displayed on Amazon at the time of purchase will apply.

