Do these 3 things before closing this tab:
1Clear out junk files and repair common Windows errors2Fix the driver behind crashes, sound loss and screen glitches3Repair Windows errors before they cause bigger problemsBegin with f/8–f/11, ISO 100, and a shutter speed chosen for the available light. On a tripod, let the shutter run as long as the static scene requires; handheld, keep it fast enough to prevent camera shake and to render people, foliage, or curtains as you intend. Keep the camera level to preserve vertical lines, and use a wide or normal focal length that gives you the required working distance.
Those settings are a starting point, not a rule. Room brightness, window contrast, sensor format, lens performance, movement, and the look you want all change the final exposure.
As an Amazon Associate I earn from qualifying purchases.
A dependable exposure baseline
The most repeatable architectural photographs come from controlling the variables that matter most: depth of field, noise, camera movement, and perspective. Set the aperture and ISO deliberately, then use shutter speed to balance the light and motion in the scene.
| Control | Starting point | Change it when |
|---|---|---|
| Aperture | f/8–f/11; Canon contributor Emma Desira gives a broader f/8–f/14 range | You need more depth of field, more light for a moving subject, or a different rendering. Very small apertures can reduce detail through diffraction. |
| ISO | ISO 100 when the light and support permit | Raise it when handheld shutter speed, moving people, or moving vegetation would otherwise force blur. |
| Shutter speed | Choose it from the light and the amount of movement. Desira suggests 1/125 second as a starting point. | Lengthen it on a locked tripod for a static building; shorten it for handheld work or moving subjects. Canon advises tripod support below 1/60 second. |
| Exposure mode | Aperture Priority or Manual | Use Manual for repeatable exposures and brackets; Aperture Priority is convenient when light changes across a location. |
| Focus | Place focus on the building plane that must be sharp; a point about one-third into the scene is a useful heuristic | Choose a nearer or farther point when foreground architecture or a distant facade is the critical subject. |
These figures are instructional guidance, not laboratory results or a universal optimum. Canon’s page credits the advice to photographer Emma Desira; Aperture Authority published a similar f/8–f/11, ISO 100, 1/125-second baseline on June 29, 2026. The correct exposure is the one that protects important highlights, records the required shadow detail, and keeps the intended motion sharp.
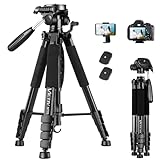
#1 Best Overall

- Camera mount tripod stand with zippered storage bag
- Adjustable height from 16.1inch to 50inch with 3-section,lever-lock legs for simple adjustments
- Folds down quickly and made of lightweight aluminum; It weighs only 1.23 lbs,lightweight and portable, easy to carry for travel,hiking,camping,etc
- 3-way head allows for tilt and swivel motion;portrait or landscape options;Built in Bubble Level,fast and accurate positioning
- Quick-release plate helps ensure fast transitions between shots
Choose tripod or handheld before setting the exposure
Tripod workflow for static architecture
A tripod is the most useful support for interiors, dusk exteriors, and night views. It lets you keep ISO low and use a long shutter without camera shake, while also making precise leveling and exposure bracketing practical. Canon’s guidance treats exposures slower than 1/60 second as tripod territory.
- Place the tripod on a firm surface and spread the legs wide enough that the camera will not shift during a long exposure.
- Level the camera before composing. A level body prevents you from tilting upward simply to fit a tall building.
- Disable any automatic setting that could change between bracketed frames, such as Auto ISO. Use Manual exposure when you need every frame to match except for the bracketed variable.
- Use a remote release or the camera’s self-timer so pressing the shutter does not move the setup.
- Review the histogram and highlight warning after the first frame, then adjust shutter speed rather than sacrificing aperture or ISO unnecessarily.
Handheld workflow
Handheld capture is appropriate when a tripod is prohibited, the viewpoint changes constantly, or people and other moving elements are central to the image. Start with the aperture that gives the desired depth of field, then select a shutter speed fast enough for your focal length, body movement, and subject movement. Increase ISO only as much as needed. A sharp, slightly noisier file is generally more useful than a blurred low-ISO file.
Image stabilization can reduce camera movement, but it does not freeze people, leaves, flags, or water. If those elements must be sharp, shutter speed—not stabilization—sets the practical limit.
Indoor architectural photography
Fit the room without exaggerating it
Tight rooms often require a wide-angle lens. A wide view can include walls, ceilings, and doorways, but moving too close changes the relative size of near and far objects and can make the room feel distorted. Step back when possible, keep the camera centered, and use the least-wide focal length that still includes the important architecture.
WhiteWall lists approximately 16–35 mm as a useful range for tight spaces and whole-building views when working distance is limited. Those figures describe a practical field-of-view range, not a requirement for every camera: a crop-sensor body shows a narrower angle than a full-frame body at the same marked focal length.
Rank #2

- 75in Extendable Camera Tripod: This tripod for camera phone can extend to a height of 75 inches by adjusting the flip locks, which can be quickly adjusted to any desired height to meet the needs of various shooting scenarios. Both the ball head and center column are equipped with level for easy real-time level calibration, ensuring perfectly level shots.Good Digital Camera Accessory Kits for you.
- 3-in-1 Detachable Center Column: The center column supports quick detachment, allowing for flexible use as a monopod or selfie stick (Max Height:43.9 in / 111.5 cm). Camera phone tripod stand can also be installed upside down for low-angle macro shooting. This 3-in-1 multi-functional design simplifies shooting equipment, saves carrying space, and enhances practicality and cost-effectiveness, making it suitable for travelers, outdoor enthusiasts, and content creators.
- 3-Level Angle Adjustment For Various Terrains: The camera tripod legs can be adjusted to three angles using the angle adjustment locks, allowing it to spread almost horizontally to achieve a minimum height of 15.35in(39cm) for low-angle shooting. Each leg adjusts independently in both angle and length, ensuring the tripod stand steadily on stairs, rocky trails, or uneven ground—making it ideal for outdoor-photographers and hikers shooting in unpredictable environments.
- Remote Control & Flexible Ball Head: Equipped with a 360° ball head, which supports free rotation in both horizontal and vertical directions. When shooting vlogs or live streams, you can flexibly switch angles and landscape/portrait modes without moving the tripod. In addition, this phone tripod has a built-in remote control with a maximum 10m control distance. Whether it's selfies, group photos, or long-distance shooting, one-button control makes shooting easier and more convenient.
- Sturdy & Stability: Constructed from aluminum alloy, this DSLR camera tripod features thickened tubes and anti-slip rubber feet that provide stronger grip on various surfaces, effectively preventing image shake. Its bottom hook allows for hanging weights, increasing counterweight and further enhancing overall stability, ensuring smooth footage even outdoors.[Max load 8kg/17.64lb (vertical) or 3kg/6.61lb(45° tilt)]
Control windows and dark interiors
A bright window can be several stops lighter than the room. First decide whether the window view is part of the subject. If it is, make a bracketed sequence from the same locked position: one frame for the room, one or more darker frames for the glazing, and a middle exposure. Blend the frames only if the movement and final style allow it.
If a single exposure is preferable, expose for the highlights you cannot replace and accept darker room shadows when that is the honest appearance. A fill flash can lift nearby shadows, but balance its output and color with the room’s existing light. Check the histogram and highlight alert rather than judging the rear screen alone.
Keep interiors still—or show their movement deliberately
With an empty room, a tripod and a longer shutter preserve low ISO and maximum tonal quality. People walking through, curtains moving, or foliage visible through a window will blur during that exposure. Raise ISO, open the aperture, or accept the blur according to the story you want the photograph to tell.
Indoor sequence
- Set the camera at the intended eye height and level it before choosing the final crop.
- Choose a focal length that includes the room without forcing the nearest wall into the extreme foreground.
- Start near the baseline aperture and ISO, then meter the darkest important area and the brightest window.
- Make a test frame, inspect highlight clipping, and decide whether to bracket or use fill light.
- Refocus if the composition changes substantially; otherwise lock focus and exposure for a consistent series.
Outdoor architectural photography
Focal length and working distance
For an entire building, Tamron describes approximately 15–35 mm as a useful range. A longer focal length can isolate a facade detail, compress surrounding elements, or let you work farther away when a very close viewpoint would exaggerate the foreground. Focal length does not determine perspective by itself: your camera position determines the relative size of near and far parts of the building.
When space permits, step backward before selecting a wider lens. If you cannot move back, use the widest view that still keeps important edges away from the frame’s extreme corners, where stretching is most noticeable.
Rank #3

- 【Lightweight and Portable】4 section leg can adjust tripod height from 20.4''/52cm to 64.1''/163cm; it can be folded to 15.5''/39.5cm to make it easy to put it in the carrying bag; the net weight with the ball head included is only 2.53lbs/1.15 KG.
- 【360 Degree Ball Head】36mm ball head can be rotated to any angle you want, helping to improve the range of camera activity during panning. It can withstand up to 17.6lbs/8kg.The 360-degree panning dial lets you set up precision shots to capture the beauty of landscapes.
- 【Efficient and Flexible】With powerful and quick flip leg lock, only use one hand can open and close all the buttons in a few seconds. It's very easy to use, saving you more time and can more focused on enjoying the shooting.
- 【Versatile Ability】The center column inverted installation (also with a short center column) to achieve the lowest angling shooting, archery and special photography.
- 【More Compatibility】This camera tripod with standard 1/4'' thread,which can be applied to most Arca-Swiss quick release plates; 1/4" screw is suitable for most cameras, DSLR camera, projector and telescope, etc.
Use light to describe surfaces
Front light records an even facade, while side light reveals relief, joints, columns, and cladding texture through shadows. Soft light around sunrise or sunset can reduce harsh contrast; Tamron specifically describes golden-hour side light as a way to emphasize both shadows and highlights. Overcast conditions can be useful when the building’s form matters more than dramatic texture.
Quick wins for a faster PC:
Repair Windows errors before they cause bigger problemsFix Now →Fix the driver behind crashes, sound loss and screen glitchesFind Drivers →Clear out junk files and repair common Windows errorsFree Scan →Night and illuminated buildings
Night architecture is usually a tripod job: keep ISO low, use a long exposure, and trigger the camera remotely or with a timer. Tamron suggests starting around −1 to −2 EV exposure compensation for illuminated buildings to protect bright signs and windows. Treat that as a safeguard, not an automatic setting. Inspect the highlight warning and histogram, because the correct amount depends on the luminance of the building and the surrounding sky.
During a long exposure, moving people and traffic become visual trails or soft shapes. If that is not wanted, shorten the shutter and raise ISO; if it is desirable, keep the camera fixed and let the movement become part of the composition.
Keep vertical lines straight
Why buildings converge
When the camera is tilted upward, the sensor is no longer parallel to the facade. Parallel edges then appear to converge toward the top of the frame. The effect is perspective geometry, not a lens defect. The taller the building and the closer your viewpoint, the more obvious it becomes.
In-camera solutions
- Keep the sensor parallel to the subject and move farther back until the building fits.
- Use a higher viewpoint, such as an upper floor or a safe elevated position, when available.
- Choose a longer focal length from the same or a farther position if it gives you the needed framing without tilting.
- Leave extra space around the building so later perspective correction can stretch the edges without cutting off important details.
Tilt-shift option
A tilt-shift lens can shift the framing upward while the camera remains level, preserving straighter verticals optically. It is an optional specialist tool, not a prerequisite for architectural work. Canon contributor Emma Desira names the TS-E 24mm f/3.5L II and TS-E 17mm f/3.5L II as preferred examples; availability and mount compatibility should be checked for your camera system.
The Tool Desk
Outbyte Driver Updater FREEFix the driver behind crashes, sound loss and screen glitchesFind Drivers →Outbyte PC Repair FREEClear out junk files and repair common Windows errorsFree Scan →Rank #4
- 【74 Inch Tall Tripod and Compact Tripod】 This tall camera tripod has a height adjustment range of 19-74 inches. It can meet the needs of daily work. This compact tripod comes with a carrying bag for outdoor and indoor shooting. This compact tripod weighs 3.14 lbs / 1.4 kg and is easy to store and stow
- 【Tripod for All Camera and Phone】Standard 1/4" screw mount compatible with all cameras ( Canon, Nikon, Fujifilm, Olympus, Panasonic), DSLR, SLR, and digital cinema cameras, also spotting scopes, projector, compact camcorders, binoculars. The 360° phone mount is compatible with iPhone 17 16 15 14 13 12 11 Pro/XS/XR/MAX/8/8 Plus/X/7 Plus/7/6s Plus/6s/6 Plus/6/Samsung Galaxy S22/ S21 Series/ Galaxy Z Flip/ NOTE/ One Plus 1+Series
- 【Professional 3-Way Pan Head】VICTIV Professional camera tripod stand is equipped with a stable and smooth 3-way pan head, it allows 360° horizontal panoramic shots, 180° up and down shots, and 90° vertical portraits. Non-slip pads provide great grip. You can also hang a backpack on the weight hook for extra stability
- 【Video Tripod for Photography】The video camera tripod is suitable for outdoor and indoor shooting. It can meet the daily shooting needs of video producers, video bloggers, and youtube users. Camera tripods for Photography, food shooting, live streaming, scenery shooting, and portrait shooting, etc
- 【Complete Tripod Units】What You Get: 1X Tripod for cell phone and camera, 1X Universal Phone Holder, 1X Extra Quick Release Plate,1X 3-way Pan Head, 1X Handle, 3X Non-slip pads. Please contact us anytime if any questions
Compare a conventional wide-angle lens with a tilt-shift lens on four practical criteria: your mount and sensor format, the field of view and working distance you need, the crop and edge stretching introduced by software correction, and how often you photograph tall structures or confined interiors. The reviewed guidance establishes these functional differences but does not establish current comparable prices.
Focus, depth of field, and edge sharpness
Architectural scenes commonly contain a near foreground, a middle facade, and distant background. At the baseline aperture, focus around the most important plane; placing it roughly one-third into the scene is a useful starting heuristic, not an optical law. Magnify the preview at a near corner and a distant edge to check whether the lens and focus choice meet the final output requirement.
Stopping down can increase depth of field, but the smallest available aperture is not automatically the sharpest. Diffraction gradually softens fine detail at very small f-numbers, and lens performance varies across the frame. If you need both a nearby foreground and a distant skyline sharper than one exposure can provide, focus bracketing or focus stacking may be appropriate when the scene is static.
Keep filters, hoods, and front elements clean. Oblique light striking a dirty filter can lower contrast and create flare that is difficult to remove from repeating lines and glass surfaces.
What’s actually slowing this PC down?
Pick the symptom - the matching free tool is one click away.
Exposure bracketing and file protection
Bracketing is most valuable when an interior includes bright windows or a night facade contains intense lights. Keep the camera fixed, use a consistent aperture, and vary shutter speed so depth of field and lens rendering remain unchanged. If people or leaves move between frames, the blend may show ghosts; decide whether a single exposure is safer.
Best Value
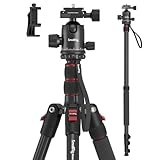
- Wide Compatibility: This camera tripod is universally compatible with cameras and devices with 1/4"-20 and 3/8"-16 threaded holes, such as DSLR cameras, action cameras and mirrorless cameras, etc. It can also be used with cell phones and projectors. 【Note】For cameras with telephoto zoom lens, you need to purchase additional tripod mount ring or telephoto lens mount for better balance.
- 2 in 1 Tripod Monopod: You can easily turn the aluminum tripod into a monopod according to your needs, this tripod is a good companion for your hiking or traveling.
- Angle Adjustable:The specially designed 36mm metal ball-head can rotate 360 degree allowing you to take photos at any angle with horizontally and vertically. And the central pole can be inverted to allow for low angle shooting and macro photography.
- Height Adjustable: 4-section column legs with 3 quick release flip-locks allows you to adjust the working height from 16" to 71" in seconds. 16.9" folden size is easily took to anywhere for outdoor photography.
- Load Bearing and Innovative Design: The dslr tripod offers high level of stability using great quality level of magnesium aluminum alloy. The net weight of the tripod is 1530g, it can withstand up to 33 lbs/15 kg(vertical)or 11 lbs/5 kg(tilt). Different from other tripods, this tripod has Three 1/4" threaded holes added to the bracket, which can meet the needs of external magic arms, mobile phones, monitors, etc.
Capture raw files when your workflow supports them. They preserve more flexibility for recovering moderate highlight and shadow detail than a compressed in-camera JPEG, but they cannot restore a channel that was fully clipped or detail destroyed by motion blur. The histogram is a diagnostic aid, not a substitute for inspecting the actual subject.
Quick setting recipes by situation
| Situation | Starting approach | Primary adjustment |
|---|---|---|
| Bright exterior, static building | Base ISO, mid-range aperture, handheld shutter if safe or tripod support for maximum precision | Change shutter speed to protect highlights and hold the desired sky brightness. |
| Dim, empty interior | Tripod, base ISO, mid-range aperture, long shutter | Bracket if windows are important; otherwise expose for the room’s priority tones. |
| Interior with moving people | Handheld or supported camera with a shutter fast enough for the intended motion | Raise ISO or open the aperture before allowing unwanted blur. |
| Golden-hour facade | Level camera, choose a focal length that gives working distance, and meter the bright side light | Watch shadow depth and highlight clipping as the sun changes. |
| Illuminated building at night | Tripod, low ISO, long exposure, remote release | Begin with modest negative compensation only if highlights require it, then verify in-camera. |
| Tall building from street level | Level sensor, step back or seek a higher viewpoint | Use a shift lens or leave correction margin if the structure still does not fit. |
Pre-shoot and on-location checklists
Before pressing the shutter
- Confirm the camera is level in both axes.
- Check that the chosen focal length leaves room for later perspective correction when needed.
- Set ISO intentionally rather than leaving Auto ISO to change between frames.
- Decide whether windows, lamps, signs, or the sky are highlight priorities.
- Check focus at both a near architectural edge and the most distant important detail.
- Look for reflections, flare, distracting parked vehicles, and temporary construction barriers.
After the first frame
- Inspect the histogram and highlight warning.
- Zoom into corners for softness, chromatic aberration, and converging lines.
- Check for movement blur in people, foliage, flags, or traffic.
- Make a bracketed set when the dynamic range exceeds one exposure’s useful range.
- Record a second composition from a different position rather than relying only on digital cropping.
Troubleshooting common failures
| Symptom | Likely cause | Fix |
|---|---|---|
| Verticals lean inward | The camera was tilted upward. | Keep the sensor parallel, move back or higher, use a longer lens, or apply perspective correction with extra crop margin. |
| Room is sharp but windows are white | The window brightness exceeded the exposure range. | Bracket from a tripod, expose for the glazing, or add controlled fill light. |
| Night facade has blown signs | The metering favored dark surroundings. | Reduce exposure, use limited negative compensation, and verify the highlight warning. |
| Tripod frame is still soft | Vibration from pressing the shutter, wind, unstable ground, or a moving subject. | Use a timer or remote release, stabilize the tripod, and shorten the exposure or raise ISO for moving elements. |
| Room looks unnaturally stretched | The viewpoint is very close and the lens is extremely wide. | Step back, use a less-wide focal length, and keep important edges away from the corners. |
| Foreground is sharp but distant facade is soft | Focus was placed too near, or depth of field was insufficient. | Refocus farther into the scene, stop down within the lens’s useful range, or make a focus bracket when the camera and subject are static. |
How to choose supporting gear
A sturdy tripod, a camera-system-compatible wide-angle lens, and a remote release cover most architectural assignments. A tilt-shift lens adds optical perspective control but increases cost, size, and handling complexity; it is most valuable when straight verticals are a frequent requirement and software correction would remove too much of the frame.
Check the lens mount and sensor format before buying. A focal length that is genuinely wide on full frame may provide a normal view on a crop-sensor body. Also confirm that the tripod is permitted at the property and that its placement will not obstruct visitors or create a safety hazard.
PC Slower Than It Used to Be?
A free scan shows the junk files, broken settings and background clutter dragging Windows down - then fixes them in one click.Free scan · Windows 10 & 11Crashes, No Sound, or Screen Glitches?
Random freezes, missing sound and display glitches usually trace back to one bad driver. Find and replace yours safely.Free scan · under a minuteWhat the published guidance does—and does not—promise
Canon Australia’s architecture advice, Tamron’s 2026 guide, Aperture Authority’s June 29, 2026 article, and WhiteWall’s guide updated September 8, 2026 provide practical starting points for aperture, ISO, focal length, support, and light. They do not establish one optimal setting for every camera, lens, building, region, or output size. The settings above should therefore be treated as a controlled starting workflow: set the camera level, protect the highlights that matter, and change one exposure variable at a time as the scene demands.
Quick Recap
Product prices and availability are accurate as of the date/time indicated and are subject to change. Any price and availability information displayed on Amazon at the time of purchase will apply.

