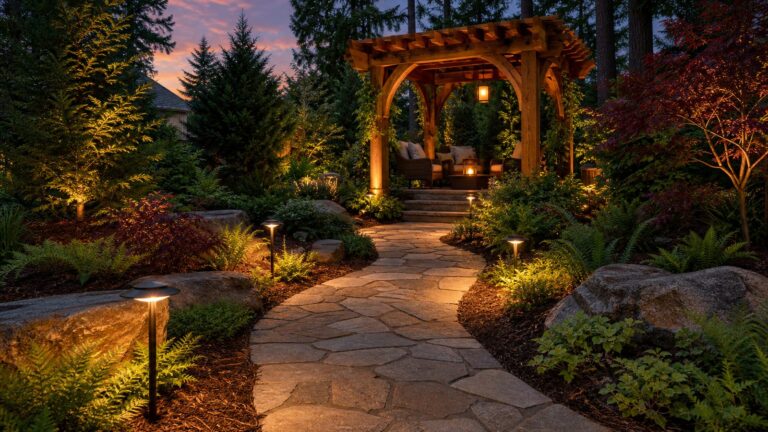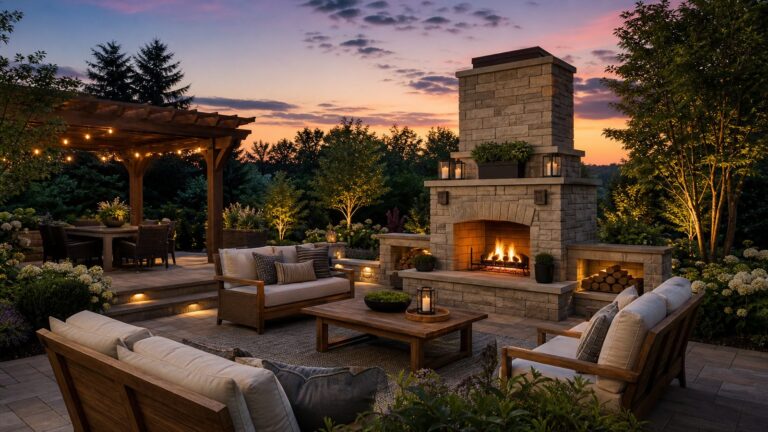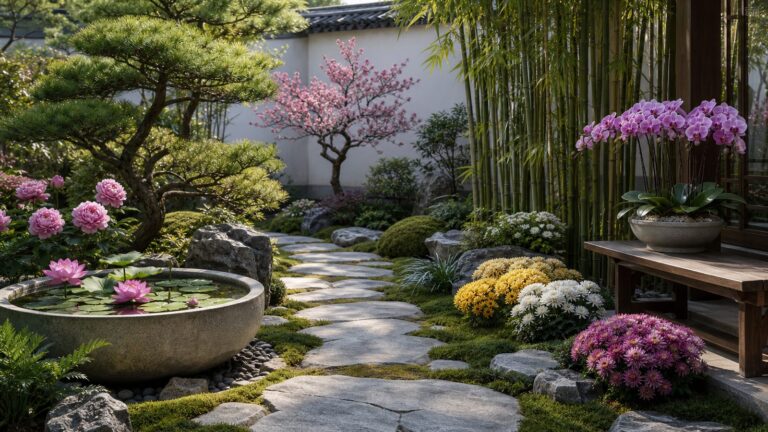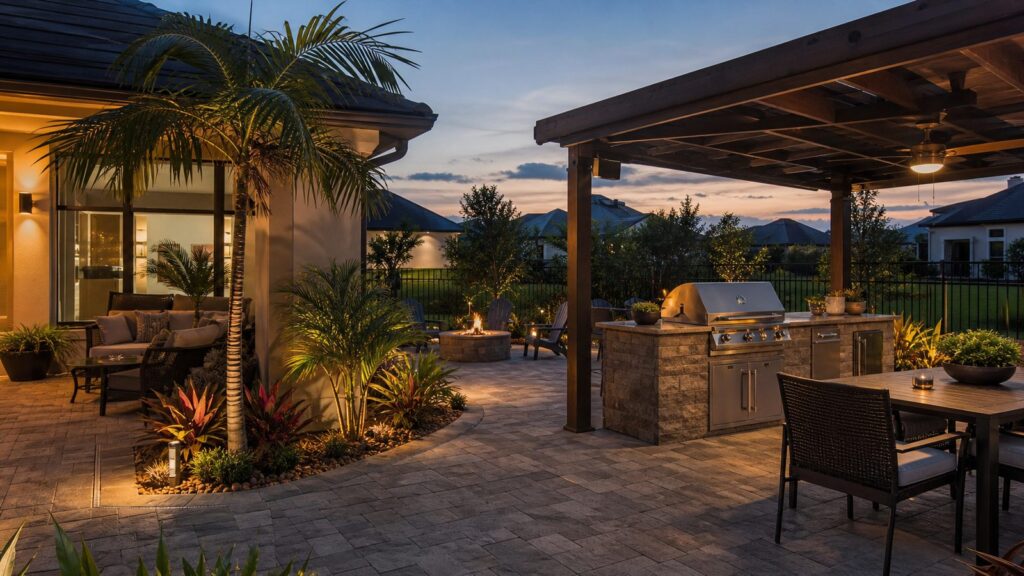
A strong naturalistic backyard garden is not a patch of unmowed lawn with a few wildflowers thrown in. It is a designed landscape that borrows from meadows, woodland edges, prairies, rain gardens, and native shrublands while still working like a real backyard. That means clean edges, planned paths, drainage that moves water away from the house, plants spaced for mature size, and enough structure that the garden looks intentional in February as well as June.
For most homeowners, the best layout depends on the yard condition you already have: full sun, shade, a wet low spot, a small patio, a slope, privacy needs, or a lawn that is too large to maintain. On our job sites, we start by separating the design into three layers: construction, planting, and maintenance access. If those three are handled in the right order, a naturalistic garden can feel relaxed without becoming messy.


Installed landscape work in 2026 commonly runs about $4.50 to $14.50 per square foot, with a 500-square-foot area landing around $2,250 to $7,250 and a 1,000-square-foot area around $4,500 to $14,500. Smaller DIY conversions using plugs, seed, mulch, edging, and basic tools can start in the several-hundred-dollar range, but professional design, grading, irrigation, stone, lighting, and larger plants move the number quickly into the low-to-mid five figures for a full backyard renovation.
Below are five backyard layout ideas that are practical enough to build, not just admire. Each one includes best-fit yard conditions, layout dimensions, construction notes, cost expectations, and the details that keep the finished garden looking designed instead of neglected.
What’s actually slowing this PC down?
Pick the symptom - the matching free tool is one click away.
#1 Best Overall
1. Meadow-and-Mown-Path Backyard
Best for: full-sun yards, oversized lawns, low-water regions, pollinator habitat, and homeowners who want less weekly mowing without giving up open movement.
The meadow-and-mown-path layout replaces a large block of turf with a dense matrix of native or adapted grasses, flowering perennials, and low groundcovers. The key is contrast. The planting can be loose, but the path must be crisp. We typically design this layout with a 3- to 5-foot-wide mown loop path, a 24- to 36-inch maintained edge along fences or beds, and at least one wider landing area for a bench, birdbath, sculpture, or small seating pad.
For a suburban backyard, a practical starting size is 400 to 1,200 square feet. A 20-by-30-foot meadow is large enough to read as a landscape, not just a bed. In a larger yard, a 30-by-50-foot meadow with a looping path gives enough depth for taller grasses and staggered bloom seasons. Keep taller plants toward the middle or back of the view and use shorter sedges, prairie dropseed-type grasses, or low perennials at the front edge so the border does not flop into walkways.
We like to repeat 3 to 7 anchor species instead of installing one of everything. A calm meadow might use one dominant grass, two seasonal flower groups, one low groundcover, one fall seed-head plant, and one early spring bulb or ephemeral. Repetition is what makes naturalistic planting look deliberate. Random variety is what makes it look like a discount plant rack.
Recommended Free Tools
Construction Notes
Start with turf removal, not planting. Existing lawn can be stripped, sheet-mulched, solarized, or cut out depending on timing, budget, and weed pressure. For professional installs, we usually want a clean seedbed or plug bed with soil loosened 4 to 8 inches deep, then amended only as needed. Many native meadow plants do not want overly rich soil, but they do need good root contact and weed control.
Use a physical edge where the meadow touches active lawn. Steel edging, stone edging, a compacted gravel mowing strip, or a 12-inch mulch band tells neighbors, guests, and HOAs that the area is designed. Without that cue, even good meadow planting can look unfinished during establishment.
Cost and Timeline
For a 500-square-foot meadow conversion, a DIY plug-and-seed approach may run roughly $750 to $3,000 depending on plant density, edging, mulch, and tool rental. A professional installation commonly falls in the $2,250 to $7,250 range using the 2026 installed landscape benchmark of $4.50 to $14.50 per square foot. Add more for irrigation, lighting, stone paths, boulder placement, or major soil correction.
Expect the meadow to take three growing seasons to look full. Year 1 is about weed control and root establishment. Year 2 brings more visible bloom and massing. Year 3 is when editing, dividing, and filling gaps makes the garden look mature.
Free tools Windows power users keep installed
One-click scans. No signup required.
2. Woodland-Edge Shade Garden
Best for: shaded yards, fence lines, mature trees, north-facing spaces, privacy edges, and backyards where turf struggles.
A woodland-edge layout works with shade instead of fighting it. Instead of trying to maintain thin grass under trees, the design creates a layered edge: canopy above, understory trees or large shrubs, smaller shrubs, ferns or sedges, shade-tolerant perennials, spring ephemerals, and leaf mulch. It is one of the best naturalistic layouts for yards with mature oaks, maples, pines, or neighboring trees that cast afternoon shade.
The most useful shape is usually a curved border 8 to 15 feet deep along the back or side of the property. Anything narrower than 5 feet tends to look like a planting strip rather than a woodland edge. If space allows, include a 3-foot stepping-stone path for pruning and weeding access. Leave 18 to 24 inches of clear space around fences, HVAC units, meters, and gates so the landscape does not become a maintenance problem.
In this layout, structure matters more than flower count. We usually start with shrubs and small trees, then build the lower layer around them. A few evergreen or winter-interest plants help the bed hold its shape after perennials go dormant. Repeated sedges, ferns, or low woodland groundcovers can knit the planting together and reduce open soil.
Windows Errors? Fix Them Before They Spread
Repair common Windows errors and clear accumulated junk for a smoother, more stable PC - no reinstall needed.Free scan · no reinstallOutdated Drivers Are Slowing You Down
One free scan finds every outdated or missing driver and matches the right update for your exact hardware.Free scan · exact hardware matchConstruction Notes
Tree roots require care. Do not cut major roots, trench aggressively, or add deep soil over the root zone. Under mature trees, we often use smaller plugs and quart-sized plants because they fit between roots with less disturbance. Keep mulch around 2 to 3 inches deep and pull it back from trunks and woody stems.
Rank #2
If the shade area is dry, group plants accordingly. Dry shade is a different hydrozone from moist shade. A plant that thrives in rich woodland soil may fail under a thirsty maple unless irrigation is provided during establishment. Plan hose reach before planting. A beautiful shade garden that cannot be watered in August is a poor construction plan.
Cost and Timeline
A 300-square-foot woodland-edge garden might cost several hundred to a few thousand dollars as a DIY project using plugs, small shrubs, mulch, and stepping stones. Professionally installed, it often lands around $1,350 to $4,350 for basic planting at $4.50 to $14.50 per square foot, with larger shrubs, small trees, stone paths, lighting, and irrigation pushing the budget higher.
The fastest way to make this layout look established is to spend money on structure: larger shrubs, a few well-placed understory trees, boulders, or a bench. Save money on the lower layer by using smaller perennials and plugs that will fill in over 2 to 3 seasons.
3. Rain-Garden Swale With Stepping-Stone Path
Best for: wet low spots, downspout runoff, compacted lawn areas, clay soil with surface water, and homeowners who want drainage improvement plus habitat.
A rain garden is a depressed planting area that collects runoff from a roof, driveway, patio, or lawn and lets that water soak into the ground. As a backyard layout, it can be shaped as a planted ribbon, shallow basin, or swale with stepping stones crossing through or beside it. Done well, it solves a real water problem while looking like a naturalistic garden feature.
Typical residential rain gardens are about 100 to 300 square feet and can often handle runoff from hard surfaces roughly three times their size when soils and sizing are appropriate. Soil should drain within about 48 hours. If water sits longer than that, the issue may require soil amendment, underdrain work, regrading, or a different drainage solution.
The most common mistake is placing a rain garden too close to the foundation. Drainage is a construction issue first. Grade around the house should slope away from the foundation at least 1 inch per foot for the first 6 feet, and downspouts should discharge at least 4 feet from the wall. We do not use a rain garden to hold water against a basement, crawlspace, slab edge, or retaining wall.
The Tool Desk
Outbyte PC Repair FREEClear out junk files and repair common Windows errorsFree Scan →Outbyte Driver Updater FREEFix the driver behind crashes, sound loss and screen glitchesFind Drivers →Layout Dimensions
For most homes, start with a shallow basin 6 to 8 inches deep, with gently sloped sides that can be walked and maintained. A 10-by-15-foot rain garden gives 150 square feet of planting area. A longer 5-by-40-foot swale can work well along a patio edge, fence line, or rear yard drainage path. Keep the bottom relatively level so water spreads instead of cutting a channel.
Place wet-tolerant plants in the bottom, average-moisture plants on the side slopes, and drier plants along the upper edge. This hydrozone approach prevents the common problem of planting one mix across three different soil conditions.
Safety, Utilities, and Permits
Call 811 before digging. That applies to rain gardens, edging, trees, fence-adjacent work, lighting, irrigation, and any grading that disturbs soil. Underground utilities can be shallower than expected, especially in older neighborhoods or where previous owners made changes.
Permit rules vary by city and county. A simple planted rain garden may not need a permit, but work tied to storm drains, curb cuts, retaining walls, major grading, decks, patios, or drainage discharge onto neighboring property can trigger review. Some jurisdictions regulate retaining walls by height, surcharge, or location, and deck or patio changes often have setback and inspection requirements. Before excavation, confirm local rules and HOA standards.
Cost and Timeline
A small DIY rain garden may start around $500 to $2,500 for plants, compost or engineered soil mix, mulch, stone, and basic tools. Professional installation for a 100- to 300-square-foot rain garden often falls in the low-to-mid four figures, especially if grading, hauling, inlet stone, overflow routing, or soil replacement is needed. If the wet area is caused by foundation slope, failed drainage, or neighbor runoff, budget separately for diagnosis and correction before planting.
4. Layered Pollinator Border Around a Patio
Best for: small urban yards, patios, outdoor dining areas, family-use backyards, and homeowners who want a naturalistic look without converting the whole lawn.
Rank #3

- Used Book in Good Condition
This is the most approachable naturalistic layout for many homes. Instead of transforming the entire backyard, you wrap a patio, deck, or seating area with layered pollinator planting. The layout creates an immersive garden room while preserving a central lawn, play area, grill zone, or circulation route.
A useful border depth is 4 to 8 feet for small patios and 8 to 12 feet where space allows. A 12-by-16-foot patio with a 6-foot planting border on two sides creates about 168 square feet of planting. Add a third side and the garden starts to feel enclosed. Keep at least 36 inches clear for primary walking paths and 48 inches where people carry food, chairs, coolers, or garden tools.
The planting should be layered from the patio outward or from the fence inward. Near the patio, use lower plants that will not flop into seating. Behind them, use mid-height perennials, grasses, and compact shrubs. At the back, use taller grasses, screening shrubs, trellises, or small trees if privacy is a goal.
Cues That Make It Look Intentional
Naturalistic planting near a patio needs stronger design cues because people see it up close. Use a clean border, repeated plant masses, consistent mulch or living mulch, and one clear focal point such as a specimen shrub, birdbath, large container, or bench. Path lighting can also make the planting read as designed at night.
We also plan maintenance access before plants go in. A 24-inch stepping-stone strip behind a deep border is much easier than reaching across wet plants to prune or weed. Leave pruning room around shrubs. A plant that is listed at 5 feet wide should not be installed 18 inches from a walkway and expected to behave.
Cost and Timeline
A 150- to 300-square-foot patio pollinator border can be a strong DIY project if the patio and drainage are already sound. Materials may run from several hundred dollars to $3,000 depending on plant size, edging, mulch, and irrigation. Professional design and installation commonly falls around $675 to $4,350 using the $4.50 to $14.50 per-square-foot benchmark, with added costs for lighting, drip irrigation, stone edging, seat walls, or patio repair.
Do these 3 things before closing this tab:
1Fix the driver behind crashes, sound loss and screen glitches2Repair Windows errors before they cause bigger problems3Scan for outdated or missing drivers - takes under a minuteIf the patio itself needs replacement, the project becomes a backyard renovation rather than a garden bed. Full backyard renovations in 2026 often fall around $15,000 to $50,000, and major projects with outdoor kitchens, retaining walls, or structures can exceed $80,000.
5. Food-Forest and Native Shrub Garden Room
Best for: privacy, edible landscaping, fire-pit areas, family gathering spaces, slopes, and yards needing more enclosure.
A food-forest or native shrub room uses layered planting to create a destination in the yard. Instead of one open lawn, the backyard gets a defined room with a bench, fire pit, small patio, hammock posts, or gravel sitting area surrounded by shrubs, small trees, edible plants, and native-style understory planting.
This layout works especially well when the rear yard feels exposed. A practical room might include a 10- to 14-foot-diameter gravel seating circle, a 3- to 4-foot path leading to it, and a planted perimeter 8 to 15 feet deep. Around the outside, use small trees or large shrubs for height, medium shrubs for enclosure, and lower grasses, perennials, herbs, or groundcovers at the edge.
Food-forest does not have to mean complicated. For most residential yards, we prefer a restrained version: one or two small fruiting or ornamental trees, several berrying or wildlife-supporting shrubs, pollinator perennials, and a durable ground layer. The goal is a beautiful garden room first, with edible and habitat benefits built in.
Construction Notes
Think about access and clearances. Fire pits need safe distance from structures, fences, overhanging branches, and combustible materials. Local fire codes and HOA rules may restrict wood-burning features. If you are building a gas fire feature, run the utility and permit checks before finalizing the planting plan.
On slopes, avoid assuming plants will solve erosion by themselves. A planted slope may still need terracing, coir logs, erosion-control blanket, stone checks, or a permitted retaining wall. Retaining wall rules vary by jurisdiction, and many cities review walls based on height, surcharge, location, or whether the wall supports a driveway, slope, structure, or neighboring grade.
Cost and Timeline
A simple shrub room with a gravel seating pad, path, mulch, and smaller plants may start around $3,000 to $8,000 as a modest professional project. Add larger trees, lighting, boulders, fire features, drainage, or retaining walls and the cost can move into the $10,000 to $30,000 range. Retaining walls alone commonly run around $3,250 to $9,000, while outdoor kitchens can add $6,000 to $25,000 or more.
Quick wins for a faster PC:
Scan for outdated or missing drivers - takes under a minuteDriver Scan →Clear out junk files and repair common Windows errorsFree Scan →Fix the driver behind crashes, sound loss and screen glitchesFind Drivers →This layout benefits from phased installation. Build the path, seating area, drainage, and major shrubs first. Add perennials and groundcovers after the structure is set. That sequence prevents new plants from being trampled during hardscape work.
Naturalistic Backyard Layout Cost Comparison
Costs vary by region, access, soil conditions, demolition, plant size, irrigation, and hardscape choices. The table below gives practical 2026 planning ranges for common backyard naturalistic layouts.
| Layout | Typical Size | DIY Starting Range | Professional Installed Range | Biggest Cost Drivers |
|---|---|---|---|---|
| Meadow with mown paths | 400-1,200 sq. ft. | $750-$3,000+ | $1,800-$17,400 | Turf removal, seed vs plugs, edging, irrigation, weed pressure |
| Woodland-edge shade garden | 150-500 sq. ft. | $500-$3,000+ | $675-$7,250 | Shrub size, tree-root work, mulch, stepping stones, watering access |
| Rain-garden swale | 100-300 sq. ft. | $500-$2,500+ | $1,500-$6,000+ | Excavation, soil mix, overflow routing, drainage correction |
| Patio pollinator border | 150-300 sq. ft. | $700-$3,000+ | $675-$4,350+ | Edging, lighting, drip irrigation, patio condition, plant size |
| Shrub garden room | 300-1,000 sq. ft. | $2,000-$8,000+ | $3,000-$30,000+ | Seating pad, paths, trees, fire feature, slope, retaining walls |
For design-only help, 2026 landscape design fees often average around $4,590, with typical projects ranging from about $1,955 to $7,220. Hourly consultations commonly run $50 to $150. Residential garden design may be priced around $0.05 to $0.15 per square foot for the design portion, while small garden design plus installation often lands around $5 to $20 per square foot.
Independent reader supportYour contribution helps us test, update, and keep practical guides available for everyone.How to Keep a Naturalistic Garden From Looking Messy
The difference between naturalistic and neglected is structure. On our job sites, we use what many designers call cues-to-care: visible signs that a human planned and maintains the space. These cues matter for curb appeal, HOA acceptance, neighbor comfort, and resale value.
Crashes, No Sound, or Screen Glitches?
Random freezes, missing sound and display glitches usually trace back to one bad driver. Find and replace yours safely.Free scan · under a minutePC Slower Than It Used to Be?
A free scan shows the junk files, broken settings and background clutter dragging Windows down - then fixes them in one click.Free scan · Windows 10 & 11Use a crisp edge where planting meets lawn, patio, driveway, or sidewalk. Repeat plants in groups, not singles. Keep paths wide enough to use. Add a bench, boulder, birdbath, arbor, or focal tree. Cut back or edit plants on a schedule. Leave winter seed heads where they add structure, but remove collapsed material that blocks paths, traps moisture against wood, or makes the garden look abandoned.
Density is also critical. Open soil invites weeds. A naturalistic garden should close canopy at the ground layer through plugs, groundcovers, mulch, living mulch, or planned infill. In sunny meadow-style areas, smaller plugs can be economical, but they need close spacing. Many perennials work well at 12 to 18 inches on center, while larger grasses and shrubs need spacing based on mature width.
Plan by hydrozone. Dry upland areas, average beds, rain-garden bottoms, dry shade, moist shade, and irrigated containers should not all receive the same plant list. Water needs are one of the fastest ways to separate plants that will thrive from plants that will limp along for two seasons and disappear.
When to DIY and When to Hire a Pro
DIY is reasonable when the area is small, the grade is stable, drainage already works, utilities are marked, and the work is limited to turf removal, soil preparation, edging, mulch, and planting. A 100- to 300-square-foot bed, a small patio border, or a simple meadow patch can be a good homeowner project if you have time for watering and weeding during establishment.
Free tools Windows power users keep installed
One-click scans. No signup required.
Hire a professional when the project involves drainage near the foundation, standing water, slopes, retaining walls, patios, decks, lighting, irrigation, gas lines, outdoor kitchens, large trees, equipment access, or permit questions. Also hire help if the design must satisfy an HOA or if the backyard needs to function for children, pets, entertaining, and maintenance crews at the same time.
Before signing a landscape contract, ask direct questions: Who is responsible for permits? How will drainage be handled? What soil prep depth is included? What plant sizes are specified? Is there a plant warranty? How long is irrigation needed for establishment? Where will debris go? How will the crew protect existing patios, fences, utilities, and tree roots? What maintenance is expected in years 1, 2, and 3?
A good contractor should be able to answer those questions in plain language and show where the water goes. If no one can explain the drainage plan, the planting plan is not ready.
Phasing a Naturalistic Backyard Over Three Years
You do not have to build the whole garden at once. In fact, naturalistic landscapes often perform better when phased intelligently.
The Tool Desk
Outbyte PC Repair FREERepair Windows errors before they cause bigger problemsFix Now →Outbyte Driver Updater FREEFix the driver behind crashes, sound loss and screen glitchesFind Drivers →Year 1: remove unwanted turf, fix drainage, call 811 before digging, install paths, edging, seating areas, major grading, irrigation sleeves, and the first structural shrubs or trees. This is the construction year. Spend money on the pieces that are hard to change later.
Year 2: add dominant perennials, grasses, sedges, groundcovers, and secondary shrubs. Watch how water, shade, weeds, and foot traffic actually behave. Adjust plant choices by hydrozone instead of forcing the original plan.
Year 3: edit aggressively. Divide plants that are working, replace plants that are not, thicken bare areas, sharpen edges, and adjust maintenance routines. This is when the garden starts to feel settled rather than newly installed.
For homeowners trying to control cost, we usually recommend investing in larger shrubs, trees, paths, and hardscape first, then using smaller plugs for meadow and matrix planting. The structure makes the garden look intentional immediately, while the lower layer fills in over time.
The Bottom Line
The best naturalistic backyard layout is the one that fits your site conditions before it fits a mood board. Full sun wants a different strategy than dry shade. A wet low spot needs drainage thinking before plant selection. A patio border must allow real circulation. A shrub room needs clearances, access, and long-term pruning space.
If you want the garden to look stunning and still work like a backyard, start with layout: paths, edges, water movement, seating, mature plant sizes, and maintenance access. Then choose native and adapted plants by region, soil moisture, sun exposure, and mature size. That sequence is what turns a naturalistic garden from a pretty idea into a landscape that can handle weather, people, and time.
Frequently Asked Questions
What is a naturalistic garden layout?
A naturalistic garden layout uses layered planting inspired by meadows, prairies, woodland edges, rain gardens, and native shrublands. It should still be designed with clear edges, paths, repeated plant groups, seating or focal points, and maintenance access.
How much does it cost to install a naturalistic backyard garden in 2026?
Professional landscaping commonly runs about $4.50 to $14.50 per square foot in 2026. A 500-square-foot naturalistic installation may cost about $2,250 to $7,250, while larger backyard renovations can range from $15,000 to $50,000 or more depending on hardscape, drainage, lighting, plant size, and site access.
Do these 3 things before closing this tab:
1Repair Windows errors before they cause bigger problems2Scan for outdated or missing drivers - takes under a minute3Clear out junk files and repair common Windows errorsCan a rain garden be part of a backyard landscape design?
Yes. A rain garden can be both a drainage feature and a naturalistic planting area. Typical residential rain gardens are about 100 to 300 square feet and should drain within about 48 hours. They must be placed and graded so they do not hold water against the house foundation.
How do I make a native garden look intentional instead of messy?
Use crisp mown or built edges, repeat 3 to 7 anchor species, keep paths clear, add visible structure such as a bench or stone border, and maintain the garden during establishment. Dense planting, mulch, and seasonal editing are what keep the space from looking abandoned.
Do I need a permit to replace lawn with native plants?
A simple lawn-to-planting conversion often does not require a permit, but local rules vary. Permits or approvals may be needed for grading, retaining walls, drainage changes, decks, patios, fire features, lighting, irrigation, or work controlled by an HOA. Always call 811 before digging.
How long does a naturalistic garden take to fill in?
Most naturalistic gardens take about three growing seasons to look established. Year 1 focuses on roots, watering, and weed control. Year 2 brings stronger growth and bloom. Year 3 is when dividing, editing, and filling gaps create a mature look.
Quick Recap
Product prices and availability are accurate as of the date/time indicated and are subject to change. Any price and availability information displayed on Amazon at the time of purchase will apply.