A good indoor compost bin is not just a bucket under the sink. It is a small household system: a place to collect scraps, a method to process them without odor or pests, and a plan for where the finished material goes. Get those three pieces right and indoor composting is clean, quiet, and useful. Skip any one of them and you usually end up with fruit flies, sour smells, leaking liquid, or a container full of half-rotted food.
For most U.S. homes and apartments, the best true indoor compost bin is a vermicompost bin, meaning a worm bin. Red wiggler worms process fruit and vegetable scraps at room temperature and turn them into castings that can be used around houseplants, raised beds, and garden soil. A countertop caddy is useful too, but it only stores scraps. A bokashi bucket ferments scraps, but the material still needs to be buried or finished elsewhere. Electric kitchen units dry and grind scraps, but their output is better treated as preprocessed food waste, not finished compost.
On our job sites, we think about compost bins the same way we think about a laundry sink, trash pullout, or utility closet: water control, access, ventilation, service clearance, and cleanup matter. A $40 bin can work beautifully if it is placed well. A $400 appliance can become a nuisance if it has no destination for the output.
Choose the Right Indoor Composting Setup
Before buying supplies, decide what job the bin needs to do. Indoor composting can mean three very different things.
#1 Best Overall

- Compact, High-Efficiency Footprint Designed to maximize composting capacity while minimizing floor space.
- Odor-Reducing System Composting worms consume food scraps quickly, helping reduce odors. An improved lid design with a built-in V-Board and coconut mat supports airflow and moisture balance.
- Moisture Management The V-Board helps retain moisture and maintain a comfortable environment for worms, supporting consistent composting performance.
- Worm Saver Tray Prevents worms and compost material from falling into the liquid collection area while improving airflow throughout the system.
- Integrated Liquid Collection Base The liquid collection tray and base are molded as one piece, eliminating extra assembly and allowing easy collection of excess liquid.
| System | What It Does | Typical 2026 Cost | Best For | Watch-Outs |
|---|---|---|---|---|
| Countertop scrap caddy | Stores food scraps before outdoor composting, curbside pickup, or drop-off | $20-$60 | Any kitchen with municipal organics or backyard compost | Does not compost by itself |
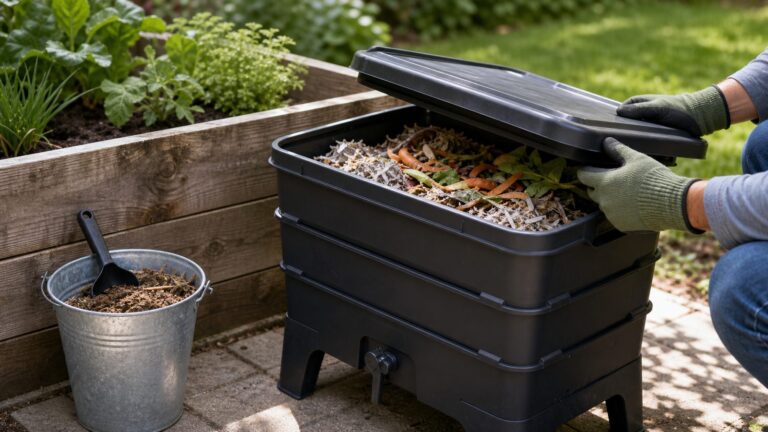
| DIY worm bin | Uses red wigglers to turn scraps into castings indoors | $25-$75 for bin supplies, plus $40-$60 for 1 lb worms | Apartments, basements, laundry rooms, small gardens | Needs bedding, moisture control, and correct feeding |
| Ready-made worm composter | Tray-style vermicomposting system | $80-$150 common range | Homeowners who want cleaner harvesting and a finished look | Still needs the same worm care as DIY |
| Bokashi bucket kit | Sealed anaerobic fermentation of scraps | $55-$75 for bucket and starter bran | Small kitchens, broader food scrap handling | Fermented material must be buried or finished in soil |
| Electric food recycler | Dries and grinds scraps | Often several hundred dollars | Homes that want volume reduction and have an outlet | Output is not finished compost and needs curing |
If your goal is a simple kitchen workflow, start with a countertop caddy and use a backyard pile or local organics program. If your goal is to make compost indoors, build or buy a worm bin. If you want to handle occasional meat or dairy scraps, bokashi may be useful, but only if you have soil, an outdoor bin, or a municipal option that accepts the fermented material.
The Environmental Protection Agency reports that food scraps and yard trimmings make up more than 30% of what Americans throw away. That is a lot of useful organic material being landfilled or incinerated. The practical question is not whether composting is worthwhile. It is which system fits your house.
Plan the Scraps Workflow First
The cleanest homes use a three-part workflow. First, place a small collection caddy near the prep area. Second, keep the actual composting or fermentation station in a protected location. Third, identify the finishing or use location before the first banana peel goes in the bin.
That last step is where many homeowners get stuck. Worm castings can be used in houseplants or garden beds after harvesting. Bokashi scraps need to be buried, added to a soil factory, or finished in an outdoor compost pile. Dried electric-composter output also needs curing in soil or compost before it belongs around plants. If you live in an apartment, line up a municipal drop-off, community garden, or curbside organics service for overflow and items your indoor bin should not handle.
What’s actually slowing this PC down?
Pick the symptom - the matching free tool is one click away.
Size the system around how you cook, not just how many people live in the house. A two-person household that cooks from scratch every night may generate more vegetable trimmings than a family of four that eats out often. As a rule, 1 lb of red wigglers can process roughly several pounds of suitable scraps per week once established, but new bins should be fed lightly for the first 2 to 4 weeks.
Best Places to Put an Indoor Compost Bin
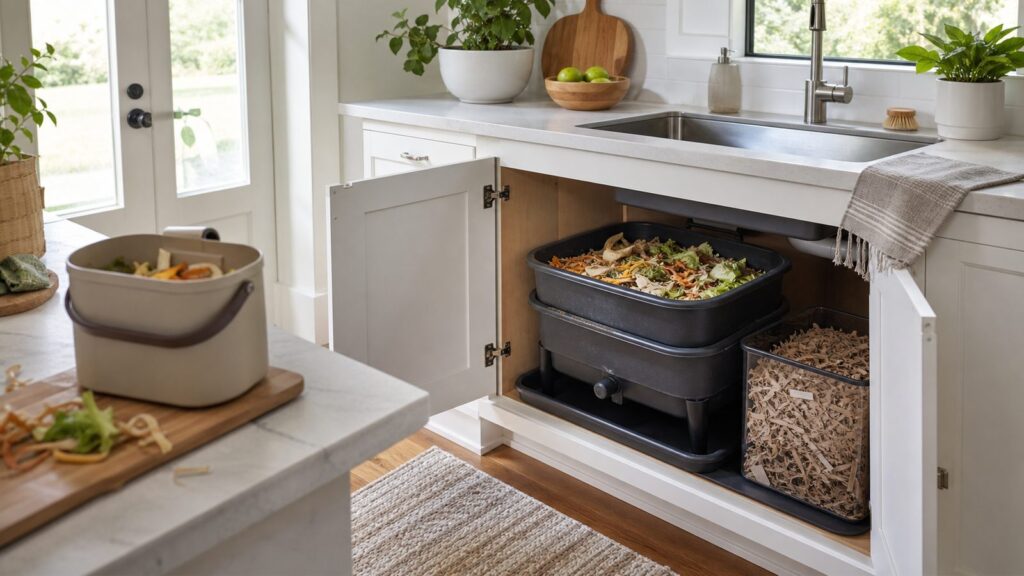
The right location is dry, accessible, protected from temperature swings, and easy to clean around. In most homes, that means an under-sink cabinet, pantry floor, laundry room, utility room, mudroom, conditioned basement, or a shaded corner of the kitchen.
For worm bins, temperature matters. Red wigglers perform best around 55-75 degrees F, with roughly 70 degrees F as an ideal working temperature. A broader range of about 55-85 degrees F can work, but hot garages, sunny windows, enclosed mechanical rooms, and unconditioned sheds can stress or kill worms. Avoid placing a worm bin beside a dishwasher, oven, water heater, boiler, or HVAC register.
From a construction standpoint, the floor and cabinet matter too. Put every indoor compost system on a secondary containment tray. A boot tray, washing machine pan, plastic appliance tray, or shallow storage-bin lid can save a sink-base cabinet from swelling, staining, and odor if liquid escapes. For under-sink installations, confirm you have at least 2 inches of clearance above the lid so the bin can be opened without scraping plumbing or the garbage disposal.
Quick wins for a faster PC:
Clear out junk files and repair common Windows errorsFree Scan →Fix the driver behind crashes, sound loss and screen glitchesFind Drivers →Repair Windows errors before they cause bigger problemsFix Now →Rank #2

- 50L COMPOST BIN: TOP XIAN NEW Worm Composters are made of high-quality black PP plastic, the total capacity of 3 reusable worm trays is up to 50L. It comes with a faucet, which can be directly opened to let the fertilizer flow out.
- EFFICIENT DECOMPOSITION: The large-sized worm bin can accelerate the conversion of organic waste into nutrient-rich compost, which is more convenient, faster and more efficient than traditional methods.
- CONVENIENT & EASY TO INSTALL AND USE: The five-layer composting bins can be easily stacked to add earthworms and waste, and the tray can also be easily removed for collection cause every tray has a carrying handle. You can store your food scraps, vegetable peelings, tea leaves, flowers, coffee grounds and other compost materials, Which greatly enhances the experience of the composting journey.
- AIR VENTILATION AND ODOR REDUCTION: The closed design prevents odors from overflowing, and there is also proper ventilation to allow oxygen to enter and speed up decomposition. The odorless design makes this worm farm a good solution for small spaces.
- NO-WORRY AFTER-SALES SERVICES: The compost bin set includes 3-layer compost box x1, gloves x1, coconut bricks x1, plastic rake x1, plastic shovel x1 and measuring cup x1. If for whatever reason you are not absolutely satisfied with our outdoor compost bin, please get in touch, and we will make it right - guaranteed!
Do not build a permanent boxed cavity around a compost bin. Compost systems need to be removed, cleaned, inspected, and occasionally corrected. A washable removable bin with clear access beats a beautiful built-in that traps moisture and odors.
Materials for a DIY Indoor Worm Bin
A reliable DIY worm bin does not require expensive parts. Use an opaque plastic storage tote because worms prefer darkness and plastic is easy to clean. A practical size for most households is 10 to 18 gallons. Smaller bins fit apartments but fill quickly. Larger bins are more forgiving, but they need floor space and are heavier when wet.
Basic supply list
- One opaque 10- to 18-gallon plastic tote with a tight lid: $10-$25
- One shallow tray or second tote lid for secondary containment: $5-$20
- Drill with 1/8-inch and 1/4-inch bits for ventilation and drainage control
- Shredded plain cardboard, newspaper, paper egg cartons, dry leaves, or coconut coir
- Spray bottle or small pitcher for moistening bedding
- 1 lb red wiggler worms, usually $40-$60 shipped in 2026
- Small hand rake, scoop, or garden trowel
- Optional: coconut coir brick, pH-neutral crushed eggshells, thermometer
Expect a DIY setup to cost about $25-$75 before worms if you already own a drill. With worms included, most homeowners land around $65-$135. A ready-made tray system commonly runs $80-$150 before or including starter accessories, depending on size and brand.
Use the right worms
Do not dig ordinary earthworms from the yard and put them in a kitchen bin. Composting bins use red wigglers, commonly identified as Eisenia fetida or Eisenia andrei. They feed near the surface, tolerate crowded organic bedding, and process food scraps better than deep-burrowing garden worms.
Recommended Free Tools
How to Build the Bin
Start with a clean tote. Drill air holes around the upper sidewalls and lid using a 1/8-inch or 1/4-inch bit. Space holes every 2 to 3 inches. The bin needs oxygen, but it does not need large pest openings. If the tote will sit inside a second tray, drill a small number of drain holes in the bottom only if you are prepared to monitor liquid. Many indoor homeowners are better served by managing moisture carefully and avoiding bottom holes, because leachate inside cabinetry is a common failure point.
Add 4 to 6 inches of loose, damp bedding. The target moisture is the feel of a wrung-out sponge. When squeezed, bedding should hold together and feel damp, but it should not drip. Extension sources describe the proper worm-bin moisture range around 60-85%, with about 80% near optimum. In plain homeowner terms, too dry slows the system down; too wet creates odor, anaerobic pockets, and liquid.
Add the worms on top of the bedding and leave the lid off under a light for 15 to 30 minutes. The light encourages them to move down into the bedding. Then cover the surface with a dry layer of shredded cardboard or newspaper and close the lid.
Wait a day before the first feeding. Then bury a small amount of chopped fruit or vegetable scraps in one corner. Cover the food completely with 2 to 3 inches of bedding. Rotate the feeding location each time: left front, right front, left rear, right rear, center. This reduces uneaten pockets, fruit flies, and odor.
Rank #3

- Compact, High-Efficiency Footprint Designed to maximize composting capacity while minimizing floor space.
- Odor-Reducing System Composting worms consume food scraps quickly, helping reduce odors. An improved lid design with a built-in V-Board and coconut mat supports airflow and moisture balance.
- Moisture Management The V-Board helps retain moisture and maintain a comfortable environment for worms, supporting consistent composting performance.
- Worm Saver Tray Prevents worms and compost material from falling into the liquid collection area while improving airflow throughout the system.
- Protective Base Feet (“Shoes”) This is special design to adding some water to pevent ants going into the worm bin.
What to Put in an Indoor Compost Bin
A worm bin is best for plant-based kitchen scraps and small, manageable feedings. Chop large pieces into 1- to 2-inch chunks so the system can keep up. Smaller pieces decompose faster and are less likely to sit exposed.
Good materials for a worm bin
- Vegetable peels and trimmings
- Fruit scraps in moderate amounts
- Coffee grounds and paper coffee filters
- Tea leaves and plain tea bags without plastic mesh
- Crushed eggshells
- Small amounts of cooked plain grains or starches
- Shredded plain cardboard and paper egg cartons
- Dry leaves or coconut coir as bedding
Materials to avoid indoors
- Meat, fish, bones, and seafood shells
- Dairy products
- Fats, oils, and greasy foods
- Pet waste
- Glossy or coated paper
- Coal ash or charcoal ash
- Pesticide-treated yard waste
- Large amounts of citrus, onion, garlic, or spicy food
Every feeding should end with a cover layer of dry bedding. Keep a small container of shredded cardboard beside the bin. This one habit prevents most odor and fly problems.
Feeding Schedule and Maintenance
For a new 10- to 18-gallon worm bin with 1 lb of red wigglers, start with about 1 cup of chopped scraps once or twice per week. After 3 to 4 weeks, inspect how quickly the food disappears. If old scraps are mostly gone, increase gradually. If you can still see food from the previous feeding, pause.
Do not feed by the calendar alone. Feed based on what the bin has processed. A healthy bin smells earthy, not sour. Bedding should be damp and springy. Worms should stay below the surface when the lid is opened.
Free tools Windows power users keep installed
One-click scans. No signup required.
Once a week, check four things: moisture, smell, visible food buildup, and pest activity. Add dry bedding if the bin feels wet. Mist with water if bedding is dry and dusty. Bury exposed scraps immediately. If fruit flies appear, freeze fruit scraps for 24 hours before feeding and make sure food is buried under bedding.
Finished worm castings usually appear after 3 to 6 months, depending on bin size, temperature, feeding rate, and worm population. Castings look dark, crumbly, and soil-like. Because worm bins do not heat up like outdoor hot compost piles, finished material may contain viable seeds. Use it accordingly, especially around vegetable beds where volunteer plants may be a nuisance.
Odor, Flies, Escaping Worms, and Other Fixes
Indoor compost problems usually come from moisture imbalance, too much food, poor airflow, exposed scraps, or temperature stress. Do not solve every problem by adding more worms. Fix the conditions first.
| Problem | Likely Cause | Fix |
|---|---|---|
| Sour or rotten smell | Too wet, too much food, not enough air | Pause feeding, mix in dry cardboard, fluff bedding, remove obvious rotting food |
| Fruit flies | Exposed fruit scraps or overfeeding | Bury food 2-3 inches deep, freeze fruit scraps first, add dry cover bedding |
| Worms climbing walls | Too wet, too dry, too acidic, too hot, or too much food | Check moisture and temperature, add bedding, pause citrus and acidic scraps |
| Slow processing | Cold bin, large scraps, small worm population | Move to 65-75 degrees F area, chop scraps smaller, feed lightly |
| Liquid in tray | Excess moisture from food scraps | Drain tray, add dry bedding, reduce watery foods like melon |
| Mold on food | Food sitting too long | Feed less, chop smaller, bury deeper, rotate feeding zones |
If the bin smells bad, stop feeding until the old scraps are mostly processed. This is the correction many beginner guides miss. Adding more food to a stressed bin makes the problem worse.
Do these 3 things before closing this tab:
1Clear out junk files and repair common Windows errors2Scan for outdated or missing drivers - takes under a minute3Repair Windows errors before they cause bigger problemsRank #4

- 🌲【Rapid & Effective Vermicomposting】- The Blütezeit worm composter speeds up composting by breaking down organic waste quickly. It turns waste into nutrient-rich compost faster than traditional methods, giving you high-quality compost for your plants in less time.
- 🌲【Easy Setup & Durable】 - Crafted from high-quality PP material, this worm bin is built to last. Its simple design allows for easy stacking of trays, bedding, and worms, making it ideal for both beginners and experienced composters.
- 🌲【Odor Control】 - Our worm compost bin features optimal ventilation with air holes in each tray to ensure proper airflow, keeping odors at bay. With balanced composting environment and clear waste guidelines, you can enjoy a clean, odor-free composting experience.
- 🌲【Compact Yet Spacious】 - The Blütezeit worm farm features a compact design, making it ideal for both indoor and outdoor spaces like apartments, balconies, gardens, and kitchens. With a generous 13Gal (50L) capacity, it offers plenty of room for efficient composting without taking up much space.
- 🌲【All-in-One Composting Kit】 - Enhance your composting journey with our all-in-one kit, including a Turning Fork, Shovel, Soil Meter, Non-woven Fabric, Coco-coir Brick, Anti-slip Feet, Cup, and Spigot for worm tea. The Soil Meter ensures ideal moisture, pH, and light levels, while our detailed User Manual offers fun and easy step-by-step guidance for success compost. Worms NOT included.
Countertop Caddies, Bokashi, and Electric Units
A countertop caddy is the simplest place to start. Choose a 0.75- to 1.5-gallon container for most kitchens. Smaller bins force frequent emptying, which helps odor control. Larger bins are convenient for heavy cooks but can sit too long. Expect to pay $20-$60 for a common 2026 kitchen caddy, with stainless steel, dishwasher-safe bodies, tight lids, and filter systems at the higher end.
Bokashi buckets are sealed fermentation systems. They can handle a broader range of scraps than a worm bin, sometimes including small amounts of meat and dairy, but bokashi is not finished compost. The fermented material is acidic and must be buried in soil, added to a compost pile, or finished in a soil factory. Drain liquid frequently through the spigot and keep the lid tightly sealed. Oxygen exposure and standing liquid are the two biggest odor drivers.
Electric kitchen composters are popular because they reduce volume quickly. Most dry and grind food scraps. That can be useful in a kitchen, but the output is not the same as finished compost. Treat it as a dry amendment that needs to be cured in soil, added to an outdoor pile, or blended into an established composting process. Also confirm outlet location, cord routing, countertop clearance, heat, noise, and filter replacement cost before buying.
Independent reader supportYour contribution helps us test, update, and keep practical guides available for everyone.Safety, Permits, HOA, and Rental Notes
Small indoor worm bins, caddies, and bokashi buckets generally do not require building permits in a typical U.S. home. They are household containers, not plumbing fixtures or permanent waste systems. The permit conversation changes when a project includes electrical work, new cabinetry with outlets, exterior structures, graywater systems, or composting toilets. Composting toilets and waterless waste systems are a separate regulated category and should not be treated like a kitchen compost bin.
Outdated Drivers Are Slowing You Down
One free scan finds every outdated or missing driver and matches the right update for your exact hardware.Free scan · exact hardware matchPC Slower Than It Used to Be?
A free scan shows the junk files, broken settings and background clutter dragging Windows down - then fixes them in one click.Free scan · Windows 10 & 11For rentals, check the lease before keeping worms or fermented waste indoors. For condos and HOAs, review nuisance, pest, odor, balcony, and waste-storage rules. Even when composting is allowed, outdoor curing bins may be restricted. Apartments often do best with a small worm bin for plant scraps and municipal organics for overflow.
From a safety standpoint, keep bins away from toddlers, pets, forced-air registers, and stored chemicals. Do not store a compost bin beside paint, solvents, pesticides, or pool chemicals. Keep lids secure but not airtight for worm bins. Wash hands after handling bedding, scraps, or castings.
When to DIY and When to Hire a Pro
Most homeowners can build a simple worm bin in under an hour. DIY makes sense if the bin will sit on a pantry floor, laundry room shelf, basement corner, or under-sink tray with no cabinet modifications. The work is basic: drill ventilation holes, prepare bedding, add worms, and manage feeding.
Hire a pro or bring in a qualified handyman or carpenter when composting is part of a larger kitchen, mudroom, pantry, or garage project. Built-in pullouts, cabinet ventilation, stone countertop changes, electrical outlets for appliances, waterproof floor detailing, and pest-exclusion work all benefit from proper layout. A compost pullout should be removable, washable, and accessible. It should not be trapped behind plumbing, blocked by a disposal, or installed over unprotected particleboard.
Best Value
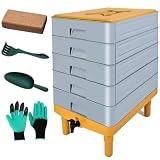
- LARGE CAPACITY COMPOST BIN: TOP XIAN Worm Composters are made of high-quality black PP plastic, the total capacity of 5 reusable worm trays is up to 100L. It comes with a faucet, which can be directly opened to let the fertilizer flow out.
- EFFICIRNT DECOMPOSITION: The large-sized worm bin can accelerate the conversion of organic waste into nutrient-rich compost, which is more convenient, faster and more efficient than traditional methods.
- EASY TO INSTALL AND USE: The five-layer composting bins can be easily stacked to add earthworms and waste, and the tray can also be easily removed for collection, which greatly enhances the experience of the composting journey.
- AIR VENTILATION AND ODOR REDUCTION: The closed design prevents odors from overflowing, and there is also proper ventilation to allow oxygen to enter and speed up decomposition. The odorless design makes this worm farm a good solution for small spaces.
- NO-WORRY AFTER-SALES SERVICES: The compost bin set includes a five-layer compost box, gloves, coconut bricks, a shovel, and a silicone scraper. If for whatever reason you are not absolutely satisfied with our outdoor compost bin, please get in touch, and we will make it right - guaranteed!
For remodels, we like to plan the scraps workflow the same way we plan trash and recycling. A practical kitchen might include a 1-gallon countertop caddy near the prep sink, a removable under-sink tray for daily collection, and a mudroom or garage-adjacent spot for a worm bin or bokashi bucket. If the home has raised beds, the outdoor finishing area should be close enough that emptying the system does not become a chore.
Step-by-Step Indoor Worm Bin Setup
- Pick the location. Choose a 55-75 degrees F area with easy access and no direct sun. Measure height, width, and door swing before buying a tote.
- Buy the bin. Use an opaque 10- to 18-gallon tote for most households. Add a secondary tray underneath.
- Drill ventilation. Add small holes around the upper sides and lid. Keep openings small enough to discourage pests.
- Prepare bedding. Add 4-6 inches of shredded cardboard, newspaper, coir, or dry leaves. Moisten until it feels like a wrung-out sponge.
- Add red wigglers. Use about 1 lb of composting worms for a typical starter bin. Let them settle into the bedding.
- Feed lightly. Start with 1 cup of chopped scraps once or twice per week. Bury food under 2-3 inches of bedding.
- Cover every feeding. Add dry bedding after food scraps. Keep extra shredded cardboard next to the bin.
- Inspect weekly. Check smell, moisture, food buildup, and temperature. Adjust before problems grow.
- Harvest castings. After 3-6 months, move finished material to one side and feed the other side so worms migrate before harvesting.
The Bottom Line
The best indoor compost bin is the one that fits your house, your cooking habits, and your destination for finished material. For true indoor composting, a worm bin is the most practical choice for most homeowners because it works at room temperature, uses no electricity, and produces usable castings. For simple scrap handling, a countertop caddy tied to outdoor composting or municipal organics may be enough. Bokashi and electric units can be useful, but both need a finishing plan.
Build the system like a small piece of home infrastructure. Use a removable bin, protect the floor or cabinet with a tray, keep it out of heat, feed it lightly, and cover every feeding with dry bedding. That is what separates a clean indoor compost setup from a smelly bucket of scraps.
Frequently Asked Questions
Can you really compost indoors without smell?
Yes, if you use the right system and manage moisture. A healthy worm bin smells earthy, not rotten. Odor usually means the bin is too wet, overfed, short on bedding, or low on airflow.
What is the best indoor compost bin for beginners?
For true composting, a 10- to 18-gallon worm bin with red wigglers is the best beginner setup. For scrap storage only, use a 0.75- to 1.5-gallon countertop caddy and empty it into outdoor compost or municipal organics.
How much does an indoor compost bin cost in 2026?
A DIY worm bin usually costs $25-$75 for supplies, plus $40-$60 for 1 lb of red wigglers. Ready-made worm composters commonly run $80-$150, countertop caddies $20-$60, and bokashi kits about $55-$75.
Can I put meat and dairy in an indoor compost bin?
Do not put meat, fish, bones, dairy, fats, or oils in a typical indoor worm bin. Bokashi systems can handle a broader range of scraps, but the fermented material still needs to be buried or finished in soil.
Where should I keep a worm compost bin indoors?
Keep it in a shaded, accessible place around 55-75 degrees F, such as a pantry, laundry room, utility room, conditioned basement, or under-sink cabinet with a tray. Avoid ovens, dishwashers, water heaters, HVAC registers, and hot garages.
The Tool Desk
Outbyte PC Repair FREEClear out junk files and repair common Windows errorsFree Scan →Outbyte Driver Updater FREEScan for outdated or missing drivers - takes under a minuteDriver Scan →How long does it take to get finished compost indoors?
A worm bin usually produces harvestable castings in about 3-6 months, depending on temperature, bin size, feeding rate, and worm population. Feed lightly at first and pause feeding if old scraps are still visible.
Quick Recap
Product prices and availability are accurate as of the date/time indicated and are subject to change. Any price and availability information displayed on Amazon at the time of purchase will apply.