The Tool Desk
Outbyte PC Repair FREERepair Windows errors before they cause bigger problemsFix Now →Outbyte Driver Updater FREEFix the driver behind crashes, sound loss and screen glitchesFind Drivers →Inside measurements are where small mistakes become expensive. A tape measure is great for general layout, but when you push it into a cabinet opening, bend the blade into a corner, or try to add the tape body length in your head, a 1/16-inch error can sneak in fast. That is enough to make a shelf bind, a cabinet filler show a crooked reveal, or a piece of trim need to be remade.
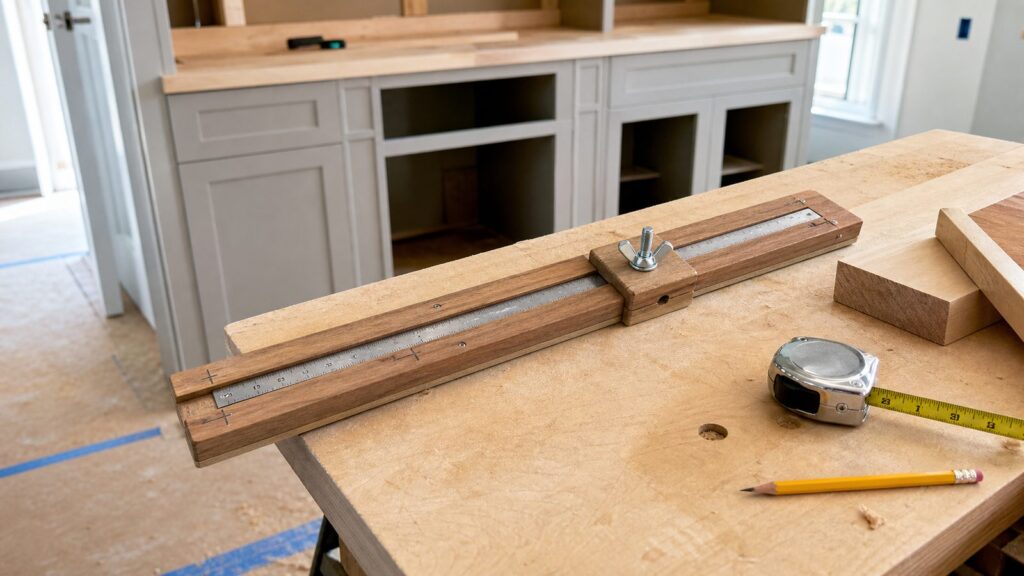
A DIY measuring stick solves that problem by physically spanning the inside opening. Instead of reading a bent tape, you extend two straight pieces until they touch both sides, lock or mark that position, then transfer the exact size to your workpiece or verify it against a rule on a flat bench. On our job sites, we use this idea constantly for cabinet fillers, shelves, drawers, closet parts, window stools, trim returns, and built-ins.
The best part is cost. A basic inside measuring stick can be made from scrap hardwood, two inexpensive steel rules, a bolt, washers, and a wing nut for roughly $5 to $25. A more durable version using aluminum bar stock, etched rules, and better hardware may land around $25 to $60. Either version can outperform a $30 tape measure in the specific job of capturing tight inside dimensions.
Why Inside Measurements Are So Easy to Get Wrong
Most measuring mistakes are not caused by carelessness. They happen because the tool is being asked to do something awkward. A standard tape measure has a flexible blade, a sliding hook, a curved profile, and a case that gets in the way when you measure between two fixed surfaces.
What’s actually slowing this PC down?
Pick the symptom - the matching free tool is one click away.
#1 Best Overall

- [INCH/MM Conversion]: One button can quickly convert two measuring unit (INCH/MM). Measuring Range:0 - 150mm (6") / Resolution: 0.01mm (0.0005")/Accuracy: ±0.02mm (0.001")
- [Stainless Steel Material]: The vernier caliper is made of high-strength stainless steel, which is waterproof, stain-proof and oil-proof. The ergonomic design brings you a comfortable feeling.
- [Large and Clear Display Screen]: Large LCD display gives you a clear reading. The thumb rolling and locking screw provide easy sliding, accurate positioning, and fine adjustment.
- [Multifunctional Use]: The digital micrometer can easily and accurately measure internal, external, height and depth dimensions.
- [Automatically shut off]: When you have no action on the dial caliper, it can automatically shut off after 4 minutes.
For example, say you are measuring the inside width of a closet for a shelf. You push the tape hook into the left wall and bend the blade up into the right wall. The reading might look like 47 7/8 inches, but the last inch of the tape is curved. If you read the outside of that curve, the number can be short. If the hook is not seated cleanly, the number can be long. If the drywall bows inward in the middle, the number you took at the front may not match the number at the back.
Tape measures also rely on a hook that intentionally moves. That movement accounts for the thickness of the hook when switching between inside and outside measurements. On a good tape, it works well. On a dropped, worn, or dirt-packed tape, it can introduce error. For rough framing, that may not matter. For finished millwork, it does.
There is also the tape body method. Many tape measures list the case length, often around 3 inches. In theory, you can place the case against one wall, extend the blade to the other wall, then add the body length. That can work, but it depends on the case sitting square, the blade staying straight, and the person adding correctly. It is not the method we want for a $700 cabinet door, a finished walnut shelf, or a painted filler that has to land with an even 1/8-inch reveal.
What a DIY Measuring Stick Does Better
A measuring stick captures the actual space. Two straight pieces slide past each other until their ends touch the inside faces you are measuring. Once that position is locked, taped, or marked, you have a physical reference for the opening. You can carry that reference to the saw, mark the part directly, or lay it against a steel rule on a flat surface.
This is transfer accuracy. You are not relying on your ability to read a curved tape in a corner. You are transferring the real opening to the part that must fit that opening.
Carpenters have used story sticks and story poles for generations because they reduce repeated layout errors. A story stick can mark shelf heights, cabinet pull locations, tile courses, siding exposures, stair parts, window trim reveals, and outlet heights. The inside measuring stick is a close cousin: it is built to capture an opening rather than repeat a layout pattern.
For a homeowner, the value is practical. If you are building three closet shelves, measuring each opening with a tape and writing down three numbers is one workflow. Using a stick to capture each opening, labeling the stick or painter’s tape, and transferring the cut directly is more reliable. It also shows you when the closet is not consistent from top to bottom.
Where This Tool Is Worth Using
Use an inside measuring stick anywhere the finished part must fit between two fixed surfaces. It is especially useful when the part will be visible, tight, painted, stained, or expensive to remake.
Good uses around the house
Cabinet fillers are a prime example. A filler strip might need to fit between a cabinet box and a wall that is not straight. If the space is 2 1/8 inches at the top, 2 inches in the middle, and 1 15/16 inches at the bottom, the smallest dimension controls whether the piece will slide in. The shape also tells you whether you need a scribed edge.
Shelves are another common case. Closet walls are rarely perfectly parallel. A shelf that fits the front of the closet may bind at the back. We measure front, middle, and back, then cut for the smallest controlling dimension and decide how much clearance or scribe is appropriate.
Window stools, trim returns, drawer parts, built-in face frames, appliance panels, floating shelves, and mudroom cubbies all benefit from the same method. When the opening is finished and visible, a physical stick removes guesswork.
When a tape measure is still fine
A tape measure remains the everyday tool for rough layout, framing, lumber cuts, wall lengths, and general estimating. In 2026, common tape measures run from about $4 to $70 at Lowe’s and about $10 to $200 at Home Depot. Most homeowners do well with a 25-foot or 30-foot pro-grade tape in the $20 to $35 range.
The point is not to replace the tape. The point is to stop using the tape for the jobs it handles poorly. Use the tape for layout. Use the measuring stick when the fit matters.
Materials and Cost for a DIY Inside Measuring Stick
You can build this tool in 20 to 45 minutes with basic supplies. For occasional homeowner use, wood strips and painter’s tape marks are enough. For repeated work, add steel rules and a clamp block so the tool locks cleanly and reads consistently.
| Option | Typical 2026 Cost | Best For | Notes |
|---|---|---|---|
| Scrap wood stick with pencil marks | $0-$10 | One-time shelf or closet projects | Fast, cheap, but less durable |
| Two wood strips with bolt, washers, and wing nut | $5-$25 | DIY built-ins, trim, cabinet fillers | Locks the dimension before removal |
| Two 6-inch steel rules with shop-made clamp | $10-$25 | Small openings, drawers, trim returns | Two $4.49 rules put the measuring portion near $9 before hardware |
| Aluminum bar stock with etched rules and knobs | $25-$60 | Frequent use and job-site durability | More stable and less prone to dents |
| Laser distance measurer | $24-$645 | Room dimensions, estimating, documentation | Useful, but not a substitute for physical transfer on finish parts |
For a basic wood version, use two straight strips about 1/4 inch to 3/8 inch thick and 3/4 inch to 1 inch wide. Hardwood offcuts work well. Plywood strips can work if they are straight and smooth. Small square dowels or basswood strips usually cost only a few dollars, and dowel kits are commonly around $6.
Rank #2

- Precise measurement: Measurement range: 0 - 6''/0 - 150 mm; Resolution: 0.01”/0.1 mm; Accuracy: +/- 0.2 mm/0.01”. Perfect and accurate caliper measuring tool for household/DIY measurement
- 4 measuring modes: This digital caliper can be used to Measure inside and outside diameter, depth and step with two sets of jaws and a probe
- Inch/mm conversion: One button quick switch between two units: inch and millimeter, definitely save your time. The buttons are made of rugged plastic carbon fiber composites, durable and portable
- Zero setting function: The smart design allows you to set zero with an easy touch of a button and start a new measurement at any point of the scale, ideal for differential measuring
- Large LCD screen & auto off: The large and easy-to-read LCD display helps you get precise results quickly and easily, auto shutdown for saving battery after 5 minutes if without operation
For most cabinet and shelf work, make the two pieces 24 to 36 inches long. That gives you enough overlap for common closet, cabinet, and window openings. For wider closets or room-scale work, build a longer version from 48-inch strips, but keep it stiff. A flimsy stick defeats the purpose.
Free tools Windows power users keep installed
One-click scans. No signup required.
How to Build a Simple Sliding Measuring Stick
The simplest reliable version uses two straight strips that overlap and slide. A small clamp block, thumb screw, or wing nut locks them together. The ends must be square because those ends are what touch the surfaces being measured.
Tools and materials
- Two straight wood strips, 24 to 36 inches long
- One 1/4-inch machine screw or carriage bolt, 1 to 1 1/2 inches long
- Two washers
- One wing nut or thumb knob
- Drill and 1/4-inch bit
- Small square
- Fine pencil or marking knife
- Sandpaper, 120 to 180 grit
- Optional: two 6-inch steel rules
Build steps
First, cut both strips straight and square. Do not rush this step. If the ends are out of square, the tool will lie to you every time it touches a wall or cabinet side.
Second, sand the faces lightly so the strips slide without grabbing. They should move smoothly but not wobble side to side.
Third, overlap the strips by at least 6 inches. Drill a 1/4-inch hole through the overlap. If you want more adjustability, drill a short slot in one strip instead of a round hole. A slot allows the stick to extend farther while still locking with the same bolt.
Fourth, install the bolt with a washer on each side and tighten it with a wing nut or thumb knob. The stick should slide when loose and hold firmly when tightened.
Fifth, label the ends. Mark one end “left” or “bottom” and the other “right” or “top.” This sounds fussy, but orientation matters when an opening is out of square or when you are transferring a measurement from a specific location.
If you add steel rules, mount them so they overlap and can be read against each other. One reliable method is to read from a known offset. For example, if one rule starts at the 10-inch mark when overlapped, you read the visible number and add 10 inches. This style is excellent for small cabinet and drawer measurements because it gives you a direct reading without bending a tape.
How to Measure an Inside Opening Accurately
The right technique matters as much as the tool. A measuring stick can capture a bad number if you place it in the wrong spot or forget to check whether the opening changes.
Do these 3 things before closing this tab:
1Clear out junk files and repair common Windows errors2Fix the driver behind crashes, sound loss and screen glitches3Repair Windows errors before they cause bigger problemsStep 1: Choose the actual fit line
Decide where the part will sit. A shelf may sit 12 inches deep in a closet, not at the front edge. A cabinet filler may fit against the face frame, not the back of the cabinet. A window stool may run between finished jambs, not rough framing.
Put the measuring stick exactly where the finished part needs to fit. If the part is 15 inches deep, measure at the front, middle, and back of that 15-inch depth.
Step 2: Extend the stick until both ends touch
Hold one end firmly against one side of the opening. Slide the other piece until it touches the opposite side. Keep the stick level and square to the surfaces unless you are intentionally measuring along an angle.
Do not force the stick. If you compress drywall, flex thin cabinet sides, or jam into paint buildup, you will oversize the part. The stick should touch, not wedge.
Quick wins for a faster PC:
Clear out junk files and repair common Windows errorsFree Scan →Scan for outdated or missing drivers - takes under a minuteDriver Scan →Step 3: Lock it before removing it
Tighten the wing nut or clamp while the stick is still in the opening. Then remove it carefully. If you bump the sliding piece before it is locked, start over. On high-value work, we often verify the same opening twice before cutting the finished part.
Step 4: Verify on a flat surface
Lay the locked stick on a bench and read it against a steel rule or tape. Better yet, transfer it directly to the material. For finish carpentry, use a sharp knife mark or a fine pencil. A fat marker line can be close to 1/16 inch wide, which is the same amount of error you are trying to avoid.
Rank #3
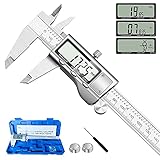
- 【STAINLESS STEEL MATERIAL】The vernier caliper is made of high-strength stainless steel and is waterproof and dirt-proof. The service life of this stainless steel digital caliper is longer than that of calipers with plastic or carbon fiber parts.
- 【ACCURATE MEASUREMENT AND ZERO SETTING】This digital caliper glides smoothly. Measuring range: 0 -6" / 0-150mm; Accuracy: ± 0.001"/ 0.02mm; Resolution: 0. 0005"/0. 01mm. At the same time, the smart design allows you to easily reset to zero by pressing a button and start a new measurement at any point on the scale, which is very suitable for differential measurement.
- 【4 MEASUREMENT MODES】The digital caliper has 4 measurement modes, which can be used to measure inside and outside diameter, depth, and step with two sets of jaws and a probe. Multiple measurement modes can bring more usage scenarios to people, and the measurement process is also very convenient.
- 【UNIT CONVERSION & LARGER LCD SCREEN】These Digital Calipers have a one-key button to quickly switch from inches (inch), fractions (F), millimeters (mm). The 6" digital caliper has a large, easy-to-read LCD DISPLAY which is easy to use and read even under strong sunlight. It will automatically turn off after 5 minutes of non-use to save power.
- 【Wide Applications】 Compared to the ordinary rulers, this stainless steel caliper can measure not only length but also caliber and depth, allows you to measure circular and cylindrical objects, more functions and better performance will satisfy you. It has always been used by professionals and hobbyists alike, jewelers, hobbyists, woodworkers, machinists, DIY, automotive mechanics, and more.
Step 5: Label immediately
Label every measurement as soon as you take it. Use painter’s tape, a cut sheet, or the back of the workpiece. Include the room, opening number, orientation, and what the number represents. Write “finished opening,” “rough opening,” or “finished part size.” Those are not the same thing.
On professional remodels, we photograph the stick in the opening and keep the measurement sheet in the project file. It reduces disputes and catches transcription mistakes before material gets cut.
PC Slower Than It Used to Be?
A free scan shows the junk files, broken settings and background clutter dragging Windows down - then fixes them in one click.Free scan · Windows 10 & 11Crashes, No Sound, or Screen Glitches?
Random freezes, missing sound and display glitches usually trace back to one bad driver. Find and replace yours safely.Free scan · under a minuteThe Three-Measurement Rule
One inside measurement is rarely enough. Houses move, drywall bows, framing twists, and cabinets settle. Even new construction can have small variations. Before cutting shelves, trim, fillers, or built-in parts, take at least three measurements.
For a vertical opening, measure top, middle, and bottom. For a horizontal span, measure left, center, and right. For a closet shelf, measure front, middle, and back. If a part has to slide into place, build to the smallest controlling dimension, then decide whether to leave clearance or scribe for a tight visual fit.
Here is a common example. A closet opening reads 48 inches at the front, 47 15/16 inches in the middle, and 47 7/8 inches at the back. A shelf cut to 48 inches may not install without damaging paint or drywall. A shelf cut to 47 13/16 inches gives you about 1/16 inch of working clearance at the tightest point. If the shelf edge will be visible, you may still scribe or caulk the front reveal depending on the finish level.
For cabinet fillers, the smallest dimension tells you what will physically fit. The largest dimension tells you how much taper, reveal adjustment, or scribing you may need. Those are different decisions. Do not average the numbers. Average measurements make average-fitting parts, and average-fitting parts are usually wrong at both ends.
Recommended Free Tools
Check Square Before You Trust the Number
A correct width does not mean the opening is square. This is one of the most common homeowner mistakes. You can measure an opening at exactly 36 inches wide, cut a perfect 36-inch part, and still have a poor fit because the sides are racked.
To check square, measure the diagonals. Go from the top left corner to the bottom right corner, then from the top right corner to the bottom left corner. If the two diagonal measurements match, the opening is square. If they differ by 1/8 inch, 1/4 inch, or more, expect scribing, tapered cuts, or reveal adjustments.
For cabinets and built-ins, also check the wall shape. Use a straightedge or 4-foot level against the wall. A dimension can be correct while the wall still bows in the middle. That bow may require a scribed filler or a relief cut on the back edge of a shelf.
We treat measurements as geometry, not just numbers. Width, height, depth, square, level, plumb, and wall shape all affect the final fit.
Measuring Stick vs Tape Measure vs Laser Measure
Each measuring tool has a place. The mistake is expecting one tool to handle every situation.
| Tool | Best Use | Typical 2026 Cost | Weakness |
|---|---|---|---|
| DIY measuring stick | Inside openings, shelves, fillers, drawers, trim, built-ins | $5-$25 basic, $25-$60 durable | Limited range unless built long |
| Tape measure | General layout, lumber cuts, framing, room checks | About $20-$35 for many pro 25-30 ft tapes | Can bend, hook can shift, case length must be added for inside measurements |
| Steel rule | Short, precise bench measurements | About $4.49 for a 6-inch stiff rule | Too short for many openings |
| Laser distance measurer | Room dimensions, estimating, documentation, long spans | About $24-$645; many common models around $75-$149 | Can struggle with glossy, transparent, reflective, irregular, or very small targets |
A laser distance measurer is useful for room-scale dimensions. If we are estimating flooring, checking wall lengths, documenting ceiling height, or building an initial plan, a laser saves time. Entry pocket lasers often run around $30 to $45. Midrange models from major brands commonly sit around $94 to $149. Longer-range or Bluetooth models can run around $219 to $289, and high-end units can go much higher.
But a laser does not replace a physical transfer stick for cabinet and trim fitting. Lasers need a reliable target surface. Glossy tile, glass, mirrors, shiny metal, irregular texture, narrow edges, and angled trim can produce unreliable readings. A laser also gives you a dimension; it does not show you the bowed wall or transfer the exact fit to a board.
For long room dimensions, combine tools. Use the laser for rough room size, a tape for layout, a level or straightedge for bows and high spots, and a measuring stick for critical fit points.
Windows Errors? Fix Them Before They Spread
Repair common Windows errors and clear accumulated junk for a smoother, more stable PC - no reinstall needed.Free scan · no reinstallCrashes, No Sound, or Screen Glitches?
Random freezes, missing sound and display glitches usually trace back to one bad driver. Find and replace yours safely.Free scan · under a minuteCommon Mistakes That Ruin Inside Measurements
The first mistake is bending a tape into an inside corner and reading the curve. That method may be acceptable for a rough closet rod, but it is not reliable for finished carpentry.
Rank #4
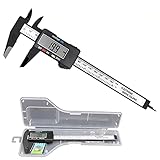
- [4 measuring methods and safety]: Digital calipers can be used to measure inner and outer diameters, depths and steps. The pins of the caliper are made of plastic, so there is no short circuit when measuring the battery or inside. Contact with the positive and negative poles. The safety is higher than that of metal calipers.
- [Measurement accuracy]: measurement range: 0-6"/0-150mm; resolution: 0.01"/0.1mm; accuracy: ±0.2mm/0.01. A perfect and accurate caliper measuring tool, suitable for home/jewelry/DIY measurement, please pay attention. This caliper is not suitable for professionals with high technical accuracy.
- [Inch/mm conversion]: Use Simhevn digital caliper to switch freely between inches and millimeters. The switching function of the two units can meet different needs. It is more convenient and widely used for measuring the value you want.
- [LCD and automatic shutdown]: High-quality and trustworthy digital calipers, LCD display screen reading is more convenient, quick and easy to get accurate results, open automatically turn on, and automatically turn off after 5 minutes of use. It is powered by a battery and includes a pre-installed battery and a spare battery.
- [Zero reset function]: Intelligent design, you can easily reset to zero by pressing the "Zero" button at any position of the measurement, and start a new measurement. It is very suitable for differential measurement, convenient for measurement, and easy to carry.
The second mistake is measuring once. Openings are not perfectly consistent. Three measurements often reveal the real problem before you cut.
The third mistake is forgetting clearance. A shelf cut to the exact tightest dimension may be technically accurate and still hard to install. Paint, wall texture, humidity, and a slightly tilted install angle can all create friction. For many painted closet shelves, 1/16 inch to 1/8 inch of total clearance is practical. For stain-grade built-ins, the clearance strategy depends on whether the edge will be scribed, covered by trim, or left exposed.
The fourth mistake is confusing the opening size with the part size. A finished opening of 30 inches does not automatically mean the finished part should be 30 inches. You may need reveal, clearance, caulk space, expansion room, or scribe allowance.
The Tool Desk
Outbyte PC Repair FREEClear out junk files and repair common Windows errorsFree Scan →Outbyte Driver Updater FREEScan for outdated or missing drivers - takes under a minuteDriver Scan →The fifth mistake is unlabeled measurements. “Bedroom shelf 47 7/8” is not enough if there are three bedrooms and each shelf has a front and back dimension. Good labels prevent wrong cuts.
The sixth mistake is ignoring diagonals. Square matters for doors, drawers, cabinet faces, window stools, and built-in panels. Measure diagonals before assuming parallel sides tell the whole story.
Independent reader supportYour contribution helps us test, update, and keep practical guides available for everyone.When to DIY and When to Hire a Pro
A DIY measuring stick is absolutely worth making for low-risk finish projects. Closet shelves, pantry shelves, simple trim returns, utility shelving, garage storage, and paint-grade filler strips are good homeowner projects if you have a saw, patience, and a way to make clean cuts.
DIY also makes sense when the material is inexpensive. If a $20 board is wrong, the lesson is annoying but manageable. If a $2,500 cabinet panel or custom countertop is wrong, that is a different risk profile.
Hire a pro when the measurement controls expensive, ordered, or hard-to-replace material. Custom cabinets, built-in bookcases, stair parts, inset doors, stone countertops, large window trim packages, and stain-grade millwork all have little tolerance for casual measuring. Professional carpentry labor varies too much by region and project scope to quote as one national number, but the cost drivers are clear: trip minimums, number of openings, complexity, shop drawings, finish level, and the cost of remaking parts if measurements are wrong.
Also hire a pro when the project involves structure, electrical, plumbing, HVAC, egress, fire separation, or changes to the building envelope. Measuring accurately is only one part of the job. The project still has to be built legally and safely.
Safety and Permit Notes for Homeowners
Making a measuring stick does not require a permit. Installing a simple closet shelf or replacing interior trim usually does not trigger a building permit in many jurisdictions, but local rules control. The 2024 International Residential Code includes categories of work that may be exempt from permits, but cities and counties can amend and enforce their own requirements.
Once the measuring project becomes a remodel, permit costs can become material. In 2026, Angi reports building permits commonly running about $525 to $3,114, with simple permits around $150 and complex renovations up to about $8,500. HomeAdvisor reports a normal range of about $530 to $3,040 and an average near $1,650.
Recommended Free Tools
Permit cost depends on jurisdiction, project valuation, square footage, structural scope, electrical work, plumbing work, mechanical work, plan review, inspections, certificate of occupancy requirements, renewals, expeditor fees, and whether after-the-fact permits are needed.
As a practical rule, cosmetic trim and simple storage are usually low-risk. Moving walls, adding openings, changing stairs, altering electrical outlets, modifying plumbing, enclosing space, or changing structural members is not the same category. Before starting that kind of work, check your local building department.
For tool safety, clamp small parts before drilling, keep hands clear of saw blades, wear eye protection, and use a sharp blade for clean finish cuts. A measuring stick improves accuracy, but it does not make rushed cutting safe.
A Job-Site Measuring Workflow That Works
Here is the workflow our crews use when the fit matters.
Do these 3 things before closing this tab:
1Clear out junk files and repair common Windows errors2Fix the driver behind crashes, sound loss and screen glitches3Repair Windows errors before they cause bigger problemsBest Value

- Large LCD display
- Spring-Loaded travel
- Metal Alloy Jaws, Chrome finish
- Inch, Metric and Fractional Readings, Hold Function
First, assign each opening a name. For example: “Laundry built-in, bay 1,” “Primary closet, left shelf,” or “Kitchen filler, range wall.” Write that name on painter’s tape near the opening and on the cut sheet.
Second, take three measurements at the actual fit line. For a shelf, that may be front, middle, and back. For a vertical filler, that may be top, middle, and bottom.
Third, check diagonals if the part has to look square in the opening. If diagonals are off, note the difference. Do not hide that information from yourself.
Fourth, check the wall or cabinet side with a straightedge. If the surface bows, note whether the piece needs to be scribed.
Fifth, record the finished opening size separately from the finished part size. Example: “Opening: 47 7/8 inches tight at back. Part: 47 13/16 inches, paint-grade shelf, 1/16 inch total clearance.”
Sixth, transfer the dimension with a knife mark or fine pencil. Cut slightly proud only if you plan to plane, sand, or scribe to final fit. Do not leave extra material without a plan for removing it accurately.
Seventh, dry-fit before finishing. Paint, stain, edge banding, and clear coat can add just enough thickness to change a tight fit. If the piece is already snug raw, it may be too tight after finishing.
Bottom Line
A DIY measuring stick is one of the cheapest accuracy upgrades a homeowner can make. For $5 to $25, you can build a tool that captures inside openings more reliably than a bent tape measure. It is especially useful for shelves, cabinet fillers, drawers, window stools, closet components, trim returns, and built-ins.
What’s actually slowing this PC down?
Pick the symptom - the matching free tool is one click away.
The real advantage is not the stick alone. It is the measuring discipline that comes with it: take three readings, label the location, check diagonals, account for clearance, verify wall shape, and separate opening size from finished part size. That is how small measurements become clean-fitting work.
Frequently Asked Questions
What is a DIY measuring stick used for in home projects?
It is used to capture inside dimensions between two fixed surfaces, such as cabinet sides, closet walls, window jambs, built-in openings, drawer spaces, and trim returns. It helps transfer the real opening size without bending a tape measure into a corner.
How do you measure inside dimensions without bending a tape measure?
Use two straight sliding sticks. Place one end against one side of the opening, extend the other end until it touches the opposite side, lock the sticks, then transfer that length to the workpiece or read it against a steel rule on a flat surface.
Is a story stick more accurate than a tape measure?
For inside measurements and repeated layout marks, it can be more reliable because it transfers the physical dimension instead of depending on a curved tape blade, hook movement, or mental addition of the tape body length.
When should I use a laser measure instead of a measuring stick?
Use a laser measure for room dimensions, estimates, ceiling heights, and documentation. Use a measuring stick for critical fit points such as shelves, trim, cabinet fillers, drawers, and built-ins where the part must fit between fixed surfaces.
How many measurements should I take before cutting shelves, trim, or cabinet parts?
Take at least three measurements. For vertical openings, measure top, middle, and bottom. For horizontal spans, measure left, center, and right or front, middle, and back. Build to the smallest controlling dimension when the part must slide into place.
Do I need a permit for built-ins, closet shelving, or interior trim work?
Simple shelves and cosmetic trim often do not require a permit, but local rules control. If the work affects structure, electrical, plumbing, HVAC, egress, or walls, check with your local building department before starting.
Quick Recap
Product prices and availability are accurate as of the date/time indicated and are subject to change. Any price and availability information displayed on Amazon at the time of purchase will apply.
Free tools Windows power users keep installed
One-click scans. No signup required.