What’s actually slowing this PC down?
Pick the symptom - the matching free tool is one click away.
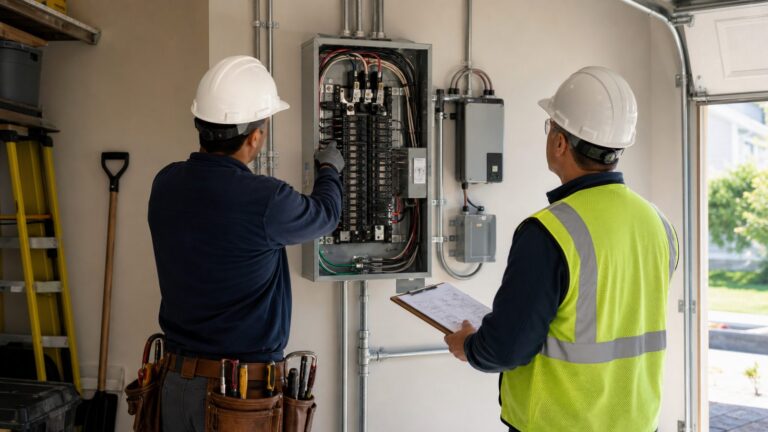
An outlet hole in drywall looks like a small repair, but it is not always just a drywall problem. If there are wires, splices, or an electrical box in that opening, the first job is electrical safety and code compliance. If the box and conductors have been properly removed back to the source, then the remaining single-gang opening can be patched like any other small-to-medium drywall hole.
On our job sites, we separate this repair into two clear paths: wires present means stop and keep the box accessible or call an electrician; no wires and no active box means patch the drywall. That decision matters more than the patch style. A perfect drywall finish is still a bad repair if it hides an active junction box behind the wall.
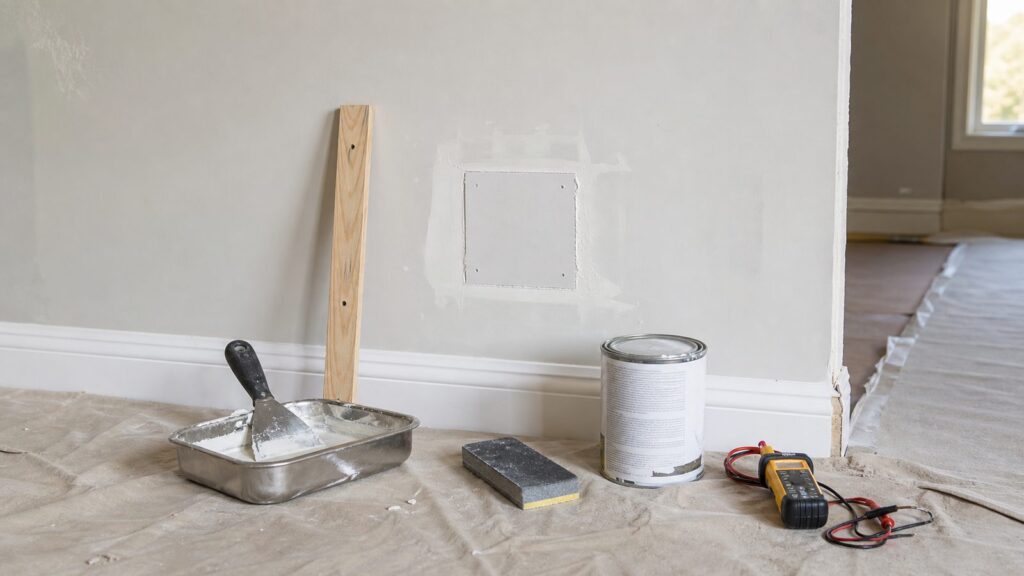
For most homeowners, the best durable repair is to square up the opening, install a wood backing strip, screw in a matching piece of drywall, tape the seams, apply two or three thin coats of joint compound, sand lightly, prime, texture if needed, and paint to a natural wall break. A California patch can also work well for a clean single-gang hole. Adhesive mesh alone is usually not our first choice for this size because it can leave a raised outline or crack later.
First Decision: Is This a Drywall Repair or an Electrical Repair?
Before you cut, mud, or paint anything, determine what is behind the outlet opening. A former outlet location may have one of three conditions:
#1 Best Overall

- Complete Repair Kit: Contains 1 pieces repair putty(8.5oz), 2 inch wall repair patches(2pcs), 4 inch wall repair patches(1pcs), 2 pieces of sandpaper, and 4 plastic scrapers.
- Waterproof Formula: The drywall repair kit contains a waterproof wall mending agent that dries quickly and leaves no residue.
- Strong Adhesion: Drywall repair patches are made from quality aluminum, making them lightweight yet strong and durable for long-lasting performance.
- Multipurpose: Wall repair patch is suitable for repairing most damaged surfaces around the home, kitchen, or office building, as well as factories and other industrial facilities.
- Ideal for DIY home renovations: Whether you're an experienced pro or a beginner, our wall patch repair kit makes wall repair a breeze, enhancing the beauty of your home.
- Active outlet or live conductors: This is electrical work first. Do not patch over it.
- Abandoned box with wires or splices inside: The box must remain accessible with an approved cover, or an electrician needs to remove or reroute the wiring properly.
- Empty hole after the box and cable were lawfully removed: This can usually be treated as ordinary drywall repair.
The National Electrical Code is commonly referenced here because boxes containing wiring must remain accessible without removing building finish. NEC 314.29 addresses accessibility for boxes with conductors, and NEC 314.25 is commonly cited for completed boxes needing covers, device covers, canopies, or similar approved covers. In plain job-site terms: do not bury a live, spliced, or wiring-containing electrical box behind drywall.
If a box still has cable entering it, even if the outlet device is gone, assume it is not ready for drywall until verified. A blank wall plate may be the correct finish if the box contains wiring that must remain accessible. If you want the opening gone entirely, hire a licensed electrician to remove the circuit conductors back to their lawful source or reroute them into an accessible box.
Safety Checks Before You Patch
Start with the power off at the breaker and test before touching anything. A non-contact voltage tester is useful, but it is not the only check we rely on. Use a receptacle tester if the device is still installed, verify the breaker label, and confirm the circuit is dead at the opening. In older houses, mislabeled panels and shared circuits are common enough that guessing is not acceptable.
If you are not comfortable proving that the circuit has been removed or made safe, bring in an electrician. The cost of that visit is small compared with the risk of creating a hidden electrical hazard inside a finished wall.
Free tools Windows power users keep installed
One-click scans. No signup required.
What to Document
For real estate prep, rental turns, insurance work, or any job where another person may question the repair later, take photos before closing the wall. Photograph the open wall, the absence of conductors if the box was removed, and any electrician work order or permit record. We do this because finished drywall hides the evidence. A few photos can prevent a future buyer, inspector, or property manager from wondering whether an electrical box was buried.
Tools and Materials for an Outlet-Sized Drywall Patch
Most interior outlet holes are based on a single-gang electrical box opening, roughly 2 inches by 3 inches at the box, but the damaged drywall area is often larger after the box is removed. Plan for a patch area closer to 4 inches by 6 inches once you square the edges.
For a standard backing-strip repair, gather:
- Non-contact voltage tester and receptacle tester
- Screwdriver, utility knife, drywall saw or keyhole saw
- Tape measure, pencil, and straightedge
- Drywall scrap matching the existing wall thickness, commonly 1/2 inch for many interiors
- 5/8-inch drywall if the wall is part of a rated assembly, garage separation, ceiling, or commercial wall where that thickness is present
- Wood backing strip, usually 1×2, 1×3, plywood, or furring strip cut 2 to 4 inches longer than the hole
- Drywall screws, typically 1-1/4 inch for 1/2-inch drywall over wood backing
- Paper tape, fiberglass tape, or the paper face of a California patch
- Setting-type joint compound for the first coat if speed matters
- Lightweight or all-purpose joint compound for finish coats
- 4-inch, 6-inch, and 10- or 12-inch drywall knives
- 120- to 220-grit sanding sponge or screen
- Primer, matching paint, and texture material if the wall is textured
- Safety glasses and a NIOSH-approved dust mask or respirator for sanding
Check wall thickness before cutting the patch. Many homes use 1/2-inch drywall on interior walls, but older homes, plaster-over-drywall, garages, multifamily separations, and some remodel conditions can be different. If the patch sits proud or recessed, the finish work becomes harder and more visible.
Best Patch Methods for an Outlet Hole
There are three common ways to patch this opening. The right one depends on how clean the hole is, how much wall texture exists, and how durable the repair needs to be.
Recommended Free Tools
| Patch method | Best use | Strength | Finish risk | Typical DIY material cost |
|---|---|---|---|---|
| Drywall insert with wood backing | Most outlet holes after box removal | High | Low when feathered properly | $15-$60 if basic tools are owned |
| California or butterfly patch | Clean single-gang holes with sound surrounding drywall | Medium to high | Low to medium; paper edges must be buried thinly | $15-$40 |
| Adhesive mesh patch | Very shallow cosmetic repairs or temporary fixes | Medium | Higher risk of a raised outline | $10-$30 |
For a professional result, we usually choose the wood backing method. It gives the drywall plug real support, lets us fasten the patch securely, and reduces movement that can crack the compound. A California patch is efficient and clean when the opening is neat, but it still requires broad feathering. The patch type does not replace finish skill.
Step-by-Step: Patch an Outlet Hole With Backing and Drywall
1. Verify the Electrical Condition
Turn off power, test the opening, and confirm there are no wires, splices, or electrical components that need to remain accessible. If the box still contains conductors, install an approved blank cover or call an electrician. Do not continue with drywall until the opening is legally safe to close.
Rank #2

- Package includes 12 pieces of drywall repair patch in three different sizes (8 pieces of 4-inch, 2 pieces of 6-inch and 2 pieces of 8-inch), 2 pieces of sandpaper (240 grit), and 2 plastic scrapers.
- Bates drywall repair patches are made from quality aluminum, making them lightweight yet strong and durable for long-lasting performance.
- The self-adhesive backing makes it easy to apply the patch to the wall, ensuring good adhesion to nearly any kind of surface.
- Bates wall repair patch is suitable for repairing most damaged surfaces around the home, kitchen, or office building, as well as factories and other industrial facilities.
- To use this product effectively, first clean and dry out the hole you want to patch before peeling back the backing and applying the drywall patch. Evenly spread out plaster with a scraper afterwards for a more seamless look.
2. Square Up the Hole
Use a pencil and straightedge to mark a clean rectangle around the damaged area. Cut away torn paper, crumbled gypsum, and ragged edges with a utility knife or drywall saw. For a former single-gang box, the final rectangle might be about 4 inches by 6 inches or 5 inches by 7 inches, depending on how much damage surrounds the opening.
Keep the opening only as large as necessary, but do not preserve weak edges. Loose paper and broken gypsum prevent a clean bond and often telegraph through the finish coat.
3. Install a Backing Strip
Cut a wood backing strip 2 to 4 inches longer than the hole height. For a 6-inch-tall opening, an 8- to 10-inch backing strip is usually enough. Slide it into the wall cavity behind the drywall, hold it tight to the back face of the wall, and drive drywall screws through the existing drywall into the backing above and below the opening.
Set the screw heads slightly below the drywall paper without tearing the face. If the hole is wider or the surrounding drywall is weak, use two backing strips, one on each side.
4. Cut and Fasten the Drywall Plug
Measure the opening and cut a drywall patch about 1/8 inch smaller in each direction so it fits without forcing. Use drywall that matches the wall thickness. Place the patch against the backing strip and fasten it with one or two drywall screws. The patch should sit flush with the surrounding wall, not proud.
5. Tape the Seams
Apply a thin bed of joint compound over the seams and embed paper tape or fiberglass mesh tape. Paper tape creates a crisp, strong joint when bedded correctly. Mesh tape is faster but works best with setting-type compound on the first coat. Keep this coat tight. The goal is to cover and bond the tape, not build the final surface in one pass.
6. Apply Thin Coats and Feather Wide
For an outlet-sized patch, the finished compound area should usually extend 8 to 12 inches beyond the opening in each direction. That sounds wide for a small hole, but broad feathering is what makes the repair disappear under paint. A 4-inch patch with compound only 1 inch beyond the seams will almost always show as a hump.
Use setting-type compound for the first coat if you need speed. A 20-, 45-, or 90-minute setting compound can let you move faster than premixed mud. For finish coats, lightweight or all-purpose compound sands easier and is more forgiving. Apply two or three thin coats instead of one heavy coat. Heavy compound shrinks, cracks, dries slowly, and creates extra sanding work.
7. Sand Without Damaging the Paper
Once the compound is dry, sand lightly with a sanding sponge or screen. Start around 120- to 150-grit for shaping and finish with 180- to 220-grit if needed. Wear safety glasses and a NIOSH-approved dust mask or respirator. Drywall dust is fine, irritating, and travels farther than homeowners expect.
Do not sand aggressively into the tape or drywall paper. If you expose tape, gouge the surface, or fuzz the drywall paper, stop and skim another thin coat.
Windows Errors? Fix Them Before They Spread
Repair common Windows errors and clear accumulated junk for a smoother, more stable PC - no reinstall needed.Free scan · no reinstallOutdated Drivers Are Slowing You Down
One free scan finds every outdated or missing driver and matches the right update for your exact hardware.Free scan · exact hardware matchRank #3

- The drywall repair kit includes 2x Wall mending agent (100g), 2x Nozzle Extender, 1x Scrapers, and 2x Sandpaper.
- This drywall patch repair kit Easily and quickly repair the damaged wall.Just gently squeeze out and use a spatula to smooth. spackle wall repair kit can be reused, Meet your various repair needs.
- The new upgrade wall patch repair kit is very safe, it does not contain formaldehyde. It is highly resistant to breakage, streak-free and waterproof.And the mending will be virtually invisible, then giving you professional-looking results.
- BONCART wall repair kit can solve all kinds of wall damage.Drywall cracks,wall stains,nail holes,wall peeling,wall stains,wall graffiti.Let your walls a new look.
- Best Service:Fast pre-sale and after-sale response, any questions about the product are welcome to contact us at any time.
8. Prime Before Paint
Prime the patch and a margin beyond it before painting. Joint compound absorbs paint differently than finished wall paint, and skipping primer can cause flashing, where the patch looks dull or shiny from certain angles. For the cleanest blend, repaint corner-to-corner or to natural wall breaks such as inside corners, trim, cabinets, or doorway returns.
California Patch Method for a Clean Outlet Opening
A California patch, also called a butterfly patch, can work well for a single-gang outlet hole when the surrounding drywall is solid. Instead of using tape around the patch, you cut a piece of drywall larger than the hole, score the back to match the opening size, snap away the excess gypsum, and leave the face paper extending past the patch like built-in tape.
For example, if the squared opening is 4 inches by 6 inches, cut a drywall piece about 8 inches by 10 inches. On the back side, mark a 4-inch by 6-inch center section, score the gypsum, snap off the outside gypsum, and keep the front paper intact around all four sides. Apply compound around the hole, press the patch into place, embed the paper flanges, and skim over the face.
The advantage is speed: no backing strip and no separate tape. The limitation is that the patch depends on the paper flange and compound bond, so it is not always ideal where the wall may be bumped, where the hole is ragged, or where the surrounding drywall paper is damaged. We use it selectively, not as a universal fix.
Quick wins for a faster PC:
Fix the driver behind crashes, sound loss and screen glitchesFind Drivers →Repair Windows errors before they cause bigger problemsFix Now →How to Match Wall Texture After the Patch
Smooth walls are the easiest to repair because the patch only needs to be flat and well feathered. Textured walls require one more step. Common finishes include orange peel, knockdown, skip trowel, roller stipple, and older hand-applied textures. A flat, smooth patch on a textured wall will be visible even if the paint color is perfect.
Practice texture on cardboard or scrap drywall before spraying or rolling the wall. Wet texture often looks heavier, glossier, and sharper than it will after it dries and gets painted. Let the sample dry, prime or paint it if needed, then compare it against the wall in side light.
For small orange peel repairs, aerosol texture cans can work, but nozzle setting, distance, pressure, and movement matter. For knockdown, spray or dab the texture, wait for it to set slightly, then flatten it lightly with a clean drywall knife. Start lighter than you think. You can add texture more easily than you can remove a heavy blob from a finished patch.
What It Costs to Patch an Outlet Hole in 2026
If you already own basic tools, a single outlet-hole patch is inexpensive in materials. Expect roughly $15 to $60 for consumables such as drywall scrap or a patch piece, joint compound, tape, sandpaper, primer, and touch-up paint. If you need to buy knives, a drywall saw, mud pan, shop-vac filter, texture spray, or safety gear for the first time, the real first-project cost is often closer to $50 to $150.
Do these 3 things before closing this tab:
1Fix the driver behind crashes, sound loss and screen glitches2Clear out junk files and repair common Windows errors3Scan for outdated or missing drivers - takes under a minuteHiring a pro costs more because a tiny patch still requires travel, setup, dust control, dry time, finish matching, cleanup, insurance, overhead, and often a return trip for sanding and paint. For a single outlet-sized patch, a realistic professional range in many U.S. markets is about $250 to $500, especially when a contractor minimum charge applies.
| Repair scenario | Typical 2026 cost | What drives the price |
|---|---|---|
| DIY materials only | $15-$60 | Patch material, compound, tape, sanding sponge, primer, touch-up paint |
| DIY first-time tool purchase | $50-$150 | Drywall knives, saw, mud pan, dust control, texture spray |
| Single small pro patch | $250-$500 | Trip minimum, setup, finish coats, sanding, paint or texture matching |
| Homewyse May 2026 drywall hole repair | $297-$472 per patch | ZIP code, site conditions, quantity, options |
| Broader national drywall repair datasets | About $294-$920, with many jobs around $515 | Includes larger holes, ceilings, water damage, multi-area repairs |
| Overall professional drywall repair range | About $380-$1,436 | Includes bigger repairs, contractor hourly rates, complex finishes |
Small holes are often poor stand-alone service calls. If you are hiring a pro, bundle the outlet patch with nail pops, door-handle dents, settlement cracks, ceiling stains, or other drywall touch-ups. One trip to repair six small items is usually better value than calling someone out for one 4-inch opening.
Rank #4

- Drywall repair kit can be used for repairing interior or exterior surfaces like drywall, plaster, wood, brick and stone
- Color indicator spackle goes on pink and dries white providing confirmation the product is dry within 1 to 5 hours
- Wall patch dries within 1 hour for repairs 1/8" in depth; for repairs deeper than 1/8" apply two or more layers and allow spackle to dry between applications
- Durable spackling will not crack, crumble, flake or shrink and creates professional looking wall repairs that last
- No priming required when used indoors, kit contains: spackle, 5x5 fiber tough patch, 4x3 100 grit sandpaper and putty knife
Labor is a real part of the number. National wage data for 2024 listed median annual wages of about $58,140 for drywall and ceiling tile installers and $64,700 for tapers. Retail repair pricing also includes business overhead, scheduling, estimating, vehicle time, supplies, insurance, and the risk of matching old paint and texture.
How Long the Repair Takes
The hands-on work for an outlet-hole drywall patch is usually short. The calendar time depends on compound choice, drying conditions, texture, and paint.
- Electrical verification: 10 to 30 minutes if straightforward; longer if circuits are mislabeled or wiring must be traced.
- Cutting and backing: 20 to 45 minutes.
- First coat and tape: 15 to 30 minutes.
- Second and third coats: 15 to 30 minutes each, plus dry time.
- Sanding and cleanup: 15 to 30 minutes.
- Texture: 15 minutes to several hours depending on dry time and complexity.
- Prime and paint: 30 to 90 minutes of work, often spread over multiple drying periods.
With setting-type compound and a simple smooth wall, a skilled repair can be ready for primer the same day. With premixed compound, heavy texture, humidity, or paint blending, plan on a two-day process. If the wall needs corner-to-corner repainting, add more time for masking, cutting in, rolling, and drying.
Independent reader supportYour contribution helps us test, update, and keep practical guides available for everyone.When to DIY and When to Hire a Pro
DIY Makes Sense When
DIY is reasonable when the box and wiring have already been properly removed, the opening is small, the wall is standard drywall, the texture is simple or smooth, and you are comfortable with dust control and finish work. If the patch is behind furniture or in a low-visibility room, this is a good beginner drywall repair.
DIY also makes sense when you already own the basic tools. The difference between a $25 material repair and a $125 first-time tool run changes the value equation, but those tools can pay off if you have more drywall maintenance ahead.
Hire a Pro When
Bring in a licensed electrician when any wiring remains, when you cannot verify the circuit, when the outlet is part of a kitchen, bath, garage, exterior, or dedicated appliance circuit, or when a permit may be required by your local authority. Bring in a drywall professional when the wall is highly visible, textured, plastered, fire-rated, water-damaged, mold-stained, or part of a larger remodel finish.
The Tool Desk
Outbyte Driver Updater FREEScan for outdated or missing drivers - takes under a minuteDriver Scan →Outbyte PC Repair FREEClear out junk files and repair common Windows errorsFree Scan →We also recommend hiring the work out when the repair sits in harsh side lighting, such as a hallway with a window at one end. Side light exposes humps, ridges, and texture mismatches. A small patch in bad lighting can require more skill than a larger patch in a forgiving room.
Permit and Code Notes
Drywall patching alone usually does not require a permit in many U.S. locations, but electrical removal or rerouting may. Local authorities having jurisdiction can interpret requirements differently, especially in multifamily buildings, commercial spaces, garages, fire-rated assemblies, and rentals.
If you are removing an outlet permanently, the cleanest path is to have the wiring disconnected and removed back to an approved point, then patch the wall after the electrical condition is resolved. If a junction remains, it needs to be in an accessible box with an approved cover. A blank plate may not be as visually clean as drywall, but it is far better than hiding a junction inside the wall.
Common Mistakes That Make the Patch Fail
The biggest mistake is patching over an electrical box that still contains wires or splices. That creates a hidden junction box and turns a cosmetic repair into a code and safety problem.
Best Value

- Meet Your Various Wall Repair Needs -- Our kit contains 14 PCS Aluminum Mesh patches, including two 10-inch patches, two 8-inch patches and ten 4-inch patches. To help you repair your walls more effectively, we also offer you 1 pack large size scraper, and 2 pieces 240 grit sandpaper. This Aluminum Drywall Repair Kit can almost satisfy the desired size you need
- High-Quality -- Our drywall repair patch is made of quality aluminum, lightweight, and high strength, otherwise, its high-density fiber for strong adhesion, which makes it not easy to fall off, creates a smooth and beautiful surface like the original wall.
- Widely Applied Use -- The drywall patch repair kit is not only suitable for repairing Wall-Stains, Wall-Peeling, Wall-Scraping, Wall-Hole. But also can apply for any places, as home kitchen, office building, factory, etc.
- Easy to Use -- Use sandpaper to sand the broken surface to ensure the surface is dry and clean. Then tear off the backing, and apply the wall repair patch onto the hole or broken surface. At last, apply the plaster with a scraper and sand the repaired area.
- Used for A Long Time Without Damage -- Our wall patch cover for eclipse patch wall repair is made of aluminum sheet and fiberglass mesh material with high strength, which is insulated, corrosion-resistant, moisture-proof and durable for long time use. These wall patch repair kits are suitable for repairing most damaged wall surfaces and will stay for a long time.
The next most common mistake is treating an outlet-sized opening like a nail hole. Spackle alone is not designed to bridge a rectangular hole of that size. Adhesive mesh patches can help in some situations, but if they are loaded with thick compound, they often leave a visible raised square.
Other avoidable problems include failing to cut back ragged edges, using drywall that is the wrong thickness, applying too much compound in one coat, sanding into the tape, skipping primer, ignoring texture, and assuming old touch-up paint will match. Paint changes with age, sunlight, sheen, wall washing, and batch differences. Always test if the wall is in a visible area.
Professional Finish Standards
A good outlet-hole patch should not draw your eye in normal room lighting. That does not mean the compound stops at the edge of the hole. It means the repair is flat, broadly feathered, properly primed, matched to the surrounding texture, and painted in a way that respects natural breaks in the room.
On our crews, we would rather apply three thin coats than fight one thick coat. We check the patch by touch as well as sight, because fingertips catch ridges that overhead light may miss. Before paint, we use a work light across the wall at a low angle. If the repair shows under harsh side light before primer, paint will not fix it.
The best repair is boring when it is finished. No bulge, no shiny spot, no square outline, no visible paper fuzz, and no mystery about whether electrical work was safely handled before the wall was closed.
Frequently Asked Questions
Can you patch drywall over an old electrical outlet box?
Only if the electrical box and all conductors have been properly removed so the opening is no longer an electrical junction. Do not drywall over a box that contains wires or splices. Boxes with wiring must remain accessible, usually with an approved blank cover.
How much does it cost to patch an outlet-sized drywall hole in 2026?
DIY consumables usually run about $15 to $60 if you already own tools, or $50 to $150 if you need basic drywall tools and texture supplies. Hiring a pro for one small patch commonly falls around $250 to $500 because trip minimums and finish work drive the price.
Do I need an electrician before patching an outlet hole?
You need an electrician if wires remain, if you cannot verify the circuit is removed, or if the outlet is being permanently abandoned and wiring must be disconnected or rerouted. Drywall work should begin only after the electrical condition is safe and code-compliant.
What is the best patch method for a single-gang outlet opening?
A drywall insert screwed to a wood backing strip is the most durable all-around method. A California patch can also work well for a clean outlet opening with solid surrounding drywall. For best results, feather joint compound 8 to 12 inches beyond the patch.
Can I use a mesh patch for an outlet hole?
You can, but it is not usually the best choice for a rectangular outlet-sized opening. Mesh patches can leave a raised outline or crack if overloaded with compound. A backed drywall plug or California patch usually produces a flatter, stronger repair.
How long does an outlet-hole drywall repair take?
The hands-on work is often 2 to 4 hours spread across cutting, backing, taping, coating, sanding, priming, and painting. With fast-setting compound, a simple smooth-wall patch can be ready for primer the same day. With premixed compound, texture, or paint blending, expect one to two days.
Quick Recap
Product prices and availability are accurate as of the date/time indicated and are subject to change. Any price and availability information displayed on Amazon at the time of purchase will apply.