Crashes, No Sound, or Screen Glitches?
Random freezes, missing sound and display glitches usually trace back to one bad driver. Find and replace yours safely.Free scan · under a minutePC Slower Than It Used to Be?
A free scan shows the junk files, broken settings and background clutter dragging Windows down - then fixes them in one click.Free scan · Windows 10 & 11The best dryer lint brush for most homes is not a single brush. It is a two-tool setup: a narrow lint-trap brush or vacuum attachment for the slot below the lint screen, plus a drill-powered rotary dryer vent brush kit for the 4-inch exhaust duct. That combination handles the whole lint path instead of only the easy part you can see.
For a straightforward wall vent, most homeowners can buy the right tools for under $50 and clean the system in 30 to 90 minutes. For a long run, roof termination, second-floor laundry room, crushed duct, bird nest, or repeated clog, professional dryer vent cleaning is usually the better call. National pricing in 2026 commonly lands around $100 to $300 for standard work, while marketplace pricing can run from about $186 to $510, with an average near $307 depending on access and scope.
On our job sites, we treat dryer vent cleaning as both a maintenance issue and a building-system issue. A brush that works well in a short, straight, rigid metal duct may be the wrong tool for a 25-foot vertical run with two elbows and a roof cap. The right choice depends on the dryer, the duct route, the material, the termination, and how safely you can reach both ends.
Why Dryer Lint Brushes Matter More Than Most Homeowners Think
Dryer lint is not just housekeeping debris. The U.S. Fire Administration estimates about 2,900 home clothes dryer fires each year, causing about 5 deaths, 100 injuries, and $35 million in property loss. Failure to clean is the leading ignition factor at 34%. NFPA research also identifies failure to clean as the leading cause in dryer-related laundry fires, with lint, dust, and fiber among the common materials first ignited.
#1 Best Overall
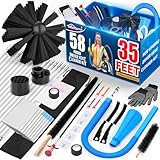
- 【Efficient dryer cleaning tool set】-Professional cleaning tool set can help you deep clean buildup lint in the dryer. Including 35feet Dryer Vent Brush × 1, Dryer Lint Vacuum Attachment × 1, Lint Trap Brush × 1, Vacuum Cleaner Adapter x1, Dryer Adapter x1, Drill Bit x 1, Multi-Use Lint Cleaner Brush x1, Anti-SLip Gloves x1, Strong Tape x2, Rods Collection Bag x1, Laundry Bag x1, Lint Collection Bag x33, Lint Grabber x1, Blockage Removal Tool x1, Gap Brush x2,MULT-FUNCTIONALCLEANINGBRUSH x4,SELF-ADHECIVEHOOK x5
- 【35Feet Dryer Vent Brush】- Easy to use with your drill, the flexible nylon rods can be quickly connected and extended to 35ft.Included adapters enable you to use the air from the clothes dryer, shop vacuum or electric blower to completely remove lint from the vent while rotary cleaning at the same time. The Dryer Vent Brush also suitable for pipes/air duct or corners
- 【Dryer Lint Vacuum Attachment】 - Easy to connect and suitable for most vacuum cleaners except for some dyson and shark vacuum cleaners. The flexible vacuum hose can deeply clean the lint accumulated in the dryer for many years
- 【Long Lint Trap Brush】- Using this extra long brush to cleaning the trapped lint and dust in dryer gap and exhaust port, and also for cleaning the coils behind your refrigerator
- 【Save Your Money】- No need to pay a professional service cost $150 per cleaning when you buy our Dryer duct Cleaning Kit
A dryer moves heated air through wet fabric, across a lint screen, through the dryer cabinet outlet, into a transition duct, through the permanent exhaust duct, and out an exterior termination. Every restriction in that path increases drying time and heat buildup. A blocked lint screen should be cleaned before or after every load, but that screen only catches part of the debris. Fine lint still gets into the lint-trap cavity, the transition duct, elbows, and exterior hood.
The warning signs are practical and easy to spot: clothes take more than one cycle to dry, the dryer exterior feels unusually hot, the laundry room feels humid, you smell something hot or faintly burning, lint collects around the outside vent, the exterior damper barely opens, or airflow at the exterior termination feels weak while the dryer runs.
If any of those symptoms show up, do not solve the problem by adding drying time. The machine is telling you the exhaust path needs attention.
The Best Dryer Lint Brush Setup for Most Homes
For most U.S. homes in 2026, the best setup is a two-level kit:
- A narrow lint-trap brush or vacuum attachment for the lint screen slot and cabinet opening.
- A drill-powered rotary dryer vent cleaning kit with flexible rods for the 4-inch exhaust duct.
A short hand brush is useful, but it is not a full dryer vent cleaning solution. It reaches the slot below the lint screen, where compacted lint and small debris collect. It does not clean a 4-inch duct run through the wall, attic, crawlspace, or roof.
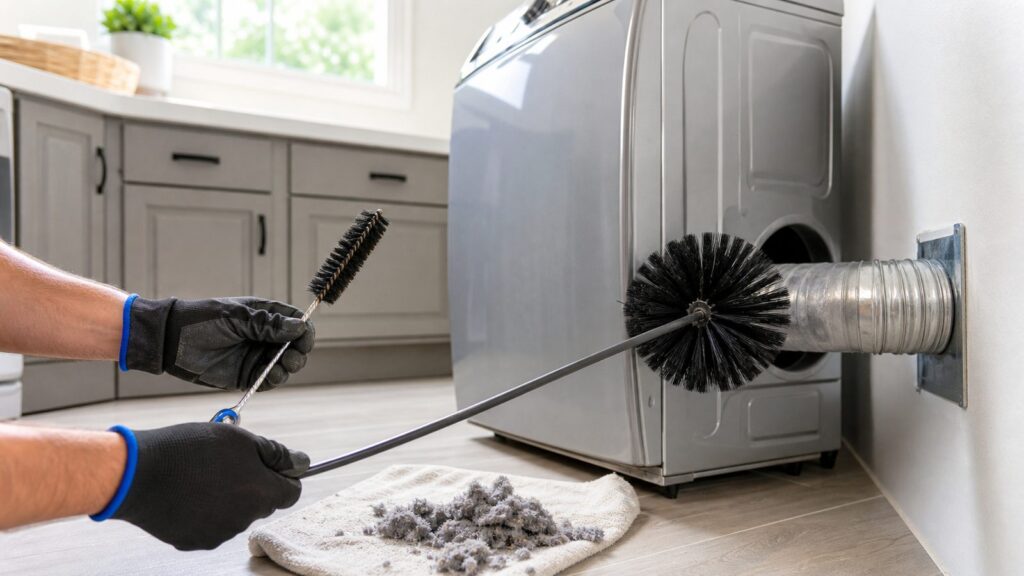
A rotary brush kit is better for duct cleaning because the bristles scrub lint stuck to the duct wall. When paired with a shop vacuum, it can pull out a surprising amount of material. Short drill-powered kits are commonly 8 to 12 feet and cost about $29 to $42 at U.S. hardware retailers. Longer 30- to 40-foot kits cost more but may be needed for second-floor laundry rooms, long horizontal runs, or vertical duct routes.
The best brush is not automatically the longest brush. The right kit matches the total developed duct length, elbow count, brush diameter, rod stiffness, drill compatibility, and duct material. A stiff rotary setup may be fine in smooth rigid metal duct but too aggressive for fragile foil flex duct that should be replaced instead of cleaned hard.
Dryer Lint Brush Types Compared
Use the brush for the part of the system it was designed to clean. That sounds obvious, but many vent problems start when homeowners buy a $10 brush, clean the lint slot, and assume the wall duct is clear.
| Tool type | Best use | Typical 2026 cost | Good fit | Limitations |
|---|---|---|---|---|
| Hand lint-trap brush, 29 to 40 inches | Lint screen slot and dryer cabinet opening | $6 to $22 | Monthly or quarterly lint cavity cleaning | Does not clean the full exhaust duct |
| Vacuum lint-removal attachment | Narrow lint cavity, under dryer, around transition connection | $10 to $25 | Homeowners with a strong vacuum or shop vac | Adapter fit varies; may not scrub duct walls |
| 8- to 12-foot drill-powered rotary kit | Short duct runs to nearby exterior wall | $29 to $42 | First-floor laundry rooms on exterior walls | May be too short for long or vertical runs |
| 30- to 40-foot rotary kit | Longer exhaust paths | Usually more than short kits | Extended runs with known duct routes and access | More risk of rod separation or binding in elbows |
| Professional dryer vent cleaning | Long, vertical, roof, damaged, inaccessible, or recurring clogs | Commonly $100 to $300; marketplace ranges about $186 to $510 | Complex vents, poor access, suspected nests, repeated long dry times | Higher cost than DIY tools |
Match the Brush to the Dryer Vent Path
Before buying a dryer lint brush, find out what path the lint actually takes. Pulling the dryer forward and seeing a short flexible hose does not tell you the full route. The duct may turn upward inside the wall, cross a ceiling cavity, pass through an attic, or terminate at the roof.
Measure the developed length
Measure the actual duct path, not the straight-line distance from dryer to exterior wall. Include vertical rises, horizontal sections, and every elbow. A dryer that sits 6 feet from an outside wall may still have a 15- to 25-foot developed run if the duct turns up, crosses framing, and exits through a roof or side wall.
Rank #2

- [Stretch Universal Connector] PetOde dryer lint vacuum cleaner attachment is designed with a premium elasticated stretch universal connector that can be connected to most vacuum cleaners! Say goodbye to the worry of purchasing incompatible attachment models
- [Suitable for Most Dryers] The inner height of our Vacuum Hoses attachment is the same as on the market at 0.4", while the outer height is 0.73" which is thinner than the hose opening on the market, so it can enter narrower gaps
- [Practical Dryer Lint Brush] This long brush is specially designed to clean the dryer lint, and can also be used to clean the refrigerator coils, radiators and other hard-to-reach places
- [Cleans Years of Build-up Lint] A dryer that is not cleaned for many years will accumulate a lot of lint. Ventilation openings can become narrow or even blocked. It can help you effectively clean your dryer vent, making your dryer more efficient
- [Cleaning Supplies] The flexible and convenient dryer vent cleaner kit is long enough, making it a perfect choice for cleaning places like behind appliances and gaps in the sofa in your home
For a brush kit, buy enough length to clean from the dryer side and the exterior side when possible. On long or vertical runs, we prefer cleaning from both ends instead of trying to drive all lint in one direction. That reduces the chance of compacting lint into an elbow or termination.
Check the duct material
Permanent dryer exhaust ducts should be smooth metal, typically 4 inches in diameter. Smooth rigid metal is the preferred material because it resists crushing and has less surface area to snag lint. Listed metal transition duct is for the short exposed connection between the dryer and wall, not for hidden permanent runs.
Quick wins for a faster PC:
Repair Windows errors before they cause bigger problemsFix Now →Scan for outdated or missing drivers - takes under a minuteDriver Scan →Vinyl or plastic accordion duct is a fire and performance concern and should be replaced. Thin foil flex duct can also be fragile, especially if it is kinked, crushed, or buried behind the dryer. If the transition duct is already damaged, do not attack it with a drill brush. Replace it with the proper listed metal connector and keep it as short and straight as practical.
Look at the termination
The outside termination matters. Wall hoods can clog with damp lint, stuck dampers, nests, or exterior screens. Roof terminations are harder to inspect and clean safely. A dryer vent should discharge outdoors, and the damper should open freely when the dryer runs.
After cleaning, run the dryer on air-only or no-heat if that setting is available. Go outside and verify that the damper opens and airflow feels strong. Then run a timed dry cycle and check for rattles, air leaks, disconnected duct sections, and weak exterior airflow.
What We Use on Job Sites and Service Walkthroughs
When our crews evaluate laundry rooms during remodels, relocations, or punch-list work, we look beyond the appliance. The dryer can be brand new and still perform poorly if the vent route is too long, kinked behind the machine, or terminated through a clogged roof cap.
What’s actually slowing this PC down?
Pick the symptom - the matching free tool is one click away.
Our basic homeowner-grade recommendation is simple: keep a narrow lint-trap brush or vacuum attachment near the laundry area, and keep a rotary duct kit sized to the actual duct length. For many homes, a 29- to 40-inch lint brush handles the lint screen cavity, while an 8- to 12-foot drill-powered kit handles a short wall vent. That setup often costs less than one professional visit and covers routine maintenance.
For a laundry room on an interior wall, upper floor, or long duct path, we step up the caution. A 30- to 40-foot brush kit can work, but only when the route is known and the duct is in good condition. If the system has tight elbows, concealed flex duct, roof exit, or weak airflow that returns soon after cleaning, the issue may be design, damage, or blockage rather than ordinary lint.
How Often to Clean the Lint Screen, Cavity, and Vent
Use a layered schedule. Each part of the system collects lint at a different rate.
- Every load: Clean the lint screen before or after drying. This is the easiest habit and the most important one.
- Monthly to quarterly: Brush or vacuum the lint screen cavity, especially if you dry towels, bedding, work clothes, or pet bedding.
- At least annually: Clean the full dryer vent duct and exterior termination.
- Every 6 to 12 months: Clean more often for heavy-use homes, pet owners, large families, second-floor laundry rooms, roof terminations, long runs, or frequent towel and bedding loads.
A simple timing check helps. If a normal load that used to dry in 45 minutes now takes 70 or 90 minutes, the vent system deserves attention. Long dry times cost money, wear out the dryer, and add heat where you do not want it.
Rank #3

- Home Essentials: Holikme dryer vent cleaner kit can easily help you to remove years of built up lint from your dryer vent, making your appliance runs more efficiently and securely; Suitable for most dryer types, please kindly check our product size information for reference in order to better shopping experience
- Home & Kitchen Gadgets: Flexible and handy vacuum hose is perfect for cleaning behind appliances beyond your reach; For effective use in dryer vents, insert the attachment slowly to ensure it reaches as far into the vent as possible; If possible, use a vacuum with higher suction power
- Fits Almost Vacuum: Our dryer vent hose adapter is suitable for most vacuum cleaners; it is easy to assemble and use; NOTICE: Not Fit For Dy-son and cordless Vacuum Cleaners
- Flexible Lint Brush: This extra long brush is specially designed for cleaning your dryer's trapped lint, and also for cleaning the coils behind your refrigerator; When cleaning dryer vent, it is recommended to first use the flexible Lint brush to loosen lint in the vent, and then connect the vacuum cleaner with a hose to suck out the lint
- Regular Cleaning: Always clean the lint trap after every use to reduce the amount of lint that ends up in the vent; Clean your dryer vents regularly to prevent excessive buildup and potential dryer fires
How to Use a Dryer Lint Brush Safely
Start with the simple side before you put a drill on anything. Unplug the dryer. If it is a gas dryer, avoid pulling or twisting the gas connector; if the dryer must be moved significantly, shut off the gas valve and call a qualified technician if you are not comfortable reconnecting and leak-checking the appliance.
Clean the lint screen cavity
Remove the lint screen and clean it by hand. Insert the narrow lint brush into the slot with slow, gentle passes. Pull lint upward rather than packing it deeper. Follow with a vacuum lint attachment if you have one. This is also a good time to vacuum behind and under the dryer, where lint can collect around the motor area and floor.
Clean the transition duct
Pull the dryer forward enough to work without crushing the connector. Loosen the clamp at the dryer outlet and wall connection. Inspect the transition duct. If it is plastic, vinyl, crushed, torn, or packed with lint, replacement is usually smarter than cleaning. Use listed metal transition duct, keep it short, and avoid sharp bends when pushing the dryer back.
Clean the wall duct
For a rotary brush kit, read the manufacturer’s directions before use. Many threaded rod systems must rotate in one direction only. Reversing the drill direction aggressively inside the duct can unscrew rods and leave a section lodged in the vent.
Do these 3 things before closing this tab:
1Fix the driver behind crashes, sound loss and screen glitches2Repair Windows errors before they cause bigger problems3Scan for outdated or missing drivers - takes under a minuteFeed the brush slowly. Do not force rods around tight elbows. Use a shop vacuum at the opening to collect loosened lint. If possible, clean from the exterior termination too. Remove lint from the hood, confirm the damper moves freely, and check for nests or wet compacted lint.
Avoid using a leaf blower as your first method on an unknown vent system. It can pack lint into elbows, blow apart weak joints, or move loose material while leaving lint stuck to duct walls. A brush scrubs; air alone may only relocate the clog.
When to DIY vs. When to Hire a Pro
DIY dryer vent cleaning makes sense when the route is short, accessible, and built with sound duct material. Professional service makes sense when the vent path is long, vertical, damaged, inaccessible, or still performs poorly after basic cleaning.
| Situation | Best choice | Why |
|---|---|---|
| Dryer backs to an exterior wall with a short, straight vent | DIY | An 8- to 12-foot rotary kit and vacuum usually reach the full path |
| Lint screen slot has visible buildup but dryer still vents well | DIY | A $6 to $22 hand brush or $10 to $25 vacuum attachment is enough for cavity maintenance |
| Vent run is over 20 feet or has multiple elbows | Pro or cautious DIY from both ends | Long runs are easier to bind, compact, or leave partially blocked |
| Dryer exits through the roof | Pro | Roof access and vertical lint buildup create safety and cleaning challenges |
| Exterior damper does not open after cleaning | Pro | There may be a hidden blockage, stuck termination, disconnected duct, or crushed section |
| You find plastic, vinyl, crushed, or concealed flex duct | Repair or replacement before aggressive cleaning | Bad material can be a fire concern and can fail during cleaning |
| Clothes still need two cycles after cleaning | Pro inspection | The problem may be duct design, appliance performance, or a hidden restriction |
Cost should be weighed against risk. A DIY setup under $50 is reasonable for a straightforward vent. A pro visit at $100 to $300, or more for difficult access, is reasonable when the duct route is complex or the symptoms point to a serious restriction.
Free tools Windows power users keep installed
One-click scans. No signup required.
Dryer Vent Code and Construction Notes
Dryer vents are part of the building system, not just an appliance accessory. The International Residential Code includes requirements for clothes dryer exhaust systems, and local amendments may apply. For homeowners, the practical takeaways are clear: dryer exhaust should terminate outdoors, ducts should be metal and smooth inside, duct joints should be installed in the direction of airflow, and protruding fasteners inside the duct should be avoided because they snag lint.
Screws driven into dryer duct are a common problem. They feel secure during installation, but the screw tips catch lint and accelerate buildup. Use appropriate clamps, foil tape rated for ducts where allowed, and proper fittings instead of leaving sharp obstructions inside the airflow path.
Rank #4

- Multi-Purpose Cleaning: Effectively cleans dryer vents, lint traps, and air conditioner coils with the included flexible dryer vent brush and appliance brush,dryer vacuum hose attachment.
- Fire Hazard Prevention: Removes built-up lint to reduce the risk of dryer fires and improves airflow for better dryer performance.
- Durable & Flexible Design: Long-lasting dryer lint brush vent cleaner bends easily to navigate tight spaces and complex vent systems.
- Easy-to-Use Tools: Includes a lint cleaner for dryer vent trap and dryer filter cleaner brush for quick, hassle-free maintenance.
- Complete Kit: Comes with all essential tools like a dryer lint removal tool and clothes dryer lint vent trap cleaner brush for comprehensive cleaning.
During remodels, laundry-room relocations, or new construction, we try to place laundry rooms near exterior walls when the plan allows it. Shorter dryer runs mean fewer elbows, better airflow, shorter drying times, less lint accumulation, and lower maintenance cost. When an interior laundry location is unavoidable, document the vent route before walls and ceilings are closed. Photos, measurements, and notes can save real time during future cleaning and inspection.
Permit requirements vary by jurisdiction and project scope. Routine cleaning does not typically require a permit. Moving a laundry room, adding a new dryer vent route, changing exterior penetrations, or altering rated assemblies may require code review, proper firestopping, and inspection. If the vent passes through a garage wall, floor assembly, attic, or concealed chase, treat the work as construction, not just appliance hookup.
Common Dryer Lint Brush Mistakes
The most common mistake is buying only a short brush and assuming the whole dryer vent is clean. A hand brush may remove lint from the trap cavity while the wall duct remains restricted 10 feet downstream.
The second mistake is crushing the transition duct when pushing the dryer back into place. A beautifully cleaned vent can be restricted again in 30 seconds if the connector gets flattened behind the machine. Leave enough room for a smooth sweep, use the shortest practical connector, and check airflow after the dryer is back in position.
Another mistake is forcing a rotary brush through unknown ductwork. If the duct is fragile foil, plastic, crushed, disconnected, or full of tight elbows, aggressive brushing can create a bigger repair. Inspect first. Replace bad material. Then clean.
Do not forget the exterior termination. Damp lint often collects at the hood. Bird nests, stuck dampers, and screens can block airflow even when the interior duct looks clean. The exterior airflow test is one of the simplest checks a homeowner can perform.
Recommended Free Tools
Best Dryer Lint Brush Recommendations by Use Case
Best for weekly and monthly maintenance
Choose a narrow 29- to 40-inch lint-trap brush or a flexible vacuum lint-removal attachment. Expect to spend about $6 to $22 for a basic brush or $10 to $25 for a vacuum kit. This is the right tool for the lint screen slot, not the whole wall duct.
Best for a short wall vent
Choose an 8- to 12-foot drill-powered dryer vent brush kit, ideally used with a shop vacuum. Expect to spend about $29 to $42. This is the most practical DIY setup for a first-floor laundry room located near an exterior wall.
Best for a long but accessible run
Choose a 30- to 40-foot rotary kit only after measuring the actual duct path and confirming the duct is rigid or otherwise suitable for brushing. Clean from both ends when possible. Work slowly, keep the drill direction consistent with the manufacturer’s instructions, and stop if the rods bind.
Best for roof exits and recurring clogs
Hire a professional. Roof terminations, long vertical runs, and repeated clogs are often not just lint problems. They may involve bad routing, damaged duct, a clogged cap, or inaccessible sections. Paying for inspection and cleaning is usually cheaper than damaging a concealed duct or leaving a restriction in place.
The Tool Desk
Outbyte PC Repair FREEClear out junk files and repair common Windows errorsFree Scan →Outbyte Driver Updater FREEFix the driver behind crashes, sound loss and screen glitchesFind Drivers →Best Value

- Home Essentials: Fireplace chimney brushes includes two high quality synthetic brush head and flexible rods that extend up to 30 feet
- Home Improvement with Simple Instructions: Dryer vent brush can be used with or without any kind of power drill and will help you achieve professional results; By sealing the connection points of the rod with tape, the risk of the rod falling off is reduced
- Improve Dryer Working Efficiency: Improving cloth dryer working performance by using this cleaning tools to clean the build up lint and dust in dryer vent, duct and exhaust port; It is recommended to select the area to be cleaned according to the diameter of the brush head
- Effortless Maintenance: Skip the service calls. Clean your dryer vent yourself in minutes and keep everything running smoothly, year after year.
- Preventing Fire Risks: Lint buildup can be dangerous and failure to clean it is the leading cause of clothes dryer fires; So remove the lint periodically is the only way to prevent dryer fires risk
Bottom Line
The best dryer lint brush is the one that matches the vent system you actually have. For most homeowners, that means a narrow lint-trap brush or vacuum attachment for routine cavity cleaning and a drill-powered rotary kit sized to the duct route for annual cleaning.
Clean the lint screen every load. Brush or vacuum the lint cavity monthly or quarterly. Clean the full vent at least once a year, or every 6 to 12 months for heavy-use homes and long duct runs. Use smooth metal duct, keep the transition short, avoid interior screws, and verify strong exterior airflow after cleaning.
If your dryer still runs hot, takes two cycles, smells burnt, or has weak airflow after basic cleaning, stop treating it like a brush-shopping problem. At that point, the better answer is a professional dryer vent inspection and cleaning.
Frequently Asked Questions
What is the best dryer lint brush for most homes?
The best setup is a narrow lint-trap brush or vacuum attachment plus a drill-powered rotary dryer vent brush kit. The first tool cleans the lint screen cavity; the rotary kit cleans the 4-inch exhaust duct.
Is a dryer lint brush enough to clean the whole dryer vent?
A short hand lint brush is not enough for the whole vent. It is useful for the lint trap slot, but the transition duct, wall duct, elbows, and exterior termination usually need a rotary brush kit or professional cleaning.
How often should I clean my dryer vent?
Clean the lint screen every load, brush or vacuum the lint cavity monthly or quarterly, and clean the full dryer vent at least once a year. Heavy-use homes, pet owners, long duct runs, and roof terminations may need cleaning every 6 to 12 months.
How much does a dryer vent cleaning brush cost in 2026?
Basic hand dryer lint brushes usually cost about $6 to $22. Vacuum lint-removal kits commonly cost $10 to $25. Short drill-powered dryer vent cleaning kits usually run about $29 to $42, with longer 30- to 40-foot kits costing more.
How much does professional dryer vent cleaning cost?
Standard professional dryer vent cleaning commonly falls around $100 to $300, depending on the market and scope. Marketplace pricing can range from about $186 to $510, with an average near $307 for more involved jobs.
Quick wins for a faster PC:
Repair Windows errors before they cause bigger problemsFix Now →Scan for outdated or missing drivers - takes under a minuteDriver Scan →Clear out junk files and repair common Windows errorsFree Scan →When should I hire a professional instead of using a dryer lint brush?
Hire a pro if the vent is roof-terminated, over about 20 feet, has multiple elbows, runs through inaccessible attic or crawlspace areas, contains damaged duct, has a bird nest, or still has weak airflow after basic cleaning.
Quick Recap
Product prices and availability are accurate as of the date/time indicated and are subject to change. Any price and availability information displayed on Amazon at the time of purchase will apply.