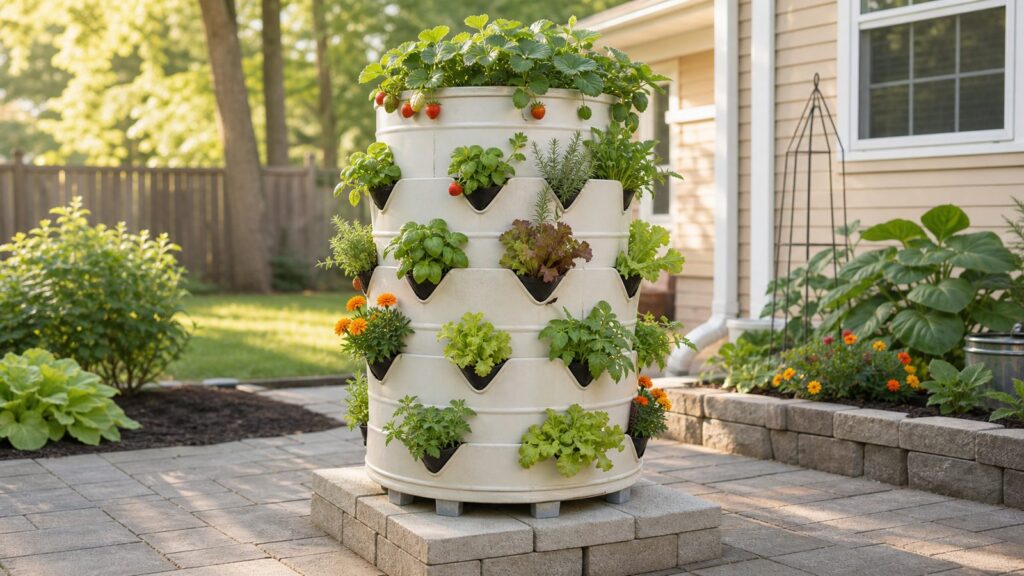
A barrel garden tower is a vertical planter made from a 55-gallon plastic drum with planting pockets cut into the sides, a perforated center tube for watering or composting, and lightweight container mix inside. Done well, it can grow strawberries, herbs, lettuce, spinach, flowers, bush beans, and compact peppers in a footprint of about 2 feet by 2 feet.
Done poorly, it becomes a 200-pound soggy barrel with cracked sidewalls, dry upper pockets, a wet lower zone, and a tip risk in the first strong wind.
The build itself is not complicated. The difference between a useful garden tower and a weekend novelty is construction judgment: food-safe materials, enough drainage, a stable base, reasonable pocket spacing, the right soil mix, and a watering plan. On our job sites, we treat any outdoor container like a small structure. It has load, drainage, exposure, maintenance access, and a failure path. A barrel tower is no different.
For a typical U.S. homeowner in 2026, expect to spend about $55 to $150 if you find a clean used food-grade barrel and already own basic tools. If you buy a new drum, bagged growing mix, a center pipe, hardware, and plants, a realistic budget is $115 to $275. If you hire a handyman or landscape pro to source materials, prepare a base, cut the barrel, add irrigation, and plant it, the installed cost can land around $250 to $600+.
#1 Best Overall
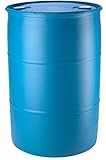
- New Blue Closed Top Food Grade Water Barrels Also Can Be Used for Oil Storage Barrels
- Pressure Checked Leak Tested excellent condition. High-Density Polyethylene Plastic Can be used for all types of liquids
- Great for a fresh water barrel use as a Rain Barrel. UN-DOT Certified All New Water Barrels are available in 15 gal, 30 gal, and 55 gal sizes.
- Dimensions: 23" X 23" X 35"; Weight: 22 lbs
- NOTE: Shipped Alone - No Box, or Covering (May have a few scratches or dirt due to shipping; simply wipe off; this does not compromise the use of the barrel)
What You Are Building
The standard build uses a 55-gallon plastic drum, typically about 23 inches in diameter and 35 inches tall. You cut staggered horizontal slits in the sidewall, warm and flare the lower edge of each slit outward to create planting pockets, drill drainage holes in the bottom, install a perforated 4-inch center tube, then fill the barrel with moist container mix in lifts.
A good design has 30 to 40 planting pockets, not 60 or 70. More pockets may look impressive on a screen, but too many cuts weaken the barrel, crowd the roots, and make watering harder. The top opening can hold a few larger herbs, flowers, or compact vegetables.
The center tube is optional, but we recommend it. A 4-inch perforated drain pipe running vertically down the middle helps distribute water deeper into the barrel. Some gardeners also use it as a small compost or worm tube. If you do, cap or screen the top so pests, leaves, and debris do not get inside.
Materials and Tools
Materials
- One 55-gallon food-grade plastic barrel: HDPE or polypropylene, with known previous contents.
- 4-inch perforated drain pipe: about 35 inches long for the center tube. A 10-foot section commonly costs about $18 to $25.
- Landscape fabric, mesh, or hardware cloth: to wrap the center tube and keep soil from packing into the perforations.
- Container mix: plan on 5 to 7 cubic feet after accounting for the center pipe and pocket voids.
- Compost: for blending into the container mix, not as the whole fill material.
- Perlite, pumice, or similar mineral aeration: improves air space and drainage.
- Exterior screws, bolts, washers, or zip ties: for securing mesh and any cap.
- Cap or removable screen for the center tube: especially important if children use the yard.
- Pavers, concrete blocks, or treated lumber sleepers: to elevate the barrel 1 to 2 inches for drainage.
- Seeds or plants: budget under $10 for seeds or $30 to $120 for nursery starts.
Tools
- Drill and bits, including 1/4-inch to 1/2-inch bits for drainage
- Jigsaw, oscillating tool, or rotary tool for pocket slits
- Heat gun for shaping pockets
- Work gloves and eye protection
- Marker, tape measure, and straightedge
- Sandpaper or deburring tool
- Level
- Utility knife or snips for fabric and mesh
Do not skip gloves and eye protection. Cut plastic can be sharp, and heated plastic can soften quickly. Work outdoors or in a very well-ventilated area when using a heat gun.
The Tool Desk
Outbyte PC Repair FREEClear out junk files and repair common Windows errorsFree Scan →Outbyte Driver Updater FREEScan for outdated or missing drivers - takes under a minuteDriver Scan →Use the Right Barrel
The barrel is the one part of this project where “cheap” can become a bad decision. Use only a food-grade HDPE or polypropylene drum with known contents. Good candidates are barrels that previously held food syrups, vinegar, pickles, olives, juice concentrate, or other food products. Avoid any barrel that held chemicals, petroleum products, cleaners, pesticides, solvents, or unknown liquids.
HDPE and polypropylene are commonly used in food-contact containers and are suitable choices for this kind of garden project. HDPE is durable, but sunlight breaks down many plastics over time. In full sun, expect the barrel to fade, get brittle, or need replacement after several years. A light-colored barrel or UV-safe exterior coating can help reduce heat and sun damage.
A used food-grade barrel often costs $10 to $40 locally when available. New 55-gallon plastic drums generally run around $60 to $130+ before delivery. A new food-grade polypropylene drum may be around $129.99, while some industrial plastic drums start around $95 before shipping. Off-color industrial barrels from big-box stores can be cheaper, but confirm the material and food-safe status before growing edibles.
If you cannot verify what was in the barrel, do not use it for vegetables or herbs. Use it for ornamental flowers only, or find another drum.
2026 Cost Breakdown
Most of the cost is not the cutting. It is the barrel, soil volume, plants, and whether you need to buy full-length materials for a small project. A 55-gallon barrel holds about 7.35 cubic feet before displacement. With a center tube and shaped pockets, most towers take 5 to 7 cubic feet of growing media.
| Item | Budget Range | Notes |
|---|---|---|
| Used food-grade barrel | $10-$40 | Only use known food-safe contents. |
| New plastic barrel | $60-$130+ | Shipping can change the real cost quickly. |
| Container mix | $25-$60 | Usually 3 to 4 bags if using 2-cu-ft bagged mix. |
| 4-inch perforated pipe | $18-$25 | You need about 3 feet but may buy a 10-foot length. |
| Hardware, mesh, cap, sandpaper | $15-$45 | Depends on what you already have. |
| Seeds or plants | $10-$120 | Seeds are cheap; nursery starts add up fast. |
| DIY total with used barrel | $55-$150 | Assumes basic tools are already owned. |
| DIY total with new barrel | $115-$275 | More if delivery fees are high. |
| Installed by pro | $250-$600+ | Usually only makes sense with base prep or irrigation. |
Bulk soil components can be cheaper per cubic foot. Screened topsoil may run about $20 to $40 per cubic yard, and organic compost may run about $20 to $42 per cubic yard. For one barrel, bagged mix is usually simpler. Bulk material makes more sense if you are filling raised beds at the same time.
Pick the Right Location Before You Fill It
Place the tower before adding soil. Once filled with moist media, compost, water, and plants, a 55-gallon garden tower can weigh roughly 180 to 300+ pounds. You do not want to drag that across a patio or lift it off a deck after the fact.
Use a stable, level surface: compacted gravel, pavers, concrete, or firm soil with a small pad. Elevate the barrel 1 to 2 inches on pavers or treated sleepers so water can escape through the bottom holes. Do not set it directly on wood decking, a balcony, or a surface that can trap moisture without thinking through weight and drainage.
Do these 3 things before closing this tab:
1Repair Windows errors before they cause bigger problems2Fix the driver behind crashes, sound loss and screen glitches3Clear out junk files and repair common Windows errorsRank #2

- CAPACITY: 55-gallon water storage barrel designed for long-term emergency water storage and preparedness needs
- CONSTRUCTION: Heavy-duty plastic barrel with secure lid ensures water remains clean and safe for storage
- MATERIAL SAFETY: BPA-free food-grade plastic construction makes it ideal for storing drinking water
- VERSATILITY: Perfect for emergency preparedness, rainwater collection, or general water storage needs
- DIMENSIONS: Large capacity barrel with approximate dimensions of 23 inches diameter by 35 inches height
For decks and balconies, check the structure before placing any large wet planter. The concern is not just the total weight. It is concentrated load over a small footprint, water staining, rot risk, and tipping. If the deck is older, soft, undersized, or already carrying furniture and people, get a professional opinion before adding a loaded barrel tower.
Sun exposure matters too. Fruiting crops like peppers and beans generally need 6 or more hours of direct sun. Many greens and herbs can do well with 3 to 5 hours, especially in hot climates where afternoon shade reduces stress. If one side gets much stronger sun, rotate the barrel every week or two unless it is tied into fixed drip irrigation.
Placement Checklist
- Level base with no wobble
- Drainage path away from doors, steps, and walkways
- No constant moisture against wood siding, trim, or decking
- Loaded weight acceptable for the surface
- Wind exposure considered
- Hose or watering access within reach
- Enough clearance to plant, prune, and harvest all sides
- HOA visibility rules checked if placed in a front yard or side yard
- No obstruction of utility access, meters, easements, or required walkways
Permit, HOA, and Safety Notes
Most barrel garden towers will not need a building permit when they are movable, under 3 feet tall, and placed in a private yard. That said, local rules vary. Some cities regulate front-yard structures, visible garden installations, drainage impacts, or items placed near sidewalks and easements. Many HOAs also limit raised beds, planters, vegetable gardens, or visible containers in front yards.
Before building, check three things: your HOA rules, your local zoning or property maintenance rules, and any utility or drainage easements on the property. If the tower is in the backyard on grade and not attached to anything, the risk is usually low. If it is on a balcony, roof deck, front yard, common area, or near a property line, verify first.
Crashes, No Sound, or Screen Glitches?
Random freezes, missing sound and display glitches usually trace back to one bad driver. Find and replace yours safely.Free scan · under a minuteWindows Errors? Fix Them Before They Spread
Repair common Windows errors and clear accumulated junk for a smoother, more stable PC - no reinstall needed.Free scan · no reinstallSafety is straightforward but nonnegotiable. Keep the tower level. Do not place it where children can climb it. Cap the center pipe. Sand all cut edges. Anchor or brace it in windy locations, especially early in the season before plant roots knit the soil together. A planted tower has more sail area than an empty barrel.
Step-by-Step Build
1. Clean and Inspect the Barrel
Wash the barrel thoroughly with mild soap and water, then rinse it well. Remove labels if possible. Inspect the sidewall for cracks, brittle areas, deep gouges, or chemical odors. If the plastic smells like fuel, solvent, cleaner, or anything you cannot identify, reject it for edible planting.
2. Mark the Pocket Layout
Set the barrel upright. Mark vertical rows around the barrel, spacing them evenly. Stagger the pockets so no continuous vertical line of cuts runs from top to bottom. This preserves more sidewall strength.
For a 55-gallon drum, use 30 to 40 pockets as the target. A practical layout is 6 to 8 vertical rows with 4 to 5 pockets per row. Keep the lowest pockets several inches above the bottom so the lower wall remains strong and the bottom reservoir area is not constantly saturated.
Make each slit about 5 to 6 inches wide. Leave at least 4 to 5 inches vertically between pocket cuts. If the barrel has molded ribs, avoid cutting straight through every rib in a stacked pattern.
3. Cut the Slits
Use a jigsaw, oscillating tool, or rotary tool to cut horizontal slits at your marks. Work slowly. Plastic can grab a blade if you rush. After cutting, sand or deburr each slit so there are no sharp edges.
4. Heat and Shape the Pockets
Warm the lower lip of each slit with a heat gun until the plastic becomes flexible. Do not scorch it. Use a scrap block, gloved hand, or rounded tool to push the softened lower lip outward and slightly downward. The goal is a small ledge that holds soil and directs the plant outward.
Let each pocket cool in position before moving on. If a pocket folds sharply or turns white from stress, you overheated or over-bent the plastic. Gentle curves last longer than hard creases.
What’s actually slowing this PC down?
Pick the symptom - the matching free tool is one click away.
Rank #3

- 𝟓𝟓-𝐆𝐚𝐥𝐥𝐨𝐧 𝐈𝐧𝐝𝐮𝐬𝐭𝐫𝐢𝐚𝐥 𝐂𝐚𝐩𝐚𝐜𝐢𝐭𝐲: This heavy-duty plastic drum offers a spacious 55-gallon capacity, ideal for industrial, laboratory, or commercial storage and transportation. Its generous size supports bulk liquid or dry goods, making it perfect for large-scale material handling.
- 𝐁𝐏𝐀-𝐅𝐫𝐞𝐞 𝐓𝐢𝐠𝐡𝐭 𝐇𝐞𝐚𝐝 𝐃𝐞𝐬𝐢𝐠𝐧: Crafted from BPA-free high-quality plastic, the seamless tight head design ensures secure containment and minimizes risk of leakage. It is perfect for storing sensitive or hazardous materials safely and efficiently.
- 𝐃𝐮𝐚𝐥 𝐅𝐢𝐭𝐭𝐢𝐧𝐠𝐬 𝐟𝐨𝐫 𝐕𝐞𝐫𝐬𝐚𝐭𝐢𝐥𝐢𝐭𝐲: Equipped with both 2-inch NPT and 2-inch Buttress fittings, this drum supports a variety of pumps and connections, providing flexibility for transferring, draining, or filling different liquid types with ease.
- 𝐔𝐍 𝐑𝐚𝐭𝐞𝐝 𝐟𝐨𝐫 𝐒𝐚𝐟𝐞𝐭𝐲 𝐂𝐨𝐦𝐩𝐥𝐢𝐚𝐧𝐜𝐞: This container meets UN standards, making it safe and compliant for the storage and transportation of regulated materials. It is a reliable choice for chemicals, oils, or industrial supplies that require certified containment.
- 𝐃𝐮𝐫𝐚𝐛𝐥𝐞 & 𝐖𝐞𝐚𝐭𝐡𝐞𝐫-𝐑𝐞𝐬𝐢𝐬𝐭𝐚𝐧𝐭 𝐇𝐌𝐖𝐏𝐄: Built from high molecular weight polyethylene (HMWPE), this drum is impact-resistant, UV-stable, and weatherproof. It withstands outdoor exposure, resists fading and cracking, and ensures long-term reliability in harsh environments.
5. Drill Drainage Holes
Turn the barrel on its side or carefully tilt it. Drill many drainage holes in the bottom. Use 1/4-inch to 1/2-inch holes and spread them evenly across the base. Add a few lower-sidewall drain holes just above the bottom so water has a secondary exit if the base holes clog.
Drainage is not optional. Container vegetables need oxygen at the roots. A sealed barrel with wet soil is closer to a swamp than a planter.
6. Prepare the Center Tube
Cut the 4-inch perforated pipe to roughly the inside height of the barrel, usually about 34 to 35 inches. Wrap it with landscape fabric, mesh, or screen so soil does not pack into the holes. Secure the wrap with zip ties or stainless screws and washers.
Stand the pipe in the center of the barrel. Keep it vertical as you fill. The top should remain accessible after planting. Add a removable cap or screen.
Free tools Windows power users keep installed
One-click scans. No signup required.
7. Mix the Growing Media
Use a lightweight, porous, well-drained container mix. A dependable blend is bagged potting or raised-bed mix amended with compost and extra aeration such as perlite or pumice. For a single tower, a practical ratio is about 70 percent potting mix, 20 percent finished compost, and 10 percent perlite or pumice.
Avoid straight garden soil, heavy clay topsoil, or pure compost. Garden soil compacts in containers, holds too much water, and limits root oxygen. Pure compost can settle heavily and stay too wet. A barrel tower needs air space as much as fertility.
8. Fill in Lifts
Pre-moisten the mix before filling. It should feel damp, not muddy. Add 8 to 10 inches of mix at a time, water lightly, and settle it by hand around the pockets and center tube. Do not ram it tight. Firm contact is good; compaction is not.
As you reach each row of pockets, work soil into the pocket area so the plants have full contact with the media. Filling in lifts reduces the sinkage that often shows up two weeks after planting.
Recommended Free Tools
9. Plant the Pockets and Top
Start with the lower pockets and work upward. Small transplants are easier than large root-bound plants. Insert the root ball through the pocket, firm soil around it from inside when possible, and water gently after each section.
Reserve the top for larger herbs, flowers, or compact vegetables. Do not load the top with full-size tomatoes, squash, corn, or sprawling cucumbers unless you are adding serious support and accepting that those plants may dominate the whole tower.
Best Plants for a Barrel Garden Tower
The pockets are best for shallow-rooted and compact plants. Think of each pocket as a small container sharing a larger soil column. Plants with aggressive roots or heavy top growth are a poor match.
Good Choices
- Strawberries
- Lettuce
- Spinach
- Parsley, cilantro, basil, thyme, and chives
- Bush beans
- Small peppers
- Nasturtiums
- Marigolds
- Compact greens
Use Caution
- Cherry tomatoes, only in the top with support
- Compact cucumbers, only with a trellis
- Kale, if spacing is generous
- Mint, because it can take over shared soil
Poor Fits
- Full-size tomatoes in side pockets
- Squash
- Corn
- Melons
- Large cucumbers without strong support
- Deep-rooted root crops
If the goal is maximum production, plant fewer varieties and group crops with similar water needs. Strawberries in most pockets with herbs on top is easier to manage than mixing peppers, lettuce, beans, flowers, and thirsty herbs in one barrel.
Rank #4

- Industrial Storage Drum: Bushman 55 gallon tight head plastic drum designed for safe storage and transport of water, chemicals, oil, and other liquids in industrial or agricultural settings; rated 1H1/Y1.9/150 and approved for holding FDA- and USDA-compliant food-grade items
- Heavy-Duty Container: Made from high density polyethylene that resists corrosion, impact damage, and UV exposure for reliable long-term use indoors or outdoors
- Tight Lid Design: Closed-head barrel with secure lid and plug closures helps prevent leaks, spills, and air exposure during storage or shipping; Please note the lid is not removable and is glued shut to the barrel
- Space-saving: Designed to stack securely when sealed, saving floor space and improving efficiency in warehouses, garages, or transport
- Large Capacity Size: Measures 22.5"L x 22.5"W x 34.75"H with a full 55-gallon capacity to support bulk storage, rainwater collection, or fermentation needs
Watering and Drainage Management
The most common failure pattern is top-dry and bottom-soggy. Water runs down channels, the upper pockets dry out, and the bottom stays wet. The center tube helps, but only if you water slowly.
For hand watering, water the top surface first, then add water slowly into the center tube. Give the barrel time to absorb it. If water immediately pours from the bottom, slow down. Fast watering often bypasses dry pockets.
Drip irrigation is the cleaner solution. A small drip ring around the top and a line into or near the center tube can keep moisture more consistent. In hot weather, a planted barrel may need daily watering. In spring or fall, every 2 to 3 days may be enough. Check by feeling the media in several pockets, not just the top.
Keep the barrel elevated so drain holes can work. Do not let mulch, leaves, or patio debris block the bottom. If the tower sits on a hardscape surface, plan for runoff. Constant wet spots can stain concrete, feed algae, create a slip hazard, or hold moisture against wood.
Quick wins for a faster PC:
Scan for outdated or missing drivers - takes under a minuteDriver Scan →Clear out junk files and repair common Windows errorsFree Scan →Fix the driver behind crashes, sound loss and screen glitchesFind Drivers →Structural Stability and Wind
A filled barrel is heavy, but height still matters. At about 35 inches tall with plants growing from all sides, a tower can catch wind. Before the root system develops, the soil can shift slightly inside the barrel. That is why base preparation matters.
Use a level pad wider than the barrel. A 30-inch by 30-inch paver area is a practical minimum. In windy areas, place the tower where it has some protection, or anchor it to a post, fence structure, or ground anchors with straps. Do not screw into siding or deck railings without understanding what you are fastening into and how water will be kept out.
Do not place a barrel tower on a slope unless you build a level pad. A small lean gets worse as the soil settles and plants grow toward the sun.
Maintenance Through the Season
Expect some settling in the first two weeks. Top off the barrel with more mix as needed. If pockets slump, add media around the plant roots and firm it gently.
Feed lightly but regularly. Container plants exhaust nutrients faster than in-ground garden beds. Use a balanced organic or slow-release fertilizer according to label rates, or supplement with diluted liquid feed during active growth. Do not overdo nitrogen on herbs and greens unless you want soft, pest-prone growth.
Check the center tube every week. If you use it for composting, add small amounts of vegetable scraps, not meat, dairy, grease, or large chunks. Keep the cap on. If pests become a problem, stop composting in the tube and use it for watering only.
At the end of the season, remove spent plants and inspect the plastic. Look for cracks radiating from pocket cuts, brittle areas, clogged drains, and UV damage. Refresh part of the media with compost and new potting mix before replanting. If the sidewall is cracking, retire the barrel before it fails while full.
When to DIY vs. When to Hire a Pro
This is a good DIY project for a homeowner who is comfortable using a drill, jigsaw, heat gun, and level. The active build time is usually 4 to 7 hours, plus shopping and cleanup. Planting can add another 1 to 2 hours depending on how many pockets you fill.
Free tools Windows power users keep installed
One-click scans. No signup required.
Best Value

- 𝟓𝟓-𝐆𝐚𝐥𝐥𝐨𝐧 𝐈𝐧𝐝𝐮𝐬𝐭𝐫𝐢𝐚𝐥 𝐂𝐚𝐩𝐚𝐜𝐢𝐭𝐲: This heavy-duty plastic drum offers a spacious 55-gallon capacity, ideal for industrial, laboratory, or commercial storage and transportation. Its generous size supports bulk liquid or dry goods, making it perfect for large-scale material handling.
- 𝐁𝐏𝐀-𝐅𝐫𝐞𝐞 𝐓𝐢𝐠𝐡𝐭 𝐇𝐞𝐚𝐝 𝐃𝐞𝐬𝐢𝐠𝐧: Crafted from BPA-free high-quality plastic, the seamless tight head design ensures secure containment and minimizes risk of leakage. It is perfect for storing sensitive or hazardous materials safely and efficiently.
- 𝐃𝐮𝐚𝐥 𝐅𝐢𝐭𝐭𝐢𝐧𝐠𝐬 𝐟𝐨𝐫 𝐕𝐞𝐫𝐬𝐚𝐭𝐢𝐥𝐢𝐭𝐲: Equipped with both 2-inch NPT and 2-inch Buttress fittings, this drum supports a variety of pumps and connections, providing flexibility for transferring, draining, or filling different liquid types with ease.
- 𝐔𝐍 𝐑𝐚𝐭𝐞𝐝 𝐟𝐨𝐫 𝐒𝐚𝐟𝐞𝐭𝐲 𝐂𝐨𝐦𝐩𝐥𝐢𝐚𝐧𝐜𝐞: This container meets UN standards, making it safe and compliant for the storage and transportation of regulated materials. It is a reliable choice for chemicals, oils, or industrial supplies that require certified containment.
- 𝐃𝐮𝐫𝐚𝐛𝐥𝐞 & 𝐖𝐞𝐚𝐭𝐡𝐞𝐫-𝐑𝐞𝐬𝐢𝐬𝐭𝐚𝐧𝐭 𝐇𝐌𝐖𝐏𝐄: Built from high molecular weight polyethylene (HMWPE), this drum is impact-resistant, UV-stable, and weatherproof. It withstands outdoor exposure, resists fading and cracking, and ensures long-term reliability in harsh environments.
DIY makes sense when the tower is going on level ground, you have a known food-grade barrel, drainage is simple, and you already own most tools.
Hire a pro or at least ask for professional input when the tower will sit on a deck, balcony, rooftop, slope, front-yard hardscape, or tight side yard with drainage issues. A pro also makes sense if you want a permanent paver base, drip irrigation tied into an existing system, multiple towers, or a cleaner finished look for a visible landscape area.
For professional assembly, a handyman or landscape installer charging roughly $50 to $125 per hour can bring the total installed cost to about $250 to $600+. That number is not justified for every homeowner, but it can be worth it if the project includes base prep, irrigation, and plant installation.
Common Mistakes to Avoid
- Using an unknown barrel: If you do not know what it held, do not grow food in it.
- Cutting too many pockets: Stay around 30 to 40 pockets for better strength and plant health.
- Skipping drainage: Bottom and lower-side holes are required.
- Using garden soil: It compacts and performs poorly in containers.
- Filling with dry mix: Dry potting mix can repel water and settle unevenly.
- Putting it on a weak deck: A wet tower can exceed 200 pounds.
- Ignoring wind: A planted barrel can act like a sail.
- Planting oversized crops: Full-size tomatoes and squash are better in raised beds or large dedicated containers.
Bottom Line
A barrel garden tower is worth building when you treat it as a small outdoor structure, not just a craft project. Use a verified food-grade 55-gallon drum, keep the pocket count reasonable, drill real drainage, fill it with lightweight container media, and place it on a level base that can handle 180 to 300+ pounds when wet.
What’s actually slowing this PC down?
Pick the symptom - the matching free tool is one click away.
The best version is simple: 30 to 40 staggered pockets, a screened 4-inch center tube, 5 to 7 cubic feet of well-drained mix, and plants that actually suit shallow side pockets. Build it that way, and the tower becomes a productive, space-saving garden feature instead of a maintenance problem.
Frequently Asked Questions
How many plants can you grow in a 55-gallon barrel garden tower?
A practical range is 30 to 40 side-pocket plants, plus a few larger plants in the top. More than 45 pockets can weaken the barrel and make watering less reliable.
What kind of barrel is safe for growing vegetables?
Use a food-grade HDPE or polypropylene barrel with known previous contents. Avoid barrels that held chemicals, petroleum products, cleaners, pesticides, solvents, or unknown liquids.
How much does a barrel garden tower weigh when full?
A filled 55-gallon garden tower commonly weighs about 180 to 300+ pounds depending on soil mix, water saturation, compost, plants, and hardware.
Quick wins for a faster PC:
Scan for outdated or missing drivers - takes under a minuteDriver Scan →Repair Windows errors before they cause bigger problemsFix Now →Fix the driver behind crashes, sound loss and screen glitchesFind Drivers →Can I use garden soil in a barrel tower?
No. Garden soil is usually too dense for containers and can compact, hold excess water, and reduce root oxygen. Use lightweight potting or raised-bed mix amended with compost and perlite or pumice.
Do I need a permit for a barrel garden tower?
Most movable backyard barrel towers do not need a building permit, but local rules and HOA restrictions can apply, especially in front yards, common areas, balconies, rooftops, and utility easements.
What grows best in the side pockets?
Strawberries, lettuce, spinach, herbs, bush beans, small peppers, nasturtiums, marigolds, and compact greens are good choices. Avoid large tomatoes, squash, corn, and full-size cucumbers in the side pockets.
Quick Recap
Product prices and availability are accurate as of the date/time indicated and are subject to change. Any price and availability information displayed on Amazon at the time of purchase will apply.
Do these 3 things before closing this tab:
1Scan for outdated or missing drivers - takes under a minute2Repair Windows errors before they cause bigger problems3Fix the driver behind crashes, sound loss and screen glitches