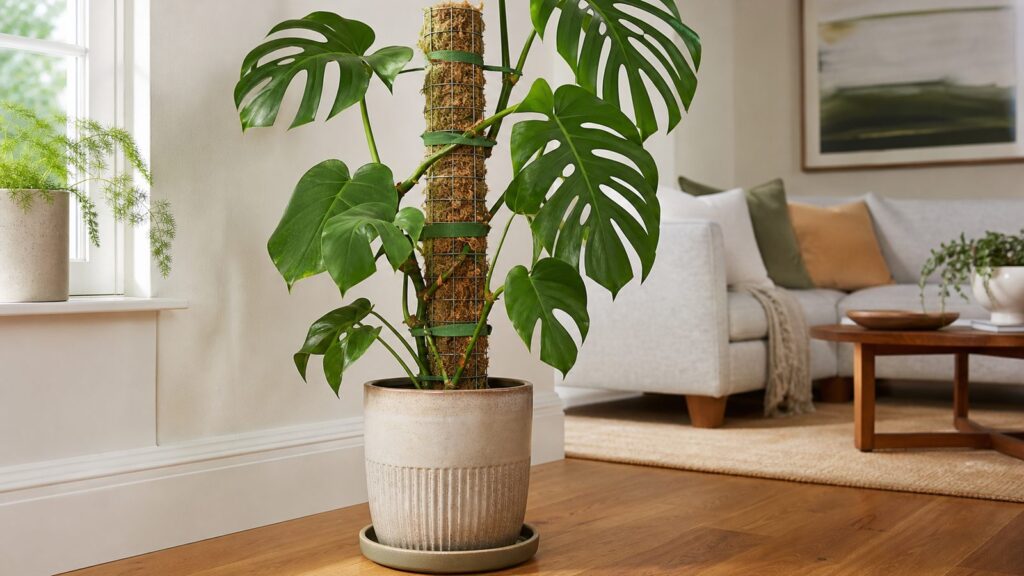
A good DIY moss pole is more than moss wrapped around a stick. For a climbing houseplant, it is a small vertical support system: a foundation in the pot, a rigid upright, a textured cladding, gentle fasteners, and a moisture plan that does not create problems for the plant or the room.
For most homeowners, one 24- to 36-inch moss pole costs about $8 to $25 if you already own basic tools. If you need to buy snips, gloves, ties, and a full roll of mesh, expect closer to $25 to $60. The work usually takes 30 to 60 minutes, plus 10 to 20 minutes to soak and squeeze the moss.
This guide is for climbing aroids such as Monstera, pothos, philodendron, syngonium, and scindapsus. The best version for most indoor plants is a rigid center stake or PVC pipe wrapped with plastic mesh, PVC-coated hardware cloth, or galvanized hardware cloth, then filled with damp long-fiber sphagnum moss. Build it taller than the plant, anchor it deeply, and keep it damp without soaking the potting mix.
What a Moss Pole Actually Does
A moss pole gives climbing houseplants a textured, moist surface where aerial roots can grip. In the wild, many of these plants climb trees or rough vertical surfaces. Indoors, a moss pole gives the plant a better target than a painted wall, curtain, bookcase, or window trim.
#1 Best Overall

- 【Complete DIY Moss Pole Kit】Package comes with 6.6ft (2pcs of 8.3in×3.3ft) premium steel wire mesh, 1pc plier, 40pcs cable zip ties, 1 roll of garden ties. The perfect DIY monstera moss pole kit inclued everything needed to make and customize plant support for indoor plants
- 【DIY Your Own Sphagnum Moss Poles】You can customize moss poles for climbing plants according to your plant's growth stage and height, like 15", 24", 30", or even 75" , and also a large moss wall. And you can also DIY your favorite houseplant growing shapes, like heart shape or an arch, etc
- 【DIY Moss Pole for Huge Growth】This self-watering steel wire mesh moss pole is excellent for covering moss, its exclusive 360° full coverage surface will allow your plant's aerial roots to better attach to it, making your plants grow faster and grow giant leaves
- 【Sturdy & Long-lasting】The wire mesh is made of premium steel with green vinyl coated , which is weather resistant, reusable, sturdy, superior to wood and plastic. These indoor plant poles are suitable for Monstera Deliciosa, Pothos, Philodendrons and more.
- 【Make Easy Moss Pole】The wire mesh can be cut easily with the included pliers. There is a sufficient amount of cable ties in the package to better secure the mesh, and the garden ties are used to secure climbing plants to monstera moss pole.The instructions and video will guide you through the entire process on how to build an easy DIY mose pole for your plants
For Monstera and many philodendrons, a pole can also encourage more mature growth over time. It is not magic. Larger leaves still depend on light, root health, nutrition, humidity, and time. But a stable, correctly placed pole lets the vine grow upright and keeps the nodes close to a surface the aerial roots can actually use.
On our job sites, we think about load paths, fasteners, drainage, and access for maintenance. The same thinking helps here. A pole that is too short, too loose, too wet, or shoved into a tight root ball after the fact will not perform well. A pole that is sized, anchored, and inspected properly can last through several growth cycles and can be extended later.
Materials, Tools, and 2026 Cost Range
For one indoor moss pole, plan on a finished height of 24 to 36 inches for smaller houseplants and 48 inches or more for large Monsteras. As a sizing rule, make the pole at least as tall as the current plant and preferably 12 to 24 inches taller. That gives the plant room to climb before you need another repot or extension.
The core materials are simple: long-fiber sphagnum moss, mesh, a center support, and soft ties. Long-fiber sphagnum holds moisture better than coco coir, which helps aerial roots attach. Coco coir is neater, cheaper, and longer-lasting, but it does not stay damp as long. A blend works well if you want less mess and better moisture than coir alone.
Quick wins for a faster PC:
Scan for outdated or missing drivers - takes under a minuteDriver Scan →Repair Windows errors before they cause bigger problemsFix Now →Fix the driver behind crashes, sound loss and screen glitchesFind Drivers →| Item | Typical 2026 US Cost | What to Look For |
|---|---|---|
| Long-fiber sphagnum moss | $5-$8 for small packs around 190 cu. in. or 8.47 oz.; $20-$60 for larger specialty packs | Long strands, not preserved decorative moss |
| Plastic mesh | Often included in $10-$20 DIY kits | Pet-friendly, no corrosion, easier to cut |
| Galvanized or PVC-coated hardware cloth | $15-$25 for a 2 ft. x 5 ft. roll; $38-$78+ for larger 25 ft. rolls | 1/4- to 1/2-inch openings, stiff enough to hold shape |
| Center support | A few dollars per pole, depending on material | Bamboo stake, PVC pipe, coated metal plant stake, or rot-resistant dowel |
| Soft plant ties | $3-$10 | Velcro plant tape, cotton string, jute twine, or coated twist ties |
| Basic tools | $0 if owned; $15-$35 if buying snips and gloves | Tin snips or wire cutters for metal mesh; heavy scissors for plastic mesh |
For one pole, a $10 to $20 kit can be the simpler buy. For several plants, buying sphagnum and a larger roll of mesh usually lowers the per-pole cost. The biggest cost drivers are pole height, mesh type, whether you use true long-fiber sphagnum, and whether you already own cutters and gloves.
Choose the Right Pole Design
There are three common designs: a round cylinder, a D-shaped pole, and a wrapped stake. A full cylinder has moss all the way around and works well in the center of a pot. A D-shaped pole has a flat back and a rounded moss-filled front. For plants near a wall, a D-shaped pole is often better because the flat side can face the wall, saving pot space and keeping damp moss farther from paint or drywall.
A wrapped stake is the simplest version: moss wrapped around bamboo, PVC, or a wood dowel and tied in place. It can work for pothos or smaller philodendrons, but it usually dries faster and gives roots less depth to grow into. For a long-term Monstera support, use a mesh-filled pole instead.
Plastic Mesh vs. Metal Hardware Cloth
Plastic mesh is easier to handle indoors. It has no sharp metal edge, will not rust, and is a better choice around children or pets. The tradeoff is rigidity. Tall poles can flex unless you use a strong center support.
Free tools Windows power users keep installed
One-click scans. No signup required.
Galvanized or PVC-coated hardware cloth is stiffer and cleaner structurally. Use 1/4- to 1/2-inch openings so roots can reach the moss and ties can pass through the mesh. The downside is the cut edge. Wear gloves, fold the seam inward where possible, and cover or crimp any sharp points. If corrosion, exposed wire, or pet safety is a concern, choose plastic mesh or PVC-coated mesh.
Sphagnum Moss vs. Coco Coir
Sphagnum moss is the better moisture material for root attachment. It holds water longer and gives aerial roots a soft, fibrous surface. Coco coir poles are tidier and often last longer before breaking down, but they do not stay as damp. If your home is dry or you are training a Monstera, use sphagnum or a sphagnum-heavy blend. If you mainly need a tidy support for pothos, coir is acceptable.
Step 1: Measure the Plant, Pot, and Anchor Depth
Start with the plant and pot, not the roll of mesh. Measure from the soil line to the top of the plant. Add 12 to 24 inches. That is your target above-soil pole height. Then add 6 to 10 inches for the buried stake or pole section.
Rank #2
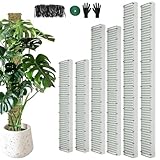
- Unique D-shaped Moss Pole: Plant poles for climbing plants is semi-cylindrical in shape, the mesh flat surface will allow your plant's aerial roots to better attach to it, PP curved backing retains moisture of the moss inside the pole, and the semi-transparent design makes it easy to observe the growth of the roots
- Various Sizes: You will get 6 packs of moss pole for plants in 3 sizes(2pcs 60-inch, 2pcs 40-inch and 2pcs 24-inch).Various sizes and sufficient quantities can meet the needs of different growing periods of plants and different kinds of plants
- Sturdy Metal Moss Poles: The sphagnum moss pole is made of high-quality metal mesh + thickened PP material,which is stronger and more durable than those made of plastic or wood. They are also resistant to corrosion and rust, and are strong enough to support the weight of big climbing plants
- Easy to Assemble and Use: The package comes with 6pcs plant moss pole mesh, 6pcs thickened plastic sheet, 300pcs zip ties, 1 roll of garden ties, 1 pair of gloves. You just need to buy extra moss and you can get a sturdy moss poles that are more suitable for your plants!! (Moss NOT INCLUDED!)
- 【Guide Plants Grow Upwards】The plant moss poles provide sturdy support for your lovely plants and guide them to climb upward, letting your plants to grow towards sunlight and produce larger and greener leaves. They are suitable for climbing plants, vines and shrubs, such as Monstera, Pothos and Money Plant
For example, if your philodendron is 24 inches above the soil, build a pole with 36 to 42 inches above the soil and a total support length around 42 to 52 inches. For a young pothos, a 24-inch finished pole may be enough. For a large Monstera, 48 to 60 inches is more realistic, and the pot needs enough weight to resist tipping.
The Tool Desk
Outbyte Driver Updater FREEFix the driver behind crashes, sound loss and screen glitchesFind Drivers →Outbyte PC Repair FREEClear out junk files and repair common Windows errorsFree Scan →Check the pot diameter too. A narrow nursery pot with a tall plant and a wet moss pole can become top-heavy. For large Monsteras, use a heavy ceramic pot or place the nursery pot inside a heavy cachepot. Think of it like a small column: the taller the upright, the more the base matters.
Step 2: Cut the Mesh and Center Support
Put on work gloves before cutting metal mesh. For a round pole, cut a rectangle of mesh long enough to match the finished pole height and wide enough to roll into a 2- to 3-inch diameter cylinder. A practical starting size for a 36-inch pole is about 36 inches tall by 8 to 10 inches wide. For a D-shaped pole, cut the mesh wide enough to create a rounded front with a flatter back, often 6 to 8 inches wide for a compact indoor support.
Cut the center support 6 to 10 inches longer than the visible moss section so it can be buried into the potting mix. Bamboo stakes are inexpensive and easy to cut. PVC pipe is rot-resistant and consistent. Wood dowels look clean but can break down faster in damp potting media. Coated metal plant stakes are durable but may cost more.
If you want the pole to be extendable, plan the top now. Leave 3 to 4 inches of open center support above the moss, or build the pole in sections that can overlap. A sectional pole is easier to extend without cutting off roots that have attached to the first pole.
What’s actually slowing this PC down?
Pick the symptom - the matching free tool is one click away.
Step 3: Hydrate the Sphagnum Moss
Place the sphagnum moss in a bucket or bowl and soak it for 10 to 20 minutes. Once it is fully hydrated, squeeze it until it is damp, not dripping. This step matters. Dripping moss makes a mess, dumps extra water into the pot on day one, and can push the plant toward soggy conditions.
The fill should feel like a wrung-out sponge. Aerial roots need moisture, but they also need oxygen. Do not pack the moss into a hard brick. A firm, springy fill is better than a compressed one.
Do not use preserved decorative moss for this project. It is made for display, not for root attachment or repeated wetting. Use long-fiber sphagnum moss or a sphagnum and coco coir blend.
Step 4: Form, Fill, and Close the Pole
Lay the mesh flat and place the center support along one edge or down the middle, depending on your design. Add damp sphagnum moss in an even layer, then roll or fold the mesh around it. For a round pole, roll the mesh into a cylinder. For a D-shaped pole, form a rounded front and keep the back flatter.
Crashes, No Sound, or Screen Glitches?
Random freezes, missing sound and display glitches usually trace back to one bad driver. Find and replace yours safely.Free scan · under a minuteWindows Errors? Fix Them Before They Spread
Repair common Windows errors and clear accumulated junk for a smoother, more stable PC - no reinstall needed.Free scan · no reinstallClose the seam with zip ties, stainless wire, plastic-coated wire, or the cut ends of the mesh folded back into itself. Keep any zip tie heads or wire twists facing away from where the plant stem will sit. Trim tails flush so they do not catch leaves or scrape stems.
At the top and bottom, tuck loose moss back inside the mesh. If you are using hardware cloth, inspect the seam and top edge with your hands in gloves. Any sharp point you can feel can damage a stem later. Fold it inward, crimp it, or cover the edge with plant tape.
Rank #3

- D Shape Moss Pole DIY Kit | Custom Sphagnum Moss Poles for Climbing Indoor Plants. Tired of pre-made moss poles that don’t fit your plant’s growth or pot size? Our all-in-one DIY moss pole kit lets you handcraft fully customized sphagnum moss poles that perfectly match your climbing plants, guiding them to grow upright and develop lush, large leaves with ease. It’s the ideal plant support solution for both houseplant beginners and seasoned gardening enthusiasts.
- You will get a complete gardening tool set with no extra tools needed, just prepare your favorite sphagnum moss to start creating! The kit includes: 10 ft dark green vinyl coated wire mesh, 4 ft D-shaped thickened Black plastic sheet, 1 pair of wire-cutting pliers, 1 pair of non-slip gardening gloves, 100pcs nylon cable ties, 10 ft plant tape, and 25pcs reusable plant clips.
- Break free from fixed-size limitations with our fully customizable design. We provide a full 10 ft roll of wire mesh and 1 pieces of 4ft plastic sheets, allowing you to cut and shape the moss pole into any length and form you need. Unlike spliced pre-made poles that are easy to loosen and deform, your handcrafted one-piece moss pole has stronger stability and a more seamless look.
- Upgraded premium materials ensure long-term use. Our vinyl-coated galvanized iron wire mesh boasts superior load-bearing, rust & corrosion resistance. Unlike rotten coir poles, fragile plastic or cracked wooden stakes, our thickened D-sheet and reinforced mesh firmly support large leafy climbing plants for years.
- Exclusive D-shaped semi-cylindrical design outperforms ordinary cylindrical poles. The flat mesh fits plant aerial roots perfectly for full attachment and rooting. Curved PP backing locks in moss moisture & nutrients, reduces water evaporation, cuts frequent watering, and creates a moist breathable root environment.
The finished pole should feel rigid enough to stand upright without wobbling in your hand. If it bends easily, add a stronger center stake or reduce the diameter. A 2-inch diameter pole is plenty for many houseplants. Large Monsteras may justify 3 inches, but bigger is not always better because it consumes pot space.
Step 5: Anchor the Pole During Repotting
The best time to install a moss pole is during repotting. That lets you place the pole near the back of the pot, settle the roots around it, and bury 6 to 10 inches of the support without stabbing through a crowded root ball.
Do these 3 things before closing this tab:
1Repair Windows errors before they cause bigger problems2Fix the driver behind crashes, sound loss and screen glitches3Clear out junk files and repair common Windows errorsAdd a base layer of potting mix, position the pole, then place the plant so the main vine or stem angles toward the moss. Backfill firmly enough that the pole does not wobble. The pole should sit close to the nodes where aerial roots emerge, not just in the middle of the pot for looks.
If you must add a pole without repotting, use a narrower support and work slowly. Push near the inside edge of the pot rather than through the densest root mass. Stop if you hit major resistance. A poorly anchored pole can damage roots and still fail to support the plant.
For renters, keep the pole fully contained in the pot. Do not fasten a plant support to drywall, trim, window frames, or built-ins unless you have approval. Damp moss near a wall can also mark paint or raise local moisture, so leave air space behind the plant and use a saucer or cachepot that protects flooring.
Step 6: Tie the Stems and Train the Aerial Roots
Use soft plant tape, Velcro plant ties, cotton string, jute twine, or coated twist ties. Tie the main vine or stem, not the petiole. A petiole is the leaf stalk; it moves as the plant adjusts to light. Tying petioles can stress or deform the plant.
Keep ties snug enough to guide the stem but loose enough to allow growth. You should be able to slip a finger under most ties. Avoid tight zip ties directly on living stems because they can girdle the plant as it thickens.
Guide aerial roots toward the damp moss as they grow. Some roots will attach; some will not. That is normal. For Monstera, align the moss pole with the back side of the stem where nodes and aerial roots are already forming. A pole placed on the wrong side of the plant may look neat but do little.
After tying, rotate the pot only if needed. Many climbing plants orient themselves toward light. If the support, stem, and light source fight each other, the plant will twist. Place the pole behind the plant, give the foliage bright indirect light, and let new growth climb into the support.
Watering, Moisture, and Mold Control
A moss pole should be damp at times, not constantly saturated. Water it from the top with a narrow-spout bottle, squeeze bottle, or small watering can. Let excess drain into the pot only when the potting mix can accept moisture. If the soil is already wet, skip the pole or wet only the upper section lightly.
For many homes, wetting the pole every 5 to 10 days is enough during active growth. In a dry room or near HVAC airflow, it may dry faster. In winter, it may stay damp longer. Use touch and smell, not a rigid calendar. Damp moss should smell earthy. Sour odor, algae, fuzzy growth, or fungus gnats are signs that the pole or potting mix is staying too wet.
Rank #4

- [Train Your Plants to Grow upwards] The sphagnum moss pole greatly helps climbing indoor potted plants with aerial roots overcome the difficulty of growing vertically towards sunlight and develop more, larger and greener leaves.
- [Unique Design] This moss pole for climbing plants is semi-cylindrical in shape, compared to coco coir poles that are generally cylindrical on the market, and its exclusive flat surface will let your plant's aerial roots to better attach to it.
- [Create an Ideal Growth Environment] We strongly suggest using sphagnum moss (NOT INCLUDED) with our plant sticks for best effect because it can provide water and micronutrients for creeping plants for a long time. Besides, our product will not end up rotting even if it stuck inside the soil for too long.
- [Assembly Tips] EOX plant pole has TWO crease lines that you need to FOLD along to make a semi-cylindrical (D-shape) moss pole. DON’T NOT roll it directly into a cylinder! If you have any assembly issues please refer to the installation video on our listing page or contact us directly.
- [Simple Method of Use] First, Place the moss pole at the bottom of an empty pot. Place the climbing plant in next and tie it against the plant support stake. And finally, fill in with your potting mix! Next, cut garden ties to secure your plant's stems to the moss stick. Besides, it only takes you a few minutes to assemble our moss pole following instructions or video.
Indoor moisture control matters. EPA guidance recommends keeping indoor relative humidity below 60%, ideally in the 30% to 50% range. Repeatedly soaking a moss pole beside a wall, window, wood floor, or fabric furniture can create a small damp zone even if the whole room feels normal.
Good practice is simple: keep the plant a few inches off the wall, use a saucer that does not overflow, avoid misting painted surfaces, and provide airflow. If condensation appears on nearby glass or the wall feels cool and damp, reduce pole watering and move the plant.
Independent reader supportYour contribution helps us test, update, and keep practical guides available for everyone.Maintenance: Monthly Inspection Checklist
Once a month, inspect the pole the same way a crew checks exposed details before they become larger problems. Look for loose ties, exposed wire, wobble at the base, compacted moss, algae, odor, mold, and roots growing where they may be damaged later.
Replace or loosen ties as stems expand. Refresh the top layer of moss if it breaks down or falls out. If the pole dries too quickly, add a light outer wrap of mesh or rebuild with a slightly larger diameter. If the pot tips or the pole rocks, the fix is usually a deeper anchor, heavier pot, or shorter extension, not more ties around the stem.
Expect sphagnum to slowly break down. A well-built pole can serve for a year or more, but high-moisture poles need more attention. If the plant has rooted heavily into the moss, avoid tearing the pole apart during active growth. Extend above it instead or repot carefully when the plant is ready.
Common Mistakes to Avoid
The most common mistake is making the pole too short. If the plant reaches the top in a month, you have created another project immediately. Add 12 to 24 inches beyond the current height whenever the room and pot size allow it.
The second mistake is overwatering. Wet moss plus wet potting mix can lead to root rot, fungus gnats, and mold-friendly conditions. The pole is not a second pot. It is a climbing surface. Moisture should be deliberate and controlled.
Recommended Free Tools
Other mistakes are easy to prevent: do not leave sharp hardware-cloth edges exposed, do not tie stems tightly, do not tie petioles, do not rely on a smooth plastic stake alone for root attachment, and do not push a thick finished pole through a dense root ball. Install during repotting whenever possible.
Do You Need a Permit or Landlord Approval?
No building permit is required for a freestanding moss pole inside a houseplant pot. This is not structural work, electrical work, plumbing, or a building-code project. It does not alter the home when it stays inside the planter.
Landlord approval may matter if you plan to fasten anything to a wall, ceiling, window frame, built-in shelf, or trim. For rental homes and apartments, keep the support freestanding. Use a heavier pot, cachepot, or plant stand instead of wall anchors. Also protect wood floors with a waterproof saucer or tray.
For very large indoor plants in public spaces, offices, or commercial interiors, the concern is usually not permits but liability: tipping, blocked walkways, water damage, and maintenance access. Keep tall plant supports out of egress paths and use stable containers.
The Tool Desk
Outbyte PC Repair FREERepair Windows errors before they cause bigger problemsFix Now →Outbyte Driver Updater FREEScan for outdated or missing drivers - takes under a minuteDriver Scan →Best Value

- Fillable Design: The moss pole for plants allows you to add sphagnum moss or other water-retaining materials inside, keeping your plants hydrated longer and promoting growth. It's perfect for monstera plant support and moss poles for climbing plants, with a moss pole small option available for smaller plants.
- Stackable Design: This small moss pole is perfect for smaller plants, offering a stackable design to add sections as your plant grows. Ideal for moss pole monstera plant support and other climbing plants, it works well as a moss pole for plants indoor.
- Plastic Mesh Design: Our plastic moss pole won’t rot like wooden poles. The mesh allows plant roots to attach to the moss, supporting healthy growth. Perfect as a moss pole for plants indoor or plastic moss poles for climbing plants, offering strong and lasting support.
- Easy Setup: Setting up our sphagnum moss pole for Monstera plant support is quick and simple. Just fill the moss pole plastic with sphagnum, attach the plastic rods, insert it into the soil, and secure your plant. In just a few steps, you’re all set—perfect for beginners!
- Quality Assurance: We offer a 48-month warranty on our moss pole Monstera plant support, including the moss pole kit. If you encounter any issues after your purchase, simply reach out to us, and we will address your concerns within 10 hours. We are committed to your satisfaction, so you can purchase with confidence.
When to DIY vs. When to Hire a Pro
Most moss poles are clear DIY work. If you can cut mesh safely, repot a plant, and manage water without soaking the floor, you can build one in under an hour. DIY is especially sensible for pothos, small philodendrons, scindapsus, syngonium, and young Monsteras.
Hire help only when the plant, container, or setting creates risk beyond normal plant care. A large interior plant in a heavy ceramic planter can weigh 75 to 150 pounds or more when watered. Moving that across finished hardwood, stone, or stairs can damage surfaces or injure someone. In that case, use a plant-care professional, interior landscaper, or handyman for moving, repotting, and anchoring.
A pro also makes sense for built-in planters, commercial lobbies, high-value flooring, or plants placed near custom millwork. The moss pole itself is simple. The surrounding finishes are what raise the stakes.
Final Builder’s Notes
A durable DIY moss pole comes down to six decisions: size it taller than the plant, use a rigid center support, choose mesh that fits your safety needs, fill it with damp long-fiber sphagnum, bury 6 to 10 inches for stability, and maintain moisture without keeping the whole pot wet.
For one plant, buying a small kit may be the easiest route. For several poles, buy moss and mesh in bulk and build them in sections. If the plant is large, give as much attention to the pot as the pole. A strong upright in a lightweight base is still a tipping problem.
Build it clean, keep it serviceable, and inspect it monthly. That is the difference between a decorative stick and a support system your climbing plant can actually use.
Frequently Asked Questions
Do moss poles really help Monstera leaves get bigger?
They can help, but they are not the only factor. A moss pole gives Monstera aerial roots a climbing surface, which can support more mature growth. Larger leaves still require bright indirect light, healthy roots, proper watering, and time.
Is sphagnum moss or coco coir better for a DIY moss pole?
Long-fiber sphagnum moss is better for moisture retention and aerial root attachment. Coco coir is neater, cheaper, and longer-lasting, but it dries faster and usually does not encourage attachment as well.
Free tools Windows power users keep installed
One-click scans. No signup required.
How often should you water a moss pole indoors?
Most indoor moss poles need light watering every 5 to 10 days during active growth, but the right interval depends on room humidity, airflow, plant size, and potting mix moisture. Keep the moss damp, not constantly saturated.
Can a moss pole cause mold in your house?
A moss pole can contribute to mold-friendly conditions if it is kept soaked beside walls, windows, floors, or furniture. Keep indoor humidity below 60%, ideally 30% to 50%, leave air space around the plant, and avoid overwatering the pole and soil.
How tall should a moss pole be for a Monstera or philodendron?
Make the pole at least as tall as the current plant and preferably 12 to 24 inches taller. Also allow 6 to 10 inches of buried support below the soil line so the pole stays stable.
Can you add a moss pole without repotting the plant?
Yes, but it is not ideal for large or root-bound plants. Use a narrow support, work near the pot edge, and stop if you meet strong resistance. Installing the pole during repotting gives better stability and reduces root damage.
Quick wins for a faster PC:
Repair Windows errors before they cause bigger problemsFix Now →Fix the driver behind crashes, sound loss and screen glitchesFind Drivers →Quick Recap
Product prices and availability are accurate as of the date/time indicated and are subject to change. Any price and availability information displayed on Amazon at the time of purchase will apply.