Quick wins for a faster PC:
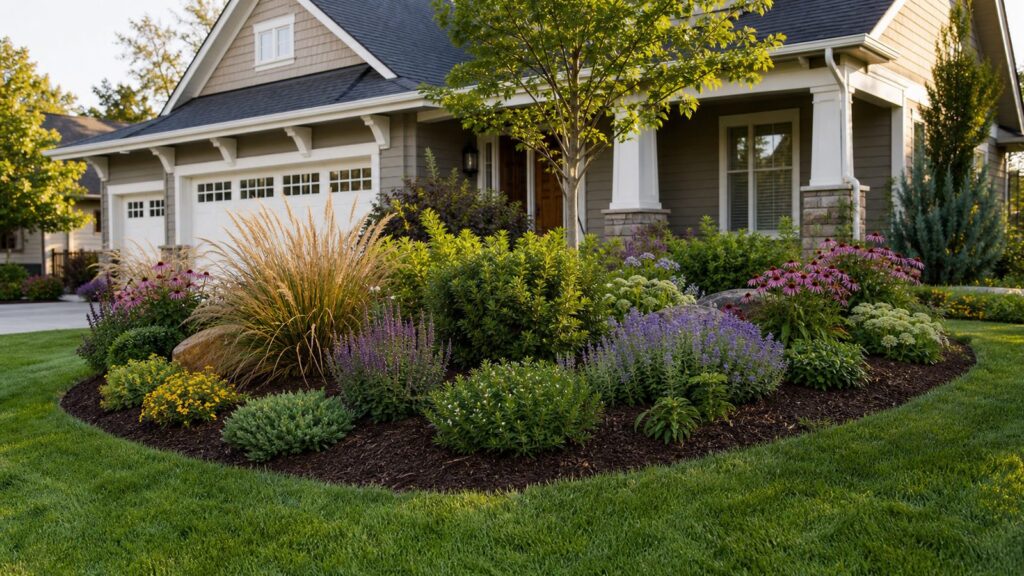
Scan for outdated or missing drivers - takes under a minuteDriver Scan →Clear out junk files and repair common Windows errorsFree Scan →A mound garden, also called a landscape berm, is a shaped planting mound that raises flowers, shrubs, ornamental grasses, or small trees above the surrounding grade. Done well, it gives a flat yard depth, improves plant visibility, creates better drainage for plants that hate wet roots, and frames a walkway, driveway, patio, or lawn edge.
Done poorly, it becomes a steep pile of loose soil that dries out, washes down the lawn, sends water toward the wrong place, and looks like a small volcano. The difference is construction discipline: layout, slope, soil volume, compaction, drainage direction, erosion control, and the right plants in the right positions.
On our job sites, we treat a mound garden as a small grading and planting project, not just a decorative flower bed. That means we mark utilities, calculate cubic yards before ordering material, build a stable base, cap it with good planting soil, feather the edges, and mulch or stabilize the surface immediately after planting.
What a Mound Garden Is Best For
A mound garden is useful when you want elevation without building a formal raised bed wall. It works especially well for:
- Showcasing flowering perennials, specimen shrubs, ornamental grasses, or a small ornamental tree.
- Creating visual separation between a lawn and driveway, patio, sidewalk, or property line.
- Improving planting conditions for species that prefer well-drained soil.
- Adding height in a flat yard without installing retaining walls.
- Softening a fence line, utility area, blank wall, or long stretch of turf.
It is not a fix for every wet-yard problem. A mound can raise plant roots above soggy soil, but it does not replace proper drainage if stormwater is running toward your foundation, garage, sidewalk, driveway, septic area, or a neighbor’s property. If the water problem involves flow, not just wet soil, solve the drainage first.
#1 Best Overall
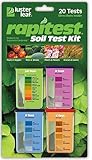
- Quick, at home results for Soil pH, Nitrogen, Phosphorous and Potash Innovative and inexpensive soil test kit features an easy-to-use capsule system and patented color comparators
- Contains all components needed for 20 tests. 5 for each of pH, N, P and K
- Contains all components needed to test all variables in several spots in the yard or garden
- Simple, detailed instructions included. Great for beginners and experienced gardeners alike.
- Soil pH preference list for over 450 plants included
Mound Garden vs. Berm vs. Raised Bed
People use these terms loosely, but the construction is different. The table below shows the practical difference.
| Feature | Typical Shape | Best Use | Construction Notes |
|---|---|---|---|
| Mound garden | Low, rounded planting mound | Flower and shrub display | Usually 12 to 24 inches high with gentle shoulders and feathered edges |
| Landscape berm | Long, broad raised landform | Screening, framing, drainage-sensitive planting | Often larger than a flower mound and may need more grading attention |
| Raised bed | Contained bed with defined sides | Vegetables, herbs, accessible gardening, tight spaces | Uses wood, block, stone, or metal edges to hold soil in place |
For most residential front yards and backyard planting areas, the sweet spot is a low, asymmetrical mound garden that blends into the lawn. It gives you the display value of a raised feature without the hard edge of a planter box.
How Tall and Wide Should a Mound Garden Be?
Keep it lower than you think. A practical residential mound is usually 12 to 24 inches high. We rarely like to see decorative lawn berms taller than about 18 to 24 inches unless there is a larger grading plan behind them. Taller mounds need wider bases, more material, better compaction, and stronger erosion control.
Outdated Drivers Are Slowing You Down
One free scan finds every outdated or missing driver and matches the right update for your exact hardware.Free scan · exact hardware matchWindows Errors? Fix Them Before They Spread
Repair common Windows errors and clear accumulated junk for a smoother, more stable PC - no reinstall needed.Free scan · no reinstallSlope is the real issue. A low mound with broad shoulders performs better than a tall mound with steep sides. For easy mowing and maintenance, aim for a 5:1 slope where you have room. That means 5 feet of horizontal run for every 1 foot of height. A 3:1 slope is often a practical upper limit, but erosion risk increases as the slope gets steeper.
Good Residential Sizes
- Small accent mound: 6 to 10 feet long, 3 to 5 feet wide, 10 to 14 inches high.
- Front-yard flower mound: 10 to 18 feet long, 5 to 8 feet wide, 12 to 20 inches high.
- Large landscape berm: 20 to 35 feet long, 8 to 15 feet wide, 18 to 24 inches high.
A mound should be longer than it is wide. Long, low, slightly irregular shapes look more natural than round piles. If you are building in a lawn, lay out the footprint with a garden hose first, then walk around it from the street, patio, driveway, and windows. If it looks too small during layout, it will usually look even smaller after planting.
Before You Dig: Utilities, Drainage, and Permits
Call 811 before digging, even for a shallow garden project. Mound gardens often involve sod removal, edging stakes, irrigation lines, shrub planting, anchor stakes, and sometimes a skid steer or trencher. Buried utilities are not always as deep or as straight as homeowners expect.
Next, watch where water already moves. After a rain, look for sheet flow, puddling, soil staining, mulch trails, algae on pavement, or water collecting near foundation walls. A mound changes grade, which can change runoff. Do not direct water toward:
- The house, basement, crawlspace, garage, or exterior steps.
- A neighbor’s yard.
- A public sidewalk, street, or right-of-way.
- A driveway where ice may form in winter.
- Fence posts, siding, deck framing, or other wood structures.
Many municipalities regulate grading that changes drainage patterns. Small planting mounds often do not need a permit, but larger berms, imported fill, work near property lines, drainage swales, retaining walls, steep slopes, or public drainage areas may trigger review. If the mound is part of a broader regrading project, get the local rules before the soil arrives.
How Much Soil Do You Need?
Soil volume adds up fast. Use this simple estimating formula:
Length x width x average depth in feet ÷ 27 = cubic yards
Then add 10% to 20% for compaction, shaping, settlement, and waste. For a rounded mound, average depth is usually much less than the tallest point. If your mound peaks at 18 inches, the average depth may be closer to 9 to 12 inches depending on shape.
Recommended Free Tools
| Mound Size | Average Depth | Base Volume | Order With 15% Extra |
|---|---|---|---|
| 8 ft x 4 ft | 8 in. | 0.8 cu. yd. | 0.9 cu. yd. |
| 10 ft x 5 ft | 12 in. | 1.85 cu. yd. | 2.1 cu. yd. |
| 15 ft x 6 ft | 12 in. | 3.3 cu. yd. | 3.8 cu. yd. |
| 20 ft x 8 ft | 18 in. | 8.9 cu. yd. | 10.2 cu. yd. |
Bagged soil gets expensive quickly. One cubic yard equals 27 cubic feet. If you are buying 1.5-cubic-foot bags, one cubic yard takes 18 bags. A 3-cubic-yard mound would take about 54 bags before waste. For anything larger than a small accent bed, bulk delivery usually makes more sense.
Rank #2

- KNOW BEFORE YOU GROW | Grow the healthiest, sustainable lawn and garden with the most accurate and easy to use professional soil test kit on the market
- FAST & ACCURATE | Unlike at-home pH meters and test strips, our mail-in professional lab analysis accurately measures 13 plant-available nutrient levels, including Nitrogen and pH. Results in 6-8 days
- FOR ANY GROWING SCENARIO | Tests any soil type and growing condition - lawn & turf, vegetable gardening, flowers, compost, trees, vines, ornamental landscape, house plants, soil-less media or hydroponics
- SAVE TIME & MONEY | Stop applying products you don’t need. Learn exactly what products and amounts you need to grow the healthiest plants possible
- CUSTOM RECOMMENDATIONS | What to apply, how much to apply, and when to apply it. Provides both organic and non-organic fertilizer recommendations to effectively amend your soil
What Soil to Use in a Mound Garden
Do not build the whole mound out of compost, potting mix, mulch, or fluffy organic material. It will settle dramatically, shed water unevenly, and fail to hold a stable shape. A better build is a stable mineral-soil base with a richer planting layer on top.
Recommended Soil Structure
- Base layer: Clean fill dirt, native mineral soil, or screened soil placed in lifts and lightly compacted.
- Planting cap: 6 to 12 inches of screened topsoil blended with compost or a quality garden mix.
- Mulch layer: 2 to 3 inches of mulch after planting, kept away from crowns, stems, and root flares.
If the existing yard has heavy clay, do not create a bathtub by placing a loose mound over compacted soil without blending the transition. Scarify the existing soil surface before adding material so the mound ties into the yard. Where practical, loosen the top 3 to 6 inches of existing soil before building the base.
Build in lifts. For a larger mound, place 4 to 6 inches of base material, shape it, water it lightly, tamp or track it enough to reduce major voids, then repeat. You are not building a roadbed, so do not compact the planting zone like concrete. The goal is stable, not sealed.
The Tool Desk
Outbyte PC Repair FREEClear out junk files and repair common Windows errorsFree Scan →Outbyte Driver Updater FREEScan for outdated or missing drivers - takes under a minuteDriver Scan →2026 Cost to Build a Mound Garden
A small DIY mound garden often costs $150 to $700 for a 30 to 100 square foot feature using bulk soil, compost, mulch, edging, and starter plants. Costs rise fast with mature shrubs, stone edging, difficult access, irrigation changes, or machine work.
| Item | Typical 2026 US Cost | Notes |
|---|---|---|
| Fill dirt | $5 to $25 per cubic yard | Useful for the stable base, not the root zone |
| Bulk topsoil | $10 to $50 per cubic yard | Delivered truckloads commonly run $150 to $600 for 10 to 15 cubic yards |
| Premium garden blend | $40 to $80+ per cubic yard | Best used for the top 6 to 12 inches |
| Mulch material | $25 to $100 per cubic yard | Installed mulch often runs $50 to $150 per cubic yard |
| General landscaping labor | $50 to $100 per hour | Varies by market, crew size, and access |
| Professional flower bed installation | $1,000 to $3,000 average | Often priced around $10 to $20 per sq. ft., or more for complete installs |
| Complete raised or flower bed installs | $20 to $65 per sq. ft. | Higher end includes more plants, edging, prep, and finish work |
| Yard grading or machine work | $1,000 to $3,500 common range | Equipment/operator time may run $40 to $180 per hour |
The biggest cost drivers are mound size, soil volume, access for wheelbarrows versus equipment, delivery distance, minimum-load charges, plant maturity, stone or metal edging, irrigation work, sod removal, clay excavation, erosion-control fabric, and whether grading review is required.
How to Build a Mound Garden Step by Step
1. Lay Out the Shape
Use a garden hose, marking paint, or flags to define the footprint. Avoid perfect circles unless the surrounding design is formal. Most mound gardens look better as an oval, crescent, kidney, or long irregular island.
Place the tallest point off-center. A crest in the dead middle makes the mound look like a pedestal. Shift the high point toward one end or one side, then let the shoulders taper down gradually.
2. Remove Sod and Prep the Base
Cut and strip existing sod inside the layout. If the lawn is healthy, you can reuse clean sod elsewhere. Loosen the exposed soil surface so imported material bonds with the existing grade. Remove roots, construction debris, large stones, and buried trash.
3. Build the Stable Core
Place mineral soil or clean fill in 4- to 6-inch lifts. Shape as you go. Lightly compact each lift by walking it in, tamping, or using equipment on larger projects. Watering between lifts helps reduce future settlement.
Keep the final shape low and broad. If you cannot walk across the side of the mound comfortably, it is probably too steep for long-term maintenance.
4. Add the Planting Layer
Add 6 to 12 inches of screened topsoil and compost blend over the shaped base. This is where the roots will establish. Rake the surface smooth, but keep subtle variation. A mound that is perfectly symmetrical often looks artificial.
Do these 3 things before closing this tab:
1Clear out junk files and repair common Windows errors2Fix the driver behind crashes, sound loss and screen glitches3Repair Windows errors before they cause bigger problems5. Water, Settle, and Final Grade
Water the mound thoroughly before planting. If the schedule allows, let it settle for several days to two weeks, then top off low spots and final-grade the shoulders. This step helps prevent shrubs from sinking after installation.
Rank #3

- Complete 4-in-1 Soil Test Kit (pH, N, P, K) – This garden soil test kit measures soil pH, Nitrogen, Phosphorus, and Potassium, giving you a full picture of your soil condition to improve fertilization and plant growth.
- 40 Accurate Tests for Long-Term Use – Includes 10 tests for each element (40 total tests), making this soil testing kit ideal for repeated use across multiple areas of your lawn, vegetable garden, or flower beds.
- Fast & Easy Soil Testing at Home – No calibration or complex tools needed. Simply mix soil with water, add the reagent, and compare the color chart for instant results. Perfect for beginners and experienced gardeners.
- All Tools Included for Convenience – This soil testing kit comes with test tubes, reagents, droppers, and a color comparison chart. Everything you need is included to perform reliable soil tests right at home.
- Improve Plant Growth & Save Fertilizer – By using this soil test kit for lawns and gardens, you can accurately balance soil nutrients, reduce waste, and grow healthier vegetables, flowers, and grass.
6. Install Irrigation Before Mulch
Drip irrigation or micro-spray is easiest to install before mulch. Mounds dry faster than flat beds because water runs off the shoulders and the raised soil warms quickly. New plantings usually need consistent watering through the first growing season.
7. Plant and Stabilize
Plant from largest to smallest: anchor shrubs or small trees first, then medium perennials, grasses, groundcovers, and bulbs. Mulch immediately. On exposed slopes, use jute netting, erosion-control blanket, or dense groundcovers to hold soil while roots establish.
Best Planting Plan: Crest, Shoulder, and Toe
A mound garden has microclimates. The crest is highest, warmest, and driest. The shoulders drain quickly and are most visible. The toe, or bottom edge, holds slightly more moisture and receives runoff from the slope.
What’s actually slowing this PC down?
Pick the symptom - the matching free tool is one click away.
Crest Plants
Use drought-tolerant, structurally strong plants near the crest. Good choices include ornamental grasses, lavender in suitable climates, Russian sage, salvia, sedum, yarrow, juniper, dwarf conifers, and compact flowering shrubs. If using a small tree, keep the mature canopy and roots in scale with the mound.
Shoulder Plants
The shoulders are ideal for medium-height perennials and grasses that create movement and color without needing constant moisture. Consider coneflower, black-eyed Susan, catmint, coreopsis, daylily, switchgrass, fountain grass where appropriate, and compact shrub roses.
Toe Plants
At the lower edge, use low plants that soften the transition into lawn or paving. Groundcovers, creeping phlox, low sedum, liriope, ajuga, perennial geranium, and compact seasonal flowers can work well. In wetter toe areas, choose plants that tolerate more moisture instead of forcing dry-site plants into the wrong spot.
Group plants by water need and sun exposure. Do not put thirsty annuals at the top and drought-tolerant plants at the bottom. That arrangement fights the way the mound naturally behaves.
Drainage and Erosion Details That Matter
A mound garden should slow, spread, and absorb water where possible. It should not create a hard dam or a chute. Feather the edges into the lawn unless you are using intentional edging. Abrupt lips catch water and can cause washouts.
Watch the first few storms after installation. Warning signs include mulch trails, rills in the soil, exposed roots, puddles at the toe, soggy turf downhill, or water moving toward pavement or the house. Small corrections made early are simple: add mulch, reshape a shoulder, place erosion matting, or add groundcovers. Waiting until the mound has cut channels into itself is more expensive.
For steeper shoulders or runoff-exposed sites, use an erosion-control blanket under mulch until roots take over. Stone can help in specific drainage paths, but do not cover a steep mound with loose rock and expect it to stay clean and stable without proper fabric, edging, and slope design.
Independent reader supportYour contribution helps us test, update, and keep practical guides available for everyone.When to DIY vs. When to Hire a Pro
A mound garden is a reasonable DIY project when it is small, low, away from structures, and not changing drainage patterns. A homeowner with a wheelbarrow, shovel, rake, hose, and a free weekend can build a 30 to 75 square foot mound if the soil delivery can be dropped nearby.
Free tools Windows power users keep installed
One-click scans. No signup required.
Hire a professional when the mound is large, near a foundation, close to a property line, tied into a drainage swale, located on a slope, or big enough to require machinery. Also bring in help if you need irrigation changes, tree installation, stone edging, grading permits, or more than about 3 to 5 cubic yards of material moved by hand.
As a practical labor check, one cubic yard of soil is roughly enough to fill nine 3-cubic-foot wheelbarrow loads. A 6-cubic-yard mound can mean 50 or more loaded wheelbarrow trips before shaping, planting, and mulching. Access matters as much as size.
Common Mound Garden Mistakes
- Building too tall: Anything over 24 inches needs a much wider base and better erosion planning.
- Making the sides too steep: Steep slopes dry out, wash out, and are hard to mow or weed safely.
- Using only compost or potting mix: Loose organic material settles too much and will not form a stable grade.
- Ignoring runoff: A pretty mound that sends water toward a house or neighbor is a construction problem.
- Skipping 811: Shallow projects can still hit irrigation, lighting, cable, gas, or electric lines.
- Planting too deep: Account for settlement so tree and shrub root flares do not sink below finished grade.
- Over-mulching: Keep mulch 2 to 3 inches deep and pull it back from stems, crowns, and trunks.
- Building against wood: Soil and mulch against siding, posts, or fencing trap moisture and shorten service life.
- Forgetting scale: A tiny mound in the middle of a large lawn usually looks accidental. Tie it to a walkway, bed line, tree group, driveway edge, or patio view.
Maintenance After Installation
The first year is about water and stability. Check soil moisture by hand, not by schedule alone. The crest may be dry while the toe is still damp. New shrubs and perennials typically need deeper, less frequent watering once established, but during the first season they need enough consistency to push roots into the mound.
Rank #4

- Accurate Soil pH Testing: Dewildetradingco Soil pH Test Strips offer measurements of soil pH levels (pH 3.5-9). As an essential tool for every gardener and grower, these test strips help determine the optimal pH for various plants, such as outdoor plants, indoor plants, gardens, grass lawns, fruit trees, flowers, vegetables, and forest shrubs.
- User-Friendly Testing Procedure: The testing process is simple and efficient. Mix the sample soil with water, let the solution sit for 30 minutes, dip one strip into the solution for 3 seconds, and then hold it horizontally for 60 seconds. Compare the results against the provided color chart on the bottle for quick and reliable readings.
- Cost-Effective and Versatile: With 100 Soil PH checker strips included in each package, Dewildetradingco provides a cost-effective solution for soil testing. It caters to various planting needs, offering valuable insights for a wide range of horticultural applications.
- Optimize Plant Health and Growth: Maintaining the correct pH is crucial for optimal plant growth and bountiful yields. Dewildetradingco Soil pH Test Strips enable gardeners and growers to adjust their soil conditions, ensuring nutrient availability and preventing wasteful spending on ineffective amendments.
- Convenient On-the-Go Monitoring: The Dewildetradingco Soil pH Test Strips are designed for portability, allowing gardeners to perform quick soil testing in various locations. As an essential tool in every gardener's soil tester kit, these pH strips help ensure thriving plant life and efficient resource management.
Top off mulch after the first heavy rain if it thins out. Keep the mulch layer at 2 to 3 inches, not 5 or 6. Pull weeds early before they root into the slope. After the first winter or rainy season, expect minor settlement. Add planting soil where needed, but do not bury crowns or root flares.
Prune for shape after plants establish. The best mound gardens look layered, not crowded. If one plant dominates the crest or blocks the plants behind it, thin or relocate it while the bed is still young.
Bottom Line
A mound garden is one of the most effective ways to add height, drainage, and plant display to a flat yard, but it needs to be built with the same care as any small grading project. Keep it low, keep the slopes broad, calculate soil by cubic yard, use a stable base with a real planting cap, call 811, and make sure runoff still goes where it belongs.
If you get those fundamentals right, the planting is the easy part. The mound will look intentional from the street, hold its shape through heavy rain, and give your flowers and shrubs the elevation they need to stand out.
Frequently Asked Questions
How tall should a mound garden be?
Most residential mound gardens should stay about 12 to 24 inches high. For easier maintenance and less erosion, keep side slopes broad, ideally near a 5:1 run-to-rise ratio where space allows.
What kind of soil should I use for a flower mound?
Use clean fill or native mineral soil for the stable base, then add 6 to 12 inches of screened topsoil and compost blend for the planting layer. Do not build the entire mound from compost, potting mix, or mulch.
How much does it cost to build a mound garden in 2026?
A small DIY mound garden commonly costs $150 to $700. Professional flower bed or mound installation often runs $1,000 to $3,000 on average, with higher costs for large mounds, mature plants, equipment, drainage work, or stone edging.
Can a mound garden help with drainage?
It can help plants that dislike wet roots by raising them above soggy soil. It should not be used as a substitute for engineered drainage if water is flowing toward a foundation, driveway, sidewalk, or neighboring property.
Do I need a permit to build a mound garden?
Small planting mounds often do not need permits, but larger berms, imported fill, work near property lines, drainage swales, slopes, or public rights-of-way may require local grading or drainage review.
Recommended Free Tools
How do I keep a mound garden from washing away?
Keep the mound low, use gentle slopes, compact the base lightly in lifts, mulch immediately, and use groundcovers, jute netting, or erosion-control blanket on exposed slopes. Watch the first few storms and correct small washouts early.
Quick Recap
Product prices and availability are accurate as of the date/time indicated and are subject to change. Any price and availability information displayed on Amazon at the time of purchase will apply.