What’s actually slowing this PC down?
Pick the symptom - the matching free tool is one click away.
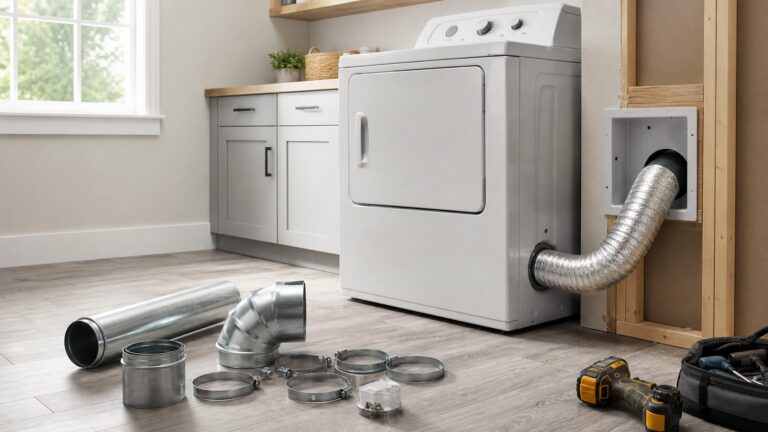
The best dryer vent hose for most homes is not the cheapest flexible hose on the shelf. It is a properly sized, smooth-wall metal exhaust system: rigid galvanized steel or aluminum duct for the permanent run, and a short UL 2158A-listed semi-rigid metal transition duct behind the dryer when flexibility is needed.
That distinction matters. Homeowners often call the whole thing a “dryer vent hose,” but there are really two parts: the exposed connector from the dryer to the wall, and the permanent exhaust duct inside or through the building. Those two parts do different jobs and have different safety rules.
On our job sites, we treat dryer venting as a construction and fire-safety detail, not a small appliance accessory. A crushed, ribbed, too-long, or poorly routed vent can add drying time, trap lint, push moisture into the home, and increase fire risk. US fire data commonly cites roughly 2,900 residential clothes dryer fires per year, causing about 5 deaths, 100 injuries, and $35 million in property loss, with failure to clean as the leading ignition factor at 34%. Broader dryer-fire datasets have estimated around 14,000 to 15,600 structure or home fires annually depending on methodology.
Here is the practical answer: use 4-inch smooth metal duct, keep the route short and direct, avoid plastic and thin foil where safety and code matter, do not hide flexible transition duct inside walls, and make sure the exterior termination is accessible, dampered, and free of screens.
Do these 3 things before closing this tab:
1Repair Windows errors before they cause bigger problems2Fix the driver behind crashes, sound loss and screen glitches3Clear out junk files and repair common Windows errorsBest Dryer Vent Hose Materials, Ranked
If you are standing in a home center aisle looking at flexible foil hoses, semi-rigid aluminum, rigid duct sections, elbows, clamps, and wall hoods, the labels can make everything look similar. They are not similar in performance.
#1 Best Overall

- Fireproof and Flame Resistant: Tested and rated as Class "0" for fire resistance, the HON&GUAN semi rigid dryer duct ensures safety by preventing flame and smoke spread within a temperature range of -22°F to 482°F.
- Easy Installation in Tight Spaces: Designed for narrow installation spaces, this dryer vent hose allows for 90-degree bending. The included accessories provide a convenient and secure installation process.
- Premium Construction: Crafted from semi rigid, high-quality aluminum foil, this dryer vent hose is recommended by leading household dryer manufacturers. It offers superior durability compared to standard aluminum foil or PVC dryer hoses.
- Maintains Integrity in Compression or Bending: The inside diameter of the hose is 4" diameter when fully stretched. With a smooth interior, this dryer duct ensures efficient and safe airflow even in compressed or bent configurations.
- Complete Set of Accessories: Each package includes one 4 inch 8 feet semi rigid dryer duct, two stainless steel 201 hose clamps, and an aluminum foil tape.
The right material depends on where it will be installed. Anything concealed in a wall, ceiling, floor, attic, crawlspace, or cabinet should be treated as permanent exhaust duct. For that, rigid smooth-wall metal is the standard we want to see. The short visible connection behind the dryer can be semi-rigid or heavy-duty flexible metal, but it should be listed for dryer transition use and kept short.
| Material | Best Use | Typical Cost | Our Recommendation |
|---|---|---|---|
| Rigid galvanized steel or aluminum duct | Permanent exhaust runs through walls, ceilings, attics, crawlspaces, or utility areas | Often about $10-$30 per 8-foot section, plus elbows and fittings | Best overall choice for airflow, cleanability, and durability |
| UL 2158A-listed semi-rigid metal transition duct | Short exposed connector from dryer to wall outlet | Usually about $10-$30 for an 8-foot connector | Good behind-dryer choice when kept short, straight, and visible |
| Periscope or slim metal duct | Tight spaces behind dryers where clearance is limited | Commonly about $20-$40 | Useful when it prevents crushing a flex connector |
| Thin flexible foil duct | Limited exposed transition use only where allowed by manufacturer and code | Often under $20 | Usually not our first choice because it crushes and traps lint easily |
| Plastic or vinyl duct | Not recommended for dryer exhaust | Cheap, but high risk | Avoid |
rigid metal duct Is the Best Permanent Dryer Vent
For the permanent dryer exhaust run, rigid metal duct is the strongest answer. Use 4-inch nominal diameter galvanized steel or aluminum duct with a smooth interior. That smooth wall is not a minor detail. It reduces turbulence, limits lint buildup, improves airflow, and makes the duct easier to clean.
Rigid metal also resists crushing. That matters in real houses. Laundry rooms get tight. Dryers get pushed back. Storage bins, vacuum handles, and shelving can press against exposed venting. In attics and crawlspaces, duct can sag if it is not supported. A flattened duct section can turn an otherwise acceptable installation into a lint trap.
When our crews install or reroute dryer venting, we plan the path before buying parts. A good route is short, direct, supported, and serviceable. It avoids unnecessary offsets. It does not discharge into an attic, crawlspace, basement, garage, soffit, or interior space. It terminates outdoors with a backdraft damper and no screen.
Why Smooth Wall Matters
A dryer moves warm, moist air carrying lint. Ribbed hose creates resistance. Each ridge slows air, creates turbulence, and gives lint a place to collect. Add a few bends, a sag, and a crushed section behind the dryer, and the appliance has to work harder to move the same air.
The symptoms are familiar: towels take two cycles, the laundry room feels hot and humid, the dryer top gets unusually warm, lint collects around the door or exterior hood, and the outside flap barely opens while the dryer runs. Those are not just annoyances. They are signs of restriction.
The Best Behind-Dryer Connector
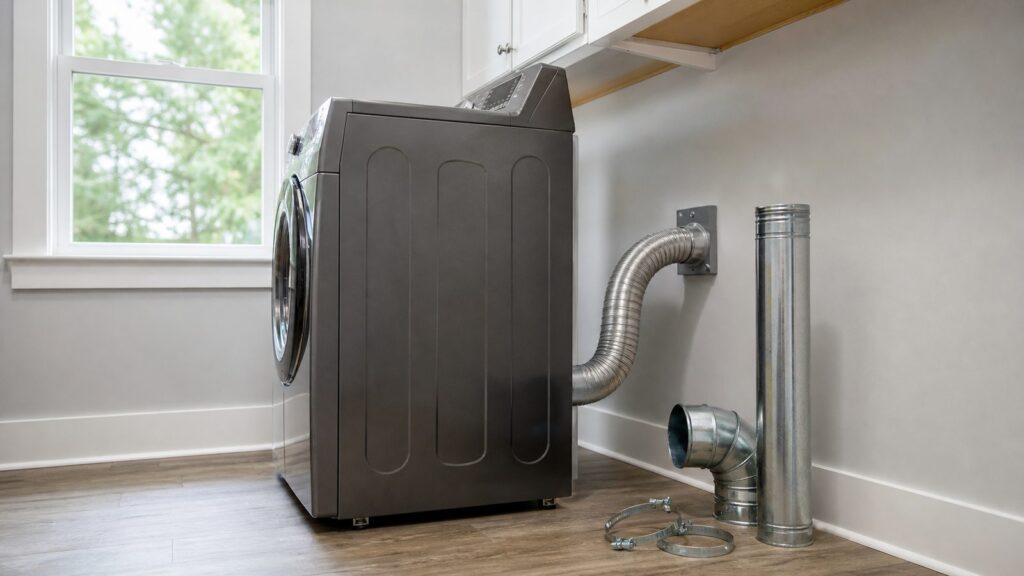
The short connector behind the dryer is where flexibility can make sense. This is the piece that connects the dryer outlet to the wall or floor duct opening. For that exposed transition, use a UL 2158A-listed semi-rigid metal or heavy-duty flexible metal transition duct.
Keep it as short and straight as practical. Code language commonly limits dryer transition ducts to a single length, listed and labeled to UL 2158A, with a maximum length of 8 feet. Just as important, that transition duct should not be concealed inside walls, floors, ceilings, or cabinets. A UL-listed transition connector does not become an approved hidden wall duct simply because it has a listing.
Behind the dryer, we want enough clearance so the connector is not smashed when the appliance is pushed into position. If the laundry room is tight, a rigid offset elbow, recessed dryer box, long-radius elbow, or periscope-style duct is usually a better fix than forcing a flexible hose into a kinked coil.
What UL 2158A Means
UL 2158A is the standard commonly associated with clothes dryer transition ducts. For a homeowner, the practical meaning is simple: if you are buying the short exposed connector behind the dryer, look for a product specifically listed and labeled for dryer transition duct use.
That listing is not permission to use the connector anywhere you want. The connector still needs to remain exposed and accessible, and it still needs to stay within the allowed length. If the vent disappears into construction, use rigid metal duct.
Recommended Free Tools
Dryer Vent Materials to Avoid
A product can be sold near dryer parts and still be a poor choice for your home. We avoid plastic, vinyl, and flimsy foil-looking ducts for dryer exhaust work where safety, code compliance, and long-term performance matter.
Plastic and vinyl ducts are the clearest “no.” They are not the right material for hot dryer exhaust. They can sag, melt, crack, and collect lint. If you have an older home with white plastic dryer hose behind the appliance, replacing it should be high on your maintenance list.
Thin accordion foil ducts are more complicated because homeowners see them everywhere. Some may be marketed for dryer use, but they are easy to crush, hard to clean, and prone to long coiled installations behind the dryer. A $15 hose can become expensive if it causes slow drying, service calls, moisture damage, or a fire hazard. For most homes, semi-rigid metal is a better connector, and rigid metal is better for the run.
Other Common Installation Mistakes
Do not use sheet-metal screws that protrude into the duct. Those screw tips snag lint and make cleaning harder. Use proper metal foil HVAC tape on joints, not cloth duct tape that dries out and fails. Do not install an exterior hood with a screen or mesh pest guard that catches lint. Use a dampered termination designed for dryer exhaust.
Do not reduce the duct below 4 inches unless the dryer manufacturer specifically allows it. Do not aggressively ovalize round duct to squeeze through framing. Do not push the dryer back until the connector kinks or disconnects. These small shortcuts are exactly where dryer vent systems fail.
Dryer Vent Length, Elbows, and Code Basics
For many US homes, the baseline dryer exhaust rule is a maximum developed length of 35 feet from the dryer location or transition connection to the termination. That length is commonly reduced by 2.5 feet for each 45-degree bend and 5 feet for each 90-degree bend, unless the dryer manufacturer’s installation instructions allow a different length.
Developed length means the actual path the air travels, not the straight-line distance across the room. A laundry room that is 10 feet from an exterior wall can still end up with a poor vent route if the duct runs up, across, around framing, and out through a roof termination.
Here is a simple example. If your duct route is 22 feet long and includes three 90-degree elbows, those elbows count as another 15 feet of equivalent length. Your effective length is 37 feet. That may exceed a 35-foot baseline before you even consider the dryer manufacturer’s requirements.
Free tools Windows power users keep installed
One-click scans. No signup required.
Always check three things: the local code used by your jurisdiction, the dryer installation manual, and the actual measured route. Manufacturer instructions can allow different maximum lengths based on blower design, duct material, and termination type. Local enforcement can also vary, especially when a permit or inspection is involved.
Exterior Termination: The Part Homeowners Forget
The vent hood outside is not just a finishing cap. It is part of the airflow system. A good dryer termination vents outdoors, includes a backdraft damper, has no screen, and can be inspected and cleaned. The flap should open strongly when the dryer runs.
We avoid terminations that discharge under a soffit where moist air can be pulled into attic ventilation. We also avoid hidden or difficult roof terminations when a shorter sidewall route is practical. Roof vents can work, but they demand better access planning. They are harder to inspect, harder to clean, and easier for homeowners to forget.
Second-floor laundry rooms need special attention. They often push vent routes through ceilings, attics, roofs, or long chases. In remodels, we coordinate the laundry layout early so the vent does not become an afterthought. Moving a dryer 3 feet during design can save 20 feet of duct, multiple elbows, and years of maintenance trouble.
Rank #2
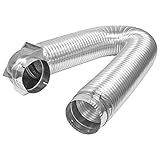
- This is a 8-feet UL Listed flexible metal (semi-rigid) transition duct attached to one Close Elbow. The original Close Elbow by Builder's Best is designed to make 90˚ turns within 4″
- Maximum velocity for this duct is 5,000 FPM. Temperature can range from - 100 degrees Fahrenheit to + 430 degrees Fahrenheit
- UL Listed and Labelled: Complies with all clothes dryer manufacturer recommendations
- Comes with 2 additional steel screw clamps
- Quality made in the USA by Builder's Best, Inc. Builder's Best brand is a US registered trademark. SAF-T-DUCT is a registered trademark by Builder's Best, Inc. SAF-T-DUCT Dryer Venting is the trusted solution for professional installers nationwide. It meets all clothes dryer manufacturer specifications
How Much Dryer Vent Hose Replacement Costs in 2026
For a simple DIY connector replacement, materials are inexpensive. A quality 8-foot semi-rigid or rigid duct section often costs about $10-$30. A periscope or slim duct for tight clearance commonly runs about $20-$40. Add clamps, elbows, metal foil HVAC tape, and a wall hood, and small DIY materials often land around $25-$100 depending on layout and part quality.
Professional replacement of an existing exposed dryer transition hose commonly costs about $100-$300 when the route already exists and no new wall or roof penetration is needed.
New dryer vent installation costs more because the work may involve layout, cutting through siding or masonry, installing duct through framing or crawlspace, adding an exterior hood, sealing penetrations, repairing finishes, and verifying airflow. National 2026 sources show wide ranges, including about $140-$600, $200-$830, and $354-$1,190. A practical planning range for most straightforward professional installs is $200-$900, with complex roof, brick, long-route, or multi-story work exceeding $1,000.
| Project | Typical 2026 Cost | What Affects Price |
|---|---|---|
| DIY connector replacement | $25-$100 in common materials | Connector type, clamps, elbows, tape, wall hood |
| Professional transition hose replacement | $100-$300 | Access, dryer movement, condition of existing outlet |
| New straightforward vent installation | $200-$900 | Length, wall type, number of elbows, local labor |
| Complex new route or reroute | $1,000+ | Roof work, brick or stucco, finished walls, attic or crawlspace access, long runs |
| Installed duct pricing | About $12.50-$20 per linear foot | Material, fittings, access, termination, repairs |
The cheapest part is not always the cheapest outcome. Thin foil hose under $20 may look attractive, but it is easier to crush, harder to clean, and often the weakest safety choice. Rigid metal costs more and takes more planning, but it usually lowers lifetime maintenance and performance risk.
Quick wins for a faster PC:
Scan for outdated or missing drivers - takes under a minuteDriver Scan →Repair Windows errors before they cause bigger problemsFix Now →When to DIY vs When to Hire a Pro
A homeowner with basic tools can often replace a short exposed transition connector behind the dryer. The job usually takes 30 to 90 minutes if the wall outlet is already in the right place, the dryer is easy to move, and the exterior termination is working.
For a DIY connector replacement, unplug the electric dryer or shut off gas according to the appliance instructions, pull the dryer out carefully, remove the old connector, inspect the wall outlet, install the shortest practical UL 2158A-listed semi-rigid connector, secure it with proper clamps, and push the dryer back while watching that the connector does not kink. Then run the dryer and confirm strong airflow at the exterior termination.
Hire a pro when the vent route needs to be installed, rerouted, extended, or opened inside construction. Also hire help for roof terminations, masonry penetrations, long runs, second-floor laundry rooms, inaccessible attic or crawlspace work, gas dryer concerns, repeated clogging, moisture damage, pest contamination, or any situation where the existing duct is crushed, disconnected, or hidden.
Gas dryers deserve extra care. Venting and combustion air should be considered together. Poor exhaust, room depressurization, or incorrect appliance clearances can create hazards beyond slow drying. If you smell gas, stop using the appliance and follow emergency procedures for your utility and local authorities.
Permit and Safety Notes
Permit requirements vary by city, county, and project scope. A simple like-for-like exposed connector replacement usually does not require a permit in many areas. A new exterior penetration, laundry room relocation, gas appliance work, or duct route through framing may require inspection. For remodels, we verify the local requirements before rough-in, because fixing a bad vent route after drywall is expensive.
Safety is not only about the material. The whole system needs to be cleanable and inspectable. For typical households, inspect and clean the dryer vent at least annually. Large families, pet-heavy homes, daily dryer use, long duct runs, roof vents, and second-floor laundry rooms may need more frequent cleaning.
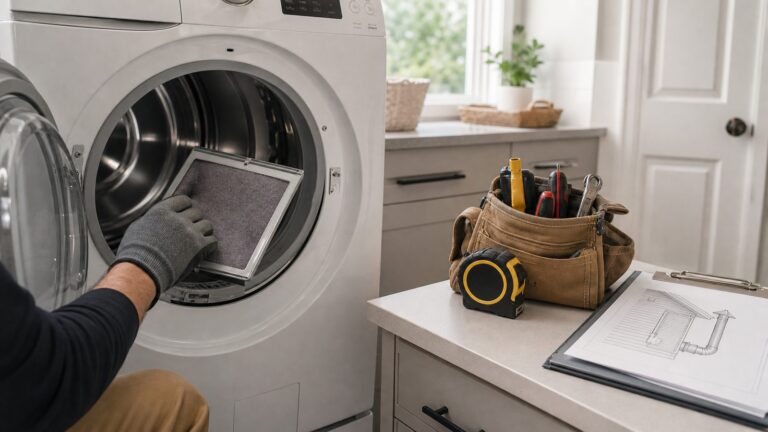
Clean the lint screen every load, but do not confuse that with cleaning the duct. Lint can still collect in the transition connector, wall duct, elbows, termination hood, and dryer cabinet. If drying time increases, clothes feel hotter than normal, the laundry room gets humid, or the outside damper barely opens, inspect the vent system before replacing the dryer.
How We Specify Dryer Venting on Remodels
Our preferred specification is straightforward: 4-inch smooth-wall rigid metal duct for the permanent run, minimal elbows, supported sections, sealed joints with metal foil HVAC tape, no protruding screws, a short visible UL 2158A-listed semi-rigid transition connector, and an exterior dampered hood with no screen.
PC Slower Than It Used to Be?
A free scan shows the junk files, broken settings and background clutter dragging Windows down - then fixes them in one click.Free scan · Windows 10 & 11Crashes, No Sound, or Screen Glitches?
Random freezes, missing sound and display glitches usually trace back to one bad driver. Find and replace yours safely.Free scan · under a minuteWe also design for service. Long runs, roof terminations, and concealed chases should have access points where practical. A vent that technically works on day one but cannot be cleaned without cutting drywall is not a good installation.
For tight laundry rooms, we solve the clearance problem with layout, fittings, or a recessed box instead of smashing a flexible connector. For upstairs laundries, we count elbows early. For dryers placed on interior walls, we compare route options before framing. A short, direct vent route is one of the easiest performance wins in a laundry remodel.
Bottom Line: What to Buy
If you need the safest dryer vent hose for a typical home, buy a short UL 2158A-listed semi-rigid metal transition duct for the exposed connection behind the dryer. If you are installing or replacing the permanent duct run, use 4-inch rigid galvanized steel or aluminum duct.
Avoid plastic, vinyl, long coils of flimsy foil, crushed accordion hose, hidden flexible duct, protruding screws, and screened exterior hoods. Measure the route, count the elbows, check the dryer manual, and keep the system accessible for cleaning.
The Tool Desk
Outbyte PC Repair FREEClear out junk files and repair common Windows errorsFree Scan →Outbyte Driver Updater FREEFix the driver behind crashes, sound loss and screen glitchesFind Drivers →Dryer venting is one of those home systems where a better installation does not look dramatic, but it works every week. Clothes dry faster, the laundry room stays cooler and drier, lint has fewer places to collect, and the system is easier to maintain for the life of the home.
Frequently Asked Questions
What is the safest dryer vent hose for a home?
The safest setup is usually 4-inch smooth-wall rigid metal duct for the permanent exhaust run, plus a short UL 2158A-listed semi-rigid metal transition connector behind the dryer. Avoid plastic, vinyl, and crushed foil hose.
Is semi-rigid or rigid dryer vent better?
Rigid metal is better for permanent duct runs because it has a smooth interior, resists crushing, and is easier to clean. Semi-rigid metal is useful only as the short exposed connector between the dryer and wall outlet.
How long can a dryer vent hose be by code?
A common IRC baseline is 35 feet maximum developed length, reduced by 2.5 feet for each 45-degree bend and 5 feet for each 90-degree bend unless the dryer manufacturer allows a different length.
Recommended Free Tools
Can I use a plastic or vinyl dryer vent hose?
No. Plastic and vinyl dryer vent hoses are poor choices for hot dryer exhaust and should be replaced with approved metal ducting. They can sag, crack, trap lint, and create unnecessary fire risk.
How much does dryer vent hose replacement cost in 2026?
A DIY connector replacement often costs about $25-$100 in materials. Professional replacement of an existing transition duct commonly runs $100-$300. New dryer vent installation often costs $200-$900, with complex work exceeding $1,000.
Do I need a permit to install or reroute a dryer vent?
Permit rules vary locally. A simple exposed connector replacement often does not require one, but a new wall or roof penetration, laundry relocation, gas dryer work, or concealed duct reroute may require a permit and inspection.
Quick Recap
Product prices and availability are accurate as of the date/time indicated and are subject to change. Any price and availability information displayed on Amazon at the time of purchase will apply.