The rip fence should be locked parallel to the table saw’s miter slot, and the blade should already be parallel to that same slot before you touch the fence. The miter slot is the shared reference: the blade and the fence are both set against it, so once the blade is right, a fence that runs parallel to the slot runs parallel to the blade. Disconnect the saw from power before making any adjustment.
This guide draws on the owner’s manuals for a Grizzly G1059 and a DeWalt 36-725, a Bosch 4000 manual copy hosted by a third-party manual site, and a secondary guide that describes an optional measuring method. Adjustment hardware and sequence differ by model, so treat the steps below as the general method and follow your own saw’s manual for the exact parts.
Why the miter slot is the reference
A rip fence guides the workpiece past the blade, so what matters is the distance between the fence face and the blade along the whole length of the cut. The miter slot is the most practical yardstick because it is a fixed groove machined into the table, and the miter gauge rides in it. If the blade and the fence are each set parallel to that groove, they are parallel to each other.
The Grizzly G1059 manual instructs the user to lock the fence beside the miter-gauge slot and adjust it so that the relationship is parallel along the fence’s length. The same manual states the principle directly: “The rip fence must be adjusted so it is parallel to the saw blade when the large knob is locked.” Because the blade is first set parallel to the slot, that wording and the slot-based instruction describe the same alignment.
What’s actually slowing this PC down?
Pick the symptom - the matching free tool is one click away.
#1 Best Overall

- PRECISION TABLE SAW RIP FENCE UPGRADE : Built from high-strength extruded aluminum, this table saw rip fence extension provides a stable, straight reference surface for cleaner and more consistent cuts. The rigid profile helps reduce flex and supports accurate alignment during repeated table saw operations
- 46" EXTENDED SUPPORT WITH SPACE-SAVING DESIGN : This 46" table saw fence extension kit with featherboards measures 47-1/4" overall and adds support when working with long boards or sheet goods. It functions as a table saw extension and outfeed support without requiring a bulky outfeed table
- VERSATILE 3-IN-1 MULTI-FUNCTION FENCE SYSTEM : Configure the fence for different cutting tasks: High Fence Mode supports tall panels and box work, Low Fence Mode 3/4" helps with controlled thin ripping, and L-Fence Mode supports edge jointing or template-guided cuts. It also works as a thin rip jig and table saw jig for added workshop flexibility
- 8 BUILT-IN T-SLOTS FOR CUSTOM JIG SETUPS: The fence body features eight integrated T-slots for mounting featherboards, stop blocks, hold-downs, and custom woodworking jigs. The included drop-in T-bolts can be inserted directly through the slot opening, allowing faster setup and adjustment without sliding hardware in from the ends of the track
- FITS MOST TABLE SAW FENCES WITH 1-1/4" OFFSET ALIGNMENT :Designed to clamp securely to most table saw rip fences without drilling or permanent modification. The 1-1/4" total thickness provides a clear offset reference
Align the blade before the fence
A fence cannot be correct if the blade it is measured against is off. The Bosch 4000 manual says the blade must be parallel to the miter slots and perpendicular to the table before rip-fence alignment. Check these two conditions first:
- Blade parallel to the miter slot: the blade should track the slot along its full travel, not only at one point.
- Blade perpendicular to the table: the blade should sit square to the table surface so the fence is not checked against a tilted blade.
If either condition fails, correct it using the saw’s blade-alignment procedure before going further. Adjusting the fence to a misaligned blade only moves the error somewhere else.
Checking the fence step by step
Use this sequence on any saw where you have confirmed the blade is set correctly. The steps follow the cited manuals; the measuring method in steps 4 and 5 is a standard practical check of the “parallel along its length” requirement rather than a figure from a specific manual.
Rank #2
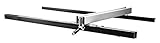
- One piece square tubular rail. Max Rip to Left of Blade-13-1/2 inch, Max Rip to right of Blade- 30 inch. Length: Fence 37 inch, Rail 57-1/2 inch. Height of the Fence is 2-1/2"
- Mounting design attaches to Delta table saws. This includes fence, steel guide tub with scale, front support rail One, rear support rail One and mounting hardware
- Three-point locking system with twin hairline pointers to assure fence is parallel to blade and accurate to within 1/64 of an inch (0. 4mm)
- Easy-gliding, steel tube fence body to handle Quick, precision ripping, and square cuts
- Fence securely clamps to front tube and hooks over rear rail to allow for fence attachments
- Disconnect the saw from power. The Bosch manual gives this precaution in its alignment instructions, and it applies to any work that involves the blade or fence hardware.
- Confirm the blade is parallel to the miter slot and square to the table, as described above.
- Move the fence to the miter-slot side and lock it using the fence’s locking mechanism. The Grizzly procedure calls for locking the fence before checking, because the working position is what matters.
- Measure the gap between the fence face and the miter slot edge at the front and at the rear of the fence. Use a tape measure or a rule held against the same reference point at both ends.
- Compare the two readings. If they match, the fence is parallel along its length. If they differ, the fence converges toward the blade at one end.
- Adjust, tighten, and recheck. Make the correction using your saw’s procedure, lock the fence, and measure again. A check before adjustment is not enough; the fence must be measured in the locked position.
Model-specific adjustment
Adjustment hardware is not interchangeable across saws. Use the steps that match your model.
The Tool Desk
Outbyte PC Repair FREERepair Windows errors before they cause bigger problemsFix Now →Outbyte Driver Updater FREEFix the driver behind crashes, sound loss and screen glitchesFind Drivers →Grizzly G1059
For this saw, position and lock the fence alongside the miter-gauge slot. If it is not parallel along its length, loosen the specified top bolts, move the rear of the fence until it tracks parallel, tighten the bolts, and recheck. The manual’s illustrations show which bolts and which part of the fence are meant, so follow those drawings rather than a generic description.
DeWalt 36-725
The DeWalt manual makes fence checking a routine task rather than a one-time setup. Its instruction reads: “Every time you use the rip fence, check its alignment to make sure the fence is parallel to the miter slot.” The manual’s adjustment procedure is the authority for this model; the sequence is not summarized here.
Rank #3
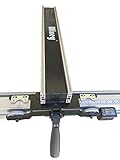
- Accurate Cutting: Upgrade your rip guide precision with the Wixey digital rip saw fence system that offers ±0.002" accuracy per ft and a digital readout for reliable, repeatable cuts across all woodworking projects
- Heavy-Duty Build: Crafted from durable steel and aluminum, this professional-grade table fence delivers long-lasting stability and is perfect for woodworking benches, rip cuts, and shop work tables
- Digital Readout: Features a backlit digital display showing readings in inches, fractions, or millimeters; constant memory preserves calibration even when powered off or removed from the bench rail
- Smooth Adjustment: Micro-adjust wheels and roller glide ensure fine-tuned, smooth fence movement - ideal for setting precise bevels, rip cuts, and repeat measurements on contractor or cabinet saws
- What’s Included: You get (1) Wixey Table Saw Fence System (WR750) - (1) Digital Readout Display – (1) 72” Fence Rail (ships in two parts) - (1) Drilling Jig & Bit - Mounting Hardware Included - Batteries (2×AAA, not included) with this digital fence tool
Bosch 4000
Set the blade first, as covered above, and disconnect power before any fence work. The manual’s own fence-adjustment steps should be followed for the hardware on your unit. No additional general adjustment sequence is established for this model from the copy reviewed.
Comparing the reference methods
Readers comparing approaches should check four things: whether the method references the miter slot or the blade directly, whether the fence is checked in its locked position, whether it needs a measuring instrument beyond a rule, and whether the adjustment instructions match their own saw.
| Source or method | Reference used | Checks fence while locked | Equipment beyond a rule | Adjustment guidance |
|---|---|---|---|---|
| Grizzly G1059 owner’s manual | Miter-gauge slot; blade parallel to fence when knob is locked | Yes | Not required; visual check described | Loosen specified top bolts, move rear of fence, retighten, recheck |
| DeWalt 36-725 manual | Miter slot | Yes, every time the fence is used | Not stated | Per the manual’s procedure; not summarized |
| Bosch 4000 manual | Blade to miter slots and table, then fence | Not stated | Not stated | Per the manual; disconnect power first |
| Dial-indicator method (secondary guide from AltitudeCraft) | Blade-to-slot measurement | Not stated | Dial indicator with a holder that fits the slot | Optional check; not a fence tolerance |
Optional: a dial-indicator check
A dial indicator gives a more precise reading of blade-to-slot alignment than a rule. The secondary guide describes mounting an indicator in a holder or jig that fits the miter slot, then sweeping the blade’s side. The Grizzly visual procedure does not require this equipment, so you do not need an indicator to set a fence correctly. Use one if you want a measured confirmation that the blade is parallel to the slot before you adjust the fence.
Rank #4
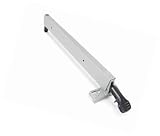
- Compatible with major 10" table saw brands; fits specific models requiring rip fence replacement. This part is compatible with the following:RTS10G, RTS10NS
- Direct replacement for part #089040002702; rip fence; fits major brand compatible 10" table saws as an OEM-style substitute.
- Major brand-compatible design; durable rip fence; precise workpiece guidance; ensures straight and accurate cuts; easy user-friendly installation; essential for table saw operation; restores cutting accuracy.
- Replaces damaged, bent, or missing rip fence; fixes poor cut accuracy, workpiece wandering, or misalignment; eliminates cutting errors and wasted material; restores proper workpiece guidance for straight and accurate cuts; avoids costly saw replacement or professional repair.
- Premium rip fence—durable build, exact compatibility with major 10" table saws, and reliable performance; shop with confidence for reliable tool parts; trusted replacement for hassle-free saw maintenance.
What counts as aligned
None of the manuals reviewed gives a universal numerical fence tolerance. They describe a procedure and a target condition, not a permitted deviation in thousandths of an inch or millimeters. The practical test is whether the fence stays the same distance from the miter slot, and therefore from the blade, along the whole length of the cut. If the readings at the front and rear of the fence differ, the fence is not aligned for your purposes, even if no manual gives a specific number for the difference.
Limits of this guidance
Manual editions and revisions change. Compare the instructions here with the manual for your exact model and revision before adjusting, and do not apply a bolt or sequence from one saw to another. The guidance here has not been checked on a specific saw.
Quick Recap
“
Product prices and availability are accurate as of the date/time indicated and are subject to change. Any price and availability information displayed on Amazon at the time of purchase will apply.
Quick wins for a faster PC:
Repair Windows errors before they cause bigger problemsFix Now →Fix the driver behind crashes, sound loss and screen glitchesFind Drivers →



