WOOD Magazine’s Bandsaw Tuneup video, presented by Craig Ruegsegger, shows how to bring a bandsaw back into alignment in three stages: blade tracking and wheel coplanarity, side guides and thrust bearing, and the table’s squareness to the blade. The video runs 11:05 and its page shows an update date of October 30, 2024. Its central message is that the work is manageable for a home or small-shop owner, in the presenter’s words: “Tuning up a bandsaw really isn’t very complicated.”
The checks below follow the video’s sequence. Where the video leaves a detail to the saw maker, this article says so rather than filling the gap with a generic specification.
What the tune-up checks and what each one controls
The video covers three groups of adjustments. They are easier to understand side by side before you touch anything:
| Check | What the video does with it | What it adjusts |
|---|---|---|
| Wheel coplanarity and blade tracking | Treats wheel coplanarity as a tune-up check and tracks the blade at the center of the wheels. | Wheel alignment and where the blade rides on the tires. Specific wheel adjustment steps are not stated in the video; follow the saw maker’s manual. |
| Side guides and thrust bearing | Uses a strip of masking tape as a gauge for spacing, after backing the guides and bearings away from the blade. | Guide bearings or guide blocks on each side of the blade, and the thrust bearing behind it. |
| Table squareness to the blade | Checks the table square to the blade side-to-side and back-to-blade, using a square. | Table tilt for side-to-side error. For back-to-blade error, the video describes shimming between table and trunnion where the saw has no built-in adjustment. |
Before you start
WOOD Magazine’s related 2026 “Two-saw Tuneup” article, listed on its Bandsaws topic page, gives the safety basics that apply here:
Free tools Windows power users keep installed
One-click scans. No signup required.
#1 Best Overall
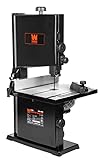
- 2.8-amp motor rotates the blade up to 2500 feet per minute
- Create cuts up to 3-1/2 inches deep and 9 inches wide
- Uses 59-1/2-inch blades anywhere from 1/8 to 3/8 inches in size
- Spacious 12-1/4 x 11-7/8-inch work table bevels up to 45 degrees
- Includes a 1/4-inch-wide blade, a 2-1/2-inch dust port, a rip fence, a miter gauge, an adjustable blade guard with ball-bearing supports, and a 2-year warranty
- Have the owner’s manual open. Model-specific hardware and adjustment methods differ.
- Unplug the saw and remove the blade before adjusting guides, bearings, or the table.
- Wear eye protection and thick work gloves when you handle the blade, which is springy and can cut.
Step 1: Check wheel coplanarity and blade tracking
Coplanarity means the upper and lower wheels sit in the same plane, so the blade runs straight between them. The video describes this as a tune-up check and tracks the blade so it sits at the center of the wheels. Because the adjustment procedure depends on the particular saw, use the manual for the steps and the hardware it names. Do the wheel check before the guides, since blade position affects every later reading.
Step 2: Set the guides and thrust bearing with masking tape
Guide and thrust settings all depend on the blade’s position, so the video starts by moving them out of the way. The sequence it demonstrates is:
Rank #2
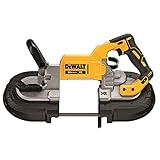
- 5'' Cutting Capacity
- Integrated hang hook allows user to hang the saw without damaging the front handle or base
- LED Work Light with 20 second delay illuminates dark work surfaces for accurate cutting.
- Tool less blade changing lever loosens blade tension
- Variable Speed for versatility and control
- Back the side guide bearings (or guide blocks) and the thrust bearing away from the blade.
- Stick a strip of masking tape where the blade will be, then bring each side guide in until it just kisses the tape without pushing the blade.
- Set the front edge of each side guide just behind the deepest part of the tooth gullet.
- Advance the thrust bearing until it just touches the tape at the back of the blade.
- Tighten the adjusters, then recheck. The video notes that an adjustment can shift when you lock it down.
- Repeat the guide checks below the table as well.
The gauge is simple, but its results depend on the blade’s position, so do the step with the blade running true and do not force the bearings against it.
Step 3: Square the table to the blade
Check two directions. The video’s order is:
- Side-to-side. Set the side of the blade square to the table using the saw’s tilt adjustment, then reset the 90-degree stop.
- Back-to-blade. Check the back of the blade against the table with a combination square. If the table is off and the saw has no built-in adjustment, the video describes loosening the trunnion bolts and adding shims between the table and trunnion.
The video names three shim materials: brass shim stock, aluminum cut from a drink can, or several layers of masking tape. Brass shim stock is presented as an option for this alignment issue, not a requirement for every saw. Recheck the table after tightening the trunnion bolts.
Recommended Free Tools
Rank #3

- POWERFUL 2.8 AMP INDUCTION MOTOR—Rip through a variety of wood materials with the 2.8 amp induction motor
- 2-SPEED DRIVE SYSTEM—Allows tool-free belt tensioning
- QUICK BLADE TENSION SETTING—Set blade tension quickly and accurately for clean cuts
- PRECISION BALL BEARING AND LOWER BLADE GUIDES—Ensure consistent tracking for accurate cutting performance
- RACK AND PINION TABLE ADJUSTMENT—Makes quick angle adjustments
Equipment differences that change the method
The video shows both bearing guides and guide blocks and says the hardware and adjustment methods differ by saw. Three variations matter most:
- Bearing guides versus guide blocks. The masking-tape gauge works for both, but the adjusters you turn are different.
- Micro-adjusters versus hand adjustment. Saws with micro-adjusters let you make fine changes at the knob. Saws adjusted by hand usually require more trial and error.
- Built-in table alignment versus shimming. If your table has built-in alignment adjustment, use it. Shimming is the fallback the video describes.
Compare your saw against these three variations before you follow any step, and treat the video as a method rather than a fixed specification.
Rank #4

- 3-3/8" Cut Capacity - Provides Larger Cut Capacity for More Variety in Applicable Materials
- Tool Connect CHIP READY - Chip Pocket Accepts Tool Connect Chip DCE042 and Connects with the Site Manager App for Easy Asset Management on the Jobsite. (DCE042 Sold Separately)
- Powerful Brushless Motor - Provide 535 MWO at 570 SFPM for Demanding Commercial Applications
- Integrated Blade Guard - Helps Protect from Unwanted Blade Contact and Keeps Bandsaw Clean for Increased Durability and Blade Life
- Variable Speed Trigger and Dial - Adds Multiple Methods for Blade Speed Control for a Variety of Applications
What the video does not establish
The video gives no measured tolerance, performance figure, or percentage improvement, and the related WOOD Magazine material it draws on does not supply one either. Readers should not expect a number to check against. The test is whether the gauge touches as described, the blade tracks at the wheel centers, and the table reads square in both directions. Use the saw maker’s specification for any numeric limit.
Watch the full video at WOOD magazine’s Bandsaw Tuneup, which is the primary source for these steps.
Quick Recap
Best Value

- Power Saws and Accessories
- Made in China
- This band saw is over 20% lighter than the original M18 Compact Band Saw
- The POWERSTATE Brushless Motor combined with Constant Power Technology delivers the fastest cutting Band Saw in it’s class
Product prices and availability are accurate as of the date/time indicated and are subject to change. Any price and availability information displayed on Amazon at the time of purchase will apply.




