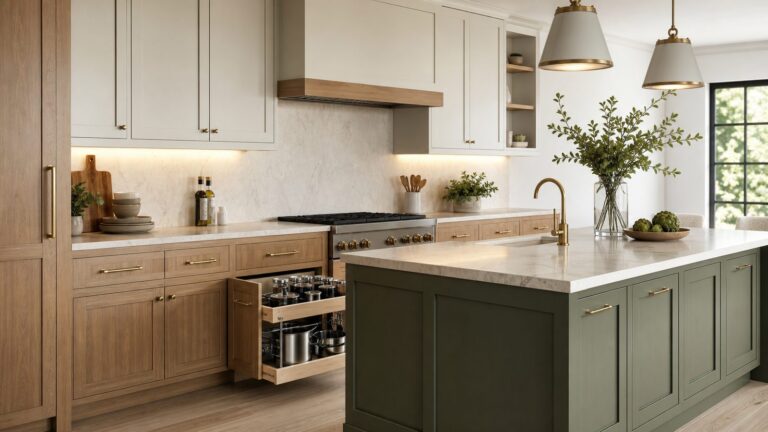
Inset cabinet doors and drawer fronts sit flush inside the cabinet face frame instead of covering it. That clean, furniture-like look is the reason homeowners ask for it. It is also why the work is unforgiving: a 1/16-inch error that might disappear on an overlay door is visible immediately on an inset cabinet.
The short answer is this: you can make and install inset cabinet doors and drawers if your openings are square, your materials are stable, and you are willing to fit every door and drawer front individually. For a single vanity, laundry built-in, mudroom cabinet, or small bar, this can be a strong advanced DIY project. For a full kitchen, stained hardwood, beaded inset, or older cabinets with uneven frames, it usually belongs in the hands of a cabinetmaker or finish carpenter.
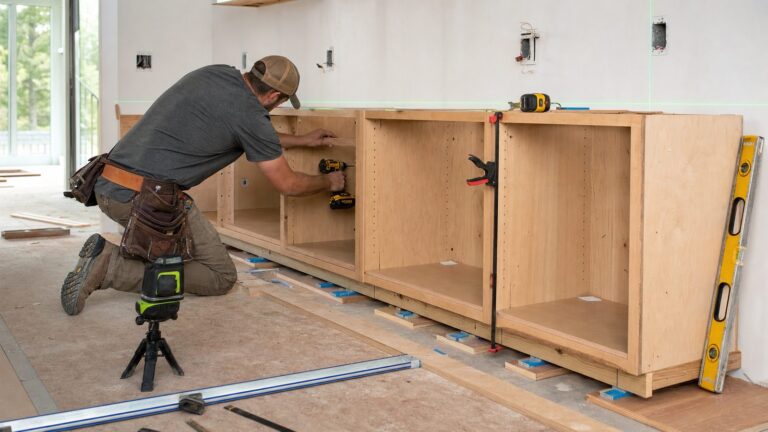
On our job sites, we treat inset work as a fitting process, not a simple parts swap. The winning sequence is to square the cabinet opening first, build the doors and drawer fronts slightly oversized, acclimate the material, trim one edge at a time, confirm the reveal, then bore hinges and install hardware after the fit is proven.
What Inset Cabinet Doors and Drawers Require
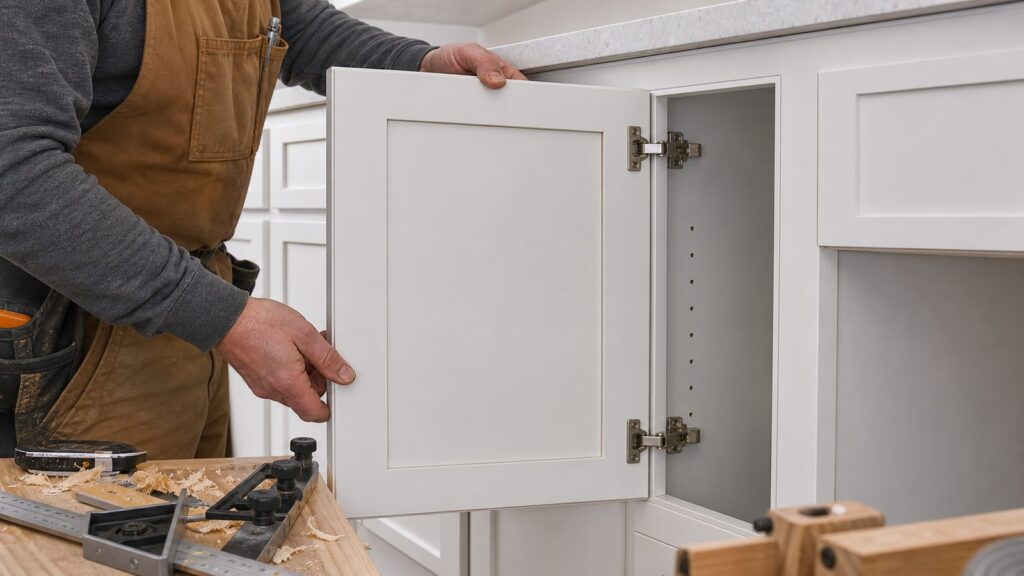
An inset door is sized smaller than the opening so it can sit inside the frame with a consistent gap, called the reveal, around all edges. A typical finished reveal is about 3/32 inch to 1/8 inch. For most homeowner projects, 1/8 inch is the better target. It gives you a little room for seasonal wood movement, paint thickness, and small frame inconsistencies.
PC Slower Than It Used to Be?
A free scan shows the junk files, broken settings and background clutter dragging Windows down - then fixes them in one click.Free scan · Windows 10 & 11Crashes, No Sound, or Screen Glitches?
Random freezes, missing sound and display glitches usually trace back to one bad driver. Find and replace yours safely.Free scan · under a minute#1 Best Overall
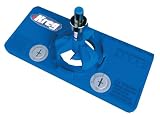
- Concealed Hinge Jig: Dedicated jig for drilling precise 35mm cup holes for European-style concealed cabinet door hinges using any hand drill
- Precision 35mm Boring System: Four-cutter carbide-tipped bit with stop collar drills clean, accurate hinge cup holes with controlled depth
- Adjustable Hinge Positioning: Supports 3mm, 4mm, 5mm, and 6mm hinge offsets with adjustable placement on the door
- Flexible Door Layout: Allows hinge positioning from 2 in (50mm) from the door edge to unlimited spacing for custom cabinet designs
- Premium Kreg Tools: We offer products that help woodworkers close the gap between idea and outcome
Tighter 3/32-inch reveals can look refined, but they demand better tooling, stable humidity, controlled finishing, and very accurate installation. They are not forgiving after paint buildup or a humid summer week.
Inset drawer fronts follow the same visual rule, but they are built as a two-part assembly: the drawer box rides on slides, and the decorative front is fitted to the face-frame opening after the box is installed. Do not build the drawer box and face as one fixed piece unless the cabinet system was designed that way. You need adjustment room.
Most traditional inset work in the United States uses face-frame cabinetry because the frame gives a defined opening and a classic flush appearance. Frameless cabinets can be designed with inset fronts, but the hardware, side clearances, and construction tolerances are different.
Tools, Materials, and Hardware
Inset work does not require exotic tools, but it does require accurate tools. A tape measure alone is not enough. At minimum, plan on a reliable combination square, straightedge, sharp pencil or marking knife, clamps, drill and driver, hinge boring jig or drill press setup, router or table saw for trimming, sanding blocks, and calibrated spacers. Playing cards work surprisingly well as reveal spacers because they are consistent and easy to stack.
For painted inset doors, MDF panels with poplar, maple, or other paint-grade rails and stiles are common because they stay flatter than wide solid wood panels. For stain-grade work, maple, cherry, walnut, and white oak all look good, but the material cost and finishing labor climb quickly because grain matching matters. Cabinet-grade 3/4-inch hardwood plywood commonly runs about $55-$170 per 4×8 sheet in 2026, depending on veneer species, grade, core, and region. Premium Baltic birch and prefinished panels can cost more per usable square foot.
Use hardware that is actually compatible with inset installation. Inset concealed hinges, butt hinges, and knife hinges all have their place, but they are not interchangeable. Adjustable concealed hinges are the most forgiving for many modern projects because they allow side, depth, and height adjustment after installation. That matters when paint cures, the house humidity changes, or one opening proves less square than it looked.
For drawers, soft-close side-mount slides can be under $10-$20 per pair in value packs. Concealed undermount soft-close slides commonly start around $25 per pair and increase with brand, load rating, locking devices, and depth or height adjustment. Undermount slides give a cleaner look and better adjustment, but they require accurate drawer-box dimensions and proper slide setback.
Measure the Openings Before You Build
Before cutting a door, check the cabinet. Measure each opening at the top, middle, and bottom for width. Measure height at the left, center, and right. Then measure the diagonals. If the diagonal measurements differ, the opening is out of square. A small difference can often be handled with careful fitting. A large difference means you should repair, plane, shim, or scribe the face frame before committing to final door sizes.
The Tool Desk
Outbyte Driver Updater FREEScan for outdated or missing drivers - takes under a minuteDriver Scan →Outbyte PC Repair FREERepair Windows errors before they cause bigger problemsFix Now →Number every opening and every door or drawer front. This is not busywork. Inset fronts are fitted to their exact openings. If a kitchen has 22 doors and 10 drawer fronts, assume all 32 pieces are location-specific after fitting.
Rank #2

- 【DURABLE AND ACCURATE】All metal cabinet hinge jig made of high quality aluminum alloy is more durable and accurate than plastic jigs. The all metal concealed hinge jig bulit-in double bearings provides continuous hinge hole drilling and much easier. The 35mm carbide tipped bit is solid and sharp for cabinet door hinges installation. Concealed cabinet hinge jig wood hole puncher locator help you drill accurate and fast as drill press.
- 【WORK WITHOUT DUST】The built in metal dust bracket of GOINGMAKE concealed hinge jig is suitable for 1-3/8 inch vaccum hose and easy to connect with your vaccum. The world's latest dust vacuum adapter makes cabinet hinges drilling without any dust for woodworking. Greatly improves the efficiency and accuracy of installing cabinet hinges. The 1-3/8 inch dust adapter is perfect for most vaccum dust collector.
- 【EASY AND FAST】GOINGMAKE cabinet hardware jig provides quick cabinet hinge hole depth setting without any measuring. The 35mm concealed hinge jig provides drill depth from 0-0.6 inch. Perfect for 1/2 inch overlay hinges or any others. GOINGMAKE cabinet hinges mounting tool is perfect for drill holes for cabinet hinges and hardware installation.
- 【VERSATILE CABINET HINGE JIG】The concealed door hinge jig can work with 2mm, 3mm, 4mm, 5mm and 6mm hinge offsets for most concealed hinges. Have no difficulty on any concealed hinges installation with 35mm hinge hole drilling jig. Our 5/64 inch drill guides provides 4 kinds of hinge screw holes spacing including 42x11mm, 48x6mm, 52x5.5mm, 45x9.5mm for most hidden cabinet door hinges installation. 5/64 inch drill bits is included.
- 【QUICK CLAMP DESIGN】We provide quick clamp on the GOINGMAKE 35mm hinge hole drilling jig pro max type. You can clamp and fix the concealed hinge jig on the workpiece easier and fast. Save a lot of time and make woodworking easier.
The basic formula for a single inset door is simple: opening width minus two reveals, and opening height minus two reveals. With a 1/8-inch reveal, a 15-inch by 30-inch opening gets a door that finishes at 14 3/4 inches by 29 3/4 inches.
For paired doors, subtract the left reveal, right reveal, and center gap before dividing by two. For example, a 30-inch-wide opening with 1/8-inch side reveals and a 1/8-inch center gap works like this: 30 inches minus 3/8 inch equals 29 5/8 inches. Divide that by two and each door finishes at 14 13/16 inches wide.
Drawer fronts use the same math as single doors unless the design calls for unequal reveals. Keep the reveal consistent across the cabinet elevation, especially where a drawer stack lines up with adjacent doors.
Make Inset Cabinet Doors
For most kitchens and built-ins, a five-piece Shaker-style door is the practical choice: two stiles, two rails, and a center panel. A common rail and stile width is 2 to 2 1/2 inches, though small drawer fronts may need narrower rails to avoid looking heavy. The center panel can be plywood, MDF, or a solid raised panel depending on the finish and design.
Build the door slightly oversized, usually by 1/16 inch to 1/8 inch in both width and height. After the glue cures and the door acclimates in the room, trim it to the actual opening. This is the difference between cabinetmaking and wishful measuring.
Dry-fit all parts before glue. Check for twist. Use flat cauls or a known-flat assembly surface when clamping. After glue-up, let doors sit long enough to release clamp stress before final fitting. If the project is in a humid climate or a house with seasonal swings, bring the material inside the conditioned space before final trimming.
Fit before finish, but think about finish thickness. Paint, primer, and clear coats build up on edges. If you fit an unfinished door to a tight 3/32-inch reveal and then spray several coats on every edge, the door may rub. Ease the edges lightly, seal all six sides, and avoid heavy paint buildup where the reveal is established.
Free tools Windows power users keep installed
One-click scans. No signup required.
Install Inset Cabinet Doors
Start with the cabinet level, plumb, and square. If the box is twisted or the face frame is not in plane, the door will tell on you. Set the door in the opening with equal-thickness spacers on all four sides. Confirm that the face sits flush with the frame. If the door rocks, the frame or door is out of plane and needs correction before hinges go on.
With concealed hinges, confirm the hinge cup bore distance, cup diameter, and mounting plate location using a test door before batching the whole kitchen. Many concealed hinges use a 35 mm cup, but the setback and plate position vary by hinge model and overlay or inset application. Generic jig settings can be wrong for inset doors.
Rank #3

- 【High Precision】 All metal cabinet hinge jig made of high quality aluminum alloy,The bottom surface is very flat, Is more durable and accurate than plastic jigs. The all metal concealed hinge jig bulit-in double bearings ,the lateral shaking is reduced, and the drilling is more stable and accurate.provides continuous hinge hole drilling and much easier, making drilling more accurate.
- 【Easy and Fast】cabinet hardware jig provides quick cabinet hinge hole depth setting,Move the hole puncher to the mark and drilling position of the board, lock the quick clip,it easy to use and greatly improves the efficiency and accuracy of installing cabinet hinges. You can easily clamp and fix the concealed hinge jig, quickly drill holes and install hidden cabinet door hinges.
- 【Widely application】The 35MM hinge opener is suitable for 12-25mm wood, 35mm hole to edge distance of 5mm, comes with 35mm hole saw and 2mm drill bit, can be used with any electric drill, 35MM hinge positioning opener is suitable for cabinet/kitchen/closet/cabinet door hinge punching and positioning,which is suitable for most common hinges.
- 【Installation steps】The kitchen hinge jig positioning hole opener installation steps 1. Adjust the drilling depth of the limit ring, normally 12-13MM. 2. Adjust the size to adapt to the thickness of the clamped board. 3. Quickly clamp the locking plate according to the drill mark. 4. Drill 35mm and left and right 2mm screw holes 5. Installation Hinge
- 【Packing list】:1 *Hinge drilling locator body, 1 *35MM drill bit, 1* 2mm Drill bit,2 *small wrenches, 1 *hexagonal tool, 1 screw, 1 limit ring . Concealed cabinet hinge jig wood hole puncher locator help you drill accurate and fast as drill press.And saves you time and effort.
Install one door completely before drilling the rest. On that test door, confirm the reveal, hinge swing, bumper thickness, pull location, and whether the door clears adjacent appliances or walls. Once that door works, repeat the setup for matching openings, but still check each one individually.
Butt hinges and knife hinges can create a beautiful traditional look, but they require cleaner mortising and offer less adjustment. If you are using them, cut shallow test mortises in scrap of the same thickness before touching the finished door. A hinge mortise that is 1/32 inch too deep can pull the door out of flush.
After hanging, adjust the reveal in this order: side gaps first, height second, depth last. Install bumpers only after the door is aligned. Bumper thickness affects how the door lands flush with the frame, so it is part of the final fit, not an afterthought.
Make and Install Inset Drawer Fronts
Inset drawer fronts are easier to understand if you separate function from appearance. The drawer box must run smoothly on its slides. The decorative front must sit flush and evenly gapped in the opening. Those are related, but they are not the same step.
Install the slides and drawer box first. Check that the box opens fully, closes evenly, and does not rack. Confirm slide setback before attaching the decorative front. This is a common failure point: a slide or locking device can push the drawer front too far out or pull it too far in, making the face sit proud or recessed.
Once the box works, place equal spacers around the drawer-front opening. Playing cards, 1/8-inch hardboard strips, or plastic setup shims all work. Hold the front flush with the face frame. Clamp it if access allows, or use two temporary screws from the front in locations that will be covered by the pull. Then open the drawer carefully and fasten the front from inside the drawer box with permanent screws.
Do these 3 things before closing this tab:
1Scan for outdated or missing drivers - takes under a minute2Clear out junk files and repair common Windows errors3Fix the driver behind crashes, sound loss and screen glitchesUse washer-head screws or oversized holes in the drawer box when you want a little adjustment. After the final reveal is set, tighten the screws. Then install pulls or knobs. Plan pull locations after you know the rail width and reveal. Pulls placed too close to an inset edge can split narrow rails and can visually crowd the frame.
Cost and Time Expectations for 2026
Inset cabinetry costs more because the labor is real. Each door and drawer front must be fitted, gapped, adjusted, finished, and often adjusted again after finishing. A standard overlay cabinet job can move quickly once the boxes are set. Inset work slows down at the face of every opening.
| Project Type | Typical 2026 Cost Range | Notes |
|---|---|---|
| Full kitchen cabinet installation | $1,935-$10,767, with many projects higher for custom work | Varies by cabinet count, layout, region, and finish level |
| Cabinets by linear foot | $100-$1,200 per linear foot | Stock is lower; semi-custom and custom inset work trends higher |
| General cabinet installation benchmark | $274-$422 per cabinet | Homewyse May 2026 starting benchmark before site adjustments |
| Kitchen cabinet installation benchmark | $486-$736 per cabinet | Kitchen work usually carries more layout, appliance, and trim coordination |
| Replace cabinet doors only | $900-$4,500 for many kitchens | Custom replacement doors often run about $180-$330 per door installed |
| DIY sheet goods | $55-$170 per 4×8 sheet for many 3/4-inch hardwood plywood panels | Species, grade, core, and prefinished surfaces change the price |
| Drawer slides | Under $10-$20 per pair for value side-mount; $25+ per pair for many undermount soft-close slides | Premium slides cost more for adjustment, load rating, and hardware packages |
For time, plan conservatively. A skilled cabinetmaker may still spend 20-45 minutes fitting and adjusting one inset door after the door has already been built and finished. A careful DIYer may spend one to two hours per front, especially in older cabinets. A full kitchen with 25-35 fronts can become several weekends of fitting, sanding, finishing, and reinstallation.
Rank #4

- 【Premium Aluminum Alloy Material】The 35mm concealed hinge jig is made of high-quality aluminum alloy material, This is a set of guide tools for installing concealed hinges very accurate.
- 【Adjustable Double Cleat Design】Adjustable double clamping plate for accurate positioning, clamping 15-25mm thickness of wood panels, convenient for fast multi-angle drilling, and installation of cabinet door hinges.
- 【Focus On Practicality】Suitable for most 35mm cabinet hinge jig clamps, with an adjustable opening depth of 10-15mm and adjustable drilling edge distance of 3-7mm.
- 【Upgrade Three Bearing Drill Sleeve】Upper, middle, and lower 3 bearing drill sleeve, the total height of drill sleeve 2cm, the small swinging amplitude of drill bit for accurate hole opening.
- 【Perfect Choice】Easy to use with any drill, you don't have to be a well-equipped woodworker to install these hinges. Perfect for any handyman who needs hinges made.
Replacing only the doors and drawer fronts makes sense when the boxes are square, solid, dry, and worth keeping. Rebuild or reface the cabinet boxes when openings are racked, the face frames are out of plane, particleboard is swelling, water damage is present, or the cabinet layout no longer works with appliances and clearances.
Recommended Free Tools
Permits, Safety, and Layout Issues
Swapping cabinet doors and drawer fronts usually does not require a building permit by itself. The picture changes when the project includes moving walls, electrical, plumbing, gas, ventilation, or appliance locations. Many kitchen remodel permit offices treat cabinet replacement differently from a broader kitchen remodel, so confirm locally before ordering materials.
Electrical and ventilation clearances matter when new cabinet layouts change appliance positions. Kitchen islands and peninsulas may trigger receptacle planning requirements. Range hoods, microwave hoods, and exhaust ducting must be coordinated with the cabinet design so doors clear the appliance, the duct path works, and the installation follows the applicable residential code and manufacturer instructions.
If the existing cabinets or surrounding painted surfaces were built before 1978, lead-safe renovation rules may apply when sanding, scraping, cutting, or disturbing old paint. Do not treat this as ordinary dust. Use lead-safe containment practices and, when required, an EPA-certified renovator.
Basic shop safety still matters. Use eye and hearing protection, support narrow parts with push blocks, clamp work before routing or drilling, and collect dust aggressively when machining MDF or painted materials. Inset work creates repeated small trimming passes, which is exactly when people get casual around blades and bits.
Common Mistakes That Ruin the Reveal
The biggest mistake is measuring only one spot. Cabinet openings are often tapered, twisted, or out of square. If you size a door from one width and one height measurement, you may build a perfect rectangle for an imperfect opening.
The second mistake is building to final size too early. Pros leave doors and fronts slightly oversized, then trim to the real opening. Final fitting belongs after the opening is checked and the material has stabilized.
Another common problem is inconsistent reveal math. A door can swing properly and still look wrong if one side has a 1/16-inch reveal and the other has 3/16 inch. The eye reads that immediately, especially on painted cabinets with strong shadow lines.
Hardware mistakes are just as costly. Overlay hinges, wrong mounting plates, incorrect cup setback, and drawer slides set too far forward can all make an inset front impossible to align. Always build one test door and one test drawer front before batching the entire room.
Quick wins for a faster PC:
Repair Windows errors before they cause bigger problemsFix Now →Scan for outdated or missing drivers - takes under a minuteDriver Scan →Clear out junk files and repair common Windows errorsFree Scan →Best Value

- 【2-in-1 Hinge & Door Jig】: Compatible with kitchen cabinets, bathroom vanities, wardrobes, TV stands, and more. Functions as both a 35mm hinge drilling guide and a cabinet door mounting jig. The built-in alignment system keeps doors perfectly flush for stable one-person installation.
- 【Flawless Hole Precision】: Snap-on ruler system eliminates manual measuring errors. Adjustable edge margins (3/4/5/6mm) and pilot spacing (45/48/52mm) ensure identical, perfectly aligned hole placement across multiple doors, accommodating most standard 35mm concealed hinges.
- 【Seamless Mounting Support】: Utilize the detachable cabinet door mounting supports to hold heavy doors in perfect alignment with the frame. Fine-threaded adjustment rods allow you to dial in the exact height, turning a difficult two-person task into a stable, one-person cabinet door installation.
- 【Deviation-Free Drilling】: The rigid CNC aluminum body and quick clamp securely hold boards up to 38mm thick. Non-marring rubber pads prevent slipping, ensuring precise 90° tear-out free cup holes even on dense hardwoods like Oak or Maple.
- 【Built-In Dust Extraction Port】: Keep indoor workspaces spotless. The standard 1-3/8" dust port connects directly to shop vacs to remove chips instantly. This reduces heat buildup, prevents twist-lock clogging, and significantly extends the drill bit's life.
Finally, do not ignore finishing thickness. Primer and paint on both the door edge and the face-frame edge can close the gap. If doors rub after painting or during humid weather, the cause is often a tight reveal combined with wood movement or finish buildup.
When to DIY and When to Hire a Pro
DIY makes sense for a single vanity, a mudroom built-in, a laundry cabinet, a shop cabinet, or a small paint-grade project where you can work slowly and accept a learning curve. It also makes sense when you own accurate tools, can build a test door, and are comfortable trimming parts in increments smaller than 1/16 inch.
Hire a cabinetmaker or finish carpenter for a full kitchen, stained hardwood, beaded inset frames, high-end hardware, or any project where the existing cabinet openings are uneven. Also hire out the work if the project touches electrical, plumbing, ventilation, countertops, or appliance layout. In those cases, the cabinet fronts are only one part of the job.
On our projects, we price inset fitting separately from basic cabinet installation. It should not be buried in a generic per-box rate. The adjustment time is predictable, visible, and necessary. Paying for that time is usually cheaper than living with crooked reveals on a premium cabinet style.
What’s actually slowing this PC down?
Pick the symptom - the matching free tool is one click away.
Final Job-Site Checklist
- Confirm every cabinet opening is square, flat, and numbered before building fronts.
- Use a 1/8-inch reveal for homeowner-friendly inset work unless the shop and finish process can support tighter gaps.
- Build doors and drawer fronts slightly oversized, then trim to fit each exact opening.
- Test one hinge setup and one drawer-slide setup before drilling or cutting the full batch.
- Install drawer boxes and slides before attaching decorative drawer fronts.
- Seal all six sides of wood doors and avoid heavy finish buildup on reveal edges.
- Check appliance, wall, and adjacent-door clearances before final hardware placement.
- Re-adjust after finishing, after bumpers are installed, and again after the home has gone through a humidity change.
Inset cabinet doors and drawers reward patience. The work is not complicated because the formula is hard; it is complicated because every small error remains visible. If you control the opening, the material, the reveal, and the hardware, the result is a cabinet face that looks built into the room instead of simply attached to it.
Frequently Asked Questions
What is the standard gap around inset cabinet doors?
A typical finished reveal is about 3/32 inch to 1/8 inch on all sides. For most homeowner projects, 1/8 inch is safer because it allows for paint thickness and seasonal wood movement.
How do you measure for inset cabinet doors and drawer fronts?
Measure each opening in several places, check the diagonals, then subtract two reveals from the width and height. For paired doors, also subtract the center gap before dividing the remaining width by two.
Can I install inset cabinet doors on existing cabinets?
Yes, if the cabinet boxes and face frames are square, solid, dry, and in plane. If the openings are racked, water-damaged, swollen, or made from failing particleboard, refacing or rebuilding is usually the better route.
Are inset cabinets harder to install than overlay cabinets?
Yes. Overlay doors hide more variation because they cover the frame. Inset doors sit inside the opening, so every reveal, hinge adjustment, and out-of-square condition is visible.
What hinges should I use for inset cabinet doors?
Use hinges designed for inset applications. Adjustable concealed inset hinges are the most forgiving for many modern projects, while butt hinges and knife hinges can look traditional but require more precise mortising.
Do I need a permit to replace kitchen cabinet doors or drawers?
Replacing only doors and drawer fronts usually does not require a permit. Permits may be needed if the project includes electrical, plumbing, gas, ventilation, wall changes, or appliance relocation.
Quick Recap
Product prices and availability are accurate as of the date/time indicated and are subject to change. Any price and availability information displayed on Amazon at the time of purchase will apply.
The Tool Desk
Outbyte Driver Updater FREEScan for outdated or missing drivers - takes under a minuteDriver Scan →Outbyte PC Repair FREERepair Windows errors before they cause bigger problemsFix Now →