Crashes, No Sound, or Screen Glitches?
Random freezes, missing sound and display glitches usually trace back to one bad driver. Find and replace yours safely.Free scan · under a minutePC Slower Than It Used to Be?
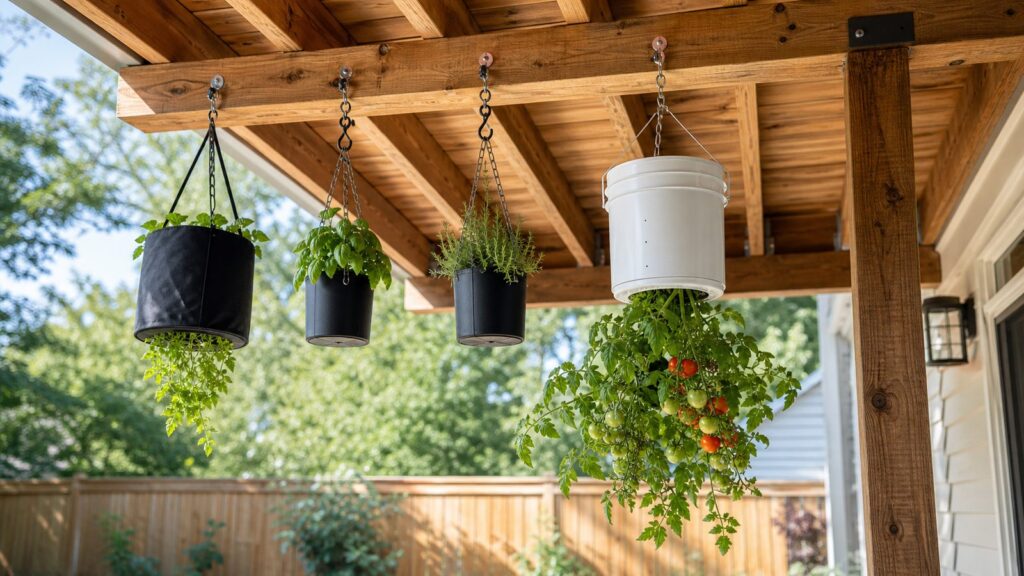
A free scan shows the junk files, broken settings and background clutter dragging Windows down - then fixes them in one click.Free scan · Windows 10 & 11Upside-down planters are a good DIY project when you need more growing space without giving up a patio, deck, porch, or small yard. The idea is simple: the plant grows out of the bottom of a hanging container while the root system sits above it in potting mix. Done well, it saves floor space, keeps some fruit off the ground, and can turn a sunny porch beam into a productive mini garden.
The part most homeowners underestimate is weight. A hanging planter is not just a bucket with dirt in it. It is a suspended load that gets heavier after watering, moves in wind, and may hang over people, pets, deck boards, railings, or a neighbor’s balcony. On our job sites, we treat hanging loads differently than decorations. We look for framing, use rated hardware, drill pilot holes, and plan where water will go before anything gets planted.
For most edible upside-down planters, expect to spend about $12 to $45 per planter if you use a basic bucket or recycled container. A more polished build with a food-grade bucket, upgraded chain, exterior-rated bracket, premium potting mix, and nursery starts can run $25 to $90 per planter. The five ideas below are the ones that make the most sense for a homeowner who wants a practical result, not a novelty that dries out by July.
Before You Build: The Rules That Make Upside-Down Planters Work
The best upside-down planter is not the prettiest one. It is the one that has enough soil volume, drains correctly, hangs from structure, and can be watered without dragging out a ladder every morning.
Quick wins for a faster PC:
Fix the driver behind crashes, sound loss and screen glitchesFind Drivers →Repair Windows errors before they cause bigger problemsFix Now →For tomatoes, peppers, and eggplant, use a 5-gallon container as the practical minimum. Container-growing guidance from university extensions commonly puts tomatoes at one plant per 5-gallon container, with roughly 12 to 24 inches of depth. Smaller containers can work for herbs, strawberries, nasturtiums, and small flowers, but they dry faster and leave less room for roots.
#1 Best Overall
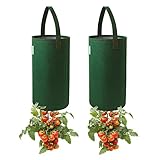
- Easy Planting: No need to tie up vines or bend down for planting. Tomatoes and vegetables grow upright for easy access.
- Space Saving: Upside down design saves space and utilizes gravity to maximize nutrient supply to roots.
- Healthy Roots: Fabric material naturally prunes roots and allows maximum oxygen for healthy growth.
- Easy to Fill: Single strap design makes it easy to fill with soil and water, and allows planting additional herbs.
- Patented Design: Zipper in design for easy assembly and patented for exclusive use.
Use a lightweight potting mix or container mix. Do not fill a hanging planter with garden soil, topsoil, or dense raised-bed soil. Those mixes are too heavy for overhead use and often drain poorly in containers. A typical 5-gallon bucket holds about 0.67 cubic feet before you allow space for planting and watering. In 2026, common bagged potting mix usually costs about $5 to $7 per cubic foot, or roughly $4 to $10 of mix per 5-gallon planter.
Drainage is mandatory. Every container needs drainage holes or slits so roots are not sitting in water and fertilizer salts can flush through. Gravel in the bottom does not fix poor drainage. If water dripping is a problem, use a tray or controlled watering setup, but empty standing water regularly to avoid root rot and mosquitoes.
For fastening, plan around wet load. A 20-inch container with moist mix and plants can weigh around 100 pounds. A full 5-gallon upside-down bucket may easily exceed a light decorative plant hook once saturated. For a tomato bucket, we like to design around at least a 50-pound working capacity, and preferably more if wind exposure is high or the planter is hanging over a walking area.
Quick Cost and Build Comparison
These ranges assume typical 2026 US retail pricing and basic hand tools. Costs vary by region, container choice, hardware rating, and whether you already own a drill, hole saw, ladder, and exterior fasteners.
| Planter idea | Best plants | Typical DIY cost | Best support | Difficulty |
|---|---|---|---|---|
| 5-gallon bucket tomato planter | Cherry, grape, patio, determinate tomatoes | $18-$55 | Joist, beam, rafter, or post-mounted hook | Easy to moderate |
| Fabric grow-bag planter | Tomatoes, peppers, strawberries | $25-$70 | Beam hook, chain, or heavy-duty hanger | Easy |
| hanging basket combo planter | Bottom tomato plus top herbs or flowers | $25-$80 | Ceiling hook or bracket rated above wet load | Moderate |
| Upcycled food-grade jug or bucket | Herbs, strawberries, nasturtiums, small peppers | $12-$35 | Small bracket, rail arm, or beam hook | Easy |
| Wall or porch rail bracket system | Multiple herbs, strawberries, compact vegetables | $45-$150+ | Lagged into framing, posts, or structural rail members | Moderate |
Idea 1: The 5-Gallon Bucket Tomato Planter
This is the classic upside-down planter because a 5-gallon bucket gives tomatoes enough root volume to have a real chance. It is inexpensive, easy to drill, and strong enough as a container when supported correctly. A basic orange utility bucket may cost about $4 each when bought in a three-pack around $11.94, while food-grade or decorative buckets often run $6 to $12 depending on the retailer.
For edible crops, use a food-grade bucket when possible. Some utility buckets are not labeled food safe. If you already own a bucket, only use it for vegetables if you know what was stored in it and can clean it thoroughly. Never use a container that held paint, solvents, pesticides, roofing products, automotive fluids, or unknown chemicals.
Materials
- One 5-gallon bucket, preferably food-grade for edible crops
- One compact tomato seedling, ideally cherry, grape, patio, or determinate
- About 0.6 to 0.7 cubic feet of lightweight potting mix
- Fabric collar, coffee filter, coconut liner, or sponge to hold mix around the stem
- exterior chain, rope, or a hanger rated for the load
- Hook or bracket rated at least 50 pounds, higher if exposed to wind
- Drill, 2-inch to 2-1/2-inch hole saw, and smaller bits for drainage
How to Build It
Drill a 2-inch to 2-1/2-inch hole in the center of the bucket bottom. Add several 1/4-inch drainage holes around the bottom, away from the main planting hole. If the bucket has a lid, you can drill a few watering holes in the lid or cut a center access hole to reduce evaporation and keep heavy rain from washing the mix.
Free tools Windows power users keep installed
One-click scans. No signup required.
Pre-moisten the potting mix before filling. This is a small step that makes a big difference. Dry mix settles hard after the first watering and can pull down around the seedling. Slip the tomato root ball through the bottom opening from inside the bucket so the stem hangs below. Use a split coffee filter, fabric collar, coconut liner, or sponge around the stem to keep soil from washing out while still letting water drain.
Fill the bucket gradually, firming the mix lightly rather than packing it tight. Leave about 1 to 2 inches at the top for watering. Hang the bucket before final watering if it is too heavy to lift safely afterward.
What It Costs
A practical budget is $18 to $55: $4 to $12 for the bucket, $4 to $10 for potting mix, $3 to $8 for a tomato start, $6 to $20 for chain or rope, and $6 to $25 for a suitable hook or bracket. Decorative finishes, food-grade buckets, and stainless or galvanized hardware push the price higher but usually extend outdoor life.
Idea 2: Fabric Grow-Bag Upside-Down Planter
Fabric upside-down planters and grow bags are popular because they are lighter than rigid containers and easier to store. Many commercial versions use breathable fabric or plastic-lined fabric with hanging straps. The benefit is root aeration and low starting weight. The drawback is durability: UV exposure, stitching quality, and strap strength matter.
Use this approach for patios where you want a softer-looking planter and do not want to drill a bucket. It works best with cherry tomatoes, patio tomatoes, peppers, strawberries, and trailing herbs. Large indeterminate tomatoes can grow in these systems, but they demand more water, more fertilizer, and stronger support than most homeowners expect.
Build Notes
Choose a fabric planter with reinforced seams and straps. If you are making your own, use outdoor-rated fabric, webbing, and UV-resistant thread. The soil volume should still be close to 5 gallons for tomatoes and peppers. A small fabric cone with 2 gallons of mix is better for strawberries or herbs than full tomato production.
Hang the bag from chain, a beam hook, or a bracket rated above the expected wet load. Do not rely on a thin decorative hook just because the empty bag feels light. Once the mix is wet and the plant has grown, the load changes.
Watering and Feeding
Fabric breathes, which helps roots but also increases drying. In hot weather, expect to check moisture daily. During peak summer heat, a tomato in a hanging fabric planter may need water every day and sometimes twice a day if it is in full afternoon sun. Use a vegetable fertilizer or tomato food in the $6 to $20 range and follow the label rather than guessing. Hanging containers have limited nutrients and flush faster than in-ground beds.
For cost, plan on $25 to $70 depending on the bag, plant, mix, fertilizer, and hardware. The bag itself may be inexpensive, but the hanger and support still need to be treated as structural components.
Idea 3: Hanging Basket With Herbs on Top and a Tomato Below
This is the best-looking version when it is done correctly: a tomato grows out the bottom while basil, parsley, thyme, marigolds, nasturtiums, or shallow-rooted flowers grow from the top. It works because the top planting softens the container and gives you more food or flowers from the same overhead space.
Rank #2
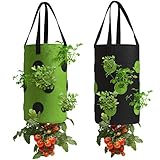
- Packgae includes: It comes with 2 pcs of fabric hanging planters in black and green, each bag measures 8.8 * 15 inches. 2 mental hooks are included for easy hanging. One nice feature is that they can easily be turned for more or less sunlight for both sun and shade loving plants.
- Heavy-duty: Made of Nonwoven Fabric, material is heavy-duty felt, good permeability let roots breathe freely and make the plants grows well and increase yield. Keeps plant warmer in winter and cooler in the summer, decreased risk of transplant shock, creates improved overall root structure.
- Upside down design: These upside down planters are great solution if you have deer or other that come and munch on your plants when you're not looking, and most importantly no more sore back and knees. The upside down design will save space and utilize gravity to maximize water and nutrient supply to roots.
- Openings on side: the upgraded design planter bags will allow you to grow so many plants in one bucket. Grow the juicy tomatoes or cucumber on the bottom and the side openings (12 holes in total) are great for herbs, strawberries, peppers, etc.
- Easy to use: The grow bag is suitable for patios, lawn, gardens, balcony, any outdoor and indoor space. Load the plant root side first pushing them through the openings, and then fill the bag with dirt, pick a suitable height and sunny area to hang the bag. These bags can easily be used for several seasons and not take up much space when storing.
The mistake is overcrowding. A tomato already wants most of the moisture and nutrients in a 5-gallon container. Add top plants only if the container has enough soil volume and the plant pair has similar sun and water needs. Basil with tomato is a practical combination. Thyme needs less water, so place it near the edge and watch moisture carefully. Marigolds and nasturtiums are useful when you want flowers without a heavy root system.
Container Size and Layout
Use a basket, bucket, or planter that holds at least 5 gallons for a tomato combination. For a smaller 2 to 3 gallon hanging basket, skip the tomato and use strawberries, trailing herbs, or flowers instead. The bottom opening should be large enough for the root ball but not so large that the mix washes out. A 2-inch hole is usually enough for a small tomato transplant.
Do these 3 things before closing this tab:
1Fix the driver behind crashes, sound loss and screen glitches2Clear out junk files and repair common Windows errors3Scan for outdated or missing drivers - takes under a minutePlant the tomato first through the bottom, secure the collar, then fill with pre-moistened potting mix. Plant the top herbs or flowers last. Keep the top planting sparse: one tomato below plus two or three small top plants is usually enough.
Where to Hang It
Tomatoes need at least 6 hours of sun per day. That does not mean the planter should bake against a south-facing wall with no airflow. Light-colored containers or shaded bucket sides can reduce root-zone heat stress in hot climates. Also put the planter where watering is easy. If the only way to reach it is a ladder, maintenance will fail during the hottest part of the season.
Expect to spend $25 to $80 for a sturdy basket or bucket, potting mix, plants, fertilizer, liner, and rated hardware.
Idea 4: Upcycled Food-Grade Jug or Bucket Herb Planter
Not every upside-down planter needs to carry a tomato. For renters, balconies, and small porches, a lighter upcycled container is often the smarter project. Food-grade buckets, large restaurant containers, nursery pots, and sturdy jugs can become small upside-down herb, strawberry, or flower planters.
This is where the safety standard changes. A 1 to 3 gallon planter can be much lighter than a tomato bucket, but it still needs drainage, clean material, and a reliable hanger. Use containers that held food, not chemicals. Wash them well, remove labels where practical, and avoid brittle plastic that has been sitting in the sun for years.
Best Plants for Small Containers
Use trailing herbs, strawberries, nasturtiums, compact peppers, and small flowers. Avoid full-size tomatoes unless the container is close to 5 gallons. Herbs that stay reasonably compact are better choices: parsley, thyme, oregano, trailing rosemary in mild climates, and small basil varieties.
For a 1-gallon container, think of it as a herb planter, not a vegetable production system. For a 2 to 3 gallon container, strawberries and compact peppers become more realistic. For anything fruiting, check water often and feed lightly but consistently.
Build Details
Cut a bottom opening sized to the plant root ball, usually 1-1/2 to 2 inches for herbs and strawberries. Add drainage holes. Use a fabric collar or coffee filter around the stem. For hanging, upgrade from the original plastic handle if it feels flimsy. A short length of chain or outdoor rope through two reinforced side holes is often more reliable than a snap-on handle.
Costs are low if you already have the container. Budget $12 to $35 for potting mix, a seedling, cord or chain, and a small bracket or hook.
Idea 5: Wall or Porch Rail Bracket System for Multiple Small Planters
If you want several upside-down planters, build the support system first and the planters second. A row of small hanging containers can overload a weak rail, fascia board, or siding attachment faster than one large bucket. This is the point where a construction mindset pays off.
Rank #3

- 【Durable Material】: The planting bag is made of high-quality felt cloth, has good permeability, is durable, can be easily folded, and can be washed and reused.
- 【Versatile Usage】: There are 12 planting holes on our planting bag. You can plant strawberries, potatoes, tomatoes, carrots, onions, peanuts, lilies, roses, garlic, hyacinths, watermelons and other vegetables on the top of the planting hole or the plant bag.
- 【Space Saving】:Hanging planters take up minimal floor space while promoting plant growth.They can be easily hung on the garden fence or pillar, and allowing Growing vegetables is fun and more diverse.
- 【Breathable Design】: Felt cloth allows air circulation and keeps vegetables from breathing smoothly, prevents root rot from excessive moisture and removes excess water, thereby promoting plant growth.
- 【Easy Installation】: Plant growing bag is the best gift for planting lovers, suit for hanging or put it on the balconies, terraces, gardens, plantations to use.
A good bracket system spreads loads into framing. On a porch, that may mean fastening into posts, beams, rafters, or joists. On a wall, it means locating studs or blocking and using exterior-rated lag screws. Do not fasten brackets to siding alone. Vinyl siding, fiber cement siding, trim boards, soffit panels, gutters, and fascia are not reliable structural supports for loaded edible planters.
Suggested Layout
For small herbs or strawberries, space brackets about 18 to 24 inches apart. For tomato buckets, allow more room: 30 to 36 inches between planters gives leaves airflow and makes watering easier. Keep the bottom of the planter high enough that the plant can hang freely, but low enough that you can water from the ground or deck.
Recommended Free Tools
A practical three-planter rail or wall setup may cost $45 to $150+. The lower end assumes recycled containers and basic hooks. The higher end includes decorative brackets, galvanized or stainless hardware, upgraded chain, food-grade buckets, premium mix, and several seedlings.
Fastening Checklist
- Find framing with a stud finder, inspection hole, attic access, or visible beam layout.
- Use exterior-rated screws or lag screws sized for the bracket holes and load.
- Drill pilot holes to reduce splitting, especially near deck posts and porch framing.
- Keep loads away from gutters, soffits, thin trim, and unsupported fascia.
- Check the planter after storms and during heavy fruiting.
Safe Hanging: Load, Hardware, and Water Control
The hardware package rating is not the whole story. A hook rated for 30 pounds may be fine for a light flower basket and wrong for a saturated 5-gallon tomato bucket. For food-producing hanging planters, we prefer a larger margin. Treat 50 pounds as a practical minimum for a 5-gallon tomato planter, and go higher for windy sites, long chains, or places where people walk underneath.
Install hooks into solid wood framing: joists, rafters, beams, or posts. Drill the correct pilot hole so the screw shank bites without splitting the wood. If you are using a wall bracket, fasten it through siding into framing with exterior-rated lag screws. If you cannot identify framing, stop and solve that before hanging the planter.
Also think about water. Planters over wood decks can leave stains. Planters over concrete can create slippery algae spots. Planters on balconies may drip onto neighbors. Drip trays can help, but they need to be emptied. A tray full of water can rot roots and become a mosquito problem. A better approach is often controlled watering: water slowly until the mix is evenly moist, then stop before runoff becomes constant.
What’s actually slowing this PC down?
Pick the symptom - the matching free tool is one click away.
Soil, Fertilizer, and Plant Choices
Use lightweight potting mix labeled for containers. It should drain well but hold enough moisture for a hot afternoon. If you make your own blend, keep it light with peat, coir, perlite, or similar container-friendly components. Avoid topsoil and heavy garden soil. They add weight, compact in the bucket, and can drown roots.
Best plant choices include cherry tomatoes, grape tomatoes, compact determinate tomatoes, patio tomatoes, peppers, strawberries, trailing herbs, nasturtiums, and small flowers. Large indeterminate tomatoes can grow upside down, but they are not the best first choice. They put more demand on water, nutrients, and support, and the stems can become awkward as the plant tries to turn upward toward light.
For tomatoes, one plant per 5-gallon container is the right baseline. For peppers, one plant per 5-gallon container is also a safe rule. Strawberries and herbs can share smaller containers, but do not crowd them so much that watering becomes impossible.
Feed regularly with a vegetable fertilizer or tomato food. Small fertilizer bags or containers typically cost $6 to $20 and may serve several planters. Start gently after transplanting, then follow the label during active growth. Too much fertilizer can push leafy growth at the expense of fruit.
The Tool Desk
Outbyte PC Repair FREEClear out junk files and repair common Windows errorsFree Scan →Outbyte Driver Updater FREEScan for outdated or missing drivers - takes under a minuteDriver Scan →When to DIY vs. When to Hire a Pro
Most single upside-down planters are reasonable DIY projects if you can safely use a drill, identify structural framing, and reach the installation point without risky ladder work. A homeowner can usually build and hang one bucket planter in 60 to 90 minutes, plus shopping time. A multi-planter setup may take a half day once layout, fastening, and cleanup are included.
Hire a pro or at least get experienced help when the planter will hang over a walkway, driveway, seating area, shared balcony, or second-story edge. Also bring in help if you need blocking added inside a porch ceiling, a freestanding frame built, brackets mounted through masonry, or a rail system attached to an older deck. Those are not gardening problems; they are load-path and fastening problems.
Permit requirements vary by city and county. Small hanging planters usually do not require a building permit, but a new freestanding frame, balcony alteration, deck modification, overhead structure, or anything attached to a multifamily building may trigger local rules, HOA approval, or landlord permission. Some jurisdictions exempt small nonstructural work, but that does not mean every exterior attachment is allowed. When in doubt, check your local building department before drilling into shared or structural elements.
Common Mistakes to Avoid
The most common mistake is using the wrong soil. Garden soil and topsoil are heavy, compact easily, and drain poorly in hanging containers. The second mistake is trusting the wrong support. Drywall anchors, soffit panels, gutters, fascia, vinyl siding, and decorative trim are not suitable for a loaded edible planter.
The Tool Desk
Outbyte PC Repair FREEClear out junk files and repair common Windows errorsFree Scan →Outbyte Driver Updater FREEScan for outdated or missing drivers - takes under a minuteDriver Scan →Rank #4

- 🍓Packgae includes: It comes with 4 pcs of fabric hanging planter bags Dark green, each bag measures 8x14 inches. 6 triangular three-dimensional pockets for easy planting, with a bottom hole for inverted planting;4 mental hooks are included for easy hanging.
- 🍅Upside down design:Maximize space with our upside down planter. Effortlessly grow strawberries or tomatoes with hanging strawberry kit. Versatile grow bags for year-round harvests. One nice feature is that they can easily be turned for more or less sunlight for both sun and shade loving plants.
- 🍓Heavy-duty: Made of Nonwoven Fabric, material is heavy-duty felt, good permeability let roots breathe freely and make the plants grows well and increase yield. Keeps plant warmer in winter and cooler in the summer, decreased risk of transplant shock, creates improved overall root structure.
- 🍅Maximize outdoor space with our upside down tomatoes hanging planter kit. Hassle-free gardening with hanging tomato planters. Enjoy fresh produce year-round. Optimal conditions with strawberry planters outdoor. Easy setup for hanging vegetable garden.
- 🍓Wide Application: these hanging garden bags are suitable for most vegetables or flowers such as tomatoes, strawberries, mint, potatoes, succulents and other small plants you want to grow.
Do not rely on a bucket handle alone for a permanent overhead installation unless the entire assembly is designed and rated for that use. Sun, wind, water, and plant growth all add stress over time. Chain, exterior rope, and rated connectors give you a better margin.
Avoid cutting an oversized planting hole. If the hole is too large and you skip the collar, soil washes out around the stem. Also avoid hanging the planter where you cannot water it easily. Upside-down planters dry faster than in-ground beds, especially in wind and summer heat.
Finally, be realistic about plant size. A compact cherry tomato is a better bet than a large indeterminate slicer. Upside-down gardening can save space, but it does not eliminate watering, fertilizing, pruning, heat stress, or pest monitoring.
Bottom Line
The best DIY upside-down planter for most homeowners is a 5-gallon bucket tomato planter hung from real structure with hardware rated above the expected wet load. If appearance matters, use a fabric grow bag or a combination basket with herbs on top. If weight or rental rules are the concern, build smaller food-grade herb and strawberry planters instead.
Quick wins for a faster PC:
Clear out junk files and repair common Windows errorsFree Scan →Scan for outdated or missing drivers - takes under a minuteDriver Scan →Plan for $12 to $45 for a simple recycled or bucket planter and $25 to $90 for a more finished version with upgraded hardware. Put the planter in at least 6 hours of sun, use lightweight potting mix, provide drainage, and install it where watering is easy. That combination matters more than the container style.
Frequently Asked Questions
Do upside-down tomato planters actually work?
Yes, especially with cherry, grape, patio, or compact determinate tomatoes. They need at least 6 hours of sun, lightweight potting mix, steady watering, fertilizer, and a strong support. They save space, but they do not reduce maintenance.
How heavy is a 5-gallon upside-down planter when wet?
Plan for at least 50 pounds of working capacity for a 5-gallon tomato planter. Wet potting mix, the container, water, plant growth, and wind movement all add load. Use higher-rated hardware when the planter hangs over people or a walking area.
Can I hang an upside-down planter from a porch ceiling or soffit?
Only if the hook or bracket is fastened into structural framing such as a joist, rafter, beam, or post. Do not hang loaded planters from soffit panels, gutters, fascia, siding, drywall anchors, or decorative trim.
What’s actually slowing this PC down?
Pick the symptom - the matching free tool is one click away.
What soil should I use in an upside-down planter?
Use lightweight potting mix or container mix. Do not use garden soil, topsoil, or dense raised-bed soil because they are heavy and often drain poorly in hanging containers.
Are 5-gallon utility buckets safe for growing food?
Use food-grade buckets when possible for edible crops. Some common utility buckets are not considered food safe. Never grow food in a bucket that held chemicals, paint, solvents, pesticides, or unknown materials.
Do I need a permit to hang upside-down planters?
A single small hanging planter usually does not require a permit, but rules vary. Check locally if you are modifying a deck, balcony, porch ceiling, exterior wall, masonry surface, shared building, or building a freestanding support frame.
Quick Recap
Product prices and availability are accurate as of the date/time indicated and are subject to change. Any price and availability information displayed on Amazon at the time of purchase will apply.