Do these 3 things before closing this tab:
1Fix the driver behind crashes, sound loss and screen glitches2Repair Windows errors before they cause bigger problems3Scan for outdated or missing drivers - takes under a minuteFor a smoother, more predictable result, match your sandpaper grit to the surface and the finish, support the abrasive so it stays in contact, and stop when the surface is ready for its next step. Hand-sanding is especially useful for refining power-sanded wood, working curves and corners, and correcting small areas without removing more material than necessary.
Which sandpaper grits should you use?
Start by inspecting the wood rather than defaulting to the coarsest paper. A well-planed board may need only a moderate starting grit; scratches or an uneven glue joint call for more cutting power. Choose a sequence in which each finer grit removes the scratches left by the previous one. WOOD Magazine recommends keeping the next grit to no more than about 50 percent higher, with 100, 150, and 220 as an example. WOOD Magazine’s grit guide gives these starting points:
| Surface condition | Possible starting grit | How to proceed |
|---|---|---|
| Clean, well-planed board | 150 grit | Use a moderate grit and inspect the scratch pattern before moving finer. |
| Presurfaced board with incidental scratches | 120 grit | Sand until the existing scratches are gone, then refine with the next grit. |
| Deep scratches, gouges, or uneven glued joints | 80 or 100 grit | Use the coarser grit only where needed, then progress through finer grits to remove its scratches. |
These are starting points, not a mandatory sequence for every board. Do not advance while scratches from the current grit remain visible. WOOD Magazine suggests 100, 150, and 220 as one sensible progression; the right steps depend on how much material must be removed.
When should you stop sanding raw wood?
Set the endpoint with the finish in mind. WOOD Magazine says 180 grit is generally sufficient for oil or clear finishes, and recommends continuing to 220 for stain or dye because color can make swirl marks and scratches more apparent. Sanding finer, such as to 320, can leave a very smooth surface but may reduce stain absorption. If you are unsure how the wood and colorant will respond, test the grit and finish on a sample piece first. WOOD Magazine’s finishing guidance also describes sanding bare wood typically to 220 grit before vacuuming and proceeding with cleaning.
Free tools Windows power users keep installed
One-click scans. No signup required.
#1 Best Overall

- FIT FOR HAND:Mouse hand sanding pad and round sanding pad both fit your hands. Sanding mouse is designed with velcro on both sides as well which is meant for sanding 90-degree vertical corners, maximizing the use of each piece of sandpaper
- HOOK & LOOP DESIGN:Hook and loop sanding block provides quick pad changes, prevents pad shifting and spinning, yet allows easy removal of the abrasive disc without wearing out overall strength. Easy to hold handle and a flat bottom
- PREMIUM PU BACKING PLATE:Hand sander block's backing plate is made of selected polyurethane(PU), flexible and durable, dampening the vibration
- STANDARD SIZE:5 inch hand sanding pad works with ANY standard 5 inch sander discs in the market. Say goodbye to such "incompatible/unmatchable" issues
- APPLICATION:Hand sanding block hook and loop is available for both wet and dry sanding, ideal for woodworking, hobby, arts and crafts, auto body, drywall, shop and automotive use
For raw wood, aluminum-oxide paper is a practical choice. WOOD Magazine recommends keeping rolls in 120, 150, and 220 grit to complement random-orbit sanding discs. A 3M 220-grit aluminum-oxide sheet is listed for wood and hand or sanding-block use; 3M also advises sanding with the grain and progressing through a grit sequence. See 3M’s 220-grit sandpaper listing. Replace worn-out scraps: paper that cuts slowly can leave an uneven scratch pattern or burnish the wood instead of sanding it cleanly.
How should you support the sandpaper?
A block helps keep the abrasive evenly engaged with a flat surface. That can make sanding more consistent and reduce accidental dishing or rounding at an edge. Choose a small block when control matters. Cork, foam, or a shop-made support can work if it is firm enough to hold the paper against the wood while offering some flex.
Rank #2
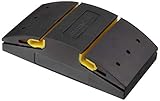
- Easy grip: solid-rubber block fits comfortably in the hand
- Convenient: accommodates 1/4 sheets of sandpaper; attached paper stays securely in place
- Wet or dry: can be used on wet or dry surfaces, indoors or out
- Durable construction: consists of 80% polypropylene and 20% TPR for heavy-duty strength and flexibility
- Warranty: backed by an Amazon Basics 1-year limited warranty
A hard block is not ideal for every task: without flex, it can wear the paper quickly or fail to follow the surface. For narrow spots and corners, a strip of hardwood with abrasive attached can work like a file. On curves and profiles, use a shaped scrap that matches the contour or several small blocks; shaped foam insulation can support broader curves. The aim is to keep the abrasive following the intended shape, not flattening a detail or rounding an edge.
How do you hand-sand after power sanding?
Power sanding can leave a scratch pattern that is difficult to see until finish is applied. A light hand-sanding pass with the grain can refine that pattern and make it less likely to show under the first coat. It is also a controlled way to reach corners, curves, or small areas the power sander missed.
Rank #3

- Versatile sanding set: Featuring 16 pieces of assorted shape sanding blocks,and 40 Sheet Hook & Loop Sandpaper(5 Sheets each of 8 different sanding grits: 40,60, 80,120,180, 220, 400, and 600), this set is perfect for all your woodworking needs. With a new improved design that allows for quick and easy changing of shapes, you'll be able to tackle any project with ease
- Hook and loop interchangeable shapes: The hook and loop interchangeable assorted shapes make it easy to switch between sanding blocks, saving you time and effort. Whether you need to sand a large surface area or a tight corner, this set has got you covered.
- Wide Range Of Uses: Manual sanding blocks are widely used and have strong grinding ability. They can be used to grind irregular planes such as uneven grooves, curved surfaces, planes, stepped surfaces, and inner holes
- Easy to use: With its soft and durable foam material and hook and loop interchangeable shapes, this sanding set is incredibly easy to use. You won't need any special tools or equipment to get started, making it perfect for beginners and DIY enthusiasts alike.
- Meticulous Workmanship: The manual sanding block adopts self-adhesive-backed sandpaper roll, which is more exquisite in workmanship, and can better perform grinding and polishing work, saving time and effort.
- Check the surface. Look for remaining scratches, glue-joint unevenness, and areas the power sander did not reach. Let the condition of the wood determine whether you need to begin coarser or can move to a moderate grit.
- Use the appropriate support. Sand flat areas with a block where practical; use a flexible or shaped support for contours and profiles.
- Follow the grain. Sand in the direction of the wood grain, using controlled strokes rather than pressing hard or lingering in one spot.
- Inspect before changing grits. Move to the next finer grit only after the previous grit’s scratches have been removed. Wipe or vacuum dust as needed to make the surface easier to assess.
- Stop at the finish-appropriate grit. Choose the endpoint for the coating or colorant you plan to use, rather than treating the finest available paper as the automatic goal.
How should you sand between coats or polish a finish?
Finish sanding is a separate operation from sanding bare wood. For dry-sanding a finish, WOOD Magazine describes zinc-stearated abrasive as resistant to clogging, but its soaplike residue may interfere with the bond of some water-based finishes. For those finishes, use silicon-carbide paper for dry sanding or switch to wet sanding.
For wet sanding, use silicon-carbide wet/dry paper with a suitable lubricant. Wipe away residue periodically so you can inspect your progress; liquid on the surface can make the remaining finish look thicker than it is. Do not use ordinary paper for a wet-sanding task.
Rank #4

- 【ASSORTED GRIT SANDING BLOCKS】 8 sand blocks, 4 sizes from coarse to ultra-fine sand, 60/80/120/220 grit, 2 blocks for each grit. There are four different colors, grey (corresponding to grit size - 220), blue (120), green (80), and orange (60), with different numbers of grains for different colors.
- 【HIGH-QUALITY MATERIALS】These sanding sponges are made of high-density sponge, flexible, tear-resistant, and very durable. sanding block sand will not come off.
- 【VERSATILE APPLICATION】The different sanding blocks can be used for different abrasive projects in woodworking, furniture polishing, metal dusting, primer polishing, drywall, wood filler, and other finishes.
- 【WASHABLE and REUSABLE SANDPAPER BLOCK】This sanding sponge can be used wet or dry, these drywall sanding blocks are very versatile. sanding blocks can be used straight away or applied wet to the surface of an object for polishing, the sanding sponges both provide excellent polishing power while reducing the need for frequent cleaning, ultimately increasing your productivity.
- 【PROFESSIONAL SERVICES】We are confident in offering a 100% Satisfaction Guarantee as we are confident that you will be satisfied with our sand block. We always strive to create a higher quality abrasive product line that offers superior abrasive performance, if there are any questions about this product, please feel free to contact us and we will resolve them for you within 24 hours!
For final polishing, WOOD Magazine recommends nonwoven synthetic pads: ultrafine gray pads for minor imperfections and nonabrasive white pads with wax before buffing. A 3M wood-finishing pad is listed for smoothing between coats of stain, sealer, or varnish and rubbing in furniture oils; its product listing recommends it for water-based stains and finishes. See 3M’s wood-finishing pad listing.
Independent reader supportYour contribution helps us test, update, and keep practical guides available for everyone.What should you check before applying the finish?
After sanding bare wood, remove embedded dust before finishing. WOOD Magazine’s guidance calls for vacuuming the surface after bare-wood sanding and then proceeding with cleaning. Check corners, joints, and broad flat areas under good light; dust can disguise scratches that become more visible after stain or a clear coat is applied.
Outdated Drivers Are Slowing You Down
One free scan finds every outdated or missing driver and matches the right update for your exact hardware.Free scan · exact hardware matchPC Slower Than It Used to Be?
A free scan shows the junk files, broken settings and background clutter dragging Windows down - then fixes them in one click.Free scan · Windows 10 & 11Quick Recap
Best Value

- 4-in-1 sand block
- Four profiles- flat, convex, concave, and a tight edge
- Change from coarse to fine grit in seconds with the quick-snap sand paper lock
- Works with any quarter sheet of sand paper in any grit
- 150 grit sand paper included
Product prices and availability are accurate as of the date/time indicated and are subject to change. Any price and availability information displayed on Amazon at the time of purchase will apply.