Quick wins for a faster PC:
Repair Windows errors before they cause bigger problemsFix Now →Fix the driver behind crashes, sound loss and screen glitchesFind Drivers →Clear out junk files and repair common Windows errorsFree Scan →Intercom installation or repair begins with identifying the system—not by matching the look of a handset or door station. Wiring type, power, station configuration, door-lock interface, and any network requirements determine what equipment is compatible and what work is safe. Use the exact manufacturer’s instructions for the model, assess existing infrastructure before planning a retrofit, and bring in a qualified technician when the product or local rules require one.
What to identify before installing or repairing an intercom
Record the manufacturer and model of the indoor and outdoor units, then locate the power supply and any accessible wiring diagram. If connections may need to be disconnected, photograph them first. Confirm how many stations are on the system and whether it supports audio, video, door release, or integration with other access-control equipment.
Systems that look similar may use different architectures. BTicino documents a two-wire BUS video-entry family, while Comelit publishes manuals for traditional systems; Verkada describes a networked, cloud-managed intercom. Those are distinct product approaches, not interchangeable wiring standards. Check the exact model’s documentation before selecting replacement equipment or making connections.
- Wiring and topology: identify the system family and how indoor and outdoor stations connect.
- Power: locate the supply and verify that the replacement equipment supports the installed arrangement.
- Stations and functions: note the number of units and whether the system needs audio, video, remote management, or door release.
- Door lock: establish how the intercom signals or powers the release mechanism and whether the replacement supports that interface.
- Network: check for network connectivity where the selected product requires it.
- Site and rules: assess mounting surfaces, cable routes, and applicable local electrical requirements.
For system-specific planning, consult the BTicino two-wire product documentation, Legrand’s two-wire system design and installation guide, or the relevant Comelit traditional-system manuals. These references apply to their respective product families; they are not universal installation instructions.
The Tool Desk
Outbyte PC Repair FREERepair Windows errors before they cause bigger problemsFix Now →Outbyte Driver Updater FREEFix the driver behind crashes, sound loss and screen glitchesFind Drivers →#1 Best Overall

- Dortronics Herculite door U-Bracket receiver housing
- Electrical/Doorbells & Intercoms
- Manufacturer: Pacific Electronics
- Buttons: Momentary action button marked talk,listen, and door
How to assess an intercom retrofit
Existing cable, conduit, power, and mounting points may be reusable, but only if they meet the replacement system’s requirements. A retrofit assessment should also account for the door-lock interface, network availability when relevant, and local requirements. The 2N retrofit guide discusses these site checks and possible reuse; it does not establish that any particular building’s infrastructure will work with a chosen product.
- Document what is installed. Record model identifiers, station locations, cable routes where known, power equipment, and the existing lock-release setup.
- Match the replacement to the system. Compare the manufacturer’s wiring diagram, system type, station count, supported functions, and power requirements with what is present.
- Check the building conditions. Confirm cable and conduit condition, network availability if needed, mounting surfaces, and a feasible route for any new wiring.
- Plan the door release and access behavior. Verify that the intercom and lock interface are compatible and that the intended operation suits the building.
- Confirm who may do the work. Check product instructions and local rules before beginning electrical work or changing access-control equipment.
For a new installation, plan station positions, cable routing, mounting, power, and door-release integration before fixing equipment in place. BTicino’s Classe 100 instructions, for example, describe mounting a bracket, routing and connecting the two BUS conductors, and attaching the indoor unit. Those steps apply to that product family only; another system may require a different layout and connection method.
Rank #2
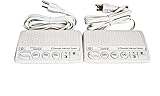
- All connection & communication quality depends on the setup & condition of the powerline.
- Read 2nd PICTURE to the LEFT B4 buying the Product (USA & Canada only)
- - WARRANTY: 12 months. domestic only
- 110 - 220 Volt AUTO voltage with U/L plug. Other Countries Requaire a separate adaptor
How to troubleshoot common intercom problems
Start with the symptom and its scope. Determine whether one station or the whole system is affected, then test the functions separately: power, ringing, two-way audio, video, and door release. Use only the checks and settings documented for the exact model, and avoid probing wiring or changing configuration when you cannot identify the system.
| Symptom | What to establish | Next step |
|---|---|---|
| No power or no response | Whether the problem affects one unit or all units, and whether the model’s documented power source is present | Use the model’s troubleshooting guide; stop if inspection would involve uncertain or regulated wiring |
| Calls do not reach another unit | Which stations are affected and whether the system uses configured station addresses | Check documented wiring and addressing for that model; BTicino’s Classe 100 guidance includes BUS wiring, voltage, termination, short circuits, and intercom-key addressing for particular faults |
| Audio or video fails | Whether ringing and door release still work, and whether the fault affects one or multiple stations | Follow the manufacturer’s specific audio or video checks; Ring lists wiring issues and unclear or black video among its product troubleshooting topics |
| Door will not unlock | Whether the call and conversation work, and whether the fault is limited to the release function | Check the model’s lock wiring and documented settings; do not assume an app-controlled product’s behavior applies to other systems |
BTicino’s guidance for its specific system also addresses network stability and correct lock wiring in relation to particular symptoms. Its stated voltage information is product-specific and should not be treated as a general intercom specification. Ring provides separate troubleshooting for its own equipment, including wiring, unlocking, and video issues; follow it only for compatible Ring devices. See BTicino product guidance and Ring Intercom troubleshooting.
Rank #3
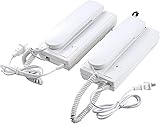
- ✅ Without unlock function.
- ✅ Intercom doorphone for double rooms, widely used in offices, warehouses, families, etc.
- ✅ There is a connection cable between this doorphone, and they need to be wired to each other to make sure it could work well.
- ✅ The maximum operating distance is 200m/656ft when it is connected by RVV2(2 PIN) cable. (3.3ft cable come with this parcel)
- ✅ Plug into 110VAC power or insert 4 x AA Batteries into each device unit. (Batteries not included)
When to stop and call a qualified technician
Do not continue if the wiring is uncertain, the work involves mains or other regulated electrical systems, equipment is damaged, or a change could affect building security or safe exit. Stop as well when the manufacturer reserves the task for qualified service. Centurion’s Intercom Handset Installation Manual states that installation, repair, and service of that product must be carried out by a suitably qualified technician.
Requirements can also vary by location and product. Ring warns of electrical-shock risk, advises turning off power before installation, says a qualified electrician may be required under local law, and instructs users to check for loose wires before restoring power. Apply those instructions to compatible Ring equipment, and follow the applicable manual and local rules for any other system. See Ring’s installation guidance.
Rank #4

- 2-Wire Installation & 2-Monitor Video Intercom system for home -The outdoor doorbell camera connects via a two-wire cable that easily plugs into the mains power supply. The indoor touchscreen can be wall-mounted and is charged with a 24V/1A adapter. It includes two 15-meter cables.
- Never miss a visit with real-time response - Receive notifications from the TUYA app on your phone when your visitors ring the doorbell. See, hear, and speak to anyone at the door, and even unlock the door remotely from anywhere.
- Intercom Calling and Call Transfer - The video intercom system with two 7-inch monitors provides call forwarding and intercom calls to indoor monitors.
- Remote Door/Gate Unlocking - The video door phone kit facilitates access by adding visual protection to monitor your visitors. It can be controlled via the Tuya smartphone app, 13.56MHz RFID cards, or an NFC-enabled mobile phone, including the indoor monitor and the exit door.
- Human Detection and Customizable Detection Zone - When the video intercom doorbell detects human activity at your front door, it will send you immediate mobile notifications. You can always adjust the detection sensitivity and set up specific detection zones to reduce unwanted alerts.
Choosing a replacement system
Compare candidate systems against the building and intended use rather than choosing by appearance or feature list alone. A two-wire product may fit some refurbishment situations; a networked system may provide remote management or integration features. Neither is automatically a better retrofit: verify compatibility, infrastructure, and support with the manufacturer before purchase.
- Compatibility with existing wiring, topology, and power
- Audio-only or video requirements and the number of indoor stations
- Door-release and access-control functions
- Network requirements and any desired remote-management features
- Retrofit effort, mounting constraints, and manufacturer documentation for the exact model
For a networked example, see Verkada’s intercom getting-started information. Treat its described features and installation recommendations as specific to Verkada’s product, not as a description of all networked intercoms.
Do these 3 things before closing this tab:
1Clear out junk files and repair common Windows errors2Fix the driver behind crashes, sound loss and screen glitches3Repair Windows errors before they cause bigger problemsQuick Recap
Best Value

- In the Box: LE-D door station, LEM-1DL answering station, and 1 PT-1210N
- Communication: push-to-talk (simplex)
- Door Release Contact: N/O dry contact, 30V AC/DC 1A
- Wiring: door station to answering station, 2-conductor with overall shield, use Aiphone #822202 (22AWG) or #821802 (18AWG)
- Dimensions: LEM-1DL 7-1/16 in H x 5-5/8 in W x 2-1/8 in D, LE-D 4-3/4 in H x 3-1/2 in W x 1-1/8 in D
Product prices and availability are accurate as of the date/time indicated and are subject to change. Any price and availability information displayed on Amazon at the time of purchase will apply.