Free tools Windows power users keep installed
One-click scans. No signup required.
For a table-leg stretcher socket, support the leg in a simple jig: register its square upper section against two cleats, cradle the turned taper beneath the socket with a fitted V-block, and clamp the leg without lifting it. Bore on a drill press. This keeps the leg stable while you lay out and drill; the socket’s position and angle still depend on your actual frame geometry.
Build a jig that registers the square part of the leg
The square upper section is the reference surface. The V-block supports the changing shape below it; it should not become a new reference that tilts or raises the leg. WOOD Magazine’s directly relevant method uses a simple base, two cleats and a fitted V-block to support the leg while drilling stretcher sockets (WOOD Magazine, December 20, 2018).
- Make the base. Use 3/4-inch plywood or solid wood, slightly wider and longer than the leg.
- Add registration cleats. Fasten two short cleats at one corner of the base, one along an edge and one at an end. Together they locate the leg’s square upper section.
- Mark the socket. Determine its location from the assembled frame or a full-size project drawing. Do not assume a universal stretcher height or drilling angle.
- Fit the V-block. Shape a V block to support the turned portion directly beneath the socket mark. Fasten it to the base with brads or screws only after checking that it supports the taper without lifting the square section away from the base or cleats.
- Seat and clamp the leg. Press the square section against both cleats, position the socket mark, and clamp the leg securely. Recheck the mark and make sure the turned section cannot rock.
- Drill and repeat. Bore the socket on a drill press. Keep the same registration and support arrangement for each leg so the parts are laid out consistently.
Drill a rectangular mortise from overlapping holes
A drill bit makes a round hole, not a rectangular mortise. For a rectangular opening, use a fence to guide a row of overlapping holes along the mortise layout. Drill each hole to the same depth, then use a chisel to remove the webs between them and square the ends as needed. The fence helps keep the row aligned; the depth consistency keeps the bottom from becoming uneven.
Check the support and the joint before cutting
- If the leg lifts: the V-block is too high or positioned incorrectly. Lower or refit it; the square section must remain seated against its registration surfaces.
- If the taper rocks: the V-block is too low, too loose, or poorly fitted. Adjust its contact so it supports the leg firmly without changing the leg’s position.
- If the socket mark shifts during clamping: release the clamp, restore the square section against the cleats, and verify the layout before drilling.
- Dry-fit the stretcher: check the joint against the assembled frame before glue-up. A related Woodcraft chair build locates stretcher mortises after dry-assembling the aprons and legs and holding the stretchers in place (Woodcraft, “Build a Shaker-Style Dining Chair”).
Make sure this is the right kind of mortise
“Mortising a turned, tapered leg” can refer to different joints. The jig above is for a stretcher socket in a turned table leg. Do not transfer its geometry automatically to chair rails, Windsor seats or splayed-leg furniture.
Quick wins for a faster PC:
Repair Windows errors before they cause bigger problemsFix Now →Fix the driver behind crashes, sound loss and screen glitchesFind Drivers →#1 Best Overall

- PRECISION MORTISES FOR FURNITURE & CABINETS - Cut tight, repeatable mortises for chairs, tables, doors, and frame-and-panel projects. The Mortising Jig turns your plunge router into a portable benchtop mortiser without the cost of a dedicated machine.
- IDEAL FOR HOBBYISTS, PROS, & ONE-PERSON SHOPS - Whether you're a home woodworker or running a small furniture shop, this jig speeds up joinery workflows with a simple setup, dead-accurate alignment, and rock-solid construction.
- BUILT FOR BATCH PRODUCTION & HIGH REPEATABILITY - Perfect for small-batch furniture and production runs. Adjustable travel stops and laser-engraved stainless steel scales ensure consistent mortises every time - even across dozens of parts.
- VERSATILE LOOSE-TENON SYSTEM - A SMART DOMINO ALTERNATIVE - Create Domino-style joinery with your plunge router. Cut mortises up to 3-1/2" long using standard guide bushings or custom tenon stock - no expensive joiner system needed.
- AMERICAN MADE QUALITY - Machined and assembled in Strongsvile, Ohio using a phenolic work surface, powder-coated steel base, and stainless-steel scales. A premium tool designed for decades of accurate joinery.
| Joint situation | What changes | Reference |
|---|---|---|
| Stretcher socket in a turned table leg | Register the square upper section and support the taper with the fitted V-block; bore the socket on a drill press. | WOOD Magazine |
| Compound-angle chair rail entering a canted leg | Layout involves both the leg’s cant in elevation and the seat-frame shape in plan. Moving the mortise to simplify the tenon can shorten a back-rail tenon, so joint geometry and remaining tenon length matter. | Fine Woodworking |
| Straight mortise with an angled tenon | One alternative is to keep the mortise square to the workpiece and angle the tenon with a router jig. This is a distinct design choice, not a drop-in replacement for a stretcher socket. | Fine Woodworking |
| Windsor chair leg entering a seat | This uses a tapered tenon in a matching tapered, reamed hole—not a rectangular stretcher mortise in a turned leg. | Popular Woodworking |
| Staked stool or chair leg | The joint may need a tapered or conical tenon and a hole drilled at combined angles; a full-size mock-up can establish the layout before drilling the seat. | Fine Woodworking |
| Sloped leg entering a table base | A project-specific method transfers the mortise outline, removes waste by boring, chisels with an angled guide block, then dry-fits and tunes the joint. | Woodsmith |
Tools and limits of the method
For the table-leg socket method, the essential powered tool is a drill press; the base, cleats and V-block are shop-made. A chisel and clamps complete the setup and cleanup. The cited method does not specify a bit diameter, drill speed, mortise dimensions or a branded jig, so choose those to suit the actual stretcher and leg rather than treating an example as a universal specification. Tapered reamers belong to the separate Windsor seat-joint application, not this rectangular-mortise method.
Quick Recap
Best Value
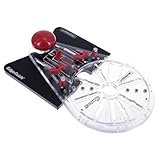
- Compatible with plunge and fixed base routers
- Straight edge has a maximum Travel of approximately 5-1/2″
- Plate Opening Sized to 1-3/16” for PC Style Bushings
- Depending on router, base may only connect with 2 or 3 opposing slots.
- Router guide has a large surface area for straight and curved edges for radial cuts
Rank #4

- TABLE ADJUSTERS: Our mortise machine features integrated clamps and swings arms that align and secure wood for accurate joints. Set your joint length, align the wood in the jig, and cut your mortise or tenon with any plunge router.
- TENON MACHINE: Mortise and tenon joints are strong, stable, and used in many projects. It's considered one of the strongest joints next to the common dovetail, and they connect by either gluing or locking into place for a strong outcome.
- MORTISE AND TENON TOOLS: Our box includes a 1/4" high-speed up-cut spiral bit, bushing guides for 1/4", 3/8", and 1/2" tenons, a two-part base plate/bushing adapter, centering tool, and adjustment wrench.
- ROUTER TABLE ACCESSORIES: Lock your chisel in place and create the perfect setup with our mortising machine. This unit can be mounted directly onto a workbench, a board that clamps in a vise, or a bench.
- GENERAL TOOLS: We're a recognized leader in designing and developing specialized precision tools dedicated to delivering exceptional customer service. We encourage artisans and DIYers to work smarter, measure better, and repair more productively.
Rank #3

- 【All-in-One Pro Combo: Complete Hinge, Lock & Latch Installation】This expanded set now integrates a door hinge jig, door lock installation kit, and door latch installation kit—engineered to guide you through every stage of door prep. From mortising hinges and drilling lock bores to precision-cutting latch plates, this all-in-one system delivers seamless, professional-grade results without the need for multiple tools or guesswork.
- 【Durable Aluminum Build with Non-Slip Protection】Crafted from robust aluminum alloy, this door hinge tool is far more durable than plastic models. It features silicone anti-skid pads on both sides, providing a stable grip that prevents slipping and protects your door from any damage during installation.
- 【Precision Fit for a Wide Range of Hinge Sizes】This versatile door hinge router jig fits round-corner hinges (1/4", 5/8" radius) and square-corner hinges, cutting clean mortises from 2.5" to 5" in length. The door jamb hinge jig accurately supports both thick hinges (4-1/2", 5") and thin hinges (2-1/2", 3", 3-1/2", 4") for professional results.
- 【Smart Lock & Latch Installation: Fits Most Common Door Sizes】The door lock drilling kit works with standard 1‑3/8" and 1‑3/4" thick doors, plus 2‑3/8" and 2‑3/4" backsets. The newly added door latch installation kit provides a dedicated door latch mortise tool that precisely routes recesses for standard latch plates and faceplates, ensuring a flush, professional fit every time—ideal for wood doors.
- 【Complete Kit: Ready for DIYers & Pros Alike】Everything is included: door hinge template, door knob installation kit, hole saw kit, door latch installation kit, bits, and manual. Achieve flawless door prep with one professional set – no second guesses, no extra tools.
Rank #2
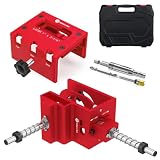
- Metal Precision, Flawless Installation: Both our door lock jig and door latch jig are precision CNC‑machined from solid 6061 aluminum, hardened and anodized. Offering 300% more rigidity than common plastic jigs, our tools stay true, giving you accurate, pro‑grade results every time.
- [🔒Patent-pending Design] Gohelper door lock jig and door latch jig are a unique, patent-pending innovation. Any unauthorized reproduction will be subject to legal action.
- Door Lock Installation Kit: For Fast, Damage‑Free Setup. Tool‑free clamping gives quick, secure, scratch‑free attachment. The alignment guide with pilot holes and a sight window ensures correct height and vertical drilling every time. Reinforced backing plates resist warping for lasting durability.
- Universal Fit for Everyday Projects: This door lock drilling kit fits common lock sizes for wood doors. Its adjustable template adapts to standard thicknesses (1-3/8" & 1-3/4") and backsets (2-3/8" & 2-3/4"), covering most household doors. Includes two drill bits for quick, professional setup right out of the box.
- Door Latch Mortise Tool for Router: No more worrying about plastic jig deformation. This latch mortising tool is built with a robust clamping mechanism – just follow the template with your router to create precise mortises with uniform depths (selectable 1/2/3mm) for tidy, dependable results.
Product prices and availability are accurate as of the date/time indicated and are subject to change. Any price and availability information displayed on Amazon at the time of purchase will apply.