Four useful joints you can cut on a table saw are the half-lap, tongue-and-groove, box joint, and splined miter. They suit different work: half-laps join crossing frame members, tongue-and-groove aligns boards or panels, box joints interlock box corners, and splines reinforce mitered corners. Choose the joint for the job, use the appropriate jig and blade setup, and test the fit on matching scrap before cutting project parts.
Choose the joint for the job
| Joint | Common uses | What the joint does | Typical table-saw setup |
|---|---|---|---|
| Half-lap | Picture, door, and face frames | Two members overlap with half their thickness removed from each, so their faces sit flush. | Single blade with a tenoning jig, or a stacked dado set with a miter-gauge auxiliary fence. |
| Tongue-and-groove | Edge-glued panels, cabinet backs, and frame-and-panel doors | A tongue engages a groove to help align boards and provide a long-grain glue surface along the edge. | Single blade or dado set; cut the groove first, then fit the tongue to it. |
| Box joint | Small boxes, drawers, chests, and tool boxes | Interlocking fingers provide substantial glue surface at a corner. | Stacked dado set or dedicated box-joint blade set, with a box-joint jig attached to a miter gauge. |
| Splined miter | Mitered box or frame corners | A spline bridges the miter to reinforce a corner whose mating faces are end grain. | Rip blade and a fence-saddle jig that holds the assembled work while cutting slots. |
These are different connections, not interchangeable ways to make a corner. A half-lap and a box joint mechanically locate intersecting pieces; a tongue-and-groove aligns adjacent edges; a spline strengthens a miter after assembly. WOOD Magazine’s four-joint guide demonstrates the methods and recommends test cuts in scrap before machining project parts.
Set up the saw before cutting joinery
- Check the saw’s limits. Before fitting a stacked dado set, confirm in the saw manual that the arbor, saw power, permitted stack width, and insert support the configuration. A dado stack removes more material per pass, can bog down an underpowered saw, and may not fit the shorter arbors on some portable saws. Fine Woodworking discusses these compatibility limits in its table-saw joinery guide.
- Use a compatible throat insert. A zero-clearance insert supports material close to the blade and can improve cut cleanliness. Use one suited to the specific saw and blade setup; it does not replace a suitable jig or safe workpiece control.
- Support the work for the cut. Depending on the joint, the setup may call for a tenoning jig, miter-gauge extension fence, crosscut sled, auxiliary fence, or fence-saddle jig. Fine Woodworking describes these fixtures for table-saw joinery.
- Keep the fence and miter gauge from trapping offcuts. Do not treat one joint’s setup as a universal procedure. WOOD Magazine warns that using a rip fence and miter gauge together for a through-cut can trap the cutoff between the blade and fence, creating a kickback hazard. Follow the saw maker’s instructions and the specific cut’s jig and support requirements; see its fundamental table-saw joints guide.
1. Half-lap: make crossing members sit flush
A half-lap removes half the thickness from each of two pieces where they overlap. When the cuts are accurate, the joined faces finish flush, which makes the joint useful for picture, door, and face frames. Its strength depends on a long-grain-to-long-grain glue bond; it is not a substitute for a mechanically strong connection where the design requires one.
Cut and fit the laps
- Set the blade height to remove approximately half the thickness of the stock. Make setup cuts in scrap with the same thickness as the project pieces.
- Use either a single blade with a tenoning jig or a stacked dado set with a miter-gauge auxiliary fence, keeping the stock controlled and supported for the chosen method.
- Adjust blade height and, as needed, the cut position until the two test pieces overlap with their faces flush. Only then cut the project parts.
A single blade can leave smoother cheeks, while a dado set removes more waste per pass but may leave a semi-rough cheek. Choose based on the finish you need and the equipment your saw can safely support.
Crashes, No Sound, or Screen Glitches?
Random freezes, missing sound and display glitches usually trace back to one bad driver. Find and replace yours safely.Free scan · under a minutePC Slower Than It Used to Be?
A free scan shows the junk files, broken settings and background clutter dragging Windows down - then fixes them in one click.Free scan · Windows 10 & 11#1 Best Overall
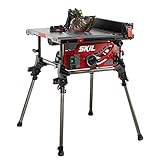
- RACK AND PINION FENCE RAILS - Ensures fence stays parallel to blade for fast smooth, and accurate cuts
- INTEGRATED FOLDING STAND - Legs quickly fold in to provide portability and convenient storage
- PARALLEL BLADE ALIGNMENT - Available micro-adjustment of blade so that it is parallel to rip fence and miter slot
- 4x4 CUTTING CAPACITY - Cuts material up to 4x4 at 90 degrees
- 2-47° BEVEL CAPACITY - Cuts between 2 positive stops at 0 and 45 degrees with quick release lever
2. Tongue-and-groove: align adjoining boards
Tongue-and-groove is useful for edge-glued tabletops and door panels, cabinet backs, and frame-and-panel doors. The tongue fits into a groove, helping keep adjoining pieces aligned and providing a lengthwise edge-glue surface. Cut the groove first; then size the tongue to match its actual width and depth.
Fit the tongue to the groove
- Choose a single-blade or dado-set method that your saw can accommodate. In a dado setup, use a compatible zero-clearance insert and support the workpiece on both sides of the blade.
- Cut a test groove in scrap of the same stock thickness and establish its width and depth.
- Cut a test tongue, adjusting its thickness until it enters the groove snugly without forcing the boards apart. Test the assembled edges before machining the panel pieces.
Terminology depends on cut direction and location: a dado runs across the grain, a groove runs with the grain, and a rabbet is cut along the edge of a board. The University of Melbourne’s joint terminology guide explains the distinction.
Rank #2
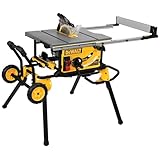
- Rack & Pinion Telescoping Fence System Make fence adjustments fast, smooth and accurate
- Patented material support, can be used for narrow rip cuts.
- 32-1/2" rip capacity easily cuts a variety of larger shelving and trim materials
- Onboard storage system provides easy access to the Blade Guard Assembly, fence, riving knife, miter gauge, wrenches, push stick, and cord wrap when not in use.
- Rolling stand designed for easy set up and breakdown with excellent stability of the portable table saw. Telescoping fence rails retract to create a small, portable package. Flip over ripping fence allows for narrow rip cuts
3. Box joint: interlock box corners
A box joint has alternating fingers that interlock at a corner, creating substantial glue surface. It is suited to small boxes, drawers, chests, and tool boxes. The repeated spacing depends on a jig attached to the miter gauge, so a small setup error can affect every finger.
Set up and test the finger spacing
- Use a stacked dado set or a dedicated box-joint blade set with a box-joint jig. A dedicated set is an option for cleaner, square-cornered cuts.
- Make the jig and test pieces before cutting the actual parts. Use a hard, wear-resistant spacer such as hard maple or white oak so the indexing spacer is less likely to deform in use.
- Cut a test pair and check the fit. The fingers should slide together by hand with moderate effort. If they require a mallet, the fit is too tight; adjust the setup and test again.
- Once the test pair fits, cut the project parts using the same stock thickness and setup.
4. Splined miter: reinforce a mitered corner
A plain miter hides end grain, but its mating faces are end grain and have limited glue strength. A spline crosses the miter and reinforces the corner. This method is useful on a mitered box or frame when you want added strength without changing the visible corner into a finger joint.
The Tool Desk
Outbyte Driver Updater FREEScan for outdated or missing drivers - takes under a minuteDriver Scan →Outbyte PC Repair FREERepair Windows errors before they cause bigger problemsFix Now →Rank #3

- POWERFUL AND PRECISE: This 10-inch single bevel compound miter saw features a 15-Amp motor delivering high power for effortless cuts. The power saw generates a no-load speed up to 5,000 RPM, ensuring precise cuts for all your woodworking projects.
- USER-FRIENDLY DESIGN: The miter saw includes an improved miter scale and controls for accurate adjustments. Its large table saw 10 inch provides better material support, and the vice clamping system secures the workpiece for precision and safety.
- LIGHTWEIGHT AND PORTABLE: Weighing only 24 lbs, this second generation power saw is easy to maneuver and transport to any job site. The compact design allows for easy storage and increased portability without sacrificing power or performance.
- VERSATILE CUTTING CAPABILITIES: With a 0-52° miter angle range left and right and an adjustable bevel range of 0-45° left, this compound miter saw offers flexibility. Adjustable bevel stops ensure precision cuts for various woodworking applications.
- GO FOR THE METABO HPT EXPERIENCE: This durable miter saw comes with the Metabo HPT 5-year warranty. Choose our durable Japanese-engineered power tools to carry out all your professional-grade work, get more at the Metabo HPT store.
Cut the slot and fit the spline
- Assemble the mitered work and hold it securely in a fence-saddle jig that cradles the box while the saw cuts the slots.
- Use a rip blade for square-cornered slots. Alternate-bevel teeth can leave small unfilled corners in the slot.
- Test the spline thickness in a scrap slot or test assembly. It should fit snugly; once the fit is right, glue it in place and trim it flush after the glue dries.
Make test cuts part of the process
Scrap tests are not just a precaution against wasting material: they are how you calibrate blade height, cut width, jig position, and fit for the actual stock. Use scrap that matches the project material’s thickness, and test the completed joint before moving to finished parts. A clean-looking cut is not necessarily a correctly fitted joint; check flushness, alignment, and how the pieces assemble by hand.
Quick Recap
Best Value

- 2-1/2-INCH MAX. DEPTH OF CUT - Corded table saw delivers up to 2-1/2-inch maximum cutting depth at 0 degrees to cut up to 3x material in a single pass
- RACK AND PINION FENCE RAILS - For quick fence adjustments; system ensures fence stays parallel to blade for fast, smooth, accurate cuts
- EXPANSIVE RIP CAPACITY - Table saw delivers 24.5-inch blade right and 12-inch blade left rip capacity to easily rip down sheets of plywood and other sheet materials
- POWERFUL 15A MOTOR - Power for a range of applications like ripping down sheets of plywood, cross-cutting 2x4s for framing, cutting dado joints, and more
- COMPACT SIZE - Portable for easy transportation and storage
Rank #4

- Site-Pro Modular Guarding System allows for tool-free adjustments of the guarding
- 24.5 in. of rip capacity for ripping 4x8 plywood or OSB sheets
- Rack & pinion telescoping fence rails make fence adjustments fast, smooth, and accurate
- Compact size for easy transportation and storage
- Metal roll cage base for jobsite durability
Product prices and availability are accurate as of the date/time indicated and are subject to change. Any price and availability information displayed on Amazon at the time of purchase will apply.




