Free tools Windows power users keep installed
One-click scans. No signup required.
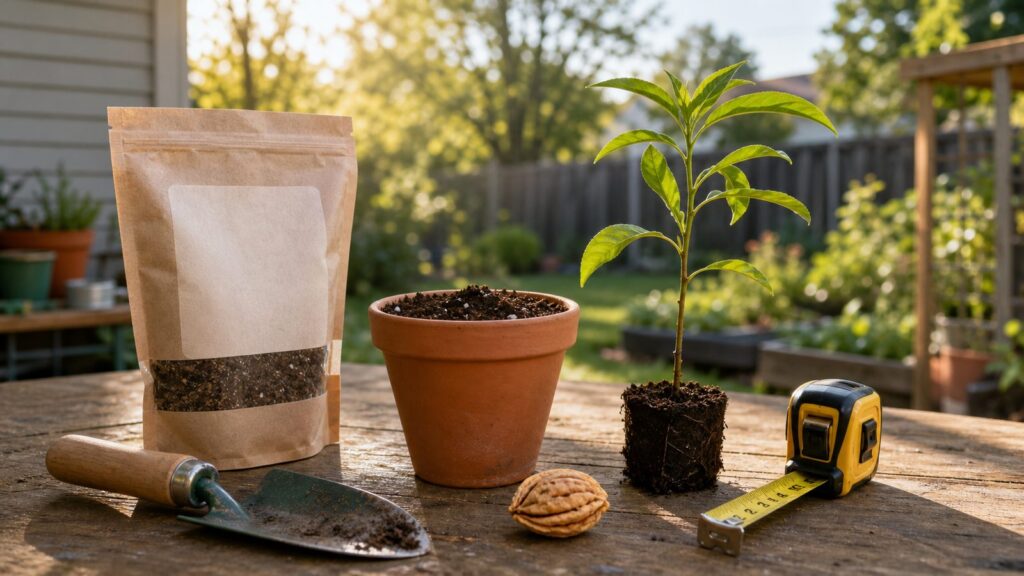
Yes, you can grow a peach tree from a pit. The honest answer is that you should treat it as a low-cost experiment, not a guaranteed shortcut to a productive backyard orchard. A seed-grown peach tree may produce good fruit, mediocre fruit, or no worthwhile fruit at all. It may take 3 to 7 years or longer before you know.
If your goal is predictable peaches, buy a grafted nursery tree matched to your region. If your goal is to learn, raise a tree from seed, and maybe end up with a useful fruit tree, a peach pit is a fine project. The process is simple: clean the pit, give it a cold dormant period, sprout it, pot it, harden it off, and plant it in the right spot.
Where many homeowners get into trouble is not germination. It is placement. On our job sites, we see trees planted too close to patios, walks, fences, utility lines, irrigation, septic components, and foundations. A peach seedling looks harmless in a pot, but a mature tree needs sun, drainage, pruning clearance, and room for equipment around it. Plan the site before you fall in love with the seedling.
Should You Grow a Peach Tree From a Pit or Buy One?
Start with the decision that saves the most time. A peach pit costs almost nothing, but the result is genetically uncertain. Peach trees grown from seed do not reliably match the parent fruit. The peaches may be smaller, later, less flavorful, more disease-prone, or surprisingly decent. You will not know until the tree is old enough to fruit.
#1 Best Overall

- Monitor Your Plants Easily: The high-quality, clear plastic of these cell trays lets you observe your plants without disturbing their root growth.
- Complete Control: The adjustable vents on these seed trays allow you to regulate temperature and humidity, giving you full control over the germination process.
- Ideal for Large Seeds: Each cell is 1.5 inches square, providing ample space for larger seeds like potatoes, tomatoes, peppers, and eggplants. Six trays equal the size of a standard 1020 flat.
- Heat Mat Compatible: These seed trays are designed to withstand high and low temperatures, making them perfect for use with a heat mat without worrying about warping or melting.
- What’s Included: The package contains 5 clear trays with draingae holes, 5 black base trays, 5 humidity domes, 5 adjustable vents and 10 plant labels for marking seeds.
A grafted peach tree is different. It is a named variety selected for fruit quality, chill-hour needs, disease resistance, size, and harvest timing. Most nursery trees are also grafted onto rootstock chosen for vigor and regional performance. That is why commercial growers and serious backyard orchardists use grafted trees.
For a homeowner, the practical split is this: grow from a pit if you want a project and can wait; buy grafted if you want fruit you can plan around. A 1- or 2-year-old nursery peach tree may fruit in about 2 to 5 years after planting. A pit-grown seedling often takes longer and may eventually be removed if the fruit or tree health is poor.
| Option | Typical 2026 Cost | Time to Fruit | Predictability | Best For |
|---|---|---|---|---|
| Grow from peach pit | $0-$35 for basic seed-starting supplies | About 3-7+ years | Low | Learning, experimenting, low-cost gardening |
| Plant a homegrown seedling outdoors | About $25-$150 if you need tools, mulch, guard, soil test, or irrigation parts | Depends on seedling age and vigor | Low to moderate | Homeowners with space to trial a tree |
| Buy a grafted bare-root peach tree | About $25-$60+ before shipping; many retail examples run around $40-$50 | About 2-5 years after planting | High | Reliable backyard fruit production |
| Hire professional planting | Commonly $150-$2,000 per tree; many national averages cluster around $300-$731 | Same tree biology, better installation odds | High if variety and site are right | Difficult sites, larger trees, drainage issues, or utility conflicts |
Pick the Right Peach Pit
The best pit comes from a ripe, locally grown peach. A peach from a farmers market, local orchard, or neighbor’s productive tree has better odds of matching your area’s chill hours, disease pressure, and climate. A grocery-store peach is usually a weaker bet because it may have been grown hundreds or thousands of miles away in a different climate.
Chill hours matter. Peach varieties need a certain amount of winter cold to break dormancy and bloom properly. In the United States, peach varieties can need roughly 100 to more than 1,000 chill hours, depending on the cultivar. Tennessee guidance commonly points to at least 850 chill hours for many Tennessee peaches. Mississippi regional averages can range from about 400-600 hours near Hattiesburg to 1,000-1,200 hours near Holly Springs. That is a major spread.
Do these 3 things before closing this tab:
1Scan for outdated or missing drivers - takes under a minute2Repair Windows errors before they cause bigger problems3Fix the driver behind crashes, sound loss and screen glitchesIf you plant a high-chill peach in a warm winter area, it may leaf and flower poorly. If you plant a low-chill peach in a colder region, it may bloom too early and lose flowers to frost. In warm climates, choose pits from proven low-chill local peaches. In colder climates, favor trees known to survive winter and bloom late enough to reduce frost damage.
Keep more than one pit if you have room. Germination is not guaranteed, and seedlings vary. Starting 3 to 6 pits gives you choices. Later, keep the strongest tree and remove weak, diseased, or poorly placed seedlings before they become permanent landscape problems.
What You Need
The materials are basic. For the seed-starting phase, budget $0-$35 if you already have containers and a refrigerator. Expect about $5-$20 for seed-starting mix, perlite, or vermiculite; $2-$10 for labels or plastic bags; and $5-$25 for a starter pot if you do not have one.
You will need a ripe peach pit, water, a scrub brush or towel, a paper towel or slightly damp medium, a resealable bag or lidded container, a refrigerator space around 34-40 degrees Fahrenheit, and a pot with drainage. Use sterile seed-starting mix or a light potting mix. Do not use dense yard soil in a starter pot; it compacts, drains poorly, and can hold pathogens around the young root.
For outdoor planting, the cost depends on what you already own. A homeowner who has a shovel, hose, pruners, and mulch may spend very little. If you need supplies, plan on roughly $25-$150 for items such as compost, mulch, a soil test, hardware cloth, trunk guard, stakes, pruners, or simple irrigation parts.
Step 1: Clean and Dry the Pit
After eating the peach, remove every bit of fruit flesh from the pit. This matters because leftover pulp encourages mold during storage and cold stratification. Rinse the pit under water and scrub it with a towel or small brush. Do not use soap.
Let the clean pit dry at room temperature for several days. Set it where air can move around it, out of direct summer heat. Label it with the peach source and date. If you are testing several pits, good labels prevent guessing later.
Rank #2

- Upgraded with Adjustable Ventilation - Gardzen seed starter tray has been newly upgraded with two air vents added to the top, allowing you to easily adjust the ventilation for optimal seed growth. Say goodbye to stagnant air and hello to thriving plants!
- High Quality and Durable - These seedling starter trays are made from premium plastic material, ensuring long-lasting use for all your seed starting needs. Comes with thoughtfully attached stickers, you can achieve a tighter fit of dome and base for maximum efficiency.
- 40-Cell Capacity - Each seed starter kit in our set comes with a generous 40-cell capacity, providing ample space for all your seeds to sprout and thrive. Whether you're a beginner or experienced gardener, this plant starter kit is perfect for starting your own garden paradise.
- Easy to Manage Kits - The 40-cell insert tray provides a simple, straightforward way to start seeds and grow plants from cuttings. The drain hole at the bottom of the seed tray prevents over watering. The clear dome allows you to clearly see the growth status.
- Versatile and User-friendly - This seed germination kit is not only suitable for starting seeds but also perfect for propagating cuttings and nurturing young plants.
Some gardeners crack the hard outer pit and stratify or plant the kernel inside. That can speed germination, but it also increases the chance of damaging the kernel or letting rot enter. For a homeowner project, we prefer the safer route: keep the pit intact unless you are comfortable cracking it carefully with a nutcracker or vise. If the kernel is nicked, crushed, or moldy, discard it.
Do not eat the kernel. Peach kernels contain amygdalin, a compound that can release cyanide when crushed or digested. Keep pits and kernels away from children and pets, and never grind them into smoothies or use them as food.
Step 2: Cold Stratify the Pit
Peach pits need a cold period to break dormancy. In practical backyard terms, that means 8 weeks to 3 or 4 months in refrigerator-like conditions. Aim for about 34-40 degrees Fahrenheit. A broader 32-45 degree range is commonly used, but do not freeze the pit solid and do not store it warm.
Put the pit in a slightly damp paper towel, peat, perlite, or vermiculite. The material should feel like a wrung-out sponge, not a wet rag. Seal it in a plastic bag or lidded container with a little air space. Label it clearly and place it in the refrigerator, not the freezer.
Check it every 2 to 3 weeks. If the towel or medium dries out, mist it lightly. If mold appears, wipe the pit clean and replace the medium. If the pit cracks and a root begins to emerge, move to potting. Handle the sprout gently; that first root is easy to break.
Quick wins for a faster PC:
Repair Windows errors before they cause bigger problemsFix Now →Fix the driver behind crashes, sound loss and screen glitchesFind Drivers →Clear out junk files and repair common Windows errorsFree Scan →A simple schedule works well in most of the country: clean and dry the pit in summer, start stratification in fall or early winter, pot it when it sprouts, harden it off as weather improves, and transplant outdoors in early spring or fall when temperatures are mild.
Step 3: Pot the Sprouted Pit
Use a pot with drainage holes, ideally 6 to 10 inches deep for the first stage. Fill it with a light potting mix. Plant the sprouted pit about 2 to 3 inches deep. If a root has emerged, point the root downward and cover gently. Water the mix so it is evenly moist, then let excess water drain.
Place the pot in bright light. A sunny window may work, but seedlings usually grow stronger under a basic grow light for 12 to 16 hours per day. Keep the mix damp but not saturated. Constant wetness is one of the fastest ways to rot a young peach seedling.
Once the seedling has several true leaves and active growth, shift it gradually toward outdoor conditions. This is called hardening off. Set it outside in shade for a few hours, then increase light and time over 7 to 10 days. Do not move a tender indoor seedling straight into full sun and wind.
Recommended Free Tools
Plan the Planting Site Before You Dig
A peach tree needs full sun. For best fruiting, plan on at least 6 hours of direct sun, with 8 or more hours preferred. Avoid low pockets where cold air settles, because spring frost can wipe out flowers. Also avoid tight side yards where airflow is poor and disease pressure stays high after rain.
Spacing matters. Most home peach trees need about 12-20 feet of spacing, depending on the expected mature size and pruning system. Keep the tree far enough from patios, walks, driveways, fences, sheds, and play areas that you can prune, spray if needed, thin fruit, and harvest safely. A peach tree trained to an open-center form still needs working room around the canopy.
Rank #3

- 【XL 2" Cells for Stronger Seedlings】This plant starter trays set includes 24 extra-large cells per tray (2" × 2" × 1.9") , providing more space for root development and healthier seedlings before transplanting. Designed to replace thin seed trays seedling starter inserts with a more durable, long-lasting option.
- 【Adjustable Humidity Dome for Better Germination】The transparent dome with adjustable vents helps regulate airflow and humidity levels, creating an ideal environment for seed germination while allowing easy monitoring of seedling growth. The transparent lids provide a clear view of your sprouts' growth.
- 【Reliable Drainage for Healthier Roots】Every cell includes proper drainage to prevent waterlogging, encouraging airflow and giving seedlings the balance they need. Ideal for gardeners using seedling starter trays for winter indoor growing or greenhouse setups.
- 【 Heavy-Duty Material for Reuse Each Season】Built from reinforced PP, these trays outperform thin inserts commonly found in grow trays. Sturdy, easy to clean, and designed for repeated use—offering reliable performance for beginner and experienced growers alike.
- 【Great for Multiple Planting Projects】With 10 growing trays and 240 total large cells, this seed starter tray kit is ideal for growing multiple batches of vegetables, herbs, and flowers at home or in greenhouse environments.
Do a drainage check before planting. Dig a hole about 12 inches deep and 12 inches wide, fill it with water, let it drain, then fill it again. If water sits for many hours or the hole is still soggy the next day, that is not a good peach site without correction. Peaches dislike wet feet. Compacted construction fill, heavy clay, and poorly drained low spots cause root stress and disease.
Before digging outdoors, call 811. Even a small tree hole can conflict with buried electric, gas, communications, irrigation, drainage, lighting, or invisible dog-fence lines. Our crews treat utility marking as a normal part of exterior work, not a formality. It is cheaper to wait for marks than to repair a line.
Setbacks and Clearances
For a backyard peach tree, use practical clearance rules. Keep it at least 10-15 feet from a house foundation when possible, farther if you plan to let the canopy spread. Stay clear of septic tanks, drain fields, retaining walls, underground drainage, and hardscape edges. Do not plant under overhead service lines. A fruit tree that needs annual pruning does not belong where every cut becomes a ladder-and-wire problem.
Check local rules if the planting area touches a right-of-way, sidewalk strip, HOA common area, easement, or street frontage. Most private backyard fruit-tree planting does not require a building permit, but street-tree and local tree rules vary. Some cities require approved street-tree permits. A few municipalities charge processing fees; one Florida example lists a $50 residential tree-permit processing fee. If the tree is near the curb, sidewalk, or shared property, verify before planting.
Step 4: Transplant the Seedling Correctly
Transplant when weather is mild. Early spring is often best in cold and moderate climates. Fall can work well in warm regions if the seedling has time to establish roots before stress weather arrives. Avoid transplanting during summer heat, drought, hard freeze, or saturated soil conditions.
Dig a broad, shallow planting hole. A good rule is 2 to 3 times wider than the root ball and no deeper than the root system. The root flare should be visible at the surface after planting. Do not bury the trunk. Deep planting is a common reason young trees decline.
Remove the seedling from the pot and inspect the roots. If roots circle the pot, tease them outward or make a few vertical cuts through the circling pattern. Set the tree on firm native soil so it will not settle too low. Backfill with the soil you removed unless a soil test or drainage correction says otherwise. Heavy amendment in only the planting hole can create a bathtub effect in clay soils.
Water thoroughly after planting. Apply 2 to 3 inches of mulch in a wide ring, but keep mulch several inches away from the trunk. No mulch volcano. Mulch against bark holds moisture and invites rot and pests. If the site has rabbits, deer, rodents, mowers, or string trimmers, install a trunk guard or hardware-cloth protection. Mechanical injury kills many young fruit trees before disease ever has a chance.
Care During the First Three Years
The first year is about roots and structure, not fruit. Keep the soil evenly moist, especially through the first growing season. A young tree typically does better with deep watering than frequent shallow sprinkling. In dry weather, check soil moisture 4 to 6 inches down. If it is dry at that depth, water slowly.
Rank #4

- 🌱 Complete 5-Pack Seed Starting Kit: Includes 5 clear seedling trays with drainage holes, 5 sturdy clear base trays, 5 humidity domes with adjustable vents, and 10 plant labels for easy seed identification.
- 💦 Humidity Control Domes with Adjustable Vents: Each dome features built-in vents to regulate temperature and humidity, creating the ideal environment for faster, healthier germination indoors.
- 🔍 Transparent Trays for Root Monitoring: Clear seedling trays allow you to observe root development without disturbing seedlings—perfect for learning, teaching, or improving your plant care skills.
- 💧 Drain Holes for Proper Airflow and Watering: Each of the 12 cells per tray has bottom drain holes that promote air circulation and prevent overwatering, helping seedlings develop strong, healthy roots.
- 🌿 Durable, Reusable & Space-Saving Design: Made of lightweight but durable plastic, these seed trays can be reused for multiple growing seasons and fit neatly on windowsills, under grow lights, or in greenhouses.
Peach trees are high-care compared with many ornamental trees. Plan for annual pruning, fruit thinning, pest monitoring, and disease prevention. The standard backyard training system is open-center pruning, which creates a vase-like structure with good light penetration and airflow. That makes fruit easier to reach and helps reduce disease pressure.
What’s actually slowing this PC down?
Pick the symptom - the matching free tool is one click away.
Prune during dormancy or according to local extension timing for your region. Remove dead, damaged, crossing, and inward-growing wood. Keep scaffold limbs well spaced around the trunk. Avoid letting the tree become tall and shaded in the center; a peach tree that is too dense produces poor fruit and dries slowly after rain.
If the tree sets fruit in future years, thin aggressively. Excess young fruit should be removed so remaining peaches can size up and limbs do not overload. Many backyard trees fail because owners try to keep every fruit. A loaded branch may look promising in May and break by July.
Independent reader supportYour contribution helps us test, update, and keep practical guides available for everyone.Disease, Pest, and Climate Realities
Peaches are not plant-and-forget trees. Common problems include peach leaf curl, bacterial spot, brown rot, borers, winter injury, frost loss, and wildlife damage. Disease pressure varies heavily by region. Humid climates often require more attention than dry climates. Warm-winter regions need low-chill genetics. Cold regions need winter hardiness and bloom timing that avoids late frost where possible.
A seedling from a local peach has better odds, but it is still a genetic roll of the dice. Watch the tree for repeated leaf spotting, cankers, weak growth, severe curl, poor winter survival, or fruit that rots before harvest. If a young tree is consistently unhealthy by years 3 to 5, removing it may be the right call. Do that before it is large enough to interfere with hardscape, utilities, or neighboring plants.
The Tool Desk
Outbyte PC Repair FREEClear out junk files and repair common Windows errorsFree Scan →Outbyte Driver Updater FREEFix the driver behind crashes, sound loss and screen glitchesFind Drivers →Keep the area around the trunk clean. Remove dropped fruit that can harbor pests and disease. Maintain mulch, but keep it off the trunk. Avoid trunk wounds from mowers and trimmers. If you use any spray program, match it to your state extension guidance and the specific problem. Do not spray blindly because timing matters, and the wrong product at the wrong time wastes money.
When to DIY and When to Hire a Pro
Growing the pit, potting the seedling, and planting a small tree are reasonable DIY jobs for many homeowners. The work is low risk when the site is open, utilities are marked, drainage is good, and the tree is small enough to handle safely. A shovel, hose, mulch, and patience may be all you need.
Hire help when the planting location is complicated. That includes compacted construction fill, drainage problems, slopes, retaining walls, hardscape conflicts, tight access, suspected utility conflicts, large tree installation, irrigation changes, or planting near a street or shared property line. Professional planting commonly runs $150-$2,000 per tree in 2026 cost guides, with many averages around $300 to $731 for small-to-average jobs. Standard landscaping labor often falls around $30-$70 per hour, while some tree planting or arborist labor ranges from $50-$150 per hour.
If the tree is purely an experiment, paying a crew to plant it may not make sense. If you are installing a grafted tree as part of a larger landscape plan, professional layout and planting can be money well spent. The real value is not just digging the hole. It is choosing the right location, managing drainage, protecting hardscape, setting the root flare correctly, and planning access for long-term maintenance.
PC Slower Than It Used to Be?
A free scan shows the junk files, broken settings and background clutter dragging Windows down - then fixes them in one click.Free scan · Windows 10 & 11Outdated Drivers Are Slowing You Down
One free scan finds every outdated or missing driver and matches the right update for your exact hardware.Free scan · exact hardware matchBest Value

- Adjustable Vents: The seed trays have adjustable vents that allow you to regulate the temperature and humidity of your seedling environment for total control over the growing process.
- Drainage Holes: The seed trays have drain holes at the bottom for proper drainage, reducing the risk of root rot and promoting healthy growth.
- Mini Greenhouse: The seed starter kit includes 10 trays and a humidity dome to create a mini greenhouse for starting seeds and fostering a healthy garden.
- Reusable and Portable: The seed trays are made of durable plastic and can be reused for multiple growing seasons. They are also lightweight and easy to transport.
- Complete Seed Starting Kit: The MIXC seed starter kit includes 10 trays, 10 watertight base trays, 10 humidity domes, and 10 plant labels for a complete seed starting solution.
Bottom Line
Growing a peach tree from a pit is worth doing if you understand the bargain. You are trading predictability for a nearly free project. Start with pits from local peaches, clean them well, cold stratify them for about 8 weeks to 3 or 4 months, pot the sprouted seed carefully, and plant only after you have checked sun, drainage, utilities, setbacks, and local rules.
If you want dependable fruit, buy a grafted peach tree matched to your chill hours and disease pressure. If you want the satisfaction of raising a tree from seed, keep the project small, start more than one pit, and be willing to cull weak seedlings. The best backyard trees are not just the ones that sprout. They are the ones planted in the right place and maintained with enough discipline to become an asset instead of a problem.
Frequently Asked Questions
Can you plant a peach pit directly in the ground?
Yes, but germination is less controlled. Outdoor planting exposes the pit to rodents, rot, drying, and inconsistent cold. Refrigerator stratification for about 8 weeks to 3 or 4 months gives you better control before potting.
How long does it take a peach tree grown from a pit to produce fruit?
A pit-grown peach tree commonly takes about 3 to 7 years or longer to fruit. Some seedlings never produce fruit worth keeping. A grafted nursery tree is usually more predictable and may fruit in about 2 to 5 years after planting.
Recommended Free Tools
Will a peach tree grown from a pit produce the same peaches?
Not reliably. Peach seedlings are genetically variable, so fruit size, flavor, harvest time, disease resistance, and tree vigor may differ from the parent peach.
Do peach trees need two trees for pollination?
Most peach trees are self-pollinating, so one tree can produce fruit. Regional variety selection still matters because chill hours, frost timing, disease pressure, and winter hardiness affect success.
How much does it cost to grow a peach tree from a pit?
The seed-starting phase usually costs $0-$35 if you use a pit from a peach and basic household supplies. Planting outdoors may add about $25-$150 for mulch, guards, tools, soil testing, compost, or irrigation parts if you do not already have them.
Are peach pits poisonous?
The hard pit should not be eaten, and the kernel inside should not be chewed, crushed, or blended. Peach kernels contain amygdalin, which can release cyanide when digested. Keep pits and kernels away from children and pets.
Quick Recap
Product prices and availability are accurate as of the date/time indicated and are subject to change. Any price and availability information displayed on Amazon at the time of purchase will apply.