Free tools Windows power users keep installed
One-click scans. No signup required.
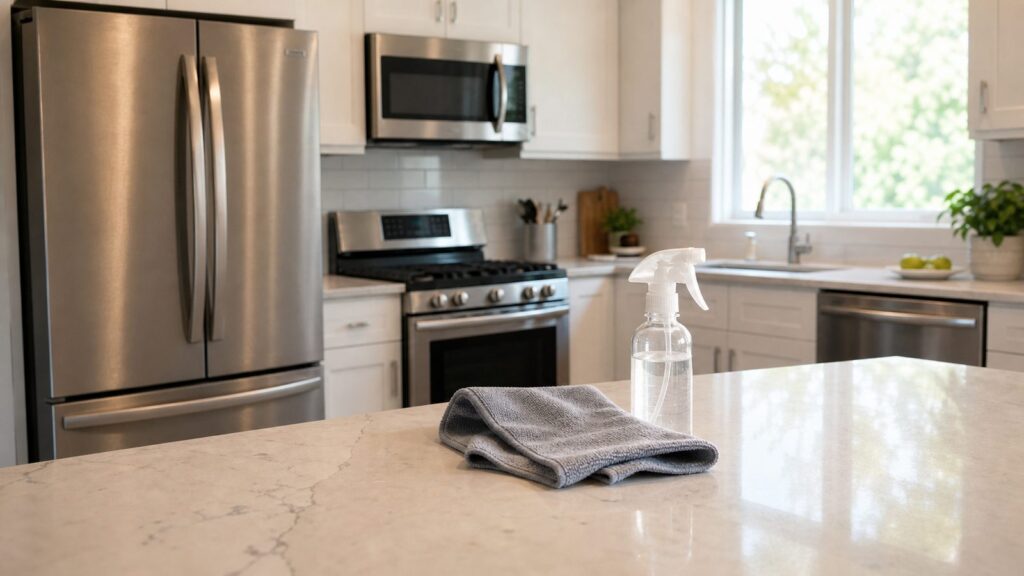
For most stainless steel appliances, the best cleaning method is simple: find the grain, wipe with a damp microfiber cloth in that direction, use mild dish soap only when water is not enough, rinse with a fresh damp cloth, and dry immediately with a clean towel. That two-cloth routine solves most fingerprints, light grease, and streaks without risking the finish.
The bigger mistake is treating stainless steel like it is indestructible. It is corrosion-resistant because chromium in the alloy forms a thin passive film on the surface, but that film can be damaged by chloride cleaners, trapped moisture, steel wool, abrasive powders, hard-water minerals, and heat. Once the finish is scratched, pitted, or chemically stained, cleaning may not bring it back.
On our job sites, stainless appliances are often installed late in a kitchen remodel for one reason: drywall grit, grout dust, tile spacers, cabinet hardware, and metal tools can permanently mark the face of a refrigerator or dishwasher in seconds. The same principle applies at home. Clean gently first, polish second, and never use a stronger product until you know what problem you are solving.
Start With the Finish: Bare Stainless, Black Stainless, or Fingerprint-Resistant
Before you reach for vinegar, baking soda, or polish, identify the appliance finish. Not all stainless steel appliance fronts are the same.
Bare brushed stainless has visible grain lines. It usually tolerates mild soap, water, and many manufacturer-approved stainless cleaners. Fingerprint-resistant stainless and black stainless are different. They are commonly coated finishes, which means aggressive scrubbing, acidic cleaners, powders, and scratch-removal tricks can damage the coating instead of cleaning the metal.
Check the exact appliance manual if you still have it. Manufacturer guidance is not uniform. Some appliance makers allow baking soda or diluted vinegar on stainless. Others caution against vinegar-based products, ammonia, citrus cleaners, abrasive powders, paper towels, rough cloths, and steel wool, especially on fingerprint-resistant finishes. If you do not know the finish, assume it is coated and use the mildest method: microfiber, warm water, and a drop of dish soap.
#1 Best Overall

- Cleans, polishes & protects stainless steel: Our stainless steel cleaner for appliances, which won a 2026 Good Housekeeping Cleaning Award, helps clean delicate, hard-to-clean surfaces. This appliance cleaner removes grease, fingerprints, water spots and residue while restoring a polished, like-new shine.
- No streak residue when used correctly: This stainless steel cleaning cloth & spray kit leaves a brilliant, streak-free finish when wiped in the direction of the metal grain and buffed with soft, dry cloth - no rinsing required.
- Safe for all stainless steel finishes: Our stainless steel polish & clean kit contains pH-neutral formula and is safe for stainless steel kitchen appliances, sinks, trash cans, grill exteriors, backsplashes, and countertops. This cleaning supplies for home kit does not contain Tetrachloroethylene (PCE) and will not dull or damage finishes.
- Prevents future smudges & water marks: This stainless steel appliance cleaner & polisher leaves behind a protective barrier that repels fingerprints, dust, and smudges, helping keep surfaces cleaner and shinier for longer.
- For appliances, sinks & Outdoor grills: Our spray & appliance cloth stainless steel kit is safe to use on stainless steel refrigerators, sinks, ovens, stovetops, microwaves, range hoods, trash cans, and grill exteriors.
The Grain Rule
Most stainless appliance fronts have a brushed grain that runs vertically or horizontally. Look closely under a light. Wipe with that grain, not across it. Cleaning against the grain leaves streaks and makes fine scratches more visible.
Use two microfiber cloths: one damp cloth to lift soil and one dry cloth to buff immediately. That one change makes a bigger difference than most specialty sprays. A damp surface that air-dries is where streaks, mineral spots, and cleaner residue show up.
The Tool Desk
Outbyte Driver Updater FREEScan for outdated or missing drivers - takes under a minuteDriver Scan →Outbyte PC Repair FREEClear out junk files and repair common Windows errorsFree Scan →The 6 Clever Ways to Clean Stainless Steel Appliances
Use these methods as a decision tree. Start with the problem you see, choose the gentlest method that fits, and stop when the appliance is clean. More product does not mean a better finish.
1. Microfiber and Warm Water for Fingerprints and Daily Smudges
Best for: fingerprints, light dust, fresh smudges, refrigerator doors, dishwasher fronts, microwave exteriors, and handles.
Dampen a clean microfiber cloth with warm water. Wring it out so it is damp, not dripping. Wipe with the grain, paying special attention to handles and touch points where skin oils build up fastest. Follow immediately with a dry microfiber towel, again moving with the grain.
This takes 2 to 5 minutes for a refrigerator door and usually costs less than a few cents in water and laundry. A microfiber multipack commonly costs about $5 to $15 in 2026, and it is the first supply we would buy before any stainless cleaner.
Do these 3 things before closing this tab:
1Repair Windows errors before they cause bigger problems2Scan for outdated or missing drivers - takes under a minute3Clear out junk files and repair common Windows errorsDo not use paper towels as your default. Some are rough enough to leave fine marks, and they tend to push oily residue around instead of lifting it cleanly.
2. Mild Dish Soap for Grease Around Ranges and Handles
Best for: cooking grease, hand oils, food film, range fronts, hood fronts, and dishwasher handles.
Mix 2 cups of warm water with 2 or 3 drops of mild dish soap. Dip a microfiber cloth into the solution, wring it well, and wipe with the grain. Use a fresh damp cloth to rinse away soap residue, then dry and buff with a clean towel.
Rank #2

- Cleans, polishes & protects stainless steel: Our stainless steel cleaner for appliances removes fingerprints, grease, residue, and water spots. Weiman appliance wipes leave a streak-free shine and a protective barrier that helps prevent future smudges.
- Safe for all stainless steel finishes: This stainless steel cleaning cloth & wipes kit is safe for all stainless steel finishes, including black stainless surfaces. Our stainless steel polish & cleaner a non-abrasive formula that doesn't scratch or dull. Does not repair existing scratches.
- For indoor & outdoor stainless steel: Our stainless steel wipes & cloth kit is ideal for stainless steel refrigerators, dishwashers, ovens, cooktop, sinks, range hoods, trash cans, and outdoor stainless steel grills. This stainless steel kitchen sink cleaner is a great choice for both inside appliances & outdoor grill exteriors.
- Easy, no-rinse application: Wipe in the direction of the metal grain, then buff with the included stainless steel cleaner cloth for a streak-free shine.
Dish soap is the right move when water alone leaves streaks because many streaks are actually thin grease films. Do not polish over grease. Polish traps the residue, smears it wider, and makes the finish look cloudy.
A bottle of dish soap typically runs about $3 to $7. Per cleaning, the consumable cost is well under $1 for a refrigerator, dishwasher, range front, or microwave exterior. The real cost is time: a lightly soiled appliance may take 5 minutes, while a greasy range front that has been ignored for a month may take 15 to 25 minutes.
3. Diluted Vinegar for Hard-Water Spots, Only When the Manual Allows It
Best for: white mineral spots, water drips below dispenser trays, dishwasher fronts near steam vents, and stainless near sinks.
Vinegar can help dissolve mineral deposits, but it is not automatically safe for every stainless finish. Use it only if your appliance manual allows acidic cleaners on that surface. Avoid it on black stainless and fingerprint-resistant coatings unless the manufacturer specifically approves it.
For bare stainless, mix equal parts white vinegar and water in a spray bottle. Spray the cloth, not the appliance. Wipe the spotted area with the grain for 15 to 30 seconds. Do not let vinegar sit on the surface. Rinse with a fresh damp cloth, then dry immediately.
Recommended Free Tools
White vinegar commonly costs about $3 to $6, and a spray bottle is usually about $2 to $8. Used correctly, this is cheap and effective for mineral spotting. Used carelessly, acid can create new problems, especially if it sits in seams, around trim, or near control panels.
4. Baking-Soda Paste for Stubborn Dried Food
Best for: dried sauce, light cooked-on splatter, sticky residue, and small stubborn spots on bare stainless where the manufacturer allows it.
Mix baking soda with just enough water to make a soft paste. Apply it with your fingers or a damp microfiber cloth. Let it sit for 2 to 5 minutes, then wipe gently with the grain. Do not scrub in circles. Rinse thoroughly with a clean damp cloth and dry right away.
Baking soda costs about $1 to $4, but it is still a mild abrasive. That matters. On brushed bare stainless, gentle use can help loosen stuck-on food. On coated finishes, it can haze or scratch the surface. Test in an inconspicuous spot first, such as a low corner or the side edge of a door.
Quick wins for a faster PC:
Repair Windows errors before they cause bigger problemsFix Now →Scan for outdated or missing drivers - takes under a minuteDriver Scan →Clear out junk files and repair common Windows errorsFree Scan →For a range, wait until the surface is fully cool. Heat changes how residues behave and can cause cleaners to flash-dry into streaks. Never use oil-based polish on surfaces that heat up.
5. Commercial stainless cleaner or polish for Shine and Fingerprint Resistance
Best for: dull-looking stainless, recurring fingerprints, light streaking after cleaning, and final presentation before hosting or listing a home.
Rank #3

- Cleans, polishes & protects stainless steel: Our stainless steel cleaner for appliances, which won a 2026 Good Housekeeping Cleaning Award, helps clean delicate, hard-to-clean surfaces. This appliance cleaner removes grease, fingerprints, water spots and residue while restoring a polished, like-new shine.
- No streak residue when used correctly: This stainless steel cleaning cloth & spray kit leaves a brilliant, streak-free finish when wiped in the direction of the metal grain and buffed with soft, dry cloth - no rinsing required.
- Safe for all stainless steel finishes: Our stainless steel polish & clean kit contains pH-neutral formula and is safe for stainless steel kitchen appliances, sinks, trash cans, grill exteriors, backsplashes, and countertops. This cleaning supplies for home kit does not contain Tetrachloroethylene (PCE) and will not dull or damage finishes.
- Prevents future smudges & water marks: This stainless steel appliance cleaner & polisher leaves behind a protective barrier that repels fingerprints, dust, and smudges, helping keep surfaces cleaner and shinier for longer.
- For appliances, sinks & Outdoor grills: Our spray & appliance cloth stainless steel kit is safe to use on stainless steel refrigerators, sinks, ovens, microwaves, range hoods, trash cans, and grill exteriors.
Commercial stainless cleaners and wipes commonly cost about $5 to $15 in 2026. Use them after the appliance is already clean. If there is grease, soap residue, or food film on the surface, clean that first with water or mild dish soap.
Apply the product to a cloth unless the label and appliance manual say direct spraying is safe. Keep cleaner away from vents, control panels, touchscreens, seams, ice dispensers, and electronics. Wipe with the grain, then buff with a dry microfiber towel.
Some products clean and polish in one step, while others leave a protective film that helps resist fingerprints. That film is useful on refrigerator doors and dishwasher fronts. It is less appropriate near cooking heat, burner areas, or oven vents unless the product label allows it.
6. mineral oil or Food-Grade Oil for a Light Finishing Buff
Best for: final buffing on clean, dry bare stainless where the manufacturer permits oil-based finishing.
A tiny amount of mineral oil can reduce visible fingerprints and give stainless a more even sheen. The key word is tiny. Put a few drops on a microfiber cloth, work it into the cloth first, then wipe lightly with the grain. Buff with a second dry cloth until the surface feels clean, not oily.
Do not use oil as a cleaner. It will not remove grease; it will blend grease into a larger smear. Do not use oil on hot surfaces, near burners, on oven doors that get warm, or on coated finishes unless your manual allows it. Avoid cooking oils that can become sticky or rancid over time.
Outdated Drivers Are Slowing You Down
One free scan finds every outdated or missing driver and matches the right update for your exact hardware.Free scan · exact hardware matchWindows Errors? Fix Them Before They Spread
Repair common Windows errors and clear accumulated junk for a smoother, more stable PC - no reinstall needed.Free scan · no reinstallWhat Never to Use on Stainless Steel Appliances
Most permanent stainless damage comes from the wrong tool or chemical, not from ordinary dirt. Avoid these unless your appliance manufacturer specifically says otherwise for that exact surface:
- Chlorine bleach or bleach-containing cleaners
- Chloride cleaners and disinfecting wipes that leave chloride residue
- Steel wool, wire brushes, and metal scrubbers
- Abrasive powders and heavy-duty scouring pads
- Ammonia, citrus cleaners, or vinegar on finishes where the manual prohibits them
- Rough paper towels, newspaper, or dirty shop rags
- Spraying liquid directly into controls, vents, seams, touchscreens, or dispenser openings
Chlorides are a serious issue because they can break down stainless steel’s passive surface film and contribute to pitting. Steel wool is just as risky. It can scratch the brushed finish and leave tiny iron particles behind. Those particles can rust later, making it look like the stainless itself is rusting.
Cost Guide: DIY Supplies vs Professional Cleaning in 2026
For most homeowners, exterior stainless appliance cleaning is a DIY job. A practical starter kit costs about $15 to $40 if you buy microfiber cloths, dish soap, vinegar, baking soda, a spray bottle, and a stainless cleaner or polish. If you already have cloths and dish soap, your per-clean consumable cost is usually under $1 to $3 per appliance.
Professional cleaning starts making sense when the whole kitchen needs attention, when grease has built up around a range and hood, when you are moving out, or when post-construction dust is involved. Exterior polishing alone is usually a small part of a larger kitchen clean, but inside-appliance cleaning is often priced separately.
Rank #4

- STAINLESS STEEL CLEANING BUNDLE: Includes a 16 oz. bottle of stainless steel cleaner and a premium 16" x 16" microfiber cloth
- PLANT-POWERED FORMULA: Made with 100% USDA Certified Biobased Content, our stainless steel cleaner leaves a brilliant polished finish.
- STREAK-FREE SHINE: Remove streaks, smudges, and residue with ease, revealing a brilliant finish that rejuvenates your appliances.
- VERSATILE & SAFE: With a pH-neutral formula, this is the best stainless steel cleaner for appliances, grills, sinks, refrigerators, microwaves, stoves, range hoods, trash cans, and more.
- BLACK STAINLESS SPECIALIST: Expertly cleans black stainless steel and leaves a protective barrier against fingerprints, dust, dirt, and smudges, keeping surfaces cleaner for longer.
| Cleaning option | Typical 2026 US cost | Best use |
|---|---|---|
| DIY starter kit | $15-$40 | Routine stainless care for several appliances |
| DIY per appliance | Usually under $1-$3 in consumables | Fingerprints, light grease, water spots, weekly upkeep |
| Standard whole-house cleaning | About $100-$300 per visit, with many current averages near $180 | General maintenance cleaning where appliances get a basic exterior wipe |
| Hourly house cleaning | About $25-$90 per cleaner, or roughly $50-$90 per hour depending on market and service | Flexible cleaning scope, kitchens, bathrooms, and touch points |
| Deep cleaning | Commonly $180-$375, $200-$450, or $250-$600+ depending on scope | Heavy grease, neglected kitchens, pre-hosting, move preparation |
| Move-in or move-out cleaning | Roughly $140-$500 | Cleaning inside and outside appliances before occupancy or turnover |
| Post-construction cleaning | Roughly $340-$800 | Dust, grit, adhesive residue, and renovation cleanup risk |
| Appliance add-on cleaning | Often about $25-$75 per appliance | Inside oven, inside refrigerator, detailed appliance work |
Cost drivers include the number and size of appliances, grease level near the range and hood, hard-water spotting, local labor rates, travel or minimum service fees, eco-friendly product requests, and whether the work includes appliance interiors. Black stainless and fingerprint-resistant coatings can also slow the job because the cleaner has to use gentler methods.
Independent reader supportYour contribution helps us test, update, and keep practical guides available for everyone.When to DIY and When to Hire a Pro
DIY is the right choice for fingerprints, fresh grease, light water spots, and routine weekly cleaning. You need about 10 to 20 minutes for a typical stainless refrigerator, dishwasher, range front, and microwave exterior if they are maintained regularly.
Hire a professional cleaner when the kitchen needs a full reset, when range grease has spread to cabinets and hood surfaces, or when you need move-out documentation. A cleaner can also be worth it before hosting, before listing a home for sale, or after a remodel when dust has migrated into every seam.
Call an appliance service company, not a house cleaner, if the issue involves removing doors, disconnecting a gas range, pulling built-in appliances, electrical controls, water lines, or damaged panels. Gas and electrical work have clear safety boundaries. In many jurisdictions, relocating a gas range, changing a hardwired appliance circuit, or modifying plumbing for an ice maker is permit or licensed-trade territory. Cleaning the front panel is homeowner work; altering utility connections is not.
There is also a point where cleaning is no longer the honest fix. Deep scratches, chemical pitting, rust from embedded steel wool, and damaged black stainless coatings may require panel replacement. Scratch removal or finish restoration can cost much more than cleaning and may not be practical on coated stainless.
Job-Site Rules for Protecting Stainless During Remodeling
Construction dust changes the cleaning equation. Drywall compound, grout haze, mortar dust, sawdust, and metal filings are not ordinary kitchen dirt. They can act like abrasive powder when dragged across an appliance face.
On our projects, stainless appliance faces stay protected until the surrounding work is complete. We do not lean cabinet doors against them, set hardware on them, tape labels directly to finished faces, or wipe dusty panels with a dry rag. If dust lands on stainless, lift it with a damp microfiber cloth before buffing. Never drag grit across the grain.
If appliances must be moved, protect the floor and appliance face before shifting them. A refrigerator door skin can dent or scratch from one careless tool belt buckle. A dishwasher panel can be marked by tile spacers, cabinet pulls, or a metal putty knife. The cheapest repair is prevention: clean cloths, soft protection, and no loose hardware on finished surfaces.
What’s actually slowing this PC down?
Pick the symptom - the matching free tool is one click away.
Maintenance Schedule for a Clean Stainless Kitchen
A realistic stainless maintenance schedule is simple. Wipe handles and touch points daily or as needed. Do a soap-and-water clean once a week in active kitchens. Polish monthly, or whenever streaks keep showing after the surface is clean. Deep clean before hosting, before listing the home, after a cooking-heavy holiday, or after any remodeling work nearby.
Best Value
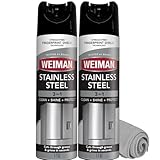
- Cleans, polishes & protects stainless steel: Our stainless steel cleaner for appliances helps clean delicate, hard-to-clean surfaces. This appliance cleaner removes grease, fingerprints, water spots and residue while restoring a polished, like-new shine.
- No streak residue when used correctly: This stainless steel cleaning cloth & spray kit leaves a brilliant, streak-free finish when wiped in the direction of the metal grain and buffed with soft, dry cloth - no rinsing required.
- Safe for all stainless steel finishes: Our stainless steel polish & clean kit contains pH-neutral formula and is safe for stainless steel kitchen appliances, sinks, trash cans, grill exteriors, backsplashes, and countertops. This cleaning supplies for home kit does not contain Tetrachloroethylene (PCE) and will not dull or damage finishes.
- Prevents future smudges & water marks: This stainless steel appliance cleaner & polisher leaves behind a protective barrier that repels fingerprints, dust, and smudges, helping keep surfaces cleaner and shinier for longer.
- For appliances, sinks & Outdoor grills: Our spray & appliance cloth stainless steel kit is safe to use on stainless steel refrigerators, sinks, ovens, stovetops, microwaves, range hoods, trash cans, and grill exteriors.
For refrigerators and dishwashers, clean handles first because they collect the most skin oil. For ranges, clean only when surfaces are fully cool. For microwaves and wall ovens, avoid spraying cleaner into vents, controls, and display areas. For black stainless, skip scratch-removal hacks entirely and stay with mild soap, water, and microfiber unless the manual gives you another approved method.
Good stainless care is not about a secret product. It is about matching the method to the problem, respecting the finish, and stopping before cleaning turns into damage.
Frequently Asked Questions
What is the best way to clean stainless steel appliances without streaks?
Use a damp microfiber cloth with warm water, wipe with the grain, then dry immediately with a second clean microfiber towel. For grease, add 2 or 3 drops of mild dish soap to 2 cups of warm water, rinse with a fresh damp cloth, and buff dry.
What’s actually slowing this PC down?
Pick the symptom - the matching free tool is one click away.
Can you use vinegar on stainless steel appliances?
Sometimes. Diluted vinegar can help with hard-water spots on bare stainless, but some manufacturers caution against vinegar, especially on fingerprint-resistant or coated finishes. Check the appliance manual, use short contact time, rinse well, and never let vinegar sit on stainless.
What should you never use on stainless steel appliances?
Avoid chlorine bleach, chloride cleaners, steel wool, wire brushes, abrasive powders, rough scouring pads, and spraying liquids directly into controls, vents, seams, or touchscreens. These can scratch, stain, pit, or damage the appliance finish.
How do you clean black stainless steel or fingerprint-resistant stainless?
Treat it as a coated finish. Use microfiber, warm water, and mild dish soap when needed. Avoid abrasive pads, powders, vinegar, citrus cleaners, and scratch-removal methods unless the exact appliance manual approves them.
Can rust marks or scratches be removed from stainless steel appliances?
Light rust-colored surface contamination may improve with a manufacturer-approved stainless cleaner. Deep scratches, embedded steel wool rust, chemical pitting, or damaged black stainless coatings may be permanent and may require panel replacement rather than cleaning.
How much does professional appliance cleaning cost in 2026?
Appliance cleaning add-ons commonly run about $25-$75 per appliance in 2026. Whole-house standard cleaning often costs about $100-$300 per visit, while deep cleaning commonly ranges from about $180-$600+ depending on scope, location, and appliance condition.
Quick Recap
Product prices and availability are accurate as of the date/time indicated and are subject to change. Any price and availability information displayed on Amazon at the time of purchase will apply.