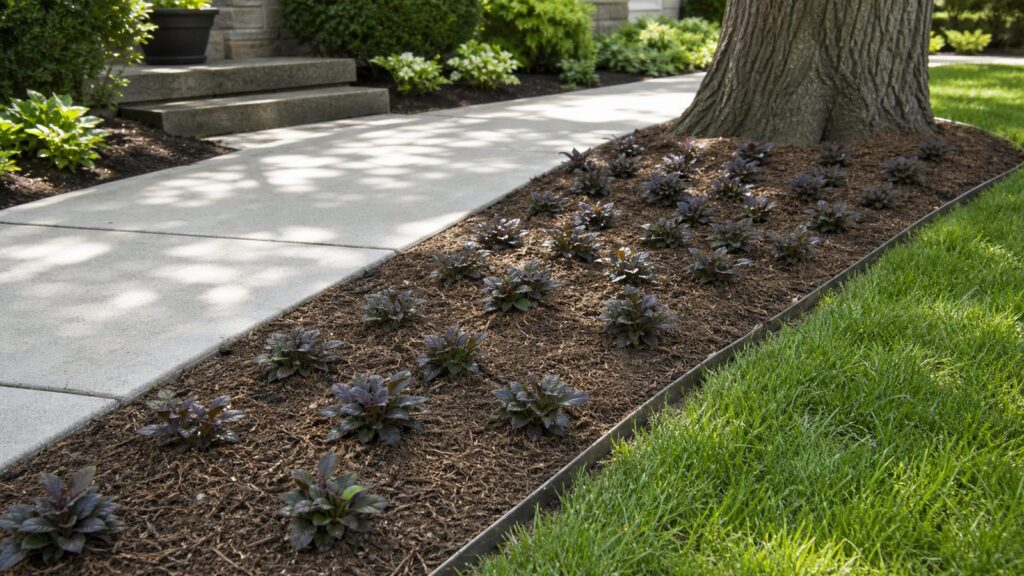
Ajuga is a low, spreading perennial groundcover that works best in small, contained beds where grass struggles: under trees, along shaded walks, between shrubs, and on modest slopes with erosion problems. The right way to plant it is simple but specific: clear the turf, loosen compacted soil, correct drainage, set plants 8 to 15 inches apart, water consistently during establishment, and keep runners inside a defined edge.
Most homeowners know ajuga as bugleweed, carpet bugle, or by the botanical name Ajuga reptans. It forms a dense mat of foliage about 3 to 6 inches tall, with spring flower spikes that often reach 6 to 10 inches. Depending on the cultivar, foliage may be green, bronze, purple, variegated, or nearly black, and the flowers are usually blue, violet, or purple.
On our landscape and construction-adjacent job sites, we treat ajuga less like a casual plant purchase and more like a small site-work item. That means checking water flow, tree roots, edging, mulch depth, soil compaction, and access for maintenance before the first flat of plants is unloaded. Ajuga can be attractive and practical, but it is not a no-maintenance lawn replacement and it is not appropriate everywhere.
Where Ajuga Works Best
Ajuga is best used as a contained groundcover in shade to part shade. It is especially useful in places where turf thins out because of tree shade, root competition, or low mowing value. Good candidates include narrow side yards, shaded front entry beds, walkway edges, small slopes, understory beds, and spaces between established shrubs.
Do these 3 things before closing this tab:
1Fix the driver behind crashes, sound loss and screen glitches2Repair Windows errors before they cause bigger problems3Scan for outdated or missing drivers - takes under a minute#1 Best Overall
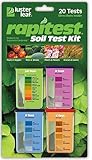
- Quick, at home results for Soil pH, Nitrogen, Phosphorous and Potash Innovative and inexpensive soil test kit features an easy-to-use capsule system and patented color comparators
- Contains all components needed for 20 tests. 5 for each of pH, N, P and K
- Contains all components needed to test all variables in several spots in the yard or garden
- Simple, detailed instructions included. Great for beginners and experienced gardeners alike.
- Soil pH preference list for over 450 plants included
Think in square feet, not acres. A 40- to 150-square-foot bed is a sensible size for most residential ajuga installations. It gives the plant enough room to knit together without creating a management problem. Large open-ended plantings near natural areas, streambanks, woods, meadows, or unmanaged lots deserve more caution because Ajuga reptans is non-native in the United States and can spread aggressively in favorable conditions.
Ajuga is widely grown in USDA Zones 3 through 9, but that range does not mean every site in those zones is equally suitable. In cooler northern areas, ajuga often tolerates more sun if soil moisture stays even. In hot, humid southern regions, it generally performs better with morning sun, afternoon shade, open air movement, and soil that drains after rain.
Before You Plant: Drainage, Boundaries, and Local Rules
The biggest ajuga failures we see are not caused by planting technique. They start with the wrong site. Ajuga prefers moist, fertile, well-drained soil. It does not like standing water, compacted clay, or mulch piled over its crown. Wet crowns and stagnant air can lead to crown rot, especially in humid climates.
After a hard rain, inspect the proposed bed. If water sits for more than a few hours, fix that first. A shallow swale, minor regrading, added organic matter, or a different plant may be the right answer. Around homes, maintain positive drainage away from the foundation. A decorative groundcover bed should never push water toward siding, crawlspace vents, basement walls, or slab edges.
Containment matters just as much. Ajuga spreads by runners. That is useful when you want quick coverage, but it becomes a nuisance when runners move into turf, planting beds, or a neighbor’s side of the property line. Use a hard edge where the bed meets lawn: steel edging, aluminum edging, concrete curb, paver edging, or a clean spade-cut edge that you are willing to maintain several times per season.
Before planting ajuga in a front yard or common-view area, check HOA rules, municipal nuisance vegetation language, and local invasive plant guidance. A simple one-page plan helps: show the bed outline, plant list, mature height of 3 to 6 inches, spring flower height up to about 10 inches, edging type, and a maintenance schedule. That small step prevents many front-yard groundcover disputes.
Ajuga Spacing and Coverage Math
Ajuga is commonly spaced 8 to 15 inches apart. The right spacing depends on budget, erosion risk, weed pressure, and how fast you need finished coverage. For most homeowners, 12 inches on center is the practical default. It is easy to lay out, costs less than tight spacing, and usually fills in well with mulch between plants during establishment.
| Spacing | Plants Per Sq. Ft. | Best Use | Plant-Only Cost in 2026 |
|---|---|---|---|
| 8 inches on center | About 2.25 | Fast coverage, visible entry beds, shaded slopes | About $9-$38 per sq. ft. |
| 12 inches on center | About 1.0 | Balanced cost and fill rate | About $4-$17 per sq. ft. |
| 15 inches on center | About 0.64 | Lower-budget beds with low weed pressure | About $3-$11 per sq. ft. |
For a 100-square-foot shaded bed, 12-inch spacing means about 100 plants. At common 2026 retail pricing, small starter plants often run about $4 to $9 each for 2.5-inch to pint pots, while specialty mail-order cultivars can run about $13 to $17 each. That puts DIY plant material alone around $400 to $1,700 for that 100-square-foot bed before compost, mulch, edging, irrigation parts, delivery, or labor.
Tighter 8-inch spacing can look finished faster and suppress weeds sooner, but it can also crowd plants in humid sites. If you choose dense spacing, do not bury the crowns, do not overwater, and do not use overhead irrigation late in the day. Wider 15-inch spacing is acceptable when budget matters and the bed is easy to weed, but exposed soil should be mulched until the plants knit together.
Tools and Materials
For a typical 100-square-foot ajuga bed, plan on starter plants, compost or soil amendment, mulch, edging, hand tools, and a hose or drip setup. You may also need landscape staples and an erosion-control blanket on slopes. Avoid landscape fabric under ajuga. It interferes with rooting runners, complicates division, and usually becomes a weed-catching layer over time.
Use compost modestly. Around tree roots, do not excavate aggressively and do not bury roots under deep imported soil. A thin amendment worked into the top few inches is usually enough. Bagged compost or topsoil amendments commonly run about $3 to $10 per bag retail in 2026. Mulch cost varies by market and delivery method, but broad installed landscape-cost data often puts mulch around $1 to $3 per square foot installed. DIY bulk mulch can cost less, especially for larger beds.
Rank #2

- Comprehensive Soil Analysis: Liquid soil test kits offer a comprehensive analysis of essential soil parameters, including pH, ammonia, nitrogen, phosphorus, and potassium. Having all these measurements in one kit provides a holistic understanding of the soil's fertility and health.
- Customized Fertilizer Recommendations: With data on pH and nutrient levels, liquid soil test kits help users apply the right type and amount of fertilizers, optimizing plant growth, and preventing over-fertilization, which could harm both plants and the environment. Whether its for lawns, garden, grass, plants, vegetables, turf, flowers, compost trees vines ornamental landscape house plants or hydroponics you will be able to get the results you want.
- Time and Cost-Effective: Liquid soil test kits are relatively quick and easy to use, saving time for gardeners and agricultural professionals. Compared to sending samples to a laboratory, these kits provide rapid results, allowing for prompt action. Additionally, they are cost-effective for routine testing, making it feasible to monitor soil health regularly.
- Optimal Plant Health and Yield: By knowing the soil's pH and nutrient levels, gardeners and farmers can fine-tune their agricultural practices to create an environment conducive to optimal plant growth. Adequate levels of ammonia, nitrogen, phosphorus, and potassium are essential for healthy plant development and higher crop yields.
- Accurate and Precise Results: Liquid test kits are designed to provide accurate and precise measurements when used correctly. They are calibrated to detect specific nutrient levels, ensuring reliable data for informed decision-making in plant nutrition and soil management. You get a total of about 140 test. which is 40 test for each parameter and about 20 or so for nitrogen
Mulch should be temporary support, not a burial blanket. Keep it about 1 to 2 inches deep between plants and pull it back from the crowns. If the crown is covered by mulch or soil, ajuga is more likely to rot.
What’s actually slowing this PC down?
Pick the symptom - the matching free tool is one click away.
How to Plant Ajuga Step by Step
1. Mark the Bed and Confirm the Edge
Lay out the bed with marking paint, a hose, or string. Walk the edge from every viewing angle, including the driveway, sidewalk, front door, and adjacent rooms inside the house. A clean bed shape is easier to maintain than a fussy outline with tight curves.
If the bed borders turf, install edging before planting or cut a sharp trench edge. For metal edging, follow the manufacturer’s depth guidance and keep the top edge visible enough to stop runners. For paver or concrete edges, make sure they are set firmly so mower wheels and freeze-thaw movement do not distort the line.
2. Remove Turf Completely
Do not plant ajuga plugs into existing grass and hope they win. Strip sod, remove stolons and roots, and shake usable soil back into the bed. For small areas, a flat shovel or sod cutter works. For larger beds, rented sod removal equipment may be faster, but protect tree roots, irrigation lines, lighting wires, and shallow utility runs.
Before digging more than a shallow planting bed, call 811 for utility locating. This matters near service walks, driveways, side yards, meter bases, irrigation controls, and any route where low-voltage lighting or drainage pipe may have been added later.
Recommended Free Tools
3. Loosen Compacted Soil
Loosen the top 4 to 6 inches of soil where practical. In heavily compacted clay, work in compost to improve structure, but do not create a bathtub-shaped pocket that holds water. If the surrounding grade is dense and poorly draining, a rich amended planting pocket can stay wetter than the native soil around it.
Where tree roots are present, work by hand. Avoid chopping major roots. Ajuga is often planted under trees because it tolerates shade, but trees also compete hard for moisture. Use shallow prep, modest compost, and careful watering rather than deep digging.
4. Set Plants at the Right Depth
Plant ajuga at the same depth it grew in the nursery pot. The crown should sit at soil level, not below it. Space plants 8, 12, or 15 inches on center based on the coverage plan. For a natural but orderly layout, use a staggered triangular pattern rather than straight rows.
Water the pots before planting if the root balls are dry. Gently loosen circling roots without tearing the plant apart. Backfill with native soil blended with a modest amount of compost, firm by hand, and water thoroughly to settle soil around the roots.
Free tools Windows power users keep installed
One-click scans. No signup required.
5. Mulch Between Plants
After planting, add 1 to 2 inches of mulch between plants. Keep mulch off the crowns and away from siding or wood trim. On slopes, use mulch plus staples or an erosion-control blanket so a thunderstorm does not wash soil away before the ajuga roots knit together.
Watering and Establishment Timeline
Ajuga needs consistent moisture while it establishes. For the first 2 to 4 weeks, check soil moisture every few days. The goal is evenly moist soil, not saturated soil. In mild spring or fall weather, watering two or three times per week may be enough. In hot weather or under thirsty tree canopies, new plantings may need more frequent attention.
Rank #3

- KNOW BEFORE YOU GROW | Grow the healthiest, sustainable lawn and garden with the most accurate and easy to use professional soil test kit on the market
- FAST & ACCURATE | Unlike at-home pH meters and test strips, our mail-in professional lab analysis accurately measures 13 plant-available nutrient levels, including Nitrogen and pH. Results in 6-8 days
- FOR ANY GROWING SCENARIO | Tests any soil type and growing condition - lawn & turf, vegetable gardening, flowers, compost, trees, vines, ornamental landscape, house plants, soil-less media or hydroponics
- SAVE TIME & MONEY | Stop applying products you don’t need. Learn exactly what products and amounts you need to grow the healthiest plants possible
- CUSTOM RECOMMENDATIONS | What to apply, how much to apply, and when to apply it. Provides both organic and non-organic fertilizer recommendations to effectively amend your soil
After the first month, taper watering based on rainfall and soil conditions. Once established, ajuga tolerates moderate dryness, but it looks better with steady moisture and good drainage. Drip irrigation or a soaker hose is better than frequent overhead watering, especially in humid regions. If sprinklers are the only option, water early in the morning so foliage can dry during the day.
Expect visible spreading in the first growing season, but do not expect instant coverage at wide spacing. At 8-inch spacing, a bed can look substantially filled faster, often within one growing season under good conditions. At 12 inches, many beds need a full season and part of the next to look dense. At 15 inches, budget for more weeding and patience.
PC Slower Than It Used to Be?
A free scan shows the junk files, broken settings and background clutter dragging Windows down - then fixes them in one click.Free scan · Windows 10 & 11Outdated Drivers Are Slowing You Down
One free scan finds every outdated or missing driver and matches the right update for your exact hardware.Free scan · exact hardware matchRoutine Ajuga Care
Ajuga maintenance is light but not optional. In spring, trim spent flower spikes if you want a cleaner look and want to reduce volunteer seedlings. Flower spikes are part of the appeal, but after bloom they can look rough in formal front-yard beds.
During the growing season, clip runners as soon as they cross the bed line. A few minutes every two to four weeks is much easier than reclaiming a lawn edge after runners have rooted. Keep a narrow inspection strip along edging so you can see what the plant is doing.
Thin or divide crowded mats in spring or fall. If the center of a patch looks weak, crowded, or bare, lift healthy outer sections and replant them into gaps. Do not fertilize heavily. Too much nitrogen can push soft growth that is more vulnerable to disease. A light compost top-dressing around the plants is usually enough for average garden soil.
Monitor for crown rot, especially in warm, wet, humid weather. Warning signs include blackened crowns, collapsing plants, mushy stems, and patches dying from the center. Improve airflow, reduce overhead watering, remove affected plants, and avoid replanting ajuga immediately into the same wet pocket without correcting drainage.
Using Ajuga on Slopes and Under Trees
Ajuga can help stabilize small shaded slopes, but it should not be asked to hold bare soil on day one. On slopes, install plants on a staggered grid and use mulch, jute netting, or an erosion-control blanket during establishment. Staples should be seated firmly so the blanket stays in contact with the soil. For visible slopes, 8- to 12-inch spacing is usually worth the added plant cost because open soil invites washouts and weeds.
Under trees, the planting approach changes. Do not trench through roots, raise the grade several inches, or pile mulch against trunks. Keep mulch thin, preserve the root flare, and water long enough for moisture to reach the ajuga root zone. Newly planted ajuga under mature trees may need supplemental water longer than ajuga in an open shrub bed because tree roots take up moisture quickly.
Avoid using ajuga where people regularly walk. It can tolerate occasional stepping during maintenance, but it is not a durable path surface. If foot traffic is part of the layout, install stepping stones, gravel, pavers, or a defined walkway and use ajuga as the border planting.
How Much Ajuga Costs in 2026
Ajuga pricing depends on plant size, cultivar, density, labor, prep work, and site conditions. Small retail starter plants commonly run about $4 to $9 each. Specialty cultivars and mail-order plants often run about $13 to $17 each. Larger containers, named foliage selections, shipping, and small-quantity orders raise the unit price.
The Tool Desk
Outbyte Driver Updater FREEFix the driver behind crashes, sound loss and screen glitchesFind Drivers →Outbyte PC Repair FREERepair Windows errors before they cause bigger problemsFix Now →For DIY work, the plant bill is usually the largest visible cost. A 50-square-foot bed at 12-inch spacing needs about 50 plants, or roughly $200 to $850 in plant material. A 100-square-foot bed at the same spacing needs about 100 plants, or roughly $400 to $1,700. Add compost, mulch, edging, staples, drip parts, and disposal fees for removed sod.
Rank #4

- Complete 4-in-1 Soil Test Kit (pH, N, P, K) – This garden soil test kit measures soil pH, Nitrogen, Phosphorus, and Potassium, giving you a full picture of your soil condition to improve fertilization and plant growth.
- 40 Accurate Tests for Long-Term Use – Includes 10 tests for each element (40 total tests), making this soil testing kit ideal for repeated use across multiple areas of your lawn, vegetable garden, or flower beds.
- Fast & Easy Soil Testing at Home – No calibration or complex tools needed. Simply mix soil with water, add the reagent, and compare the color chart for instant results. Perfect for beginners and experienced gardeners.
- All Tools Included for Convenience – This soil testing kit comes with test tubes, reagents, droppers, and a color comparison chart. Everything you need is included to perform reliable soil tests right at home.
- Improve Plant Growth & Save Fertilizer – By using this soil test kit for lawns and gardens, you can accurately balance soil nutrients, reduce waste, and grow healthier vegetables, flowers, and grass.
Professional landscaping costs vary widely by market. Broad 2026 national figures commonly put typical landscaping work around $4.50 to $12 per square foot, with complex projects higher. Crew rates are often cited around $50 to $120 per hour depending on region and scope. A simple 100-square-foot ajuga installation may fall around $450 to $1,200 or more, but dense spacing, specialty plants, drainage correction, edging, irrigation, slope stabilization, and difficult access can push it well above that range.
The best budget control is selective density. Use 8-inch spacing only where fast coverage matters: front entries, slopes, and weed-prone beds. Use 12 inches for most areas. Use 15 inches where the bed is low priority and easy to weed. Once established, ajuga can be divided in spring or fall to fill gaps elsewhere.
Independent reader supportYour contribution helps us test, update, and keep practical guides available for everyone.When to DIY and When to Hire a Pro
DIY is reasonable when the bed is small, drainage is already good, the slope is mild, and you are comfortable removing turf and maintaining edges. A 40- to 100-square-foot shaded bed along a walkway is a good homeowner project. Plan one full weekend for turf removal, soil prep, edging, planting, and cleanup if you are working by hand.
Quick wins for a faster PC:
Clear out junk files and repair common Windows errorsFree Scan →Scan for outdated or missing drivers - takes under a minuteDriver Scan →Repair Windows errors before they cause bigger problemsFix Now →Hire a professional when the project involves drainage correction, compacted construction fill, steep slopes, large tree roots, irrigation changes, retaining edges, or front-yard HOA documentation. Also hire help if the bed touches hardscape that must shed water correctly, such as patios, steps, foundation walls, driveway edges, or basement entries. Groundcover is cheap compared with repairing water problems caused by poor grading.
A pro should give you more than a plant count. Ask for bed square footage, spacing, cultivar, edging type, soil preparation method, mulch depth, watering plan, and establishment warranty terms. If the proposal simply says “install ajuga,” it is too vague for a reliable comparison.
Common Mistakes to Avoid
The first mistake is planting ajuga in wet clay or a low spot. If water sits there, ajuga will struggle and may rot. The second is using it as a large lawn substitute in hot, humid regions without considering crown rot, airflow, and local invasive concerns.
Another common mistake is planting too tightly and then watering overhead every evening. Dense foliage, warm nights, and wet crowns are a poor combination. If you want fast coverage, balance tighter spacing with better airflow and morning watering.
Do not skip edging. Ajuga runners are easier to clip when the bed boundary is obvious. Do not bury the crown under mulch. Do not expect wide spacing to suppress weeds immediately. And do not plant it next to natural areas before checking local invasive-species guidance.
Good Alternatives to Ajuga
If ajuga is not a good fit for your site, especially near natural areas, consider regionally appropriate alternatives. Native options may include wild ginger, green-and-gold, foamflower, golden ragwort, creeping phlox, wild strawberry, or sedges depending on your climate, soil, deer pressure, and light conditions.
Best Value

- Professional Soil Test Kit: All soil test kits on the market can not accurately detect soil chemical elements, the soil must be sent to the laboratory to test in order to obtain accurate data; NewTest Labs to solve this pain point, after a long period of in-depth research, the development of this professional soil testing kit; beginners can also accurately detect the chemical elements in the soil
- A Total of 40 Tests for 4 Parameters Consisting of 10 Tests each for pH, Nitrogen, Phosphorus & Potassium: NewTest soil test kit for lawns can independently test pH, nitrogen, phosphorus and potassium levels in garden soil up to 10 separate times, and help us grow the healthiest vegetable
- Detailed & Easy to Understand Step-by-Step Instructions for Use: NewTest soil testing kit for gardening come with a quick guide and detailed instructions, so even beginners can follow the steps to detect accurately the desired elemental levels; With NewTest soil tester for garden nutrients you can become an expert gardener
- Easy to Read Colorimetric Results: NewTest Labs have designed specific reading methods for each soil nutrient element in order to obtain the most accurate results; just follow the steps and compare the tested test strips or liquids to the colorimetric card, you can quickly read the level range of the nutrient element and get accurate results
- Tests any Soil Type & Gardening Condition: NewTest soil nutrient test kit is suitable for all soil types of lawn & turf, vegetable gardening, flowers, compost, trees, vines, ornamental landscape, house plants, soil-less media or hydroponics; If you have any questions, please contact NewTest Labs for the perfect solution
No groundcover is universal. Sedges may handle shade and root competition better in some sites. Creeping phlox wants more sun and sharper drainage. Wild ginger and foamflower can be excellent in woodland-style shade but may not tolerate the same foot traffic or sun exposure. Match the plant to the actual site instead of forcing ajuga into a location where drainage, heat, or spread risk is already working against you.
The Bottom Line
Ajuga is a strong choice for small, shaded, contained groundcover beds when the site drains well and the edge is maintained. Use 12-inch spacing as the default, tighten to 8 inches where fast coverage or erosion control matters, and stretch to 15 inches only where weeds are manageable. Keep crowns at soil level, mulch lightly, water consistently during establishment, and clip runners before they become a boundary problem.
What’s actually slowing this PC down?
Pick the symptom - the matching free tool is one click away.
Handled that way, ajuga can turn a thin, muddy, hard-to-mow patch into a finished planting bed. Handled casually, it can rot in wet soil, creep where it is not wanted, or create maintenance friction with neighbors, HOAs, and natural areas. The plant is useful. The installation details decide whether it stays useful.
Frequently Asked Questions
Is ajuga invasive in the United States?
Ajuga reptans is non-native in the U.S. and can spread aggressively in favorable sites. Check state or county invasive plant guidance before planting, especially near woods, meadows, streambanks, or unmanaged lots.
When is the best time to plant ajuga?
Spring and fall are the best planting windows in most regions. Plant when temperatures are moderate and soil moisture is easier to manage. Avoid planting during peak summer heat unless you can water carefully.
How far apart should ajuga be planted?
Plant ajuga 8 to 15 inches apart. Use 12 inches on center for most beds, 8 inches for faster coverage or erosion-prone slopes, and 15 inches where budget matters and weed pressure is low.
Do these 3 things before closing this tab:
1Repair Windows errors before they cause bigger problems2Fix the driver behind crashes, sound loss and screen glitches3Clear out junk files and repair common Windows errorsCan ajuga replace grass in a shady lawn?
Ajuga can replace grass in small shaded areas with light foot traffic, but it is not a full lawn substitute. It needs defined edges, drainage, occasional runner trimming, and protection from heavy walking.
How much does it cost to plant ajuga groundcover in 2026?
Small starter plants commonly cost about $4 to $9 each, while specialty plants often run $13 to $17 each. At 12-inch spacing, plant-only cost is roughly $4 to $17 per square foot before prep, mulch, edging, and labor.
Why is my ajuga dying or rotting in the center?
Center dieback is often caused by crown rot, poor drainage, overcrowding, or wet foliage in humid weather. Thin crowded mats, improve airflow, water in the morning, and correct drainage before replanting.
Quick Recap
Product prices and availability are accurate as of the date/time indicated and are subject to change. Any price and availability information displayed on Amazon at the time of purchase will apply.