PC Slower Than It Used to Be?
A free scan shows the junk files, broken settings and background clutter dragging Windows down - then fixes them in one click.Free scan · Windows 10 & 11Crashes, No Sound, or Screen Glitches?
Random freezes, missing sound and display glitches usually trace back to one bad driver. Find and replace yours safely.Free scan · under a minuteA Magic Eraser can be a great spot-cleaning tool, but it is not an all-purpose sponge. The short version: use it on hard, durable, light-colored surfaces where you are removing a surface mark, not protecting a finish. Avoid it on polished, sealed, glossy, dark, coated, or delicate materials.
On our construction punch lists, melamine foam is most useful for black scuffs on painted trim, fingerprints around door hardware, light soap scum on tile, and move-in marks on vinyl or plastic. It is also one of the easiest ways to cause dull patches on a cabinet door, fine scratches on stainless steel, or a cloudy spot on stone. The difference is the surface.
A Magic Eraser works because melamine foam has a hard, open-cell structure that behaves like very fine sandpaper. It lifts grime mechanically. That is why it can remove stubborn marks with only water, and also why it can abrade a finish if you scrub the wrong material or press too hard.
How a Magic Eraser Actually Cleans
Standard white melamine pads do not clean by disinfecting, bleaching, or dissolving dirt. They clean by abrasion. When you wet the pad and rub it across a mark, the foam wears down while its microscopic structure scrapes away the grime. Think of it as a very mild sanding block, not a soft kitchen sponge.
Recommended Free Tools
That matters because many household surfaces are only as durable as their top layer. A painted wall has a paint film. A cabinet may have lacquer or conversion varnish. A natural stone counter may have a sealer and polished face. Stainless appliances often have a brushed surface or clear protective coating. If the surface depends on sheen, polish, coating, wax, oil, or sealer, a Magic Eraser can change the way that surface reflects light.
#1 Best Overall

- 5X CLEANING POWER VS SPRAYS* – Unlike some sprays, Magic Eraser can remove layers of built-up dirt and grime 5X faster.
- LASTS 2X LONGER – Our upgraded erasers last 2X longer, while other erasers crumble.
- CLEANS 150+ MESSES** WITH WATER ALONE – From dried countertop stains to sharpie on the wall, Magic Eraser has you covered.
- TACKLE MESSES IN 3 EASY STEPS – Just wet both side of the eraser, squeeze to activate scrubbing power, and erase everyday tough messes with ease.
- RINSE & REUSE MULTIPLE TIMES – Rinse the eraser after scrubbing to keep cleaning more messes.
The best rule of thumb is simple: if the surface relies on a finish, treat the Magic Eraser as a risk, not the default cleaner. Start with microfiber, warm water, and mild dish soap. Move to melamine only when the mark remains and the material can tolerate light abrasion.
Before You Use One: The Job-Site Method
We use melamine foam in small, controlled areas. That keeps a cleaning task from turning into a repaint, touch-up, or finish repair.
Use this process
First, identify the surface. Ask whether it is painted, sealed, polished, coated, glazed, raw, oiled, waxed, or laminated. Second, test a hidden area about 1 inch by 1 inch. Good test spots include the back of a cabinet stile, the low hinge side of a door, behind a trash can, or a corner hidden by furniture.
Wet the sponge with clean water and squeeze it until it is damp, not dripping. A dry Magic Eraser is more aggressive and more likely to dull or scratch. Use light pressure in short strokes. Do not scrub a whole wall, cabinet face, or appliance panel like you are sanding drywall.
Stop immediately if you see paint color, cabinet finish, stone residue, or metallic-looking dust transferring to the pad. Dirt transfer is normal. Finish transfer is a warning.
After cleaning, wipe the area with a damp microfiber cloth, then dry it with a second clean towel. On tile, tubs, shower surrounds, refrigerator drawers, and food-adjacent surfaces, rinse well because the foam wears away as you use it and can leave residue behind. Do not combine a standard melamine pad with bleach or other cleaners unless the product label specifically says to do so.
11 Things You Can Clean With a Magic Eraser
These are the uses that make sense for most homeowners, assuming the surface passes a spot test. Use light pressure and stop when the mark is gone.
What’s actually slowing this PC down?
Pick the symptom - the matching free tool is one click away.
1. Scuffs on painted baseboards and interior doors
Black shoe marks, rubber transfer, and grime around door edges are classic Magic Eraser jobs. Painted baseboards and doors with a durable enamel usually tolerate careful spot cleaning better than flat wall paint. Work in small 2- to 4-inch areas and feather the edges with a damp microfiber towel so you do not leave a bright clean patch surrounded by older soil.
Be careful on older trim, especially in homes built before 1978. Aggressive rubbing can disturb old paint. If the paint is peeling, chalking, alligatoring, or unknown, do not use abrasive cleaning as your first move.
2. Crayon, pencil, and light marker transfer on washable painted walls
A Magic Eraser can remove crayon and light transfer marks from many washable wall paints. The risk is burnishing, which means the cleaned area becomes shinier or duller than the surrounding wall. Flat and matte paints are the most vulnerable. Eggshell and satin can also lose their even sheen if scrubbed too hard.
For walls, clean from the bottom up in small areas. That sounds backward, but it helps prevent dirty drip streaks from running down over dry paint. Use a nearly dry sponge and finish with a damp microfiber cloth. If the wall paint transfers to the sponge, stop. That is no longer cleaning; it is paint removal.
Do these 3 things before closing this tab:
1Clear out junk files and repair common Windows errors2Fix the driver behind crashes, sound loss and screen glitches3Repair Windows errors before they cause bigger problems3. Soap scum on ceramic or porcelain tile
Glazed ceramic and porcelain tile are generally more tolerant than stone because the surface is fired and hard. A damp melamine pad can remove soap film near shampoo ledges, shower walls, and tub surrounds without a strong chemical cleaner.
Rinse thoroughly afterward. The eraser breaks down as it works, and shower surfaces should not be left with foam residue. For heavy mineral scale, use the right descaler for the surface instead of grinding at it with a sponge.
4. Light grime and haze on grout
Melamine foam can brighten grout lines when the problem is surface grime. It will not fix cracked grout, missing grout, mold behind caulk, or staining caused by water intrusion. On sanded grout, expect the sponge to wear quickly because the grout texture is abrasive.
Rank #2

- 5X CLEANING POWER VS SPRAYS* – Unlike some sprays, Magic Eraser can remove layers of built-up dirt and grime 5X faster.
- LASTS 2X LONGER – Our upgraded erasers last 2X longer, while other erasers crumble.
- CLEANS 150+ MESSES** WITH WATER ALONE – From dried countertop stains to sharpie on the wall, Magic Eraser has you covered.
- TACKLE MESSES IN 3 EASY STEPS – Just wet both side of the eraser, squeeze to activate scrubbing power, and erase everyday tough messes with ease.
- RINSE & REUSE MULTIPLE TIMES – Rinse the eraser after scrubbing to keep cleaning more messes.
Use the corner of the pad rather than rubbing broadly over the tile field. If grout is crumbling or the joint is lower than the tile edge, plan for grout repair instead of repeated scrubbing.
Quick wins for a faster PC:
Repair Windows errors before they cause bigger problemsFix Now →Scan for outdated or missing drivers - takes under a minuteDriver Scan →Clear out junk files and repair common Windows errorsFree Scan →5. Glass cooktop spots after the surface is cool
Once a glass cooktop is fully cool, a damp melamine sponge can help remove light cooked-on residue and pan transfer marks. Do not use it on a hot surface. Avoid dragging crumbs, salt, sugar crystals, or gritty debris under the pad because those particles can scratch glass.
For burned sugar, heavy carbon, or thick residue, use a cooktop-safe scraper and cleaner as directed by the appliance manufacturer. Melamine is for the remaining film, not for chiseling off buildup.
6. Microwave interior splatter
Microwave interiors are usually painted or coated metal, so use a gentle hand. Steam the interior first by heating a microwave-safe bowl of water for 2 to 3 minutes, then let it sit with the door closed for another 2 minutes. Wipe loose soil with microfiber. Use the Magic Eraser only on stubborn splatter.
Keep the pad away from vents, damaged paint, exposed metal, and labels. Rinse with a damp cloth afterward because food-contact interiors should not be left with cleaning residue.
7. Refrigerator shelves and drawers
Plastic refrigerator bins, shelves, and drawer fronts often collect gray scuffs, sticky rings, and produce stains. Remove the parts if possible, clean them in a sink, and rinse well. A Magic Eraser is especially useful on white or translucent plastic, but test first on glossy clear drawers because some plastics can haze.
Do not use melamine on stainless refrigerator door faces. The removable plastic parts and the appliance exterior are different materials.
8. White sneaker soles
Rubber midsoles and white sole edges respond well to a damp melamine pad. This is a low-risk use because the goal is to brighten a durable, non-precious surface. Avoid suede, leather uppers, dyed fabric, and printed logos. The sponge can lighten dye or scuff texture.
Use short strokes along the sole edge and wipe dry. One pad can clean several pairs of shoes if the soil is light, but asphalt grime will wear it down faster.
9. Plastic outdoor furniture
White resin chairs, plastic tables, and molded outdoor furniture often pick up gray oxidation, leaf marks, and general grime. Wash first with mild soap and water, then use melamine on remaining marks. Expect the pad to disappear faster outdoors because textured plastic is rough.
Do not use it as a substitute for refinishing faded furniture. If the plastic surface has oxidized, you may clean it unevenly and reveal patchy color.
10. Vinyl window frames
Vinyl window frames and patio door tracks can collect black transfer marks, bug residue, and general dirt. A damp Magic Eraser works well on many white vinyl frames. Stay away from painted, foiled, or dark-color specialty finishes unless the manufacturer confirms they can be scrubbed.
Use a vacuum first in tracks. Grit trapped in the track can scratch if you rub it around with foam.
11. Fiberglass or acrylic tub and shower surrounds
Fiberglass and acrylic surrounds can usually handle careful spot cleaning, but they are not indestructible. Always test first. Use melamine on soap scum rings, product stains, and transfer marks, then rinse thoroughly.
Rank #3

- OUR LONGEST LASTING ERASER –Mr. Clean Magic Eraser Whole Home Extra Durable XL lasts 5X longer than the Whole Home Extra Durable Eraser.
- 75% MORE SCRUBBING POWER* – Built for durability, there are 75% more water-activated micro scrubbers to help you tackle tough messes with ease. *vs Whole Home Extra Durable Eraser.
- FOR LARGE, TOUGH EVERYDAY MESSES – Designed for tough messes like car wheels, patio furniture, grill grates, and other areas inside and outside of your home.
- TACKLE MESSES IN 3 EASY STEPS – Just wet both side of the eraser, squeeze to activate scrubbing power, and erase every day, tough messes with ease.
- RINSE & REUSE MULTIPLE TIMES – Rinse the eraser after scrubbing to keep cleaning more tough messes.
If the surface is already dull, chalky, cracked, or worn through at the floor, cleaning is not the real issue. That is a resurfacing or replacement conversation. Repeated abrasive cleaning on an aging surround can make it harder to keep clean because the surface gets rougher.
6 Things You Should Not Clean With a Magic Eraser
The most expensive Magic Eraser mistakes happen when someone treats a finished surface like bare tile. These six categories are where we tell homeowners to slow down or choose another method.
1. High-gloss, dark, satin, or custom-painted finishes
Dark paint and high-sheen paint show abrasion quickly. A Magic Eraser can leave a cloudy patch, dull halo, or uneven sheen that is obvious in side light. Custom cabinet colors and site-finished trim are especially risky because touch-up paint may not match after months or years of UV exposure and normal wear.
Free tools Windows power users keep installed
One-click scans. No signup required.
Use microfiber and mild soap first. If repainting would be annoying or expensive, do not test your luck in the most visible spot.
2. Stainless-steel appliance faces
Stainless steel is not just “metal.” Appliance faces are brushed in a direction and may have coatings that help resist fingerprints. Melamine can create fine scratches that catch light across the grain. Once those scratches are there, wiping will not remove them.
Use a stainless cleaner or mild soap and water with a microfiber cloth, wiping with the grain. Reserve melamine for removable plastic parts, not the appliance face.
3. Natural stone: marble, granite, limestone, travertine, and similar materials
Natural stone can be polished, honed, sealed, or filled. A Magic Eraser can dull the polish, disturb sealer, or change the sheen. Marble, limestone, and travertine are especially vulnerable because they are softer and more reactive than porcelain tile.
The Tool Desk
Outbyte PC Repair FREEClear out junk files and repair common Windows errorsFree Scan →Outbyte Driver Updater FREEFix the driver behind crashes, sound loss and screen glitchesFind Drivers →Granite is harder, but the sealer and polish still matter. Use a pH-neutral stone cleaner and a soft cloth. If staining has penetrated the stone, cleaning the surface harder usually will not solve it.
4. Nonstick cookware
Do not use melamine foam on nonstick pans, baking sheets with coatings, air-fryer baskets, or coated inserts. Abrasion can degrade the coating. Once a nonstick surface is scratched or flaking, it is no longer performing as designed.
Soak with warm water and dish soap, then use a non-scratch sponge approved for cookware.
5. Vehicle paint and coated headlights
A car’s finish includes clear coat, and many headlights have protective coatings. A Magic Eraser can abrade those layers. It may make a mark look better for a moment while creating a dull spot that requires polishing or refinishing.
Use automotive clay, polish, or cleaning products made for the specific surface. Vehicle finishes are not a good place for household trial and error.
6. Bare, oiled, waxed, or polished wood
Wood finishes vary widely. Bare wood can fuzz or stain. Oiled and waxed wood can lose protection. Polished furniture can develop dull patches. Hardwood flooring can show scrub marks or sheen differences in normal room light.
Rank #4

- OUR LONGEST LASTING ERASER –Mr. Clean Magic Eraser Whole Home Extra Durable XL lasts 5X longer than the Whole Home Extra Durable Eraser.
- 75% MORE SCRUBBING POWER* – Built for durability, there are 75% more water-activated micro scrubbers to help you tackle tough messes with ease. *vs Whole Home Extra Durable Eraser
- FOR LARGE, TOUGH EVERYDAY MESSES – Designed for tough messes like car wheels, patio furniture, grill grates, and other areas inside and outside of your home.
- TACKLE MESSES IN 3 EASY STEPS – Just wet both side of the eraser, squeeze to activate scrubbing power, and erase every day, tough messes with ease.
- RINSE & REUSE MULTIPLE TIMES – Rinse the eraser after scrubbing to keep cleaning more tough messes.
Use the cleaner recommended for the wood finish. If you do not know the finish, treat it as delicate until proven otherwise.
Material-by-Material Guide
This table is the practical version of the rule. The same sponge can be useful, risky, or a bad idea depending on the material and finish.
| Surface | Use a Magic Eraser? | Contractor note |
|---|---|---|
| Flat or matte drywall paint | Use with caution | May burnish or remove pigment; test a hidden 1-inch area first. |
| Eggshell or satin wall paint | Use with caution | Can lose sheen if scrubbed; use light passes only. |
| Painted trim enamel | Often suitable | Good for scuffs if paint is sound and not old lead paint. |
| Cabinet lacquer or conversion varnish | Usually avoid | Can dull finish, especially on dark or glossy doors. |
| Porcelain or ceramic tile | Usually suitable | Rinse well after use to remove foam residue. |
| Grout | Suitable for light grime | Will not repair cracked, missing, or moldy grout. |
| Acrylic tub | Spot test | Use light pressure; repeated abrasion can dull worn surfaces. |
| Fiberglass surround | Spot test | Fine for scuffs if gelcoat is intact. |
| Quartz countertop | Use caution | Can affect resin sheen; follow counter manufacturer guidance. |
| Granite or marble | Avoid | Risk to polish and sealer; use pH-neutral stone cleaner. |
| Stainless appliance face | Avoid | Fine scratches can show across brushed grain. |
| Vinyl window frame | Often suitable | Best on white vinyl; be careful with dark or coated finishes. |
| Laminate surface | Spot test | Durable laminate may tolerate it; glossy laminate can dull. |
| Glass | Use caution | Remove grit first; avoid specialty coatings. |
| Wood | Avoid | Especially bare, oiled, waxed, polished, or site-finished wood. |
Cost: Sponge vs Cleaning Visit vs Repair
A Magic Eraser is cheap. Damage from using it in the wrong place is not. In 2026, generic melamine sponges commonly run about $0.20 to $0.60 per sponge online. Branded Mr. Clean pads often run about $0.90 to $2.00 per pad depending on pack size, store, formulation, and local pricing.
Recent retail examples show why the range is wide. A 6-count branded pack listed around $5.60 to $6.07 at a major retailer, or roughly $0.93 to $1.01 per pad. A food-service retailer listed a 6-count at $11.49, or about $1.92 per pad. Generic 50-count packs appeared around $10.79 to $15.29, or about $0.22 to $0.31 per pad.
| Option | Typical 2026 cost | Best use |
|---|---|---|
| DIY spot cleaning | Under $5 if you already own towels; $8-$20 for branded pads, gloves, and cloths | Small scuffs, transfer marks, light soap film, punch-list cleanup. |
| Regular house cleaning visit | About $100-$300 per visit | Routine cleaning across multiple rooms, not finish repair. |
| Hourly professional cleaning | About $35-$75 per worker-hour | Targeted cleaning where scope is clear. |
| Deep or move-out cleaning | About $200-$700+ | Heavy soil, whole-house prep, rental turnover, sale prep. |
| Repair after damage | Varies widely | Repainting, cabinet touch-up, countertop polishing, appliance-panel replacement, or wood refinishing. |
The repair line is the one to respect. A $1 pad can create a visible dull spot on a $4,000 appliance suite or a custom cabinet door that requires color matching. When the surface is expensive, finished, or hard to replace, the cheapest move is usually the gentlest cleaner first.
Independent reader supportYour contribution helps us test, update, and keep practical guides available for everyone.Lead Paint, Dust, and Older Homes
For homes built before 1978, painted trim, doors, windows, stair parts, and built-ins deserve extra caution. Lead-based paint was commonly used before the federal residential ban. Abrasive rubbing can disturb old paint layers and create dust, especially on friction surfaces like windows and doors.
The Tool Desk
Outbyte PC Repair FREEClear out junk files and repair common Windows errorsFree Scan →Outbyte Driver Updater FREEFix the driver behind crashes, sound loss and screen glitchesFind Drivers →Homeowners should avoid aggressive dry rubbing, sanding-like cleaning, or scraping on old painted surfaces unless they know what they are dealing with. If paint is peeling, chalking, cracked, or repeatedly shedding dust, cleaning is not the fix. The condition needs lead-aware evaluation and repair.
For paid contractors, the EPA Renovation, Repair and Painting Rule can apply when work disturbs painted surfaces in pre-1978 housing and child-occupied facilities. Common thresholds are more than 6 square feet of interior painted surface per room or more than 20 square feet of exterior painted surface. Contractors covered by the rule need lead-safe certification and practices. That is not a Magic Eraser rule; it is a job-scope and occupant-safety rule.
Microplastic Shedding and Disposal
Melamine foam wears away as it cleans. That is part of how it works. Recent research has found that melamine sponges can release microplastic fibers as they break down. Denser sponges tend to last longer and shed less than lighter, weaker pads.
Use these sponges sparingly. Do not use a full pad where a microfiber cloth and mild soap would work. Pick up visible foam crumbs and dispose of them in the trash instead of rinsing heavy debris into a drain. For large cleaning jobs, step back and ask whether you are solving dirt or grinding away a surface layer.
Do these 3 things before closing this tab:
1Scan for outdated or missing drivers - takes under a minute2Clear out junk files and repair common Windows errors3Fix the driver behind crashes, sound loss and screen glitchesWhen to DIY vs When to Hire a Pro
DIY is reasonable when the mark is small, the material is durable, and the downside is limited. Examples include scuffed baseboards in a newer home, white vinyl window frames, plastic refrigerator drawers, sneaker soles, and a few soap-scum spots on ceramic tile. Plan on 5 to 20 minutes for a small room’s worth of touch-ups.
Bring in a professional cleaner when the job is broad, time-sensitive, or part of a move-out, sale prep, or rental turnover. A deep cleaning crew charging in the $200 to $700+ range may be the better value when the home needs bathrooms, appliances, floors, trim, and cabinets cleaned at once.
Hire a trade professional, not a cleaner, when the issue is material failure. Water stains, swollen MDF trim, soft drywall, failed caulk, cracked grout, peeling paint, rust bleed, recurring mold, and finish loss are repair items. A Magic Eraser may lighten the symptom, but it will not stop moisture, restore a coating, or rebuild a damaged substrate.
Best Value
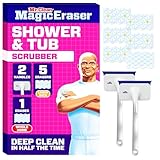
- DEEP CLEAN IN HALF THE TIME* - Cuts cleaning time in half vs sprays.
- CUTS THROUGH 100% OF SOAP SCUM & GRIME – Erase stubborn soap scum and bathroom grime with ease.
- MAGIC ERASER LAST 5X LONGER** - Shower and Tub Magic Erasers last 5x longer when used with the scrubber.
- ALL IN ONE BATHROOM CLEANER - Featuring a sturdy grip handle and a 360-degree rotating head, the scrubber effortlessly makes hard to reach places easy to clean. Plus the built in squeegee leaves a streak free finish.
- EASY STORAGE - After cleaning simply hook or hang the scrubber for you next clean.
For pre-1978 painted surfaces, lead risk changes the decision. If the paint condition is poor or the scope is more than a tiny spot, get guidance from a lead-safe certified contractor before disturbing it.
What’s actually slowing this PC down?
Pick the symptom - the matching free tool is one click away.
Common Mistakes We See
The first mistake is using the sponge dry. Dry melamine cuts faster and is more likely to leave scratches or dull spots. Wet it and wring it nearly dry.
The second mistake is scrubbing harder when the first pass does not work. Use light, repeated passes. If the mark does not move, the problem may be staining, etching, coating damage, or material failure.
The third mistake is skipping the spot test. Cabinets, appliance panels, floors, countertops, and painted walls can all react differently even inside the same house.
The fourth mistake is assuming “chemical-free” means risk-free. A plain melamine pad may not need added cleaner, but it is still a plastic abrasive.
Crashes, No Sound, or Screen Glitches?
Random freezes, missing sound and display glitches usually trace back to one bad driver. Find and replace yours safely.Free scan · under a minuteWindows Errors? Fix Them Before They Spread
Repair common Windows errors and clear accumulated junk for a smoother, more stable PC - no reinstall needed.Free scan · no reinstallThe fifth mistake is trying to erase problems that need repair. Mold at a tub joint usually means failed caulk or moisture behind the joint. Brown ceiling stains mean water. Swollen trim means the material has taken on moisture. Peeling paint needs prep and repainting, not more rubbing.
The Bottom Line
A Magic Eraser belongs in a homeowner’s cleaning kit, but it should be treated like a precision abrasive. It is excellent for isolated scuffs, transfer marks, light grime, and soap film on suitable hard surfaces. It is the wrong tool for glossy paint, stainless appliance faces, natural stone, nonstick cookware, vehicle finishes, and finished wood.
If you remember one contractor rule, make it this: clean dirt, do not abrade the finish. Test first, use water, keep pressure light, rinse residue, and stop the moment the surface itself starts coming off on the sponge.
Frequently Asked Questions
Is a Magic Eraser safe for painted walls?
Sometimes. It can work on washable paint for small marks, but flat paint may burnish and eggshell or satin paint can lose sheen. Test a hidden 1-inch area first and stop if paint transfers to the sponge.
Quick wins for a faster PC:
Scan for outdated or missing drivers - takes under a minuteDriver Scan →Repair Windows errors before they cause bigger problemsFix Now →Fix the driver behind crashes, sound loss and screen glitchesFind Drivers →Can you use a Magic Eraser on stainless steel appliances?
No. Stainless appliance faces can develop fine scratches or dull patches, especially across the brushed grain. Use microfiber and a stainless-safe cleaner instead.
Will a Magic Eraser damage granite or marble?
It can. Natural stone may have polish and sealer that melamine foam can dull or disturb. Use a pH-neutral stone cleaner and soft cloth for marble, granite, travertine, and limestone.
Does a Magic Eraser disinfect surfaces?
A standard white melamine pad does not disinfect by itself. It removes visible grime mechanically. Only a product specifically labeled as disinfecting should be treated as a disinfectant.
Should you use a Magic Eraser wet or dry?
Use it wet, then squeeze out excess water until it is damp. A dry pad is more aggressive and more likely to scratch, dull, or remove finish.
What should homeowners avoid cleaning in pre-1978 homes?
Avoid aggressive rubbing on old painted trim, doors, windows, and other painted surfaces if lead paint may be present. Peeling, chalking, or damaged paint should be evaluated with lead-safe practices.
Quick Recap
Product prices and availability are accurate as of the date/time indicated and are subject to change. Any price and availability information displayed on Amazon at the time of purchase will apply.