Free tools Windows power users keep installed
One-click scans. No signup required.
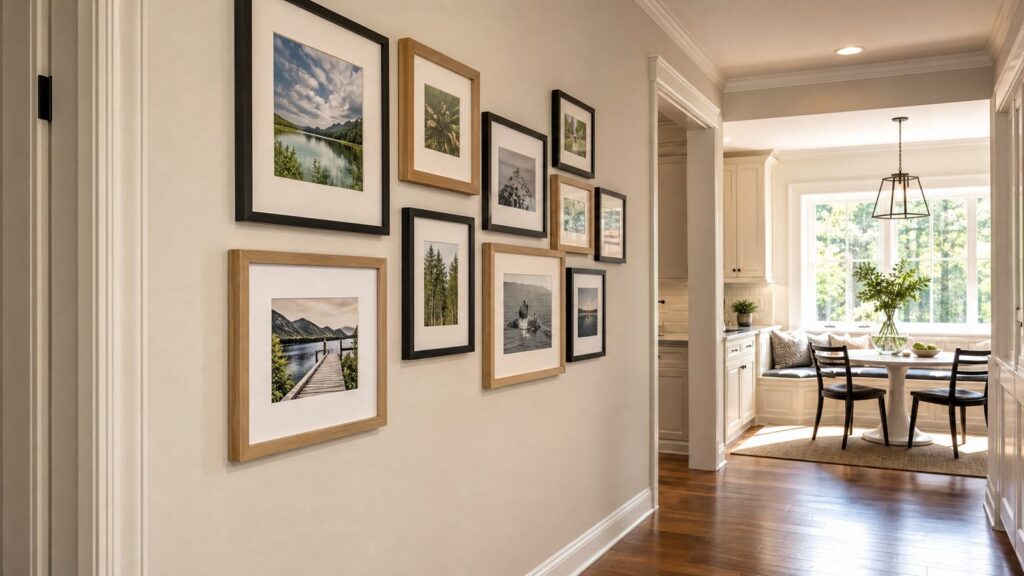
A good photo wall does two jobs. It tells the story of your family, travel, pets, kids, work, or favorite places, and it also looks intentional enough to belong in a finished room. The difference between a wall that feels designed and a wall that feels random usually comes down to layout, spacing, frame size, wall conditions, and hardware.
On our job sites, we treat photo walls as a light finish carpentry and wall-detailing project, not just a decorating errand. A 10-frame gallery on plain drywall is simple. A stair wall, bathroom wall, tile backsplash zone, plaster wall, or tall two-story entry needs more planning. The wrong anchor can tear drywall. Cheap frames can warp in humidity. Adhesive strips can fail on textured paint. A layout that ignores handrails, door swings, switches, and sight lines will always look a little off.
This guide gives you 31 photo wall ideas, then shows you how to size, hang, budget, and protect them like a pro. Use it whether you are filling a hallway after a remodel, adding warmth to a breakfast nook, planning a bath-safe mini gallery, or building a flexible wall that can change every season.
Start With The Wall, Not The Frames
Before buying frames, measure the wall and identify what you are fastening into. A photo wall over a sofa, bench, wainscot, stair run, mudroom hooks, or breakfast banquette has different limits than an open hallway wall. The wall material matters too: drywall, plaster, masonry, tile, shiplap, cabinet panels, and painted brick all need different hardware.
#1 Best Overall
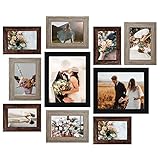
- Multi-size: 10pcs picture frames set come with TWO black frames 8x10in, FOUR gray frames 5x7in and FOUR wood grain brown frames 4x6in. Just remember to peel off the protective film on both sides of the plexiglass.
- Different collocation: The picture frame set for wall collage has multi colors for you to choose, black, wood grain brown and gray. You can match the color of the room with different photo frames to make them more in line with the tone of your room.
- Easy to use: This picture frame collage set can be hung on the wall or tabletop display vertically or horizontally to savor your moment of happy life anytime.
- Durable & Beautiful: The gallery wall picture frame set is made of premium MDF, with smooth hand feeling, not rough, clear texture, the unique grain of each frame give the picture frame an elegant and rustic artistic sense.
- Creative Gift: This collage picture frame set has a seemingly simple design, but everything is ingenious, is also the best choice as a warm gift.
For most rooms, keep the center of the arrangement near eye level, usually 57 to 60 inches from the finished floor. Over furniture, leave about 6 to 10 inches between the furniture top and the lowest frame. In hallways, keep frames tight enough to read as one composition but not so low that shoulders and bags catch them. A common spacing range is 2 to 3 inches between frames for a polished grid and 3 to 5 inches for an eclectic wall.
If you are planning a remodel, think ahead before drywall closes. In kitchens, baths, mudrooms, stair landings, and hallways, we often add blocking where we know heavy mirrors, rails, shelves, or grouped art may go later. A strip of 2x blocking between studs gives you real fastening strength and removes guesswork. It is inexpensive during framing and much harder to add after paint, tile, or trim are complete.
31 Photo Wall Ideas That Work In Real Rooms
1. Symmetrical Grid Wall
A grid is the cleanest choice when you want family photos to look architectural. Use identical outside frame dimensions, identical mats, and consistent spacing. For a 9-piece wall, three rows of 16×20 frames with 2 inches between frames usually fills about 52 inches wide by 64 inches tall. Black, white, oak, or thin metal frames all work, but do not mix frame sizes if you want the grid to stay crisp.
2. Black-And-White Family Wall
Converting photos to black and white solves the most common gallery wall problem: clashing colors. This works especially well in living rooms, hallways, bedrooms, and stair walls. Keep one control variable, such as all black frames or all white mats, and the wall will feel unified even if the photos span 20 years.
What’s actually slowing this PC down?
Pick the symptom - the matching free tool is one click away.
3. Staircase Timeline
A stair photo wall can become a family timeline, with older photos lower on the run and newer photos moving upward. Align the centerline of the arrangement with the stair slope, not the level floor. Keep the lowest frames clear of handrail use and shoulder traffic. In busy stairways, choose acrylic glazing instead of glass because it is lighter and less break-prone.
4. Kitchen Breakfast-Nook Wall
Breakfast nooks are one of the best kitchen locations for photos because they are away from range heat, steam, and grease. A 4-piece or 6-piece grid above a banquette can make the nook feel built-in. Leave 8 to 12 inches above the seat back and use washable frames with glass or acrylic fronts.
5. Bath-Safe Mini Gallery
A powder bath can handle a small framed photo wall better than a full bath because it has less steam. For full bathrooms, use duplicate prints, sealed or moisture-resistant frames, mats or spacers that keep paper off the glazing, and avoid placing photos directly above tubs, showers, or exterior walls that may run colder. The Library of Congress notes that photographs are sensitive to high, low, and fluctuating humidity, and the EPA recommends indoor humidity around 30% to 50%.
6. Picture Ledge Rotation Wall
Picture ledges are ideal if you change photos often. Install one, two, or three ledges and overlap frames in layers. A typical ledge depth is 3 to 5 inches. Fasten ledges into studs or blocking when possible, especially if children can reach them. This is a good choice for playrooms, hallways, offices, and rental-friendly spaces where you want fewer wall holes.
Do these 3 things before closing this tab:
1Repair Windows errors before they cause bigger problems2Fix the driver behind crashes, sound loss and screen glitches3Clear out junk files and repair common Windows errors7. Rail System Wall
A track or rail system lets you hang photos from cables or rods and adjust them without making new holes. It is practical for plaster walls, galleries, long corridors, and homes where artwork changes regularly. The rail still needs solid installation, but once installed, the photos can move without patching the wall each time.
8. Oversized Print With Small Snaps
Anchor the wall with one large framed print, such as a 24×36 or 30×40, then cluster smaller 5×7, 8×10, and 11×14 frames around it. This gives the wall a focal point instead of a scattered look. Oversized framing costs more, but one large photo often makes the entire wall feel more finished.
9. Kids Art And Photo Mix
Combine school portraits, candid photos, drawings, awards, and small shadow boxes. Use matching frames or one repeated mat color so the wall does not become visually chaotic. For active kids zones, use acrylic glazing and secure lower frames with two-point hanging hardware or rated strips where appropriate.
10. Travel Map Wall
Place a map at the center and surround it with travel photos. Use small labels only if they are part of the design, not because the wall needs explaining. A 24×36 map with 8×10 or 11×14 photos around it works well on a home office, hallway, or guest room wall.
11. Wedding Or Anniversary Wall
A wedding wall can look mature if you avoid overfilling it. Use one large portrait, a few detail shots, and one or two family images. Keep frame finishes restrained: brass, black, walnut, or white. This idea works well in a primary bedroom hallway, dressing area, or sitting room.
12. Hallway Year-By-Year Wall
Use one photo per year in identical frames. A long hallway can handle a linear layout better than a clustered gallery. Try 8×10 photos in 11×14 frames, spaced 3 inches apart, with the centers aligned at 57 to 60 inches above the floor.
13. Mudroom Sports Wall
Mudrooms take a beating, so keep the photo wall above hooks, benches, and bag traffic. Use durable frames, acrylic glazing, and secure hangers. A sports wall can include team photos, action shots, medals, small pennants, and framed programs. If you are remodeling the mudroom, add blocking before drywall so shelves and heavier memory displays have real backing.
14. Shadow-Box Memory Wall
Shadow boxes add depth for tickets, ribbons, baby shoes, military patches, vacation keepsakes, or sports medals. They are heavier than flat frames, so do not rely on a small nail in drywall. Use studs, blocking, French cleats, or properly rated anchors.
Recommended Free Tools
15. Tile-Safe No-Drill Wall
For tile, avoid drilling unless you are comfortable with the risk or hiring someone who is. A tile-safe photo wall can use existing grout-line hooks, nearby drywall, a rail mounted above the tile, or ledges fastened outside the tile field. Adhesive products can work only when the tile is clean, smooth, dry, and the frame is within the rated weight.
16. Pantry-Door Mini Wall
The inside of a pantry door can hold lightweight photo tiles, magnetic frames if the surface allows, or a small grid of snapshots. Keep pieces thin so they do not hit shelving. This is useful for family recipes, school schedules, and casual kitchen memories.
Rank #2

- Modern Minimalist Style: Our Picture frames are carefully packaged with minimalist art in mind, featuring natural colors such as black, white, and brown. Whether used as wall hangings or desk decorations,the gallery wall frame set is suitable for all seasons. We prioritize the perfect balance of aesthetics and functionality, ensuring a comfortable and natural experience for our customers.
- Use and Display: The back of our Picture frames features metal latch for securing the inserted photo, along with two small metal hook that allow the frame to be hung horizontally or vertically on shelves or walls. The photo frames for wall can also be displayed as a stable and sturdy tabletop or cabinet decoratio.
- Nicely Made Framers: Constructed of quality PS material which let the 12x12 frames light but durable. The clear and transparent acrylic can accurately show your photos and artworks, while also protecting them from stains and scratches.
- Quality Packaging: Our frames are carefully packaged to ensure safety and integrity. Each frame is securely wrapped at the four corners, and comes with a sturdy and durable outer packaging box. This ensures that the frames are not damaged during the entire transportation.
- A Thoughtful Gift: Our 12 by 12 picture frame set will make a great gift for friends and family. This gallery frame, as a thoughtful gift for your loved ones, is a perfect choice for birthdays, housewarmings, ceremonies, holidays, or any occasion worth commemorating. The mixtiles add an artistic touch and showcases your personal style to any space.
17. Corner Wraparound Gallery
A wraparound gallery turns an awkward corner into a feature. Keep the spacing consistent on both walls and use one frame finish or one photo treatment. This works well where a hallway turns into a kitchen, office, or family room.
18. Built-In Bench Backdrop
If you have a window seat, mudroom bench, breakfast banquette, or reading nook, a photo wall above it can make the area feel custom. Keep frames above head height where people lean back. In a bench area, 10 to 14 inches above the back cushion is usually safer than a low-hung arrangement.
19. Above-Wainscot Gallery
Wainscot or board-and-batten creates a natural lower boundary. Hang photos in the drywall field above it and use the trim line as your layout reference. This is one of the most reliable ways to make a hallway gallery look integrated with the home.
20. Shelf-And-Frame Mix
Mix framed photos with a shallow shelf for small objects. Keep shelves shallow in corridors, usually 4 inches or less, so they do not become a bump hazard. Shelves should be fastened into studs, blocking, or appropriate anchors.
21. Vertical Narrow-Wall Stack
A narrow wall between doors, beside a vanity, or at the end of a hall can hold a vertical stack. Use three to five frames, all the same width. For example, five 11×14 frames stacked with 2 inches between them creates a clean 78-inch-tall arrangement.
22. Clipboard Photo-Swap Wall
Clipboards make swapping photos easy in a kids room, craft room, laundry room, or casual office. Use a level line and mount the clips or boards evenly. Because the photos are exposed, use duplicates rather than irreplaceable originals.
23. Canvas Cluster
Canvas prints reduce glare and feel less formal than framed photos. A cluster of 12×12 or 16×20 canvases works well in family rooms and bedrooms. In kitchens and baths, canvas is more vulnerable to moisture and grease than framed photos behind glass or acrylic.
24. Framed Photo Tiles
Photo tiles are lightweight and easy to arrange in a grid. They are good for renters and dorm-like spaces, but adhesive strength depends on wall texture, paint condition, humidity, and weight. Test one tile first for several days before committing to a full wall.
25. Brass Frame Gallery
Brass frames warm up white walls, marble baths, navy vanities, walnut cabinetry, and traditional interiors. Use brass consistently and vary photo sizes carefully. This is especially effective in a powder bath or dressing area.
26. All-White Mat Gallery
Wide white mats make snapshots feel elevated. A small 5×7 photo in an 11×14 frame can look more refined than an 8×10 photo packed tightly into the same frame. Keep mat widths consistent if the wall is formal.
The Tool Desk
Outbyte PC Repair FREEClear out junk files and repair common Windows errorsFree Scan →Outbyte Driver Updater FREEScan for outdated or missing drivers - takes under a minuteDriver Scan →27. Rustic Wood Frame Wall
Rustic wood frames fit farmhouse kitchens, cabins, lake houses, mudrooms, and casual family rooms. Use restraint: too many distressed finishes can look busy. One wood tone, repeated across the wall, is enough.
28. Modern Thin-Black-Frame Wall
Thin black frames work in almost every home because they provide a crisp outline without overpowering the photos. Pair them with black-and-white images for a modern hallway or with color prints for a more personal family room.
29. Mixed Oval And Rectangle Frames
Ovals soften a gallery wall and help older portraits or heirloom photos feel intentional. Mix them with rectangles, but keep the frame finish related. A wall of random shapes needs one strong control variable.
30. Family Recipe And Photo Kitchen Wall
Frame family recipes, kitchen snapshots, holiday meal photos, and handwritten notes. Keep this wall away from the range, sink splash zone, and dishwasher steam. A pantry wall, desk niche, or breakfast area is usually a better location than the main cooking wall.
Quick wins for a faster PC:
Clear out junk files and repair common Windows errorsFree Scan →Scan for outdated or missing drivers - takes under a minuteDriver Scan →31. Seasonal Or Holiday Swap Wall
Use a ledge, rail, or consistent frame set and rotate prints for holidays, school years, vacations, or seasons. This is the easiest way to keep a photo wall current without creating new holes every few months.
Best Photo Wall Ideas By Room
Dry living rooms and bedrooms give you the most freedom. Standard frames, paper mats, canvas prints, and adhesive strips can all work if the wall is smooth and the pieces are light enough. Hallways and stairs need tougher thinking because frames are more likely to get bumped. Use acrylic glazing, two-point hanging, and layouts that respect handrails, switches, thermostats, and door casing.
Kitchens need distance from heat, grease, and steam. We prefer breakfast nooks, pantry walls, desk niches, side walls near the dining area, and transition walls between the kitchen and family room. Avoid the range wall unless the photos are protected, washable, and outside the main cooking zone.
Bathrooms need the most restraint. A powder room is usually fine for framed duplicates. A full bath with poor ventilation is not the place for original family prints, valuable photos, or cheap paper mats. The 2024 International Residential Code lists local exhaust rates of 50 cfm intermittent or 20 cfm continuous for bathrooms and toilet rooms. That does not make every bathroom photo-safe, but it gives you a baseline: if the mirror stays fogged and towels stay damp, the room is too humid for delicate photo materials.
Rank #3

- Versatile Sizes for Display: Vittanly 15-Pack Multi-Size Picture Frame Set includes 3x 8x10", 6x 5x7", and 6x 4x6" frames. Ideal for showcasing family photos, artwork in living rooms, bedrooms, and offices
- Sturdy & Ready-to-Use Construction: Crafted from scratch-resistant engineered wood with shatter-proof plexiglass. It not only provides a great view of your photos but also protects them from dust and scratches
- Gallery Wall – Mix & Match Designs: Effortlessly create curated displays with 3 complementary sizes. Arrange vertically or horizontally for dynamic layouts, or separate frames to decorate shelves, desks, and entryways
- Convenient Tabletop Stand:Each frame includes pre-installed stand legs and wall hooks for immediate tabletop or hanging use. Acid-free matting protects cherished memories
- Home Decor Accessory:With a classic and simple design, these frames can match any home decor style. They are also a wonderful present idea for birthdays, holidays, and special occasions
Mudrooms and laundry rooms are similar to kitchens and baths: moisture, backpacks, shoes, sports gear, and door swings matter. Keep photo walls above the impact zone, use durable glazing, and choose frames that can be wiped down.
Layout Rules That Make A Photo Wall Look Built-In
The easiest mistake is starting with the photos instead of the overall shape. First decide the boundary: a rectangle over a sofa, a diagonal band on a stair wall, a vertical stack on a narrow wall, or a long horizontal run in a hallway. Then choose frame sizes that fill that boundary without crowding nearby trim, outlets, switches, sconces, or thermostat controls.
For a formal wall, keep outside frame dimensions consistent. A 3-by-3 grid of 16×20 frames can carry nine photos without looking cluttered. For a smaller wall, six 11×14 frames in two rows of three is often enough. For an eclectic wall, keep one visual rule steady: all black-and-white photos, all white mats, all black frames, or all natural wood frames.
Use paper templates before you make holes. Cut kraft paper or printer paper to each frame size, mark the hanger location on the paper, and tape the templates to the wall. Stand back from the next room, hallway approach, and seated positions. On a job site, we check the view from where people actually enter the room, not just from straight-on.
Outdated Drivers Are Slowing You Down
One free scan finds every outdated or missing driver and matches the right update for your exact hardware.Free scan · exact hardware matchPC Slower Than It Used to Be?
A free scan shows the junk files, broken settings and background clutter dragging Windows down - then fixes them in one click.Free scan · Windows 10 & 11Keep spacing consistent. Two inches between frames reads tight and modern. Three inches is forgiving for mixed sizes. Four to five inches can work for large pieces, but small frames spread too far apart start to look disconnected. Around doors and trim, leave at least 2 inches of breathing room, and more if the casing is wide or decorative.
Hardware And Wall Types: What Actually Holds
Photo walls fail when the hanger is chosen by habit instead of by load and substrate. A small sawtooth hanger on a 5×7 frame is different from a 24×36 framed print with glass. AS Hanging notes that simple drywall picture hangers may hold only about 5 to 10 pounds without anchors. Heavier pieces need a real load path: studs, blocking, French cleats, rail systems, or properly rated anchors installed exactly as specified.
| Wall surface | Best approach | Watch-outs |
|---|---|---|
| Painted drywall | Picture hooks, rated anchors, studs, blocking, or French cleats for heavy pieces | Texture and weak paint reduce adhesive-strip reliability |
| Plaster | Pre-drill carefully, use rail systems, masonry-style anchors where appropriate, or find framing | Plaster can crack if fasteners are driven aggressively |
| Tile | Use grout lines, nearby drywall, no-drill ledges, or hire a pro for drilling | Tile can crack, and waterproofing behind tile must not be compromised |
| Brick or masonry | Masonry anchors or screws installed with the correct bit | Dust, bit size, and anchor type matter; avoid random oversized holes |
| Shiplap or wood paneling | Fasten into studs or solid boards when possible | Thin decorative paneling may not carry heavy frames by itself |
| Cabinet side panels | Use light frames or consult the cabinet installer | Screws can penetrate finished cabinet interiors if too long |
For heavy photo ledges, shadow boxes, oversized frames, and glass-fronted pieces, use two mounting points. A French cleat is one of the cleanest solutions for wide or heavy items because it spreads the load and helps keep the piece level. In remodels, blocking behind drywall is better than relying on specialty anchors later.
Adhesive strips are useful, but they are not magic. Humidity, wall texture, fresh paint, old paint, dust, and frame weight all affect performance. Follow the manufacturer weight limit and curing time. In bathrooms, laundry rooms, and hot kitchen zones, assume adhesive performance is reduced.
Free tools Windows power users keep installed
One-click scans. No signup required.
2026 Photo Wall Cost Guide
A photo wall can cost less than a dinner out or more than a small finish carpentry project. The range depends on frame count, frame quality, print size, wall type, ladder work, and whether you hire layout and installation help.
| Project type | Typical 2026 cost | What is included |
|---|---|---|
| DIY small photo wall | $40-$150, excluding prints | Off-the-shelf frames, hooks, anchors, level, painter’s tape, templates, basic wire |
| Midrange retail-frame wall | $150-$600 | 8-15 framed photos, better mats, acrylic or glass, printed enlargements, rated hooks or strips |
| Custom-framed wall | $39-$1,000+ per piece | Custom materials, mats, glazing, specialty sizes; many 16×20 frames land around $75-$250 |
| Large statement frame | $139-$650+ | Retail 24×36 framed photos may start around $139; oversized custom tiers can run about $375-$650 |
| Professional hanging | $98-$213 typical range; about $143 common national cost | Layout help, measuring, fastening, leveling; many pros have a $75-$100 minimum trip charge |
| Drywall repair allowance | $10-$135 for many small holes; $294-$920 national pro repair range | Patch, sand, texture, primer, and paint matching if anchors fail or layouts move |
Michaels advertises fast custom framed photos from $29, with listed framed photo examples including $49 for 5×7 and $139 for 24×36. Canvas prints can start around $35 for 8×10. Those numbers are useful for budgeting, but the finished cost changes quickly with mats, glazing, frame material, promotions, shipping, and the number of pieces.
Professional installation is often worth pricing for stair walls, tall entries, tile, masonry, plaster, oversized pieces, and gallery walls with 10 or more frames. A 10-piece gallery wall commonly takes 1.5 to 2.5 hours depending on layout complexity and substrate. Costs rise for tall walls, stairs, valuable art, heavy mirrors, masonry drilling, tile drilling, and installer-supplied hardware.
Do not ignore repair risk. A failed anchor can turn a $20 frame into a wall repair and repainting project. Thumbtack’s 2026 drywall repair data puts national repair costs around $294 to $920, with many homeowners paying about $515. Mr. Handyman lists small hole repairs around $10 to $135, which is more realistic for minor DIY patching but not for larger damage, texture matching, or repainting a whole wall section.
Recommended Free Tools
Kitchens And Bathrooms Need Different Photo Wall Details
Kitchens and baths are where general decorating advice gets people into trouble. Paper photos, inexpensive mats, raw wood frames, and adhesive strips do not love humidity, grease, heat, or cleaning chemicals.
In kitchens, keep photo walls out of the direct range zone. Steam, cooking oil, and heat will collect on frames and glazing. Better kitchen locations include a breakfast nook, pantry wall, dry bar, command center, built-in desk niche, or transition wall. Use glass or acrylic fronts and frames that wipe clean. Avoid raw, unfinished wood near sinks and dishwashers.
In bathrooms, use copies, not originals. Choose sealed or moisture-resistant frames, use mats or spacers, and avoid exterior walls, shower walls, and spots directly above tubs. A small powder room wall with a 4-frame grid can be excellent. A full bath with weak ventilation is a poor home for valuable photos.
Ventilation matters. The EPA recommends using kitchen and bath exhaust fans when cooking or showering and keeping indoor relative humidity roughly 30% to 50%. If your bath fan is undersized, noisy, or rarely used, fix that before hanging paper-based decor. For many bath remodels, fan performance and duct routing are more important than the photo wall itself.
Quick wins for a faster PC:
Clear out junk files and repair common Windows errorsFree Scan →Scan for outdated or missing drivers - takes under a minuteDriver Scan →Repair Windows errors before they cause bigger problemsFix Now →When To DIY And When To Hire A Pro
DIY makes sense when the wall is standard drywall, the frames are light, the layout is small, and you are comfortable measuring carefully. A 6-frame grid of 11×14 frames over a console table is a good DIY project. Plan on 2 to 4 hours if you are printing photos, assembling frames, making templates, and hanging carefully.
Hire a pro when the work involves stairs, tall ladders, plaster, tile, masonry, oversized frames, valuable photos, heavy shadow boxes, rail systems, or more than 10 to 12 pieces. Also consider help if the layout needs to align with millwork, sconces, a stair slope, or multiple sight lines. A professional art installer or careful handyman can usually complete a typical gallery wall faster and with fewer holes.
Rank #4

- Aluminum Photo Frames: Crafted from lightweight aluminum, our metal picture frames provide a modern, rustic look while ensuring long-lasting use. The sleek finish adds a touch of elegance to any setting
- Glass Cover: Each frame comes with real glass panel, which effectively protects and preserves your photographs from scratching
- Versatile Multi-Pack Set: The photo gallery wall frame set has 2 sturdy hooks and a stand on the back for optional vertical and horizontal hanging on the wall to decorate your house. This set includes a variety of sizes (11x14, 8x10 and 5x7 inches) to accommodate your different photo display needs
- Easy to Use: Easily change photos by opening the snap-lock tabs on the back of each frame. Perfect for showcasing family portraits, landscapes, or special moments in your living room, office or gallery wall
- Display Photo Sizes: The photo collage frame for wall can display two sizes photos. 5x7" frame can display 4x6" photos with mat or 5x7" without mat, 8x10" frame can display 5x7" photos with mat or 8x10" without mat, 11x14" frame can display 8x10" photos with mat or 11x14" without mat
During a remodel, bring it up early. If you know you want a heavy ledge wall in a mudroom, a stair gallery with rail hardware, or a large framed photo over a freestanding tub, the right time to plan backing, lighting, fan placement, and clearances is before drywall, tile, and trim are installed.
Safety, Clearance, And Permit Notes
Most ordinary photo hanging does not require a building permit. Many cities list painting, trim, cabinets, and ordinary wall-mounted decorative work as exempt from permits. Examples from Chicago, Tacoma, Kansas City, Hillsborough County, and New York City show that minor finish work is commonly exempt, although local rules vary.
Do these 3 things before closing this tab:
1Scan for outdated or missing drivers - takes under a minute2Repair Windows errors before they cause bigger problems3Fix the driver behind crashes, sound loss and screen glitchesPermits and code concerns can appear if the photo wall becomes part of electrical work, structural work, built-in cabinetry, bathroom ventilation changes, lighting additions, or work in multifamily common areas. Do not cover required signage, smoke alarms, carbon monoxide alarms, electrical panels, sprinklers, handrails, guardrails, or egress paths. In shared corridors or rental properties, ask the property manager before installing anything that projects into the path of travel.
Use acrylic glazing in narrow halls, stairways, children’s areas, and mudrooms. It is lighter than glass and less likely to break into dangerous shards. For large or heavy pieces, use locking hangers or two-point supports so frames do not shift when doors slam or people brush past.
Installation Checklist For A Clean Result
First, measure the total wall area and mark the centerline. Decide the outside boundary of the arrangement before you hang anything. Second, lay the frames on the floor and photograph the arrangement. Third, make paper templates and mark each hanger location, not just each frame outline. Fourth, tape the templates to the wall and check the view from the room entry, seated positions, and adjacent hallway.
Fifth, identify studs, blocking, tile edges, grout lines, or masonry conditions. Choose hardware by actual loaded weight, not by guess. Sixth, install the largest or most central piece first, then work outward. Seventh, use a level after every few frames. Small errors compound across a grid.
Outdated Drivers Are Slowing You Down
One free scan finds every outdated or missing driver and matches the right update for your exact hardware.Free scan · exact hardware matchWindows Errors? Fix Them Before They Spread
Repair common Windows errors and clear accumulated junk for a smoother, more stable PC - no reinstall needed.Free scan · no reinstallFinally, add bumpers to the lower corners of frames so they sit flat and do not scuff the paint. Keep extra prints, frame backing tabs, and hardware in a labeled bag. If you plan to rotate photos seasonally, choose frames with easy-open backs or use a ledge or rail system from the beginning.
Photo Wall Mistakes We See Most Often
The first mistake is hanging too high. Most homeowners hang art 4 to 8 inches higher than it should be. The second is using too many tiny frames on a large wall. If the room is big, include at least one larger anchor piece.
The third mistake is trusting adhesive strips in the wrong conditions. They can work well on clean, smooth, dry painted walls with light frames, but they are less reliable on texture, humidity, fresh paint, dusty walls, and heavy frames. The fourth mistake is ignoring the cost of changing your mind. If you make 30 holes while experimenting, patching and paint touch-up can take longer than the original hanging.
The fifth mistake is placing photos where the room will damage them. Full baths, range walls, sink splash zones, and sunny exterior walls can shorten the life of prints and frames. Use duplicate prints, protective glazing, and better locations.
Final Builder Advice
The best photo wall is not necessarily the biggest or most expensive. It is the one that fits the room, respects the wall conditions, and can be maintained without becoming a repair project. A simple 6-frame grid in a breakfast nook can look better than a 30-piece wall that fights the trim, lighting, and furniture.
If you are remodeling, plan photo walls the way you plan towel bars, mirrors, hooks, and shelves. Add blocking where heavy pieces may go. Keep kitchen photos away from grease and steam. Treat bathroom photos as replaceable unless the room has excellent ventilation. Use acrylic where breakage matters. Spend money on the pieces and hardware that carry the most weight, visually and literally.
Done well, a photo wall is one of the most personal finishes in a home. It should look relaxed, but it should not be careless. Measure twice, use the right fasteners, and let the wall tell the story without making the drywall pay for it later.
Frequently Asked Questions
What is the best spacing for a photo wall?
Use 2 to 3 inches between frames for a clean grid and 3 to 5 inches for a more eclectic gallery. Keep spacing consistent so the wall reads as one composition.
How much does a photo wall cost in 2026?
A small DIY photo wall often costs about $40-$150 excluding prints. A midrange retail-frame wall usually runs $150-$600, while custom framing can range from about $39 to $1,000+ per piece.
Can I hang family photos in a bathroom?
Yes, but use duplicate prints, moisture-resistant frames, mats or spacers, and good ventilation. Avoid placing photos above tubs, showers, or on damp exterior walls.
When should I hire someone to hang a gallery wall?
Hire a pro for stairs, tall walls, plaster, masonry, tile, oversized frames, heavy shadow boxes, valuable photos, or layouts with more than 10 to 12 pieces.
Do photo walls require a permit?
Ordinary photo hanging usually does not require a permit. Permits may matter if the project includes electrical work, structural work, built-ins, ventilation changes, or work in shared multifamily areas.
Are adhesive strips safe for photo walls?
They can be safe for light frames on clean, smooth, dry painted walls, but they are less reliable on textured paint, humid rooms, fresh paint, dusty surfaces, and heavier frames.
Quick Recap
Product prices and availability are accurate as of the date/time indicated and are subject to change. Any price and availability information displayed on Amazon at the time of purchase will apply.