Do these 3 things before closing this tab:
1Fix the driver behind crashes, sound loss and screen glitches2Clear out junk files and repair common Windows errors3Scan for outdated or missing drivers - takes under a minuteThe right way to repair broken plastic depends on more than the word plastic. First identify the resin, then assess the damage and the conditions the part must withstand. A small, clean break in rigid ABS may need plastic-specific instant adhesive; a cracked polypropylene panel may need fusion welding or mechanical reinforcement; a bent thermoplastic part may only need controlled heat to be reshaped.
This guide covers six practical repair methods: controlled heat, plastic-specific instant adhesive, two-part epoxy or urethane, solvent welding, fusion welding, and mechanical reinforcement. It also explains when a repair is unsuitable—especially for fuel, pressure, food-contact, electrical, vehicle-safety, and sensor-related parts.
As an Amazon Associate I earn from qualifying purchases.
Start by identifying the plastic and the damage
“Plastic glue” is not one universal product. Polyethylene and polypropylene have low surface energy, so ordinary cyanoacrylate, epoxy, and general-purpose adhesives often peel away from them. ABS, PVC, acrylic, nylon, polycarbonate, and polyurethane each have different bonding, solvent, and heat-welding behavior. 3M’s adhesive guidance explains why plastic type and surface energy matter before an adhesive is selected.
Look for a molded resin marking
Inspect the underside, inside surface, or edge of the part for a molded abbreviation such as:
#1 Best Overall

- J-B WELD PLASTICBONDER (Tan): A quick setting and multipurpose two part urethane adhesive & gap filling system that provides a strong and lasting bond to many plastic surfaces. J-B Weld PlasticBonder is great for DIY plastic repairs, filling dents, bumper repairs and more! J-B Weld PlasticBonder now comes in a syringe allowing for an easy 1:1 mix ratio. The unique syringe has a re-sealable cap that prevents drying out and leaking, allowing for multiple uses!
- CURE AND SET TIME: After mixing the two part formula with the included mixing tray and stir stick, PlasticBonder takes 15 minutes to set and 30 hours to cure. J-B Weld PlasticBonder set and cure color is tan
- STRENGTH: J-B Weld PlasticBonder has tensile strength of 3770 PSI.
- SURFACE APPLICATIONS: Thermoset & Carbon Fiber Composites, Thermoplastics and Coated Metals, Plastic & PVC, Concrete, Ceramic & Tile, Fiberglass, and Aluminum.
- DO IT YOURSELF: Big or small, you can DIY it with J-B Weld. Our heavy duty epoxy and adhesives repair & restore it right the first time. J-B Weld delivers superior performance, quality, and results for the World’s Strongest Bond.
- ABS — acrylonitrile butadiene styrene
- PP — polypropylene
- PE, HDPE, or LDPE — polyethylene
- PVC — polyvinyl chloride
- PS — polystyrene
- PC — polycarbonate
- PA — nylon or polyamide
- POM, acetal, or Delrin — acetal plastic
- PUR, PU, or RIM — polyurethane or reaction-injection-molded material
A triangular resin-identification mark may contain a number:
| Code | Typical resin |
|---|---|
| 1 | PET or PETE |
| 2 | HDPE |
| 3 | PVC |
| 4 | LDPE |
| 5 | PP |
| 6 | PS |
| 7 | Other or mixed resin |
The number is a resin-identification system, not a guarantee that a particular adhesive or welding method will work. It also does not automatically mean that an item is accepted for recycling. See the ASTM description of the Resin Identification Code and the EPA’s recycling guidance.
Do not identify an unknown plastic solely by its color, gloss, or stiffness. Additives, fillers, coatings, plasticizers, and different grades can change how it behaves. If there is no marking, use manufacturer documentation or test a hidden area and a scrap piece from the same product. For welding, the most useful test is whether a proposed filler rod melts and blends with clean material from the damaged part.
Determine whether it is a thermoplastic
Thermoplastics soften when heated and can often be reshaped or fusion-welded. ABS, PVC, PP, PE, polycarbonate, and nylon are common thermoplastics, although each requires different temperatures and technique.
Thermosets do not melt back into a weldable liquid after curing. Some polyurethane parts, including certain bumper covers, are thermosets. They need a compatible bonded or hot-melt-style repair rather than a true fusion weld. Polyvance explains the limitation of welding thermoset polyurethane.
Classify the damage
Before choosing a method, ask:
- Is the part merely bent, or is material cracked or missing?
- Is the break clean and close-fitting, or is there a gap?
- Will the repair flex, vibrate, carry a load, or support a fastener?
- Must it be watertight, chemical-resistant, heat-resistant, or weather-resistant?
- Will the repaired part contact food, fuel, drinking water, or skin?
- Is it part of a vehicle bumper, sensor system, restraint, electrical system, pressure system, or other safety function?
Quick decision chart
| Damage or application | Best first option | Useful reinforcement | Avoid |
|---|---|---|---|
| Bent, intact, thin thermoplastic | Controlled heat and reshaping | Fixture or support while cooling | Direct flame or uncontrolled heat |
| Small, clean, close-fitting break | Plastic-specific instant adhesive | Small hidden splint if needed | Ordinary glue on PE or PP |
| Gap, hole, missing piece, or broken housing | Two-part epoxy or flexible urethane | Mesh, fiberglass, or backside patch | Brittle adhesive on flexible plastic |
| ABS or PVC crack | Material-specific solvent cement | Backside reinforcement | Random solvent on unidentified plastic |
| PP, PE, HDPE, LDPE, or TPO crack | Fusion welding with matching plastic | Hot staples or mesh | General-purpose superglue or epoxy alone |
| Broken tab, boss, or mounting point | Flexible or semi-rigid repair adhesive plus reinforcement | Pinning, hot staples, splint, or fabricated tab | Adhesive-only repair under repeated load |
| Food-contact, fuel, pressure, or safety part | Approved replacement or specified repair | Professional inspection | Unverified household repair products |
Before most plastic repairs: universal preparation
- Make the item safe. Remove batteries and power, drain fluids, and keep fuel or solvent containers away from heat and ignition sources.
- Wash the part. Remove dirt, grease, silicone, wax, polish, mold-release residue, and other contamination.
- Dry it completely. Moisture trapped in a joint can interfere with adhesion and curing.
- Test-fit the pieces. Confirm that the break closes properly before applying adhesive, solvent, or heat.
- Mark alignment points. Use pencil, masking tape, or a marker so the pieces do not shift during assembly.
- Roughen bonding areas where the product allows it. A typical starting point is 120–200 grit abrasive on glossy surfaces, but follow the adhesive manufacturer’s directions.
- Do not touch prepared surfaces. Finger oils can undo careful cleaning.
- Prepare the crack. A V-groove gives filler or weld material more surface area. A small stop-hole at each end can help prevent a crack from running when the repair product and part geometry support that approach.
- Fixture the repair. Tape, clamps, jigs, or temporary supports must hold the part still during curing or cooling without distorting it.
- Test on scrap first. This is particularly important with solvents, heat, unknown plastic, and expensive or visible parts.
Loctite recommends clean, dry surfaces, appropriate roughening, accurate alignment, clamping, and full cure before loading. The same preparation principles apply to most plastic repair systems.
1. Re-form a bent thermoplastic with controlled heat
Best for: A bent tab, warped rim, distorted toy part, or misaligned thin thermoplastic component that is still in one piece.
Quick wins for a faster PC:
Repair Windows errors before they cause bigger problemsFix Now →Fix the driver behind crashes, sound loss and screen glitchesFind Drivers →Clear out junk files and repair common Windows errorsFree Scan →Not suitable for: A cracked or shattered part, heat-sensitive electronics, an unknown plastic located near wiring, a part that must retain precise dimensions, or a component exposed to temperatures near its softening point.
How to do it
- Remove the part if possible, keeping heat away from batteries, wiring, seals, and lubricants.
- Warm it gradually with hot water or a controllable heat source. For a small, thin part, hot water may be sufficient.
- Test flexibility repeatedly. Do not assume that a particular heating time or temperature works for every resin.
- Gently return the part to its intended shape. Do not force it once it begins to resist.
- Hold it in position while it cools. A fixture is better than hand pressure for maintaining accurate alignment.
- Check the fit before reinstalling or loading the part.
Nearly boiling water followed by cold water can reshape some small thermoplastic pieces, but it is not a universal repair. Some plastics will not soften sufficiently in hot water, while excessive heat can warp, discolor, weaken, or decompose the material. Never use a direct flame on plastic.
Limitation: Heat restores shape; it does not rebuild a fractured joint or replace missing material. A bent load-bearing tab may still need a patch, splint, or replacement.
Rank #2
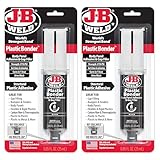
- Plasticbonder: Is A Quick-Set, 2 Part, Urethane Adhesive System That Provides Strong, Lasting Repairs And Works On Thermoset, Carbon Fiber Composites, Thermoplastics, Coated Metals, Concrete & More.
- Count On Us: For More Than 40 Years, Our Products Have Earned A Loyal Following From People Who Take Pride In Their Work. With Each Product We Innovate, We Continue To Provide The World'S Strongest Bond For Your Projects.
- Simple To Use: J-B Plasticbonder Has A 1:1 Mixing Ratio, Sets In 15 Minutes And Can Be Sanded After 30 Minutes. With A Tensile Strength Of 3770 Psi, Plasticbonder Cures To A Hard, Permanent Bond.
- Versatile And Dependable: Perfect For Indoor Or Outdoor Use, Epoxy & Adhesives, Plastic, Composite, Pvc, And More. Plastic Bonder Makes A Great Gap Filler And Dries Black In Color.
2. Bond a clean break with plastic-specific instant adhesive
Best for: Small, clean breaks with close-fitting surfaces and modest loads—such as some toys, trim pieces, small housings, and decorative parts.
Free tools Windows power users keep installed
One-click scans. No signup required.
Plastic-specific cyanoacrylate systems may include an activator or primer. They are different from ordinary superglue and are not automatically suitable for flexible parts, large gaps, repeatedly stressed hinges, water-exposed repairs, PE, or PP.
How to do it
- Dry-fit the pieces and confirm the correct orientation.
- Clean and dry both surfaces.
- If the product includes an activator, apply it exactly as directed. Some systems call for activator on both surfaces and a short waiting period.
- Apply a small amount of adhesive to one surface. Too much can slow curing and leave a brittle, messy joint.
- Align immediately and hold the pieces firmly without sliding them.
- Leave the repair undisturbed for the package-specified set and cure time.
- Do not load the part merely because the surface has set. Depending on the product, full cure may take up to 24 hours.
Product instructions vary. For example, Loctite’s plastic bonding system describes activating both surfaces, waiting about one minute, applying adhesive, and holding the joint for roughly 30–60 seconds before allowing it to cure. Use the exact directions for the product in hand rather than treating those timings as universal; see the company’s plastic-bonding instructions.
Why repairs fail: Instant adhesive forms a thin, relatively rigid bond. It performs poorly when the joint is flexed, peeled, poorly fitted, contaminated, or exposed to a load larger than the product was designed to carry. For a larger gap or flexible part, use a gap-filling epoxy or flexible urethane and reinforce the hidden side.
3. Use two-part epoxy or flexible urethane with a backside patch
Best for: Missing material, holes, gaps, cracks, broken screw bosses, broken tabs, rigid housings, and repairs that require gap filling.
Choose a rigid epoxy for a rigid part that will not flex significantly. Choose a flexible or semi-rigid urethane for a flexible panel, bumper cover, or component that moves during service. Automotive repair systems are available in rigid, semi-rigid, and flexible formulations because a cured repair must match the movement of the original part. Examples include rigid, semi-rigid, and flexible repair materials.
How to do it
- Remove loose fragments and contamination.
- Align the visible side and hold it with tape or a fixture.
- Roughen the backside and an area extending beyond the crack. The adhesive needs a broad, prepared surface rather than a narrow bead on the fracture line.
- If appropriate for the part and product, drill a small hole at each end of a crack to reduce further propagation.
- Cut fiberglass cloth, mesh, a plastic patch, or a shaped splint so it spans well beyond the damaged area.
- Mix the resin and hardener in the specified ratio. Do not add extra hardener in an attempt to make it cure faster.
- Apply the mixed material to the prepared area, wetting the reinforcement fully.
- Taper the adhesive around the edges of the patch rather than leaving a sharp step that concentrates stress.
- Clamp or support the part without squeezing all the material out of the joint.
- Wait for the complete cure before sanding, drilling, reinstalling, exposing the repair to water, or applying a load.
As one product-specific example, Permatex’s plastic repair kit directs users to roughen and clean the surface, extend sanding beyond the damage, stop suitable cracks with drilled holes, cover the damage with fiberglass, saturate the reinforcement with mixed epoxy, and taper the edges. Its dimensions and curing instructions belong to that kit and should not be generalized to every epoxy.
Loctite Epoxy Plastic is marketed for several plastics including ABS and PVC and lists resistance to water, moisture, solvents, and impact after curing. That does not mean every epoxy works on every plastic: always check whether the product specifically includes the resin being repaired, particularly PP and PE.
Important limitation: Epoxy can be too rigid for a part that flexes. It can also fail on low-surface-energy plastics or oily, additive-rich parts even when the mixed epoxy appears hard. Increase the bond area and add mechanical reinforcement, or switch to a plastic-welding method when the base material is a compatible thermoplastic.
What’s actually slowing this PC down?
Pick the symptom - the matching free tool is one click away.
4. Solvent-weld compatible plastics
Best for: Close-fitting cracks and joints in compatible materials such as ABS, PVC, and CPVC when the selected cement is made for that resin.
Solvent welding is chemically different from gluing. The solvent softens compatible surfaces; pressure brings those softened surfaces together, and the material fuses as the solvent evaporates. PE and PP generally cannot be solvent-welded with the solvents used for ABS and PVC. Loctite’s solvent-welding explanation describes the distinction.
Rank #3
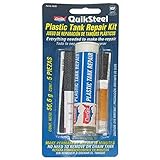
- Manufacturer: BLUE MAGIC
- Country of manufacture: United States
- Part number: 6522KTRI
- Included components: Unit, Instruction Guide
How to do it
- Confirm the resin and choose cement intended for it.
- Test the cement on scrap or an inconspicuous area. Solvent can soften, craze, stain, or damage nearby surfaces.
- Make the joint as clean and close-fitting as possible.
- Clean and dry the mating surfaces.
- Use primer only when the product instructions require it.
- Apply the cement to the specified surfaces and assemble immediately while they are active.
- Hold the joint firmly so it cannot shift.
- Allow the full product-specified cure before applying pressure, load, or fluid.
For pipe products, Oatey specifies primer where required for PVC and CPVC and says not to use primer for ABS under its instructions. Oatey also recommends holding an assembled joint for at least 30 seconds, while noting that cure depends on joint size, temperature, humidity, and product. Never test a solvent-welded joint with compressed air or gas.
Safety: Solvent cements are chemical products. Use ventilation, eye protection, suitable gloves, and the label’s flammability precautions. Do not improvise an acetone mixture for an unidentified plastic. Acetone may soften ABS in some applications, but it is not a general-purpose plastic welding liquid and should not be assumed to work on PLA, PETG, PE, PP, or other unknown materials.
Outdated Drivers Are Slowing You Down
One free scan finds every outdated or missing driver and matches the right update for your exact hardware.Free scan · exact hardware matchWindows Errors? Fix Them Before They Spread
Repair common Windows errors and clear accumulated junk for a smoother, more stable PC - no reinstall needed.Free scan · no reinstall5. Fusion-weld thermoplastics with matching plastic
Best for: Cracks and breaks in weldable thermoplastics such as PP, PE, TPO, ABS, PVC, polycarbonate, and nylon when the correct equipment and matching filler are available.
A true fusion weld melts the base material and a compatible filler together. The filler rod should match the base plastic as closely as possible. A bead merely sitting on top of unmelted plastic may look finished but provide little strength.
How to do it
- Identify the resin. Do not select welding rod by color alone.
- Obtain matching rod or donor material. A strip cut from the same type of plastic is often better than an unknown rod.
- Align the break. Hold the cosmetic side with a fixture or suitable tape, keeping the joint accessible.
- Prepare a V-groove. Grind along the crack to expose clean material and provide room for filler. The Polyvance repair guide describes a groove typically no deeper than about half the material thickness.
- Weld the backside first. This secures the alignment and adds reinforcement where it is least visible.
- Allow it to cool. Then weld the front side with matching rod.
- Control the heat. Keep the hot-air stream moving and avoid scorching, bubbling, gloss changes, or burn-through.
- Blend thoroughly. The rod and base should melt together; do not simply lay a hot bead over the surface.
- Finish after cooling. Grind or sand the repair only when the plastic has cooled and hardened.
A dedicated hot-air or nitrogen plastic welder provides better temperature and airflow control than an improvised soldering iron. A low-wattage soldering iron may be useful for a small, noncritical maker repair, but it can smear rather than fuse the plastic, contaminate the joint, overheat nearby material, or create a weak notch.
3D-printed parts: A matching-filament friction weld made with a rotary tool can be useful for some printed parts, but it is a specialized technique that is difficult to control. Do not assume that a solvent used for one filament works for another: acetone is associated primarily with ABS-compatible applications and should not be generalized to PLA or PETG.
Trade-off: A properly executed fusion weld can restore the material itself and be very durable, but the result depends on resin identification, filler compatibility, temperature, groove geometry, cleanliness, and operator technique. Practice on scrap before attempting a visible or valuable part.
6. Reinforce the break mechanically
Best for: Long cracks, flexible panels, broken mounting tabs, screw bosses, high-stress areas, or parts where adhesive alone would be loaded in peel.
Mechanical reinforcement can be used by itself for some noncritical repairs, or combined with adhesive or welding. Options include hot staples, reinforcement mesh, a backside plastic or metal splint, small screws and washers, rivets, or a newly fabricated plastic tab.
Hot-staple repair
A hot-staple tool heats a shaped wire staple and embeds it across the crack from the hidden side. The softened plastic locks around the staple as it cools. I-CAR describes hot-staple repair as a way to join plastic pieces and identifies staple shapes for flat repairs, outside corners, curves, and inside corners.
Rank #4

- J-B WELD PLASTICWELD: A quick setting and multipurpose two part epoxy that provides a strong and lasting bond on various plastic surfaces (Plastic & PVC, Fiberglass, Glass, ABS, Composites and Vinyl). J-B Weld PlasticWeld comes in a syringe allowing for an easy 1:1 mix ratio. The unique syringe has a re-sealable cap that prevents drying out and leaking, allowing for multiple uses!
- CURE AND SET TIME: After mixing the two part formula with the included mixing tray and stir stick, PlasticWeld takes 5 minutes to set and 1 hour to cure. J-B Weld PlasticWeld set and cure color is Translucent Yellow.
- STRENGTH: J-B Weld PlasticWeld has tensile strength of 3900 PSI.
- SURFACE APPLICATIONS: Plastic & PVC, Fiberglass, Glass, ABS, Composites and Vinyl.
- DO IT YOURSELF: Big or small, you can DIY it with J-B Weld. Our heavy duty epoxy and adhesives repair & restore it right the first time. J-B Weld delivers superior performance, quality, and results for the World’s Strongest Bond.
- Work from the hidden side whenever possible.
- Align the crack and choose a staple shape that follows the part’s geometry.
- Heat the staple with the hot-staple tool.
- Press it partway into the plastic without driving it through the visible surface.
- Allow the plastic to cool and grip the staple.
- Cut off protruding wire and grind or cover the remaining metal.
- Finish the seam with compatible plastic repair adhesive, filler, or weld material.
A hot staple is reinforcement, not automatically a watertight or cosmetic repair. It may need a surface-filling step, and exposed metal can interfere with moving parts or create corrosion and snagging problems.
Backside patch, splint, or replacement tab
- Make the visible side flush and hold it in position.
- Cut a reinforcement strip that extends well beyond both sides of the break.
- Roughen and clean the hidden side.
- Bond or weld the strip across the break, using a material compatible with the part and the chosen repair system.
- Round or taper the ends of the reinforcement to reduce stress concentration.
- For a broken tab or boss, rebuild the missing shape only after the reinforcement is secure.
3M’s plastic repair materials include flexible backside patches for through-damaged plastic. For tabs, its plastic-tab procedure uses drilled pinning holes so repair adhesive can flow through and mechanically key to itself. Follow the product’s prescribed hole size, spacing, and application method rather than drilling randomly.
Trade-offs: Mechanical reinforcement improves strength and crack resistance, but it can be visible, add thickness, interfere with moving parts, or create a new stress concentration. Keep it on the hidden side and spread the load over a broad area whenever possible.
How to make a plastic repair last
- Increase the area. A broad backside patch is usually stronger than a thick bead concentrated on the crack.
- Match flexibility. Use flexible adhesive or urethane on a flexible part; avoid making one small section rigid.
- Prefer shear to peel. Arrange a patch or joint so loads travel across the bond rather than lifting its edge.
- Blend transitions. Taper adhesive and reinforcement edges so the repair does not create a sharp notch.
- Use matching plastic for welding. Similar color does not prove similar resin.
- Keep the repair still. Movement during cure or cooling is a common cause of weak or misaligned joints.
- Respect cure time. “Sets” and “fully cured” are different stages. Temperature, humidity, joint size, and product chemistry all affect the result.
- Protect against the environment. Check compatibility with water, solvents, oils, sunlight, heat, and freeze-thaw cycles.
- Test gradually. Start with light movement or a small load, inspect the joint, and increase service only if it remains sound.
When replacing the part is safer
Food and drink contact
Do not assume that a cured adhesive, epoxy, filler, or solvent cement is food-safe because it is hard, waterproof, or described as nontoxic. Food-contact authorization depends on the specific substance, manufacturer, intended use, and conditions of use. The FDA’s food-contact information explains the issue, and its guidance on determining regulatory status makes clear that approval is application-specific.
The Tool Desk
Outbyte Driver Updater FREEScan for outdated or missing drivers - takes under a minuteDriver Scan →Outbyte PC Repair FREERepair Windows errors before they cause bigger problemsFix Now →For drinking bottles, cooking utensils, baby items, microwave containers, and food-storage vessels, replacement is generally the safer recommendation unless the complete repair system is explicitly authorized for that use.
Fuel, pressure, hot coolant, and gas
Do not use a generic plastic repair for fuel tanks, fuel-system components, gas lines, pressure vessels, or hot pressurized radiator tanks. For example, Permatex’s technical information specifically excludes plastic fuel tanks from one of its plastic tank repair products.
Safety and electrical components
Replace or obtain an approved repair for brake, steering, restraint, helmet, lifting, protective, and structural components. Treat electrical insulation as safety-critical where a repair failure could cause shock, a short circuit, or fire. Do not bury damaged conductors or compromised insulation under an adhesive and assume the assembly is safe.
Vehicle bumpers and sensor-equipped parts
Vehicle manufacturers can prohibit otherwise effective plastic repair techniques in areas containing radar, parking sensors, cameras, or other advanced driver-assistance equipment. Ford, for example, has stated in one collision-repair position that hot staples, plastic welding, fillers, and substrate repairs are not permitted for certain ADAS-equipped bumper fascias because they may affect sensor operation. Check the vehicle’s repair information and OEM restrictions before repairing a bumper; the Ford position document is an example, not a universal rule for every vehicle.
Recommended Free Tools
Safety when heating, welding, or solvent-welding plastic
Heated plastic can release irritating or hazardous fumes. The UK Health and Safety Executive warns that plastic fumes can irritate the eyes, nose, and lungs and recommends controlling exposure with local exhaust ventilation.
- Work outdoors or use effective local exhaust ventilation.
- Keep the fume plume away from your face and do not breathe directly over the work.
- Wear eye protection and heat-resistant gloves when using hot tools.
- Stop if plastic smokes, chars, bubbles unexpectedly, or gives off a strong odor; verify the resin and reduce the heat.
- Keep solvents away from flames, sparks, heaters, and other ignition sources.
- Never heat a container that may contain fuel, solvent, pressurized contents, or trapped vapors.
- Follow the safety data sheet and product label for adhesives, primers, epoxies, and solvent cements.
Troubleshooting failed repairs
The adhesive peels off immediately
Common causes include the wrong plastic—especially PP or PE—silicone or oil contamination, a glossy surface that was not prepared, an adhesive that is too rigid for the part, a joint loaded in peel, or movement during cure.
Best Value

- CERAMIC SAVIOR - Our newest ceramic glue is tailor-made for repairing cracked ceramic, porcelain, china and pottery. It delivers a flawless, incredibly strong, undetectable repair that promptly renews your cherished and fragile ceramic pieces to their former glory. With a food safe adhesive formula, broken mug and cutlery is no longer a concern.
- UNBREAKABLE BONDING - Say goodbye to weak, temporary fixes! Our best glue for ceramic repair offers unmatched bonding strength. With state-of-the-art technology and premium formula, it ensures a bond that surpasses expectations, guaranteeing your restoration stays securely in place for ultimate peace of mind.
- ETERNAL IN ANY CONDITION - Enjoy lasting performance with our porcelain repair kit – it won't harden or become brittle over time, maintaining its bonding power indefinitely! Waterproof and resistant to high temperatures, it ensures your pottery bonds remain strong even in harsh conditions, perfect for outdoor or bathroom ceramics.
- SETS IN SECONDS - End the frustration of waiting for glue to dry! Our best glue for ceramic repair sets in just 15 seconds, allowing you finish repairing swiftly without compromising quality. No more delays in your DIY crafts projects! Say hello to efficient, hassle-free repairs and crafting.
- SAFE AND NON-TOXIC - Our food safe ceramic repair kit prioritize safety without affecting performance, made with safe ingredients, and undergo rigorous testing, passing MSDS, SGS, and other safety assessments. Unlike inferior porcelain glues that may pose health risks, our transparent, pungent-odorless, eco-friendly adhesive ensures 100% safety for you and the environment.
- Remove the failed adhesive mechanically.
- Identify the resin instead of applying another product at random.
- Re-clean and roughen the surface as directed.
- Select a specialty adhesive, primer, solvent cement, or welding method compatible with that plastic.
- Increase the bond area and add hidden-side reinforcement.
3M identifies PE and PP as low-surface-energy plastics that may require specialty chemistry, primer, or surface treatment.
The epoxy is soft or tacky
Possible causes include an incorrect resin-to-hardener ratio, incomplete mixing, a cold workpiece or environment, moisture, contamination, expired material, or poor storage. Do not add extra hardener as a guess. Loctite’s epoxy troubleshooting guidance notes that cold conditions can slow or stall curing and emphasizes the specified mix ratio and curing temperature. Remove and remake a failed repair rather than loading partially cured epoxy.
Do these 3 things before closing this tab:
1Scan for outdated or missing drivers - takes under a minute2Clear out junk files and repair common Windows errors3Fix the driver behind crashes, sound loss and screen glitchesThe weld looks melted but breaks easily
Check for an incorrect filler rod, insufficient melting of the base plastic, excessive heat, a shallow groove, a repair made only from the visible side, contamination, or sun-degraded material. Expose clean base material, use matching rod, weld both sides where possible, and practice on scrap.
The crack continues to spread
Stop using the part. If the geometry and repair system allow it, drill a small stop-hole at each end, enlarge the prepared area, and add a broad backside reinforcement. A crack in a load-bearing or safety-critical component may indicate that replacement is more appropriate than enlarging the repair.
The plastic discolors, bubbles, or burns
Stop heating. Lower the temperature, increase the tool’s travel speed, improve ventilation, and verify the plastic type. Excessive heat can degrade the part and compromise the weld. PVC is particularly heat-sensitive in welding applications; Polyvance’s instructional material also cautions against excessive welding temperature.
A practical testing checklist
Before returning a repaired item to normal use, verify:
- The pieces are correctly aligned and the repair has not distorted the part.
- The adhesive, epoxy, urethane, solvent weld, or plastic weld has reached its full specified cure or cooling time.
- There are no unbonded edges, voids, burnt areas, sharp metal edges, or loose reinforcement pieces.
- Moving parts still clear the repair.
- Threads, screw bosses, seals, and mounting surfaces remain correctly positioned.
- The repair has been exposed only to environments that the product is rated to withstand.
- A light-load test does not open the crack, flex the joint excessively, or produce a new crack.
If the part carries a significant load, contains fluid under pressure, protects a person, or controls a vehicle or machine, do not rely on a casual hand test. Use the manufacturer’s repair criteria or replace the component.
Frequently Asked Questions
What is the strongest way to repair broken plastic?
There is no single strongest method for every resin. A correctly executed fusion weld can be highly durable when the base is a compatible thermoplastic, the filler matches, and the heat and groove are controlled. For a flexible panel or broken tab, a flexible adhesive combined with a broad backside patch, hot staples, or a splint may be more suitable. A method is only as strong as its compatibility with the plastic, geometry, and service load.
Will superglue work on polypropylene or polyethylene?
Ordinary cyanoacrylate often performs poorly on polypropylene and polyethylene because they have low surface energy. Use a specialty adhesive system specifically rated for the resin, usually with its required primer or activator, or consider fusion welding or mechanical reinforcement.
Can acetone repair any plastic?
No. Acetone can soften ABS in some applications, but it is not a universal plastic-welding solvent. It should not be assumed to work on PLA, PETG, PE, PP, or an unidentified plastic. Solvent welding should use a product made for the confirmed resin.
What’s actually slowing this PC down?
Pick the symptom - the matching free tool is one click away.
Can a cracked plastic food container be glued?
Replacement is generally safer. A cured repair product is not automatically food-safe; food-contact authorization depends on the specific product and intended conditions of use. Only use a repair system explicitly authorized for that application.
How long should a plastic repair cure before use?
Follow the exact product instructions. Set time is not full cure, and cure depends on temperature, humidity, joint size, and chemistry. Some plastic-specific instant-adhesive systems can require up to 24 hours for full cure, while epoxies and solvent cements have different service times.
The Bottom Line
Identify the resin before choosing a repair. Use controlled heat only to reshape intact thermoplastic, instant adhesive for small close-fitting low-stress breaks, epoxy or urethane for gaps and missing material, solvent cement for compatible ABS/PVC-type joints, fusion welding with matching plastic for suitable thermoplastics, and mechanical reinforcement for cracks, tabs, bosses, and repeated loads. When the part involves food, fuel, pressure, hot coolant, electrical safety, restraints, structural loads, or vehicle sensors, an approved replacement or professional repair is usually the better decision.
Quick Recap
Product prices and availability are accurate as of the date/time indicated and are subject to change. Any price and availability information displayed on Amazon at the time of purchase will apply.
Free tools Windows power users keep installed
One-click scans. No signup required.

