You can build a compost bin from hardware cloth, reclaimed pallets, a drilled trashcan, or a wood-and-wire frame. The first three designs are the more beginner-friendly plans; the framed bin involves carpentry and lap cuts. The “in a day” phrasing is a useful project goal, not a verified time estimate: the cited plans do not state how long construction takes.
Which DIY compost bin should you build?
Choose by pile size, what you plan to compost, available materials, and how you want to turn the pile. The capacities below come from University of Wisconsin–Madison Division of Extension plans revised in 2013; they are approximate volumes expressed as bags of material, not guaranteed usable capacity.
As an Amazon Associate I earn from qualifying purchases.
| Design | Approximate capacity | Best fit | Construction demand |
|---|---|---|---|
| Wire hoop | 8–10 30-gallon bags of yard materials | Large yard-waste pile; movable holding or turning bin | Little assembly; cut and fasten mesh |
| Pallet enclosure | 8–10 30-gallon bags of yard materials | Low-cost or reclaimed-material build | Little or no building skill in the Extension plan |
| Drilled trashcan | About one 30-gallon bag of yard materials and kitchen scraps | Small batches in a compact footprint | Drilling required |
| Portable wood-and-wire frame | 8–10 30-gallon bags of yard materials | A movable frame for holding or turning compost | Above-average skill; lap cuts and frame assembly |
For food scraps, prioritize an enclosed bin rather than an open mesh or pallet design. StopWaste says a rodent-resistant enclosure needs openings no larger than 1/4 inch, a tight-fitting lid, and an enclosed bottom. Its guidance describes open plastic or metal mesh yard-trimmings bins as not rodent-resistant and recommends using them for plant materials rather than food scraps. See StopWaste’s build-your-own compost bin guide.
1. Build a wire-hoop compost bin
A wire hoop is a simple, large-capacity option that can serve as a holding bin or be lifted and moved when you turn the pile. The Extension plan rates it as inexpensive and easy to assemble, with capacity for eight to ten 30-gallon bags of yard materials.
#1 Best Overall

- Twin chambers: Two separate chambers allow one side to finish composting while leaving the other side available to add fresh wastes; Constant alternation of the two sides will create an uninterrupted stream of nutritious compost
- 360⁰ Tumbling Design: The rotating design prevents you from digging or mixing the pile by hand; And the deep fins on eight panels make it easier to turn the compost bin
- Excellent Aeration: Air vents can make the air fully circulate and will not cause an explosion due to excessive internal pressure; Deep fins can better break the clumps, which is conducive to the full fermentation of oxygen
- Sturdy & Durable Construction: Constructed of premium metal frame and high-quality pp plastic body, this tumbling composter is corrosion-resistant, weathering-resistant, sturdy, and durable for long-lasting service life
- Garden Gloves Included: The gloves that not only protect your hands from injury, but are also waterproof, making them easy to clean; With 4 durable ABS plastic claws for easy digging, planting and other gardening work
Materials and tools
- 12.5 feet of 36-inch-wide, 1/2-inch hardware cloth
- Clips or wire ties
- Optional stakes for added stability
- Heavy-duty wire or tin snips, pliers, hammer, metal file, gloves, and a level
Assembly
- Put on gloves and cut the hardware cloth to length with heavy-duty snips.
- File sharp cut ends to reduce the risk of cuts.
- Curve the mesh into a circle, overlap the ends, and fasten them with clips or wire ties.
- Set the hoop on level ground. Add stakes if stability matters more than easy moving and harvesting.
The listed mesh dimension is specific to this plan. If you choose another design, follow that plan’s dimensions rather than assuming the same length or material applies. See the Wisconsin Extension wire-mesh bin plan.
2. Make a compost bin from pallets
Four pallets can form a three-foot-or-larger cube-like enclosure. The Extension plan rates this build as requiring little or no building skill and gives it the same approximate yard-material capacity as the wire hoop: eight to ten 30-gallon bags.
Rank #2
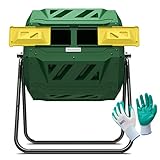
- ✅Speed Up Composing Process: More advanced models use rotating to bring oxygen to the center of the bin and paddles inside the chamber to help mix and aerate the composting materials when turned. These improvements or modifications are designed for one reason: to speed the composting process.
- ✅How do Compost Tumblers work? Simple. You load them with green and brown waste from your yard and kitchen. When full, you give them time to work, in other words, heat up. Turning a compost pile mixing the organic materials and the organisms it contains with heat-producing oxygen is the traditional method of keeping the process going full steam. By turning the tumbler, the organic materials are mixed and infused with fresh oxygen.
- ✅Easy to Access Finished Compost: Just Slide the door open and take the organic fertilizer out when the compost is ready. When a check reveals the compost is complete —and this can happen in a matter of weeks —the same access that allowed you to fill the tumbler lets you empty it. Now is the time to spread the results.
- ✅Dual-Bin Design: The dual bin design takes a different approach to the continuous-use composted concept, Two bins are set side-by-side into a single rotating chamber. Thickly insulated compartments conserve the heat generating by the decaying matter, and this greatly speeds the process. This design also allows you to add food waste to one chamber while the other is composting.
- ✅Totally Organic and Money-Saving: If you're looking for a fast, convenient way to compost your kitchen throw-outs, grass clippings, and organic yard waste, our outdoor kitchen compost bin is just right for you! The Compact Compost Tumbler quickly recycles it into nutrient-rich compost.
Materials
- Four pallets for the sides
- Hook-and-eye latches, bolt latches, rope, or wire to join the sides
- Optional fifth pallet for a base
Assembly
- Stand four pallets on edge to form a four-sided enclosure at least 3 × 3 × 3 feet.
- Join the corners with the fastening method you selected so the sides stay together but can be opened when needed.
- If you add a fifth pallet as a base, account for the trade-off: it may decompose faster and makes turning compost at the bottom more difficult.
Using salvaged pallets can reduce material purchases, but the Extension plan does not address pallet treatment markings; it does not establish which markings are safe. See the Wisconsin Extension pallet-bin plan.
3. Turn a trashcan into a small-batch composter
A covered 30- to 50-gallon trashcan is the most compact of these options. The plan estimates capacity at about one 30-gallon bag of yard materials and kitchen scraps. Because it is enclosed, it is the most suitable of these four designs for food scraps, provided it is built and maintained to limit pest access.
Rank #3
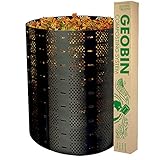
- Large capacity—expandable to 3.75 feet (237 gallon)
- Easy to assemble with closure keys. Easy to move. Easy to reassemble.
- The best value composting bin on the market.
- Excellent ventilation.
Materials and setup
- A 30- to 50-gallon trashcan with a cover
- Drill with a 1/2- to 1-inch bit
- Coarse untreated sawdust, straw, or wood chips for the base
Assembly and filling
- Drill rows of holes around the sides, then add holes in the lid and bottom for airflow and drainage.
- Place 2 to 3 inches of coarse untreated sawdust, straw, or wood chips in the bottom.
- Layer one part green material with two parts brown material, and finish with a layer of browns.
- Keep the contents damp and mix them regularly. The Extension plan says finished compost can take six to twelve months; regular mixing and suitable moisture may shorten that composting time.
Construction time and composting time are different: the six-to-twelve-month estimate refers to producing finished compost, not building the container. For pest-prone areas, the Extension expert response advises avoiding meat, dairy, oils, fats, processed foods, and bones. See the Wisconsin Extension trashcan composter plan.
4. Build a portable wood-and-wire frame
This framed design can hold compost or be moved to make turning easier. It is a more involved build than a hoop or pallet enclosure: the Extension plan rates it above average in building skill because it requires lap cuts and assembly of four square frames. It is a less certain fit for a beginner aiming to finish in one day unless the parts are prepared ahead of time.
Rank #4

- ✅Speed Up Composing Process: More advanced models use rotating to bring oxygen to the center of the bin and paddles inside the chamber to help mix and aerate the composting materials when turned. These improvements or modifications are designed for one reason: to speed the composting process.
- ✅How do Compost Tumblers work? Simple. You load them with green and brown waste from your yard and kitchen. When full, you give them time to work, in other words, heat up. Turning a compost pile mixing the organic materials and the organisms it contains with heat-producing oxygen is the traditional method of keeping the process going full steam. By turning the tumbler, the organic materials are mixed and infused with fresh oxygen.
- ✅Easy to Access Finished Compost: Just Slide the door open and take the organic fertilizer out when the compost is ready. When a check reveals the compost is complete —and this can happen in a matter of weeks —the same access that allowed you to fill the tumbler lets you empty it. Now is the time to spread the results.
- ✅Dual-Bin Design: The dual bin design takes a different approach to the continuous-use composted concept, Two bins are set side-by-side into a single rotating chamber. Thickly insulated compartments conserve the heat generating by the decaying matter, and this greatly speeds the process. This design also allows you to add food waste to one chamber while the other is composting.
- ✅Totally Organic and Money-Saving: If you're looking for a fast, convenient way to compost your kitchen throw-outs, grass clippings, and organic yard waste, our outdoor kitchen compost bin is just right for you! The Compact Compost Tumbler quickly recycles it into nutrient-rich compost.
Materials
- Four 12-foot 2 × 4s made of cedar or non-arsenic pressure-treated wood
- 12 feet of 36-inch-wide, 1/2-inch hardware cloth
- Galvanized screws, hinges, poultry-wire staples, exterior wood adhesive, and hook-and-eye latches
Build outline
- Cut the boards for the four square frames, including the lap cuts specified by the plan.
- Assemble the frames using the specified adhesive and galvanized screws.
- Stretch the hardware cloth taut across the frame and secure it with poultry-wire staples.
- Connect the frames with hinges and add hook-and-eye latches so the enclosure can be opened and moved as designed.
Use the full plan for cut dimensions and assembly details rather than estimating them from the material list. See the Wisconsin Extension portable wood-and-wire bin plan.
Recommended Free Tools
What materials should you buy or salvage?
Start with the chosen plan’s bill of materials. “36-inch-wide, 1/2-inch hardware cloth” is specified for both the wire hoop and framed design, but the hoop needs 12.5 feet while the frame plan lists 12 feet. The pallet and trashcan builds use different materials, so hardware cloth is not a universal requirement.
Best Value

- Dual Chamber, High Capacity: Our compost bin features a dual chamber with a generous capacity of 43 gallons. Perfect for large families and avid gardeners, you can simultaneously compost in one chamber while adding new organic material to the other, reducing overall composting time.
- Convenient Access: The dual-chamber composter tumbler features a detachable sliding door with a large opening, making it effortless to add waste or remove compost. The compost bin features a secure seal that effectively keeps out mice, insects, and other pests, ensuring a safe and efficient composting process.
- Built to Last: Crafted from high-quality PP materials and supported by sturdy metal components, our compost bin outdoor boasts a robust load-bearing capacity of 110 lbs. They are BPA-free, UV-resistant, and weatherproof, enduring direct sunlight, typhoons, rain, snow, and more.
- Effortless Tumbling: Say goodbye to the hassle of manual stirring. Our tumbling composter's innovative 360° tumble design ensures thorough mixing, faster decomposition, and higher-quality compost output. Simply roll it every few days, and you'll have compost ready in just 4-6 weeks.
- Optimized Airflow: The garden compost tumbler features strategically placed vents that promote proper air circulation and prevent potential issues. Internal grooves effectively break up clumps, ensuring uniform mixing of materials and accelerating the decomposition of organic matter.
- For a wire hoop: hardware cloth, wire ties or clips, and heavy-duty snips; stakes are optional.
- For a pallet bin: four pallets and suitable corner fasteners; a fifth pallet is optional.
- For a trashcan composter: a covered can and a drill with an appropriate bit.
- For the framed bin: specified lumber, hardware cloth, galvanized screws, poultry-wire staples, hinges, adhesive, and latches.
Salvaged materials may make a build less expensive, while new lumber and hardware add cost. StopWaste lists material estimates of $15–$30 for its E-Z wire bin, $175–$200 for a three-bin system, and $100–$120 for an all-wood bin. Those are page-listed estimates accessed in 2026; the page does not state a publication date, so they should not be treated as current national prices or as cost estimates for the four plans above. Its separate guide also notes that a three-bin system takes more space and carpentry skill, while a standard bin directly on the ground can produce better compost faster than a tumbler; tumblers are not beginner-friendly.
How to choose a build-day project
- Choose the wire hoop if you need a large yard-waste bin that is quick to assemble and easy to move.
- Choose pallets if you have suitable pallets available and want a roomy enclosure with minimal carpentry.
- Choose a drilled can for a compact container and small batches, especially if you want to include kitchen scraps.
- Choose the framed bin if you have carpentry experience, want a movable structure, and can prepare the cuts and parts in advance.
None of the cited Extension plans verifies that a beginner can complete a particular design within a fixed number of hours. Treat “one day” as a scheduling target, leave time for careful cutting and safe handling, and use the detailed plan for your selected design. The Wisconsin Extension DIY Compost Bin Series collects these plans and related options.
Quick Recap
Product prices and availability are accurate as of the date/time indicated and are subject to change. Any price and availability information displayed on Amazon at the time of purchase will apply.
Free tools Windows power users keep installed
One-click scans. No signup required.

