What’s actually slowing this PC down?
Pick the symptom - the matching free tool is one click away.
Accurate biscuit joints start with a shared layout, a slot depth matched to the biscuit, and a joiner held firmly against securely clamped stock. Mark and test the joint before glue-up; then follow your tool’s manual for its specific adjustments and cutting sequence. These 12 practices cover the workflow from setup to assembly.
Prepare the joint and the joiner
1. Lay out both pieces together
Arrange the mating pieces in their intended assembled position before marking. Draw each biscuit centerline across both pieces at every planned location. Use those marks to align the joiner’s registration mark on each cut; marking the pieces separately can make corresponding slots harder to match.
| # | Preview | Product | Price | |
|---|---|---|---|---|
| 1 |

|
DEWALT 20V MAX XR Biscuit Joiner, Brushless, Tool Only (DCW682B) | $239.00 | Buy on Amazon |
| 2 |

|
DEWALT Biscuit Joiner, 6.5 Amp, 10,000 RPM, Retractable 45 Degree Notch, for Depth Spots (DW682K) | $198.99 | Buy on Amazon |
| 3 |
|
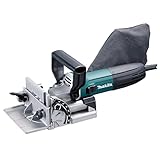
Makita PJ7000 Plate Joiner, Blue | $259.00 | Buy on Amazon |
As an Amazon Associate I earn from qualifying purchases.
2. Choose the biscuit before setting depth
Select a biscuit size appropriate to the joint and stock, then set the joiner’s depth control to the matching setting. Do not assume a setting from one machine transfers to another. DEWALT’s DW682K instruction manual advises making a test cut so an undersized slot is not discovered during assembly.
Free tools Windows power users keep installed
One-click scans. No signup required.
3. Set fence angle and height for this joint
For the DW682K manual’s edge-joint example, the fence is set to 90 degrees and its height adjusted to position the biscuit approximately at the center of the stock thickness. Frame, corner, and offset joints need different setups; use the instructions for the joint and machine in hand. The DW682K product page lists a fence adjustable from 0 to 90 degrees and preset depth stops for common biscuit sizes: DEWALT DW682K specifications.
#1 Best Overall
- Brushless motor provides powerful and consistent cutting performance for most common biscuit sizes
- Achieve accurate results with dual rack and pinion fence design along with tool-free depth, height, and bevel adjustments
- Depth selection knob allows users to easily adjust between #0, #10, #20 biscuits (biscuits sold separately)
- Integral fence allows users to quickly and easily adjust the bevel capacity from 0 -90°
- Paddle switch design accommodates left and right handed users
4. Lock adjustments and clamp the work
Check that fence settings are secure and locking knobs are tight before cutting. Clamp the workpiece firmly so it cannot shift, and keep the fence squarely and firmly against the work throughout the plunge. A slipped workpiece or fence can put a slot out of alignment.
Make controlled, verified cuts
5. Follow the manual’s cutting sequence
Cutting sequences are model-specific. For the DW682K, DEWALT instructs users to start the tool, let the blade reach full speed (approximately one second), plunge until it bottoms against the stop, and let the return spring retract the blade before releasing the switch. Follow your own joiner’s manual rather than applying this sequence automatically to another model.
6. Practice on scrap first
Make practice cuts in scrap wood before cutting visible parts. Use the test to check that the registration mark lands where intended and that the slot depth suits the biscuit and stock. DEWALT’s manual recommends practice to develop a feel for accurate cuts.
7. Dry-fit the joint before adding glue
Insert the biscuits and bring the pieces together without adhesive to check alignment and fit. Correct any setup or layout problem while the parts are still dry; the DW682K manual recommends trial-fitting before gluing.
Rank #2
- 6.5 amp, 10,000 rpm motor provides power for working in the hardest woods
- Dual rack and pinion fence ensure blade and fence are always parallel for accurate joints every time
- Integral one-piece fence is adjustable and tilts 0-90°
- Flush cuts can be made at 0° without removing fence
- 45-degree locating notch in fence allows indexing off the outside surface of a mitered joint
Adapt the layout to the application
8. For edge joints, space biscuits along the seam
Edge-to-edge panel joining is described in the DW682K manual as the simplest and most common plate-joiner application. Place slots at planned points along the seam, including positions inward from the ends, and use the manual’s example as a setup reference rather than a universal spacing rule. Panel length, stock, and the joiner’s reach affect the layout.
9. Treat frame, corner, and offset joints as separate setups
The DW682K manual illustrates frame, corner, and deliberate offset joints as well as edge joints. Reposition the fence and workpiece for the joint being made, and verify the registration marks and slot depth on scrap. Do not carry an edge-joint setup over to a different joint without checking the manual.
10. Use the manual’s narrow-frame workaround cautiously
For frame pieces too narrow for a #0 biscuit, the DW682K manual describes letting the biscuit tip protrude and trimming it after the joint dries. This is a specific workaround, not a general instruction for every narrow frame or joiner. Confirm that it suits the design and your machine’s directions before using it.
11. Consider two biscuits across thick stock
For stock thicker than 1 inch, DEWALT’s DW682K manual says a user may wish to place two biscuits across the thickness at each position and gives clearance dimensions for its described setup. Those dimensions and the method are specific to that manual and setup. Check your machine’s instructions and the actual workpiece geometry before cutting.
Rank #3
- Powerful 5.6 AMP motor delivers 11,000 RPM for quick, precise cutting in a variety of woods
- Cast aluminum pivot fence with three positive stops at 0°, 45° and 90°
- Six depth settings with one-touch stops for most common biscuits sizes including #0, #10, and #20
- Large and easy-to-operate cam locks for angle guide and fence adjustments
- Rack-and-pinion vertical fence system engineered for accurate fence adjustments
Assemble the joint and choose a compatible system
12. Glue the slots and mating faces, then clamp
DEWALT’s manual directs users to spread woodworking glue in each slot and on the mating flat surfaces, insert the biscuits, assemble the pieces, and clamp until dry. The manual explains that biscuits absorb moisture from glue and expand. That manufacturer explanation is not a guarantee of joint strength for every material or design; the joint still needs to suit the work.
Match the joiner to the connector system
Most plate joiners use settings for common #0, #10, and #20 wooden biscuits, but not every joiner uses the same connector system. Compare the required biscuit or groove, stock and joint, depth and fence adjustments, power source, and dust connection before selecting equipment. These are manufacturer specifications, not independent performance comparisons.
| Joiner | Manufacturer-described system or features | What to verify for your work |
|---|---|---|
| DEWALT DW682K | Manufacturer lists a corded tool, 0–90-degree fence, preset depth stops, and a vacuum adapter in the kit: product page. | Confirm biscuit size, setup, and dust-collection adapter compatibility in the manual. |
| Makita PJ7000 | Manufacturer lists a corded plate joiner with six depth settings, including #0, #10, and #20: product page. | Check the manual for the correct setting and joint-specific setup. |
| Lamello Classic X | Manufacturer describes a 4 mm groove system for compatible Lamello joining elements and furniture and interior applications: product page. | Confirm that its groove and joining elements suit the intended joint; it is a distinct system, not a standard #0/#10/#20 biscuit setup. |
Manufacturer descriptions establish listed specifications and intended applications, not comparative cutting accuracy, durability, or real-world performance.
Recommended Free Tools
Quick Recap
Product prices and availability are accurate as of the date/time indicated and are subject to change. Any price and availability information displayed on Amazon at the time of purchase will apply.

