Recommended Free Tools
Some links on this page are affiliate links: if you buy through them we may earn a commission, at no extra cost to you.
Yes—an unwanted desktop PC tower can become a compact cabinet, cubby, organizer, or display case. Remove the electronics, clean and inspect the chassis, then add shelves or dividers suited to light-duty storage. A full-size or mid-tower is usually the best candidate; laptops and many mini-PCs are too shallow to be practical.
The case is the reusable material, not the electronics. Reuse, donate, or recycle the removed parts separately, and treat the finished piece as decorative storage—not load-rated furniture.
Choose a tower that suits the job
A mid-tower is often the best balance of usable space and manageable size. A full-height ATX case offers more room, while a small-form-factor case can work as a desktop organizer for cables, stationery, controllers, or small collectibles. Laptop shells and many all-in-one computers generally lack the depth and open volume for useful household storage.
Do these 3 things before closing this tab:
1Clear out junk files and repair common Windows errors2Fix the driver behind crashes, sound loss and screen glitches3Repair Windows errors before they cause bigger problemsBefore dismantling anything, measure the interior width, depth, and height, then compare those dimensions with the items you want to store. Check that the base is stable, panels and rails are intact, and the case has no severe rust or structural damage. A case with solid side panels can enclose belongings; mesh or missing panels suit ventilated displays better than dust-sensitive items. Metal cases are relatively easy to drill and paint but may have sharp edges. Plastic cases are lighter, but can crack under drilling or concentrated loads.
#1 Best Overall

- FRAME Modular Case System – The revolutionary FRAME system gives new meaning to the word customization. Want to upgrade the motherboard tray to billet aluminum? Want to swap out your front I/O panel for more USB ports? Now you can. A case that can change and grow with your needs (or just your mood). The options are nearly limitless
- 3x CORSAIR RS ARGB PWM Fans – High-performance fans pre-installed in the front of case. Support daisy-chainable 4-pin PWM connections and Zero RPM mode for near-silent operation at low loads. Each Fan has eight LEDs and easily controllable with your motherboard’s +5V ARGB connector
- CORSAIR InfiniRail Fan Mounting System – This steel multi-point mounting system offers unmatched flexibility in front and roof fan configuration. Simply slide the rail to mount fans up to 200mm (140mm in the roof) wherever you like, ensuring targeted airflow
- Clean Lines or Turbo Cooled – The internal side panel near the motherboard tray can be used as a cable cover for clean cable management, or you can remove it and mount fans to the side for increased cooling potential
- 3D Y-Pattern Airflow Panel – Optimized for high airflow and minimal restriction, the steel front panel is perforated in three dimensions with a Y-pattern that provides a low-obstruction path for cool air
There is no universal weight limit: capacity depends on the case construction, shelf material, bracket layout, and how weight is distributed. Use this project for light-duty storage. If you need a reliably load-rated bookcase, a child-safe cabinet, a waterproof container, or secure storage, choose purpose-built furniture instead.
Decide whether the computer should be reused first
If the computer still works, consider donating it, selling or reusing its parts, or repurposing the whole machine before stripping the chassis. Converting the case makes most sense when the computer is obsolete, incomplete, damaged, or otherwise unlikely to be used as a computer.
Rank #2

- Ample Interior: Explore ample interior space for Micro-ATX or Mini-ITX motherboards, ensuring easy and future expansion
- Components Clearance: Accommodates CPU coolers with a max height of 159mm, GPU cards up to 360mm, and PSU up to 160mm in length.
- Versatile Cooling: Maximize cooling performance with a 240mm liquid cooler and 5 fans.
- Modular I/O Panel: You have the flexibility to adjust its position at the front, top, or bottom on both sides
- Edge-To-Edge Panel: Show off your meticulous build through the transparent side panel with pride.
Protect your data and sort the electronics
Back up files and erase storage devices before selling, donating, recycling, or giving them to someone else. Deleting files or reinstalling an operating system may not be sufficient for highly sensitive data. The FTC’s computer-disposal guidance recommends backing up information and erasing the drive before transfer or disposal.
- Working parts: Test and reuse, sell, or donate them where appropriate.
- Drives: Sanitize them before they leave your control; use a professional data-destruction service for sensitive data if needed.
- Batteries: Keep them out of household trash and use an appropriate battery or electronics recycling channel. Do not puncture, crush, or use a swollen battery.
- Power supply: Remove the complete unit if you are making non-powered storage. Do not open or attempt to repair it; keep it intact for reuse or electronics recycling.
- Other electronics: Motherboards, memory, fans, cables, and drives that are not reusable should go to an appropriate electronics recycler.
Electronics may contain hazardous substances, and local collection options vary. The U.S. EPA’s donation and recycling guidance explains reuse and recycling options in the United States; check local rules or an appropriate program where you live. Never dismantle a CRT monitor as part of this project; use a qualified recycling channel.
Rank #3

- EXCEPTIONAL GPU COOLING-The PSU shroud is perforated on the side and bottom, enabling optimal air intake from two 120mm fans (not included).
- LARGE RADIATOR SUPPORT-Supports up to a 360mm radiator in front and a 240mm radiator up top for powerful liquid cooling potential.
- HIGH-PERFORMANCE AIRFLOW-Ultra-fine mesh on the top, front, and side panels creates maximum airflow and filters dust.
- PRE-INSTALLED FANS-Equipped with two 120mm Quiet Airflow fans—one in front, one in rear—for solid out-of-the-box performance.
- SEAMLESS CABLE MANAGEMENT-Effortlessly route and conceal cables using the wide channels, hooks, and straps.
Tools and materials
For a simple conversion, you may need only screwdrivers, a soft brush, a cleaning cloth, and storage bins that fit the empty case. A shelf build may also need measuring tape, shelf material, small brackets or reused rails, bolts, nuts, washers, and a drill with bits. For finishing, consider a file or edge trim, primer and paint suitable for the case material, and rubber or felt feet. Use eye protection when drilling and gloves while handling unfinished metal, but finish sharp edges rather than relying on gloves alone.
How to convert the tower
- Unplug and document. Disconnect the computer and every peripheral. If you may reuse components, photograph the interior before dismantling it. Work on a clear surface.
- Remove the panels and parts. Take off the side panels, then remove expansion cards, drives, optical drives, motherboard, fans, cabling, and the complete power supply. Remove drive cages or brackets only if they obstruct your layout. Keep screws and reusable brackets in a labeled container. Do not open the power supply.
- Use ESD care for parts you are saving. Follow appropriate grounding precautions, handle components by their edges, and place them in anti-static storage. See Dell’s electrical and ESD safety guidance.
- Clean and inspect the empty case. Remove dust with a soft brush or compressed air outdoors or in a well-ventilated area. Check corners, pass-throughs, rails, feet, and plastic parts for burrs, rust, damage, or loose fittings. File burrs smooth or cover them with suitable edge trim. Stop if you find a swollen battery or contamination you cannot safely clean.
- Plan the layout. Mark shelf heights based on the objects you will store. The original drive bays and other mounting holes may provide useful fixing points. Existing holes can avoid unnecessary cutting and help keep the project reversible.
- Fit and support shelves. Cut plywood, MDF, hardwood, acrylic, or plastic to suit the measured interior. Support each shelf at multiple points with suitable brackets, bolts through existing holes, or reused rails. Do not balance a loaded shelf on a thin ledge or one unsupported panel. For books or other relatively dense items, use adequately supported shelves, keep the load modest, and secure and stabilize the case.
- Add dividers if useful. Thin plywood, acrylic, corrugated plastic, metal mesh, foam board for very light items, or a retained drive cage can separate smaller belongings. Clear acrylic or polycarbonate suits a display; wood or metal is a better fit for more substantial stored items.
- Test before finishing. Fit shelves and check that they sit level and do not shift. If a shelf flexes, shorten its span, use thicker material, add support, or add a divider. Do not try to fix a weak shelf simply by adding screws to a weak panel.
- Finish and stabilize. If painting, clean and degrease the surface, remove adhesive residue, treat rust, lightly scuff glossy finishes, and use primer suited to the material. Mask screw holes and moving parts, apply light coats, and let the finish cure before loading it. Reinstall serviceable feet or add non-slip pads; use a suitable mechanical wall restraint for a tall or stacked unit when appropriate.
- Load gradually. Start with light items. Watch for shelf sag, bowing panels, shifting brackets, sliding feet, or a leaning case. Move heavy objects lower, reduce the load, or add suitable support if the unit feels unstable.
Three practical layouts
Vertical cabinet
Keep the tower upright for books, tall collectibles, or narrow floor storage. Its narrow footprint can make it easier to place, but also easier to tip. Put heavier items low, use non-slip feet, and consider a wall restraint. Do not assume the original case feet or panels were designed to support a furniture load.
Rank #4
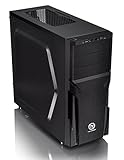
- Designed for gamer, perforated metal mesh front and top panel to allow quick heat dissipation and rapid air intake for maximum ventilation. The heighten foot-stands at the bottom help to enhance airflow
- Tool-free Installation
- The perforated front-top panel has implemented one data transfer SuperSpeed USB 3.0 port along with one standard USB 2.0 port, a HD microphone and headset jacks, to grand direct access when needed
- Optimized Ventilation
- Pre-mounting holes to support motherboards up to standard ATX and CPU cooler installation, long graphic card also supported as well as Advanced Cable Management and Liquid Cooling System
Horizontal cubby
Lay the chassis on a broad side to make a low console, bedside organizer, or storage bin. Check that the panel touching the floor is sound and that the feet do not cause rocking. Keep weight off a fragile glass side panel; a panel intended as a computer window is not a shelf.
Display case
Use an intact window or add a clear panel to show figures, models, or other collectibles. A mesh-sided or open case is less protective against dust. If you add lighting, choose a removable battery-powered light or low-voltage USB light with an enclosed controller, route wires away from sharp edges, and avoid exposed mains wiring. A non-powered display is the simplest option. Do not reconnect an old desktop power supply just to run decorative lighting unless you understand the electrical risks and know the unit is functional.
Best Value

- Comes with 4x pre-installed PWM-controlled 120mm ARGB fans, ensuring adaptable airflow and vibrant lighting with daisy-chain connectivity for easy setup.
- Integrated 26-LED ARGB strip offers full spectrum color control and synchronization with motherboard software, enhancing both visibility and aesthetics.
- Supports ATX, Micro-ATX, Mini-ITX, and back-connect ATX or Micro-ATX motherboards for cleaner routing and flexible builds
- Each side panel features a tool-less mounting mechanism for easy and fast access to internal components, streamlining your build process.
- Fits high-end hardware with support for GPUs up to 420mm, CPU coolers up to 178mm, and a top radiator up to 360mm
Stacking and other ideas
Stacking multiple cases can create a taller storage unit, but merely placing one tower on another is not a safe fastening method. Mechanically secure the cases to one another and, where appropriate, anchor the stack to a suitable wall structure. A tall, narrow stack can tip, especially on carpet or where children may climb or pull on it.
A small case might instead hold cables, craft supplies, game controllers, or workshop odds and ends. Plants belong in a separate waterproof pot or tray, not directly against the case: moisture can damage finishes and cause bare steel to rust. For food or pantry items, use clean, removable containers rather than placing food directly on painted or dusty surfaces. A PC tower is not a security-rated safe, even if it has a lock or a lock-like front panel.
Turning a computer case into an aquarium is a separate, advanced project—not a routine storage conversion. A normal PC case is not watertight, and its seams, openings, structure, corrosion resistance, and electrical risks all need serious attention. A purpose-built aquarium is generally the safer, more practical choice.
Quick wins for a faster PC:
Clear out junk files and repair common Windows errorsFree Scan →Scan for outdated or missing drivers - takes under a minuteDriver Scan →When a different storage solution is better
Choose a conventional shelf or cabinet for heavy books or tools, a plastic drawer organizer for small parts and cables, a used filing cabinet for robust enclosed storage, or a purpose-built display case for dust-sensitive collectibles. A computer case can be inexpensive when the chassis and materials are already on hand, but shelves, hardware, paint, and time can outweigh the cost of a ready-made organizer. Measure and price the actual project rather than assuming it will be cheaper.
The most useful conversion starts with an unwanted, structurally sound tower and a specific light-duty purpose. Remove and deal with the electronics responsibly, support shelves properly, smooth exposed edges, and stabilize the finished unit. If the case needs extensive repair or the job calls for strength, security, or moisture protection, use storage designed for that purpose.
Quick Recap
Product prices and availability are accurate as of the date/time indicated and are subject to change. Any price and availability information displayed on Amazon at the time of purchase will apply.


Leave a Reply