Quick wins for a faster PC:
Scan for outdated or missing drivers - takes under a minuteDriver Scan →Repair Windows errors before they cause bigger problemsFix Now →Some links on this page are affiliate links: if you buy through them we may earn a commission, at no extra cost to you.
Replacing a loose or noisy 1/4-inch instrument output jack is usually a manageable soldering repair—provided you first confirm the jack is the problem and buy a mechanically compatible replacement. This guide covers wired guitar and bass jacks, including passive TS wiring and active-instrument TRS battery switching. It does not treat amplifier, mains-powered, or every headphone connector as interchangeable with a guitar jack.
What “jack connector” means
A jack or socket is the female receptacle; a plug is the connector inserted into it. A guitar’s so-called input jack is technically its output jack: the instrument sends signal through it to an amplifier or interface.
The procedure below is for a wired 1/4-inch audio jack. A 3.5-mm headphone socket, DC power jack, XLR socket, speaker connector, PCB-mounted jack, or amplifier jack may use different contacts, mounting, and safety procedures.
Confirm the jack is actually faulty
Do these checks before opening the instrument:
- Try a second known-good instrument cable.
- Try another amplifier or audio-interface input.
- Gently move the plug. Crackling, signal loss, or sound that returns in one position points to a jack, cable, or solder fault.
- Check whether the plug fits loosely, falls out, or causes the jack to rotate in the body.
- Inspect for a visibly cracked solder joint or broken wire.
- If the instrument is active, fit a fresh battery before assuming the jack has failed.
A cable or amplifier can mimic a bad jack; repair guidance from Guitar.com recommends checking both first. Resoldering may be enough when the jack is mechanically sound and only a joint is cracked. Replace the jack when its contact spring is weak, body or threaded bushing is damaged, contacts are corroded, or the plug remains loose after resoldering.
#1 Best Overall
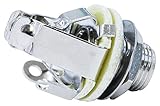
- 2 Pack Pure Tone PTT1 Mono Full-contact Output Jacks
- US Spec - Requires a 3/8 inch mounting hole
- 2 concave ground contacts and 2 concave hot leads
- Increased Voltage Handling Capacity
- Cleaner, Stronger, Clearer Signal
Choose a compatible replacement
Electrical configuration
| Type | Typical use | Important caution |
|---|---|---|
| TS (mono, two conductors) | Most passive electric guitars and basses | Tip carries signal; sleeve carries ground |
| TRS (three conductors) | Active battery switching, stereo pickup/microphone systems, or switching circuits | The ring is not automatically a second audio channel |
| Switching jack | Circuits with normally open/closed contacts | Map every contact before moving wires |
| PCB-mounted jack | Factory circuit boards | Not a simple two-wire substitute; pads and anchor pins can be damaged |
TS and TRS describe contact count, not the whole circuit. In a typical active instrument, the ring switches the battery negative connection when a plug is inserted. In a stereo acoustic system it may carry a second signal. Verify the manufacturer’s diagram rather than assuming every three-lug jack is wired alike. See the basic arrangements in Seymour Duncan’s wiring diagrams and its active-instrument stereo jack example.
Mechanical fit
Match the original jack’s diameter, thread pitch, shaft length, nut and washer, mounting method, hole depth, body thickness, jack-plate or recess, and solder-lug clearance. A common Switchcraft-style guitar jack uses a 3/8-inch (9.53-mm) hole and 3/8 × 32 thread, but that is not universal; compare the manufacturer’s dimensions (example specification). Switchcraft lists open-frame, enclosed, right-angle, PCB, and two- or three-conductor versions in different sizes (catalog).
Open-frame jacks are easy to inspect and solder. Enclosed types protect contacts but may not fit a shallow cavity. Long-shaft, recessed, locking, and plastic versions require their own clearance and hardware. Do not enlarge the instrument’s hole merely to accommodate a mismatched part.
PC Slower Than It Used to Be?
A free scan shows the junk files, broken settings and background clutter dragging Windows down - then fixes them in one click.Free scan · Windows 10 & 11Crashes, No Sound, or Screen Glitches?
Random freezes, missing sound and display glitches usually trace back to one bad driver. Find and replace yours safely.Free scan · under a minuteRank #2

- Package Contents: 2 high-quality input jacks for replacement and assembly of all electric guitars and basses
- Premium Materials: This guitar jack is crafted from high-quality brass to ensure excellent conductivity and long-lasting durability, providing excellent signal transmission
- Dual Grounding: This electric guitar part uses a double-tension grounding system to ensure a stable connection, minimize noise, and ensure a pure audio signal
- More Stable Connection: The mono guitar output jack uses 4 contacts, creating a larger contact area, thereby enhancing stability and signal integrity
- Versatile Use: This guitar output jack is ideal for electric guitars, basses, and other instruments requiring a 1/4-inch mono connection
Tools, materials, and safety
- Correct replacement jack
- Soldering iron with clean, tinned tip and a stable stand
- Electronic solder, desoldering pump or wick
- Small screwdrivers, nut driver or socket, needle-nose pliers and cutters
- Wire stripper, masking tape, marker, and phone camera
- Heat-shrink tubing or electrical insulation
- Digital multimeter with continuity mode
- Known-good cable and amplifier/interface
- Optional helping hands, hemostat or clip heat sink, and contact cleaner
Unplug the instrument from amplifiers, pedals, interfaces, chargers, and power supplies; remove an active-instrument battery. Ventilate the work area, use an iron stand, and keep the hot tip away from finish, plastic, cloth, and insulation. A tube or powered amplifier can retain hazardous voltage after unplugging. Its jack replacement is not this procedure; use a qualified technician unless you are trained for that equipment (example of the additional disassembly involved).
Identify tip, ring, and sleeve
Terminal positions vary between jack models, so do not copy a lug’s physical location or trust wire colour. Tip touches the plug’s pointed contact, ring touches the middle band, and sleeve touches the plug’s long outer body.
- Disconnect the jack from the instrument.
- Set the multimeter to audible continuity.
- Insert the appropriate plug.
- Touch one probe to the plug tip and the other to each jack lug. The lug that beeps is tip.
- Touch a probe to the plug sleeve to find sleeve. On a TRS plug, use the ring contact to find ring.
Testing while the jack remains wired can give false readings through pots, shields, or other circuit paths.
Rank #3

- PREMIUM DESIGN: 1/4 inch mono output jack socket featuring brass multi-contact construction for superior conductivity and durability
- DUAL GROUNDING: Features dual tension grounds that ensure stable connection and minimize unwanted noise interference
- SIGNAL QUALITY: Equipped with dual positive tips that optimize signal tone transmission for clearer sound output
- VERSATILE USE: Perfect for electric guitars, bass guitars, and other musical instruments requiring 1/4 inch mono connections
- PACKAGE CONTENTS: Set of 2 high-quality input jack sockets with mounting hardware for easy installation
Standard wiring diagrams
Passive mono guitar or bass
Hot / signal       → Tip
Ground / shield    → Sleeve
Ring               → Unused (insulated)
Ground may be a separate wire or braided shield connected to a common ground point such as a potentiometer case. Black is often ground, but colours are not standardized.
Recommended Free Tools
Typical active instrument
Instrument signal  → Tip
Circuit ground     → Sleeve
Battery switching  → Ring
This is a common arrangement, not a universal diagram. Confirm the exact battery circuit and switching contacts before soldering. Never permanently tie the ring to ground unless the instrument’s circuit specifically requires it.
Step-by-step replacement
- Disconnect everything. Unplug all equipment and remove the battery from active instruments.
- Compare parts. Check terminal count and switching contacts, thread, shaft length, hole diameter, nut, washer, and cavity clearance. Stop if the replacement configuration differs until you map the circuit.
- Gain access. Remove the control plate, cavity cover, pickguard, jack cup, or side jack plate as applicable. Protect the finish with tape or cloth and keep hardware organized.
- Prevent rotation. Hold the jack body while loosening the external nut. Spinning the jack twists and can break its wires.
- Photograph and label. Take several close photographs and a cavity overview. Mark wires as hot, ground, ring/battery, or switch contact; sketch the connections.
- Desolder. Heat one joint only until solder melts, then use pump or wick and gently lift the wire. Do not pull against solid solder or overheat plastic, insulation, circuit boards, or finish. Guitar.com’s repair guidance recommends this controlled approach.
- Prepare wires. Trim oxidized ends, strip only the needed length, twist strands, and pre-tin them. Slide heat-shrink over a wire before soldering if insulation is needed. Tinning and short heating time help avoid melting jack plastic (Adafruit’s TRS instructions).
- Solder by function. Attach hot to the identified tip lug, ground to sleeve, and—only when required by the circuit—battery or switching lead to ring. Heat lug and wire together, add enough solder for a smooth mechanical joint, then hold still while cooling.
- Inspect. Look for dull or cracked solder, stray shield strands, bridges between terminals, melted insulation, and lugs carrying mechanical strain. Perform a gentle tug test after cooling.
- Reinstall. Orient the jack as before, replace washer and nut in the original order, hold the body, and tighten firmly—not excessively. Over-tightening can damage finish, plate, threads, or wiring.
- Test before closing. Insert a cable and check signal, pickup selections, controls, plug movement, hum, cable retention, and active battery switching. Remove the plug from an active instrument and verify the battery disconnects.
- Reassemble and retest. Route wires away from sharp edges and moving controls, avoid pinching them, replace covers or plates, and perform one final cable test.
Test and troubleshoot by symptom
No sound
- Confirm a known-good cable and amplifier.
- Verify hot is on tip and ground on sleeve.
- Check every joint for mechanical strength and a tip-to-sleeve short.
- Ensure the volume-control output still reaches the jack.
- Fit a charged battery if active and confirm the ring circuit is not incorrectly grounded.
Loud hum
Look for a disconnected ground or braided shield, reversed or shorted conductors, shield strands touching tip, or a separate grounding fault elsewhere in the instrument.
Rank #4
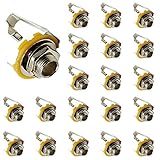
- Total Size: 29 x 19mm/1.14 x 0.75 inch(H*D); Material: Metal
- Type: 6.35mm / 1/4" Heavy Duty Mono Chassis Socket Female Jack For Termination Of Guitar Accessories Parts.
- With compact contact, high sensitivity, double insurance, anti-noisy specially.
- It is 1/4" 6.35mm long mono jack socket,comes with washer and nut for installation,ready to use.
- This jack is fit for all electric guitar and bass guitar replacement and building.
Sound only with the plug halfway inserted
The signal may be on ring or sleeve, or the jack type may not match the plug. Re-identify contacts with the multimeter.
Battery drains with the cable removed
The battery-switch lead is likely on the wrong contact, or the jack lacks the required switching arrangement. Check ring continuity with the plug inserted and removed.
Jack still spins
Inspect the nut, washer, anti-rotation feature, jack plate, and body opening. Hold the jack body while tightening; replace damaged hardware rather than repeatedly forcing it.
Best Value

- Premium Material: Crafted from durable steel and copper alloy with a sleek chrome finish, designed for long-lasting performance.
- Easy Installation: Includes matching screws for quick and hassle-free mounting on your guitar.
- Enhances Appearance: The glossy chrome surface adds a modern and stylish touch to your instrument.
- Universal Compatibility: Compatible with Fender Stratocaster and similar electric guitars and basses featuring a standard 6.35mm output jack.
- Versatile Application: Perfect as a replacement part for both electric and acoustic guitars, enhancing sound quality and reliability.
Replacement does not fit
Compare hole diameter, thread, shaft length, body depth, and terminal clearance. A shallow cavity may require a short-shaft or different body style. Do not drill until dimensions and the modification are intentional.
Wire is too short
Do not stretch it. Add an insulated extension with heat-shrink and secure the wire so cable insertion cannot pull on the new joint.
When a different solution is better
A PCB-mounted jack may have anchor pins, switched contacts, and delicate plated-through holes; lifted pads are often a technician job. Complex active preamps, stereo acoustic systems, fragile finishes, and inaccessible jacks also justify professional service.
If a Telecaster-style jack repeatedly loosens, a retrofit plate can improve mechanical retention, but compatible body dimensions and new mounting holes are required. The Allparts plate is specified for a 7/8-inch opening and requires drilling; it does not include the jack (product details).
For a 3.5-mm TRS headphone socket, left and right commonly occupy tip and ring with ground on sleeve; TRRS adds another contact and standards vary. Use the device-specific diagram rather than the guitar wiring above (TRS reference).
Final decision checklist
- Was another cable and amplifier tested?
- Does the replacement match TS/TRS function and all mounting dimensions?
- Were terminals identified electrically rather than by position or colour?
- Are solder joints smooth, insulated, and strain-free?
- Does the instrument pass signal, movement, hum, and control tests before reassembly?
- Does an active circuit disconnect its battery when the plug is removed?
The Bottom Line
For a conventional passive guitar or bass, the repair is usually two connections—hot to tip and ground to sleeve—but success depends on diagnosis, terminal identification, mechanical fit, and testing. Active, stereo, PCB-mounted, and powered equipment require their own circuit information and may be safer in a technician’s hands.
Quick Recap
Product prices and availability are accurate as of the date/time indicated and are subject to change. Any price and availability information displayed on Amazon at the time of purchase will apply.
Free tools Windows power users keep installed
One-click scans. No signup required.


Leave a Reply