Some links on this page are affiliate links: if you buy through them we may earn a commission, at no extra cost to you.
Rayforge is a free, open-source desktop application for designing, preparing, previewing and sending jobs to laser cutters and engravers. It brings drawing and CAD tools, toolpath generation, simulation and machine control into one workflow. Whether it can run your machine depends chiefly on its controller and connection—not just its brand. GRBL is its clearest compatibility case; Marlin and Smoothieware are supported, OctoPrint can connect over HTTP, and Ruida support is experimental.
What Rayforge is—and what it is not
Rayforge is standalone software, not a laser cutter, hardware brand or merely a G-code sender. Its intended workflow runs from design through toolpath preparation and preview to a connected machine or an exported G-code file. The project is MIT-licensed and offers builds for Linux, macOS and Windows. The core software is free; hardware and materials are separate, and optional AI features may use a third-party OpenAI-compatible service with its own charges.
As of August 18, 2026, the latest release shown on the project’s release page was version 1.9.3, released August 14, 2026. The project describes that release as a maintenance update, including recipe post-processing changes, a raygeo upgrade, and fixes for shrink-wrap processing and 3D-preview depth testing. Release information can change, so check the current releases before installing.
Recommended Free Tools
What you can do with Rayforge
Rayforge aims to combine several steps that might otherwise require separate design, CAM and machine-control programs:
#1 Best Overall

- 【10W High-Power Laser 】Equipped with a 10000mW optical power and a 450nm blue light diode laser, this engraver delivers deep, fast engraving on wood, bamboo, acrylic, leather, dark glass, and coated / anodized metal. Not for Bare Steel. Please note: bare stainless steel or uncoated metal is not recommended unless using a marking spray or surface preparation. This ensures you get the right tool for your actual material needs.
- 【Laser Cutter 300x300mm Work Area】TTS-10 Pro offers a 300x300mm (approx. 11.8x11.8 inches) engraving area, perfect for custom coasters, jewelry, keychains, phone cases, and small signage. If your project requires larger than 12 inches, Please measure your workpiece before purchasing to avoid size mismatches.
- 【Main Board Upgrade】 Laser engraving the mainboard adopts 32-bit dual-core MCU with various functions. Faster processing speed. It can engrave online and TF card offline. You can also use the mobile app and computer WEB for engraving.
- 【Full Metal Frame & Reliable Motion System】Built with aluminum alloy + injection-molded parts, dual Y-axis motors (42 stepper), and GT2-6mm synchronous belts. We take quality control seriously – every unit is tested before shipping.
- 【Software Compatibility and TF Card Offline Work】Comes with a detailed manual, TF card (4GB), card reader, and all necessary assembly tools. Supports LightBurn & LaserGRBL with simple .lbrn or .nc file export. Prefer offline? Just save your file to the TF card, insert, and start engraving via the control board. No complex setup required. If any steps are unclear, our online wiki (wiki.twotrees3d.com) provides video tutorials and FAQs.
- Draw and edit: Create lines, circles, curves and filled shapes; use parametric sketches, geometric and dimensional constraints, alignment, transformations and measurement tools.
- Import and export: Import SVG, DXF, PDF, JPEG, PNG and BMP files; export SVG and DXF; save projects in Rayforge’s .ryp format.
- Prepare cutting and engraving: Set up contour cutting, raster engraving, cross-hatch fill, depth engraving, frame operations, multi-pass cuts, step-downs, holding tabs, overscan and kerf or path-offset compensation.
- Process images and paths: Use Floyd–Steinberg or Bayer dithering, image tracing, path smoothing, travel optimization, spot-size interpolation, and lead-in or lead-out processing.
- Preview the job: Inspect toolpaths and use an animated 3D simulator to review order, travel moves, layer sequencing, rotary motion and work-area placement.
- Manage materials: The project README describes more than 60 built-in materials, user-created libraries, recipes associated with material, thickness, machine and laser head, and material test grids.
- Use cameras and rotary setups: Documented features include USB-camera alignment, background tracing, fisheye calibration, projector alignment, print-and-cut registration, rotary engraving and fourth-axis workflows.
- Connect or export: Jog and control a connected machine, send a job, or generate G-code without directly connecting to a laser. Advanced users can also work with addons, profiles, macros, hooks, pre-flight checks, a G-code console and headless or CLI workflows.
These are documented project capabilities, not a guarantee that every feature works with every controller or machine configuration. In particular, camera alignment depends on calibration, and rotary operation depends on compatible hardware and correct firmware and axis setup. Material recipes and test grids help you find settings; they do not guarantee a result. Material formulation and color, focus, air assist, lens condition, spot size and machine calibration all matter.
Will Rayforge work with your laser?
Start with the controller and firmware. A familiar machine name or an entry in a device directory can make setup easier, but it does not prove that every model variant, firmware revision or communication method from that brand will work. Check the controller, then confirm that Rayforge supports its protocol and your intended connection.
| Controller or connection | What to expect |
|---|---|
| GRBL | The strongest general compatibility case. Rayforge documents USB/serial, network and Telnet connections for compatible devices. It says a GRBL-based device may work without a built-in profile if configured correctly. |
| Marlin | Supported through a serial driver. |
| Smoothieware | Supported, including network/Telnet workflows. |
| OctoPrint | Can serve as a network intermediary through an HTTP API connection. |
| Ruida | Experimental. Do not assume dependable or complete compatibility; the project suggests trying a generic Ruida profile. |
| Unsupported or uncertain controller | You may still be able to generate G-code for use elsewhere, but direct machine control is not established by that alone. |
Rayforge’s device directory lists examples including xTool D1 Pro, Ortur Laser Master 3, Longer Ray5, Sculpfun S30 models, Atomstack X40 Pro and A70, Creality Falcon models, NEJE Master 3 Max, TwoTrees TTS-55, OMTech K40+, Carvera Air and MKS DLC32 boards. Treat those as profiles or compatibility examples, not a blanket promise covering every product line. The project also describes its firmware support in a firmware reference.
Crashes, No Sound, or Screen Glitches?
Random freezes, missing sound and display glitches usually trace back to one bad driver. Find and replace yours safely.Free scan · under a minutePC Slower Than It Used to Be?
A free scan shows the junk files, broken settings and background clutter dragging Windows down - then fixes them in one click.Free scan · Windows 10 & 11For example, the directory lists the xTool D1 Pro; that is not evidence that every xTool model or controller is supported. Similarly, Ruida being listed does not make it a mature choice for an OMTech or other CO₂ setup. Verify the exact controller, firmware and connection path against Rayforge’s supported devices and your machine documentation.
Install Rayforge
The official installation guide lists Linux, Windows and macOS. Linux options include Snap, a Ubuntu 24.04 PPA, Flathub, Pixi for developers and installation from source; follow the current guide for the option that matches your system.
Rank #2
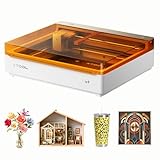
- NOTE: CMYK Inkjet module and RA3 Lite Rotary are not included in this M2 standalone, available separately as add-ons.
- Ultimate Versatility in One Machine: Innovative dual-mode architecture lets the M2 laser engraver add a CMYK Inkjet module((sold separately) to work with the laser. Transform 300+ materials—cardstock, felt, leather, wood, etc.—into masterpieces. Enjoy full-color printing (module required), precision cutting, and custom engraving with a seamless print-to-cut workflow in one setup.
- Smart Crafting with Dual-Camera: Built-in dual cameras, this M2 laser engraving machine offers a real-time preview of your workspace. Backed by ACS, it fuses this vision with motion control for a "Place & Go" experience-ensuring high accuracy while eliminating guesswork and wasted material.
- Effortless Software with Customizable Templates: Beginner-friendly xTool Studio offers hundreds of ready-to-use templates and an integrated AI image generator. Go from creative text ideas to finished personalized gifts and home decor in just minutes. No steep learning curve—just design, click, and create.
- Power Options for Every Creative Goal: Comes standard with 10W diode lasers. You can add the CMYK Inkjet module or 3W IR laser (both sold separately) to unlock full-color printing or fine engraving on metal/plastic. The M2 adapts to every project you imagine, from delicate engravings and high-speed batch cutting to full-color printing.
For the documented Linux Snap route, install the app and add your user to the serial-device group:
sudo snap install rayforge
sudo usermod -a -G dialout $USER
Log out and back in for the group change to take effect. Then enable Snap hotplug support, connect the serial interface, and—if needed—grant camera access:
Quick wins for a faster PC:
Clear out junk files and repair common Windows errorsFree Scan →Fix the driver behind crashes, sound loss and screen glitchesFind Drivers →Repair Windows errors before they cause bigger problemsFix Now →sudo snap set system experimental.hotplug=true
sudo snap connect rayforge:serial-port
sudo snap connect rayforge:cameraThe camera command is only needed for camera access. To inspect Snap permissions and connections, run:
snap connections rayforgeSet up your first machine
- Launch Rayforge and open Settings → Machines, or press Ctrl+Comma.
- Select Add Machine. Choose a built-in profile, import one, or select Device Not Listed.
- Choose the controller family and connection type: serial, network, OctoPrint, or G-code export only.
- Enter the connection details and let the setup wizard probe the device where supported.
- Check the work area, origin, axis directions, units, speeds, acceleration, laser head and any rotary or camera settings before creating the machine.
- Name and create the machine, then confirm its connection status before trying to run a job.
The documented examples for serial ports are /dev/ttyUSB0 or /dev/ttyACM0 on Linux and COM3 on Windows. A common baud rate is 115200, though some machines require 9600 or 57600. Network setups may require an IP address and a port such as 23 or 8080. These are examples, not universal values; use the machine’s own controller documentation.
The wizard can import a LightBurn .lbdev device profile, including camera calibration and laser settings. Check imported values against your actual machine: profile import does not mean every LightBurn project, setting or workflow transfers completely.
Rank #3

- [Unbeatable Power & Productivity] With a powerful 40W (40,000mW) laser, this advanced laser cutter and engraver machine slices through 18mm cherry wood as easily as butter in a single pass. Engrave at blazing speeds up to 600mm/s on a spacious 23.93" x 15.16" bed—perfect for large projects like door signs or up to 119 dog tags in one go.
- [Exclusive xTool Patented Technologies] Achieve next-level precision on your precious items with the xTool S1 laser engraver, thanks to xTool’s patented Pin-point Positioning technology. Enjoy stunning 3D engravings on curved surfaces like spoons and plates. Effortlessly tackle projects up to 118 inches (3000mm) with AutoPassthrough Technology.
- [Your First Laser Engraver, Easier Than Ever] Ready to use right out of the box. Auto-focus and powerful, intuitive software—xTool Creative Space (XCS)—make it simple for anyone to start creating. We’ve pre-tested over 400 materials with optimal parameter settings; just preview, click, and engrave. No design skills? No problem—input a few words, and the AI-powered software will create a unique design for you. Plus, there are over 1,000 step-by-step project tutorials to guide you.
- [Class 1 Safety, Safe with Kids and Pets Around] The protective cover filters 99% of laser light, safeguarding your eyes without the need for goggles. The enclosed design blocks smoke and noise, ensuring a comfortable and secure workspace. Built-in 5 flame sensors automatically halt operation if a flame is detected. With an emergency stop button and a lid-open stop feature, you’re fully protected for peace of mind.
- [Premium Quality, Built to Last] This laser engraving machine has a 3mm aerospace-grade aluminum frame for exceptional stability and durability. xTool prioritizes quality with over 71,830 hours of rigorous testing, including laser tube aging, power stability, and extreme conditions. Every S1 unit undergoes 7 strict pre-shipment inspections and 100% scenario testing to ensure flawless performance.
Before you send a real job
A correct-looking design is not enough. Use this first-job check before cutting or engraving:
The Tool Desk
Outbyte PC Repair FREERepair Windows errors before they cause bigger problemsFix Now →Outbyte Driver Updater FREEFix the driver behind crashes, sound loss and screen glitchesFind Drivers →- Confirm the controller, firmware and communication method.
- Verify the configured work-area dimensions, origin, axis directions and units.
- Test jogging cautiously and confirm that movement matches the on-screen direction.
- Preview the toolpath and check its layer order, travel moves and placement within the work area.
- Use the frame function or a low-power outline where the machine supports it.
- Run a material test grid on scrap to find suitable settings; do not treat a library recipe as a guarantee.
- Use a dry run with the laser disabled where possible, then check placement again before enabling it.
- Use an appropriate enclosure, ventilation and eye protection, and keep fire precautions in place. Stay with the machine for the entire job.
A simulator cannot reproduce the material, focus, actual laser output, air-assist performance, smoke, backlash, belt tension, lens condition, kerf, heat damage or fire risk. Preview and simulation help catch workflow and placement errors; they do not replace calibration or safe operation.
Independent reader supportYour contribution helps us test, update, and keep practical guides available for everyone.Common connection and setup problems
Rayforge does not connect
First identify the controller rather than relying on the machine’s brand. Then check that the cable supports data, the operating system can see the serial device, and another program is not already connected. On Linux, check group membership and, for Snap, the serial-port connection. Verify the baud rate, and confirm whether the machine expects serial or network communication. A proprietary controller or modified firmware may not behave like a standard GRBL machine.
The machine connects, but movement or job placement is wrong
Review the work-area dimensions, origin, X/Y direction and reversal settings, units, work-coordinate offsets and any rotary configuration. Recheck values imported from a profile. If camera alignment is involved, confirm that the camera has not moved and that the calibration matches the lens, bed position and workpiece height. Do not run a full-power job until a low-risk framing or dry-run check confirms placement.
The preview looks right, but the result is poor
Recheck focus, material, power and speed, air assist, lens condition and mechanical calibration. Test on scrap. Built-in recipes and test grids are starting points, not production guarantees.
Free tools Windows power users keep installed
One-click scans. No signup required.
Rank #4

- 【Custom Gifts & Crafts】 Create personalized cups, bags, wallets, signs, wood crafts, gifts, and more with this laser engraving machine. The 10W 10000mW laser delivers the power needed for detailed engraving across wood, coated metal, glass, leather, stone, and other compatible materials.
- 【Home DIY & Workshop Projects】 Designed for beginners and makers, this laser engraving machine features a 360° fully enclosed design that helps contain fumes, dust, and operating noise. Its five-part modular assembly simplifies setup without complicated belt adjustments, saving approximately 30–40 minutes.
- 【Detailed Designs & Fine Patterns】 For names, logos, text, artwork, and intricate patterns, this laser engraving machine uses advanced point-compression technology to achieve a fine 0.01mm square focus, producing sharp lines and crisp details.
- 【Faster Batch Engraving】 For personalized products and multiple custom pieces, the laser engraving machine reaches speeds of up to 20,000mm/min to help reduce engraving time and improve productivity. The 300×300mm work area also accommodates larger designs or multiple smaller items.
- 【Safer & More Flexible Operation】 For home, DIY, and workshop use, this laser engraving machine combines lid-open auto-stop, flame detection, emergency stop, safety lock, and 15° tilt-stop protection. It supports LightBurn, LaserGRBL, and CutLabX, with Wi-Fi, USB, APP, and TF-card offline control, plus optional Air Assist and Rotary Roller compatibility.
You want to change controller settings
Rayforge can read and write GRBL settings through its interface, but incorrect values can make a machine behave badly or become inoperable. Record the original settings before changing anything, and use values appropriate to your controller and machine.
Rayforge vs. LightBurn vs. LaserGRBL
| Choose | It may suit you if… | Main qualification |
|---|---|---|
| Rayforge | You want free, open-source software with integrated design, CAM, simulation and machine control; your controller is supported; and you value extensibility, Linux support or automation. | Compatibility and setup depend on controller and configuration. It is not a universal replacement for LightBurn, and some support—especially Ruida—is experimental. |
| LightBurn | You prefer a mature commercial product with extensive documentation, established adoption and commercial support. | Check the edition, platform and controller support for your setup. Rayforge’s ability to import an .lbdev profile does not establish complete workflow equivalence. |
| LaserGRBL | You have a compatible GRBL laser and want a focused, lightweight laser-control workflow. | It is centered on GRBL rather than Rayforge’s wider design and controller ambitions; its full feature set requires GRBL laser-power modulation through the G-code S command. |
Rayforge’s advantages are openness, cross-platform builds and its breadth of documented workflow tools. LightBurn’s appeal is its established commercial ecosystem. LaserGRBL is a focused choice for compatible GRBL users who do not need broader CAD, simulation or controller support. There is no reliable basis here to claim that one is faster, more accurate or more reliable than another; choose based on your controller, required workflow and support needs. See the projects’ Rayforge README, LightBurn documentation and LaserGRBL download page.
Who should use Rayforge?
Rayforge is a promising fit if your machine uses GRBL or another documented controller, you want an open-source workflow, and you are comfortable checking machine settings and connection details. It is especially relevant if you need more than a basic sender—for example, integrated drawing and toolpaths, previews, rotary or camera workflows, custom profiles or automation.
It may be a poor fit if your machine relies on an unsupported proprietary protocol, you need a dependable production system backed by vendor support, or you want a setup that works with minimal controller troubleshooting. Owners of Ruida machines should treat the support as experimental. Owners of fiber lasers or other specialized systems should verify support for their exact controller and workflow rather than infer it from the general laser focus of the software.
What’s actually slowing this PC down?
Pick the symptom - the matching free tool is one click away.
Quick Recap
Product prices and availability are accurate as of the date/time indicated and are subject to change. Any price and availability information displayed on Amazon at the time of purchase will apply.


Leave a Reply