The Tool Desk
Outbyte Driver Updater FREEScan for outdated or missing drivers - takes under a minuteDriver Scan →Outbyte PC Repair FREERepair Windows errors before they cause bigger problemsFix Now →Some links on this page are affiliate links: if you buy through them we may earn a commission, at no extra cost to you.
Yes—a compatible 3D printer can be converted into a diode-laser engraver, with limited cutting ability. But the printer provides only the motion system: a safe, usable conversion also needs compatible controls, beam containment, ventilation, interlocks and fire precautions. A small diode laser is not a substitute for a CO₂ cutter, and the bare printer is not safe to operate as a laser machine.
What a 3D-printer laser conversion can—and cannot—do
The conversion replaces the print head with a diode-laser module and uses the printer’s X/Y motion to move it across a workpiece. Software sends motion and laser-power commands through either the printer’s firmware or a separate laser controller. This can be practical for engraving and occasional work on thin materials, but compatibility and safe operation depend on the exact printer, electronics, module and enclosure.
“Laser cutter” can overstate what a modest diode system does. Optical output power—not the module’s electrical input rating—is the useful comparison. The ranges below are broad capability categories, not guaranteed results; material, focus, coatings, airflow, speed and passes all matter.
Do these 3 things before closing this tab:
1Scan for outdated or missing drivers - takes under a minute2Repair Windows errors before they cause bigger problems3Fix the driver behind crashes, sound loss and screen glitches| Approximate optical output | Typical role |
|---|---|
| 1–2 W | Marking and engraving; cutting is generally limited to very thin or favorable materials. |
| About 5 W | Engraving wood, paper, cardboard, leather and some opaque surfaces; limited cutting of thin stock. |
| About 10 W | More practical cutting of thin plywood and craft materials, often with air assist and multiple passes. |
| 20 W or more | Faster or deeper diode cutting is possible, with greater fire and reflection hazards and more demanding containment. |
These diode categories do not make a machine equivalent to a CO₂ laser, which is generally the more suitable technology for substantial acrylic or sheet-material cutting. Fiber lasers are intended chiefly for metal marking and engraving, not as universal wood or acrylic cutters.
#1 Best Overall

- 【10W High-Power Laser 】Equipped with a 10000mW optical power and a 450nm blue light diode laser, this engraver delivers deep, fast engraving on wood, bamboo, acrylic, leather, dark glass, and coated / anodized metal. Not for Bare Steel. Please note: bare stainless steel or uncoated metal is not recommended unless using a marking spray or surface preparation. This ensures you get the right tool for your actual material needs.
- 【Laser Cutter 300x300mm Work Area】TTS-10 Pro offers a 300x300mm (approx. 11.8x11.8 inches) engraving area, perfect for custom coasters, jewelry, keychains, phone cases, and small signage. If your project requires larger than 12 inches, Please measure your workpiece before purchasing to avoid size mismatches.
- 【Main Board Upgrade】 Laser engraving the mainboard adopts 32-bit dual-core MCU with various functions. Faster processing speed. It can engrave online and TF card offline. You can also use the mobile app and computer WEB for engraving.
- 【Full Metal Frame & Reliable Motion System】Built with aluminum alloy + injection-molded parts, dual Y-axis motors (42 stepper), and GT2-6mm synchronous belts. We take quality control seriously – every unit is tested before shipping.
- 【Software Compatibility and TF Card Offline Work】Comes with a detailed manual, TF card (4GB), card reader, and all necessary assembly tools. Supports LightBurn & LaserGRBL with simple .lbrn or .nc file export. Prefer offline? Just save your file to the TF card, insert, and start engraving via the control board. No complex setup required. If any steps are unclear, our online wiki (wiki.twotrees3d.com) provides video tutorials and FAQs.
Check whether your printer is a suitable donor
Do not assume compatibility from a family name such as “Ender-3.” Creality lists its 5 W CV laser module for the Ender-3 S1 and Ender-3 S1 Pro; that does not establish compatibility with every Ender-3 revision or another printer model. Check the exact model, board revision, firmware and module documentation before buying or wiring anything. Creality’s CV-Laser Module information
A promising donor has rigid, repeatable X/Y motion, a reasonably flat work surface, sound belts and wheels, usable homing or limit switches, adequate work clearance and a documented way to control the laser. A machine with frame play, erratic motion, undocumented electronics or an enclosure not designed for laser use is a poor starting point. Mechanical fit does not establish electrical compatibility or laser safety.
- Record the printer model and revision, control-board version, firmware and supply voltage.
- Verify the module’s mounting pattern, supply voltage, polarity, current requirements and cooling needs.
- Confirm whether the controller provides the required PWM or TTL control signal, its voltage level, grounding and enable behavior.
- Confirm how homing, limit switches, emergency stop and interlocks will work in laser mode.
- Ensure the laser workflow cannot accidentally turn on the hotend or heated bed.
Never infer wiring from connector shape or wire color. A fan port or heater output is not automatically a suitable laser connection; follow the module and controller documentation. Some builds reuse the printer’s motion system but replace its electronics with a GRBL-compatible controller. That can give a more conventional laser-control path, but adds wiring and configuration work.
Plan the safety system before installing the laser
An exposed high-power diode installation should be treated as a Class 4 laser system unless the complete system has been appropriately enclosed and safeguarded. The FDA describes Class 4 lasers as presenting immediate eye and skin hazards from direct or reflected exposure, as well as potential fire hazards. A beam can remain dangerous at a distance, and the eye can focus it onto a small retinal spot. FDA information on laser products and hazard classes and FDA laser safety FAQs
A homemade box should not be called Class 1 unless the complete machine has been evaluated and classified to the applicable requirements. Treat the enclosure as a safety system, not a cosmetic cover. Before powering the laser, plan for:
- Beam containment: Enclose the direct beam and hazardous scattered or reflected light. Avoid gaps, including around doors and cable pass-throughs.
- Rated viewing window: If you need a window, use material specified for the laser’s wavelength and appropriate optical density. Clear plastic or an unspecified colored acrylic sheet is not a reliable safeguard.
- Interlock: Opening the lid or door should stop emission. Prefer a hardware-based interlock rather than relying on a software macro.
- Emergency stop and controlled enable: Provide a physical way to stop laser emission, and consider a key-controlled enable to prevent casual activation. A software pause is not a physical emergency stop.
- Exhaust: Vent smoke outdoors where lawful and practical, or use a properly designed filtration system. A fan that simply recirculates fumes into the room is not adequate respiratory protection.
- Fire response and supervision: Keep suitable fire equipment close, remove combustible clutter, and remain present for the entire job. Do not leave a running laser unattended.
- Eye protection: Eyewear must be rated for the actual wavelength and provide suitable optical density. Lens color or a generic “laser safety glasses” label is not enough. Eyewear does not replace containment.
Blue diode modules commonly operate around 450–460 nm; Creality lists 455 ± 5 nm for its documented modules. Confirm the exact module’s specification before selecting any protective equipment. Creality module specifications xTool also recommends enclosure, ventilation, fire equipment and continuous supervision for laser work. xTool safety and cleanup guidance
Rank #2
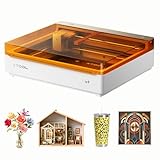
- NOTE: CMYK Inkjet module and RA3 Lite Rotary are not included in this M2 standalone, available separately as add-ons.
- Ultimate Versatility in One Machine: Innovative dual-mode architecture lets the M2 laser engraver add a CMYK Inkjet module((sold separately) to work with the laser. Transform 300+ materials—cardstock, felt, leather, wood, etc.—into masterpieces. Enjoy full-color printing (module required), precision cutting, and custom engraving with a seamless print-to-cut workflow in one setup.
- Smart Crafting with Dual-Camera: Built-in dual cameras, this M2 laser engraving machine offers a real-time preview of your workspace. Backed by ACS, it fuses this vision with motion control for a "Place & Go" experience-ensuring high accuracy while eliminating guesswork and wasted material.
- Effortless Software with Customizable Templates: Beginner-friendly xTool Studio offers hundreds of ready-to-use templates and an integrated AI image generator. Go from creative text ideas to finished personalized gifts and home decor in just minutes. No steep learning curve—just design, click, and create.
- Power Options for Every Creative Goal: Comes standard with 10W diode lasers. You can add the CMYK Inkjet module or 3W IR laser (both sold separately) to unlock full-color printing or fine engraving on metal/plastic. The M2 adapts to every project you imagine, from delicate engravings and high-speed batch cutting to full-color printing.
An ordinary 3D-printer tent or enclosure may contain heat or dust but is not necessarily designed to block a laser beam, resist fire or exhaust fumes. Likewise, an accessory’s safety features do not automatically make a user-built machine safe as a whole. A full enclosure, controlled exhaust, functioning interlock and predictable emergency shutdown must work together.
Choose the conversion route and parts
Manufacturer-supported module
A module intended for a particular printer can reduce uncertainty around its mount, voltage and operating procedure. Creality’s CV module is one example for the Ender-3 S1 and S1 Pro. Check the manufacturer’s current documentation for the precise model and revision. A supported module still does not settle the safety of a custom enclosure, room ventilation or work practices.
Third-party diode module
This route may work with other printers, but the builder must establish mechanical, electrical and firmware compatibility. Verify the laser’s driver, cooling, voltage, control interface, enable line and shutdown behavior. Do not proceed if the module and printer documentation do not let you establish these details.
Replacement laser controller
Replacing the printer board with a controller designed for laser motion can improve software compatibility, but means configuring motion, power control, homing, limit switches, interlocks and emergency-stop behavior. LightBurn documents support for several G-code controller families, including GRBL, Smoothieware, Marlin, FluidNC and grblHAL; actual compatibility depends on the specific controller and firmware. LightBurn controller identification guide
A complete build may require a laser module and rigid mount, suitable driver and control wiring, a focus adjustment, a nonreflective work surface or sacrificial bed, and an enclosure with suitable window and door interlock. Air assist, extraction ducting and fan, a physical stop, controlled enable, fire equipment and wavelength-appropriate eyewear are also part of the practical safety budget—not optional extras to add after the first test.
Convert and configure the machine in a controlled sequence
- Identify the exact machine and interface. Record its model, revision, board, firmware, voltage, control outputs and mounting dimensions. Use the manufacturer-supported path if available; do not proceed on assumptions.
- Remove or disable printing components. Remove filament and any print-head parts that obstruct the laser or beam path. Ensure the laser job configuration cannot activate the hotend or bed heaters.
- Install a rigid, adjustable mount. Align the module squarely to the work surface and motion path, protect it from collisions, and allow focusing at the workpiece height. Do not rely on a nearby 3D-printed bracket as a fire barrier.
- Fit the work surface. Use a suitable nonreflective surface and a replaceable sacrificial board or appropriate bed. Avoid exposed reflective surfaces in the beam path.
- Add air assist and extraction. Air assist can clear smoke and reduce charring, but does not eliminate fire risk. Route exhaust outdoors or through a properly designed filtration setup.
- Complete the enclosure and safety controls. Install beam-blocking walls, a wavelength-appropriate window if needed, interlock, controlled enable and emergency stop before powering the laser.
- Wire only from verified documentation. Confirm supply, polarity, ground, PWM/TTL signal, enable and shutdown behavior. Do not defeat an interlock to make a machine operate.
- Configure the control path. Use the manufacturer’s laser procedure where documented, or configure a compatible laser controller. Confirm that heaters are inactive and that homing, power modulation and shutdown behave predictably.
- Set up the job in compatible software. Import artwork, set the actual work area and origin, establish axis direction and any head offset, then focus and frame the job with the laser disabled or at an appropriate low-power setting.
There is no universal printer menu path or firmware command for enabling a laser: labels and behavior vary by model and software version. Follow the exact machine and controller instructions rather than applying settings meant for another printer.
Rank #3

- [Unbeatable Power & Productivity] With a powerful 40W (40,000mW) laser, this advanced laser cutter and engraver machine slices through 18mm cherry wood as easily as butter in a single pass. Engrave at blazing speeds up to 600mm/s on a spacious 23.93" x 15.16" bed—perfect for large projects like door signs or up to 119 dog tags in one go.
- [Exclusive xTool Patented Technologies] Achieve next-level precision on your precious items with the xTool S1 laser engraver, thanks to xTool’s patented Pin-point Positioning technology. Enjoy stunning 3D engravings on curved surfaces like spoons and plates. Effortlessly tackle projects up to 118 inches (3000mm) with AutoPassthrough Technology.
- [Your First Laser Engraver, Easier Than Ever] Ready to use right out of the box. Auto-focus and powerful, intuitive software—xTool Creative Space (XCS)—make it simple for anyone to start creating. We’ve pre-tested over 400 materials with optimal parameter settings; just preview, click, and engrave. No design skills? No problem—input a few words, and the AI-powered software will create a unique design for you. Plus, there are over 1,000 step-by-step project tutorials to guide you.
- [Class 1 Safety, Safe with Kids and Pets Around] The protective cover filters 99% of laser light, safeguarding your eyes without the need for goggles. The enclosed design blocks smoke and noise, ensuring a comfortable and secure workspace. Built-in 5 flame sensors automatically halt operation if a flame is detected. With an emergency stop button and a lid-open stop feature, you’re fully protected for peace of mind.
- [Premium Quality, Built to Last] This laser engraving machine has a 3mm aerospace-grade aluminum frame for exceptional stability and durability. xTool prioritizes quality with over 71,830 hours of rigorous testing, including laser tube aging, power stability, and extreme conditions. Every S1 unit undergoes 7 strict pre-shipment inspections and 100% scenario testing to ensure flawless performance.
Commission the conversion with a small test
Before the first powered test, close the enclosure and verify that opening it interrupts emission. Test the physical stop and controlled enable. Make sure extraction is running, the workpiece is known and suitable, the beam is aimed at the work surface, and reflective tools or debris are out of the beam path. Keep fire equipment within reach.
- Check alignment without looking into the beam. Use the lowest practical power and shortest possible pulse according to the module instructions. Never align an exposed beam by eye.
- Focus on scrap material. Run a small speed-and-power test grid on known material. Focus and material response vary; use the result to find a workable setting rather than assuming a universal preset.
- Frame the job. Confirm the origin, axes and boundaries with the laser disabled or in a verified low-power framing mode. If framing visibly marks or burns the material, stop and correct the mode or power before continuing.
- Try a conservative cut test. Start with a small piece of known, untreated, thin material. Observe continuously, begin with one pass, and change settings gradually. Stop at once if it flames, smolders excessively or produces abnormal smoke.
Vector lines can be used for scoring or cutting, while filled shapes are generally raster engraved. A cut advertised for one material and setup does not predict the result on another; material composition, focus, airflow, speed and pass count change performance.
Independent reader supportYour contribution helps us test, update, and keep practical guides available for everyone.Use materials whose composition you can identify
Good starting candidates include untreated wood, paper, cardboard, some natural leather, slate and certain opaque coated surfaces. Anodized aluminum may be marked depending on the laser and coating, but a blue diode should not be treated as a general-purpose metal cutter.
Identify the base material, coatings, adhesives and laminates before processing. Consult supplier safety information, and test only a small sample in the enclosed, exhausted machine while supervising it. xTool warns that laser processing can ignite materials and create smoke and fumes. xTool material and laser safety guide
- Avoid PVC and vinyl. Laser processing can release corrosive and hazardous gases.
- Do not process unknown plastics, coatings or foams. Their fumes and fire behavior may be unsafe or unpredictable.
- Use caution with ABS and polycarbonate. They may melt or process poorly with blue diode systems, and are not a dependable route to clean cuts.
- Avoid fiberglass and carbon-fiber composites. Their materials and processing byproducts present additional hazards.
- Check acrylic by color and wavelength. Some transparent or blue acrylic can transmit or reflect blue diode light rather than absorb it effectively. The result may be poor cutting and an unpredictable beam path.
Troubleshoot only after shutting down unsafe behavior
The laser does not fire
Possible causes include an incorrect supply or polarity, incompatible PWM/TTL signal, inactive enable, open interlock, firmware mode or software-profile mismatch, or a faulty driver. Power down and check the documentation, voltage, control type and profile. Do not bypass the interlock to test emission.
The laser stays on at full power
This is a stop-work condition. Use the physical stop and disconnect laser power when safe. A floating PWM line, wrong signal polarity, unsuitable output, missing common ground or firmware mismatch can cause uncontrolled output. Do not resume until power modulation and shutdown are verified.
Rank #4

- 【Custom Gifts & Crafts】 Create personalized cups, bags, wallets, signs, wood crafts, gifts, and more with this laser engraving machine. The 10W 10000mW laser delivers the power needed for detailed engraving across wood, coated metal, glass, leather, stone, and other compatible materials.
- 【Home DIY & Workshop Projects】 Designed for beginners and makers, this laser engraving machine features a 360° fully enclosed design that helps contain fumes, dust, and operating noise. Its five-part modular assembly simplifies setup without complicated belt adjustments, saving approximately 30–40 minutes.
- 【Detailed Designs & Fine Patterns】 For names, logos, text, artwork, and intricate patterns, this laser engraving machine uses advanced point-compression technology to achieve a fine 0.01mm square focus, producing sharp lines and crisp details.
- 【Faster Batch Engraving】 For personalized products and multiple custom pieces, the laser engraving machine reaches speeds of up to 20,000mm/min to help reduce engraving time and improve productivity. The 300×300mm work area also accommodates larger designs or multiple smaller items.
- 【Safer & More Flexible Operation】 For home, DIY, and workshop use, this laser engraving machine combines lid-open auto-stop, flame detection, emergency stop, safety lock, and 15° tilt-stop protection. It supports LightBurn, LaserGRBL, and CutLabX, with Wi-Fi, USB, APP, and TF-card offline control, plus optional Air Assist and Rotary Roller compatibility.
Engraving or cuts are inconsistent
Check focus at the actual workpiece height, mount rigidity, bed level, belt play, material consistency, air assist, extraction and lens condition. Clean the lens only as directed by the module maker. A small test grid can reveal whether settings or material are the main variable.
Recommended Free Tools
The design is mirrored or offset
Check the origin, axis directions, actual work-area dimensions and laser-head offset from the printer’s former nozzle position. Confirm them with a small test pattern before using a larger workpiece.
Smoke builds up inside the enclosure
Stop the job. Inspect the fan direction, duct restrictions, outlet, enclosure leaks and filter condition; replace saturated filters and ensure the enclosure has controlled make-up air. A carbon filter alone is not proof that all hazardous compounds have been removed.
The workpiece catches fire
Stop laser emission immediately. Keep the enclosure closed if opening it could feed the fire with oxygen or expose you to the beam; use appropriate fire equipment and disconnect power when safe. Do not restart until the cause is understood. Continuous supervision is essential because material can ignite and fire can spread quickly. xTool guidance on supervision and fire precautions
Decide whether conversion is worth the effort
Converting can make sense if you already own a mechanically sound, specifically compatible printer, want to experiment or engrave, and can build the enclosure and exhaust system. It is less attractive if the printer remains important for printing, the board or firmware must be replaced, or you need dependable cutting rather than a project platform.
Compare the full conversion—not just the laser head—with a complete machine: include the mount, controller work, enclosure and rated window, interlock and stop, exhaust, air assist, work bed, fire equipment, eyewear, software and replacement optics. A dedicated enclosed diode machine may reduce integration work. For substantial acrylic or sheet cutting, evaluate a CO₂ system; for metal marking, a fiber system is the more relevant category. Each has its own safety and operating requirements.
If you use the printer as a learning platform and have a documented compatible module, conversion can be worthwhile. If your priority is frequent, repeatable cutting or a turnkey safety setup, a purpose-built enclosed laser is often the more sensible choice.
Quick Recap
Product prices and availability are accurate as of the date/time indicated and are subject to change. Any price and availability information displayed on Amazon at the time of purchase will apply.


Leave a Reply