Some links on this page are affiliate links: if you buy through them we may earn a commission, at no extra cost to you.
The best Christmas yard-art pattern depends on your display space, cutting skill and storage plan. For a practical 2020-style display, flat-storing white reindeer are the easiest reusable project; a sleigh scene or Gingerbread Manor makes a strong focal point; penguins, giant candy and geometric trees add humor or color; and 90-inch-plus soldiers and nutcrackers deliver maximum street visibility at the cost of material, bracing and storage.
Pattern shortlist by style, size and effort
The figures and prices below are source-date snapshots, not audited bestseller rankings. Prices and availability should be checked with the named publisher before buying. Dimensions are finished-pattern measurements where the source provides them.


| Pattern family | What it adds to a display | Published size | Practical considerations | Source-price snapshot |
|---|---|---|---|---|
| White reindeer and deer families | Traditional silhouettes that work as a pair or herd | Not stated | Simple construction; sections disassemble and store flat, making them suitable for beginners and small garages | About $15 for plans (This Old House, 2026) |
| Mrs. Snow and Child; other snow figures | Friendly, readable characters for a front walk or porch | 45-inch and 30-inch snowman patterns; Winfield also lists designs up to about 46 inches wide | Moderate silhouette cutting; easy to arrange as a family group | About $15 for plans (This Old House, 2026) |
| Santa, sleigh and reindeer scenes | A focal tableau with a strong traditional theme | Sleigh about 3 feet high; Easy-Rider Clauses pattern 54 by 73 inches | More pieces and support work than a single silhouette; a wooden sleigh can be purchased as a kit | About $100 for the wooden sleigh kit (This Old House, 2026) |
| Penguins and comic characters | Humor and movement instead of a conventional silhouette | Tangled Penguins: about 57 inches high by 17 inches wide; Caroling Penguins: about 28 by 42 inches | Best for a group scene; interior cut lines and multiple colors increase painting time | Winfield catalog listing; price not stated |
| Gingerbread Manor | A large, instantly recognizable centerpiece | 46 inches high by 47 inches wide | Broad panels are straightforward to trace, but the footprint needs a firm support and clear storage area | Plan price not stated in the cited listing |
| Giant candy, trees and geometric shapes | Colorful accents that can fill gaps between characters | Four peppermint disks about 11 inches across; candy canes about 69 inches high; Christmas Tree 72 inches high | Simple outlines suit low-complexity scenes; repeated disks and stripes make painting efficient | Giant Yard Candies listed at $11.45 in Winfield’s 2026 catalog |
| Toy soldiers, nutcrackers and life-size figures | Maximum visibility from the street | Toy soldier 90 inches; nutcracker 92 inches | Uses more plywood, needs deeper or stronger anchoring, and occupies substantial off-season storage | Winfield catalog listing; price not stated |
How to choose a pattern
For a first project or limited storage
Choose white reindeer or a simple tree, present, ornament or stocking. Reindeer that come apart store flat, while geometric outlines minimize intricate interior cuts.
For a central feature
Use the 46-by-47-inch Gingerbread Manor, a three-foot sleigh, or the 54-by-73-inch Easy-Rider Clauses. Mark the support locations on the pattern before cutting so the large surface does not become top-heavy.
#1 Best Overall
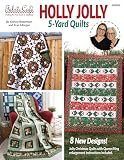
- 8 FESTIVE HOLIDAY QUILT PATTERNS – Create beautiful Christmas quilts with 8 brand-new seasonal designs including stars, Irish chain, and row quilts perfect for holiday décor, gifts, and cozy winter quilting projects.
- USES ONLY 5 ONE-YARD FABRIC CUTS – Designed with Fabric Café’s trusted 5-yard quilting method, each pattern helps simplify fabric selection while creating stunning full-size quilts with less stress and waste.
- BEGINNER FRIENDLY INSTRUCTIONS – Clear step-by-step directions, easy-to-follow construction, and detailed diagrams help confident beginners and experienced quilters complete projects with ease.
- DIRECTIONAL FABRIC FRIENDLY DESIGNS – Most patterns are designed to work beautifully with directional holiday prints, giving you more flexibility when using Christmas-themed fabric collections.
- PERFECT FOR CHRISTMAS GIFT QUILTING – Ideal for handmade gifts, festive home décor, and winter sewing projects, this quilting book helps bring joyful holiday quilts to life with less planning and more sewing.
For a playful family display
Combine the 57-by-17-inch Tangled Penguins or 28-by-42-inch Caroling Penguins with candy canes or peppermint disks. Their contrasting shapes make a scene legible without realistic human proportions.
For maximum distance visibility
The 90-inch toy soldier and 92-inch nutcracker are the largest listed choices. Plan the anchoring, transport route and storage location before committing to a full-size figure.
Rank #2

- New designs to give as gifts or keep for yourself
- Easy to follow pattern instructions for lap, twin, queen and king included
- Make it Christmas With 3-Yard Quilts has 8 festive designs
Materials and tools
ProjectPlans’ checklist specifies the following core supplies:
- Jigsaw or scroll saw, with sharp blades; wear eye protection and follow the saw manufacturer’s safety guidance.
- 1/2-inch or 3/4-inch AC/BC plywood.
- Screwdriver, medium or fine sandpaper and wood putty.
- White exterior primer.
- Acrylic or exterior glass enamel, paint brushes and a waterproof felt pen.
- Black gloss marker for outlines.
- Optional water-based varnish.
- 1/2-inch conduit and straps, dowel, steel rod or wooden stakes for support.
Exterior-grade plywood is preferable to interior sheet goods because the decoration will see damp air and ground splash. Thicker 3/4-inch stock adds weight and stiffness for tall figures; 1/2-inch stock is easier to carry for smaller cutouts.
Repeatable build procedure
- Prepare the layout. Place the full-size pattern over the plywood and trace the outside edge. Arrange parts to reduce waste, while keeping enough margin for clean cuts and supports.
- Cut the silhouette. Follow the traced line with a jigsaw or scroll saw. Keep both hands clear of the blade path, support the sheet, and use a sharp blade; Tom Silva of This Old House notes that dull tools do not produce the intended cut.
- Repair and smooth. Fill grooves and voids with wood putty. Sand the face, perimeter and every inside corner so paint cannot bridge over splinters.
- Prime both faces. Apply white exterior primer to the front, back and edges. Let it dry fully before handling; sealing both sides reduces moisture entry through the sheet.
- Transfer interior details. Replace the pattern after priming and retrace windows, clothing, facial features or other paint boundaries.
- Paint in the pattern’s sequence. Block in large color fields first, then add smaller details. Use a waterproof felt pen or black gloss marker only after the paint has cured enough to avoid smearing.
- Seal and brace. Apply water-based varnish if desired. For additional moisture protection, This Old House recommends several coats of exterior stain-poly before painting. Attach the selected conduit, dowel, rod or stakes to the rear, keeping fasteners away from fragile edges.
- Test the installation. Set the piece on a calm day, check that it stands plumb, and push each stake or rod far enough into firm soil to resist ordinary wind. Move tall figures if the support flexes.
Weatherproofing painted plywood
Seal the whole panel
Water reaches plywood through faces, edges, screw holes and cutouts. Prime both sides and all edges rather than painting only the visible front. The stain-poly recommendation from This Old House is an additional moisture-control step, not a substitute for covering exposed edges.
Build in drying time
Paint and varnish should be dry before stacking, transporting or installing. Trapped moisture between stacked panels can damage an otherwise sound finish.
Keep wood off wet ground
Use stakes, conduit or rods so the plywood does not sit directly in soil or puddles. Inspect the bottom edge after each season and touch up any chipped coating before storage.
Store flat and dry
Reindeer and other knock-down designs can lie flat. Store panels supported evenly, away from concrete-floor dampness, and avoid leaning a large sheet where it can warp.
Independent reader supportYour contribution helps us test, update, and keep practical guides available for everyone.Support, safety and storage decisions
- Small signs and candy disks: one or two stakes may be adequate if the panel is low and narrow.
- Wide houses and sleighs: use multiple rear attachment points so the load is shared instead of twisting one fastener.
- Tall figures: use rigid rods or conduit and deep, stable anchoring; inspect after strong wind.
- Public-facing placement: keep stakes, braces and electrical cords outside walking paths and do not block sightlines for vehicles.
- Seasonal storage: label parts, bag fasteners and photograph the assembled layout before disassembly.
A practical 2020-style display plan
For a balanced yard without oversized construction, start with a pair of flat-storing white reindeer, add the 45-inch and 30-inch snow figures near the entry, and use 69-inch candy canes or a 72-inch tree to create height. If the yard has more space, replace the center pair with Gingerbread Manor or a sleigh scene. Reserve the 90-inch soldier or 92-inch nutcracker for sites that can handle deeper anchoring and protected off-season storage.
Jennifer Largesse of This Old House describes the underlying approach well: “When you look at something that seems complex, it’s not necessarily more difficult. You’re just building upon the same basic techniques.” The same tracing, cutting, sanding, sealing and bracing workflow scales from a small ornament to a life-size character.
Frequently Asked Questions
What plywood is best for outdoor Christmas cutouts?
Use 1/2-inch or 3/4-inch AC/BC plywood, prime both faces and edges, and keep the finished panel off wet ground. Thicker stock is stiffer for tall figures; thinner stock is lighter for small pieces.
Recommended Free Tools
What tools do I need to make Christmas yard art?
A jigsaw or scroll saw, screwdriver, sandpaper, wood putty, brushes, primer, exterior paint, a waterproof marker, and stakes or conduit cover the basic workflow.
How can I weatherproof painted plywood decorations?
Seal faces, edges and cutouts with exterior primer, allow complete drying, and consider several coats of exterior stain-poly before painting. An optional water-based varnish adds another topcoat.
Quick Recap
Product prices and availability are accurate as of the date/time indicated and are subject to change. Any price and availability information displayed on Amazon at the time of purchase will apply.


Leave a Reply