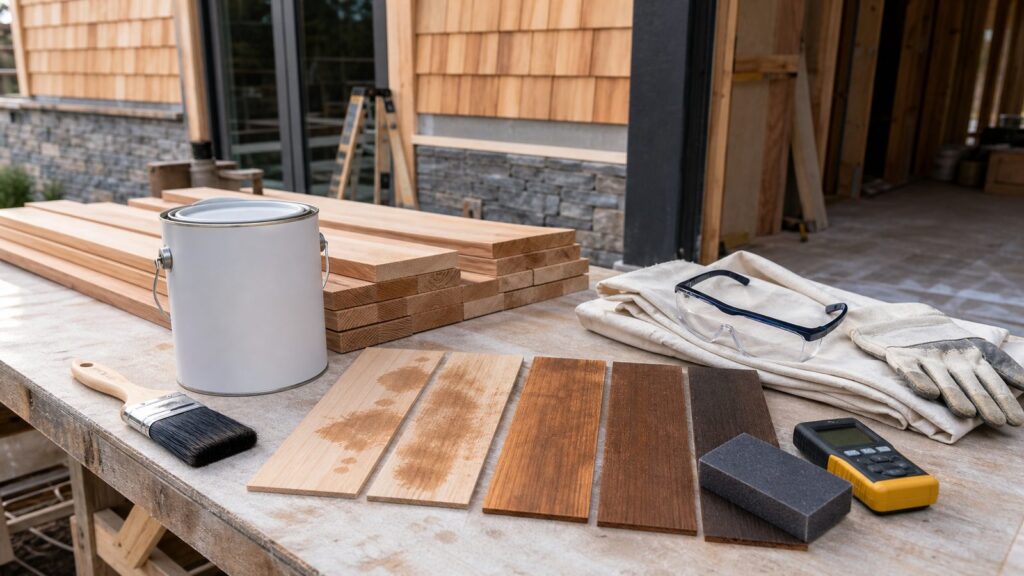
To prevent stain from bleeding, first identify what is actually bleeding: natural wood tannins, resin from knots, old dye or pigment from a previous finish, or excess stain that was never wiped off or cured. Each problem needs a different fix. On our job sites, the reliable sequence is simple: stop moisture, clean and sand to a stable surface, test the full coating system in a hidden area, use the right stain-blocking primer or sealer when needed, apply thin coats, and follow the label for temperature, humidity, dry time, and recoat time.
The mistake that causes the most callbacks is treating every brown mark as the same problem. Amber stains coming through white paint on cedar are not the same as blotchy pine under stain. A sticky deck rail is not the same as redwood tannin moving through latex primer. This guide separates those conditions so you can fix the actual cause instead of burying it for a few weeks.
Start by diagnosing the bleed
Before you buy primer or another gallon of stain, look closely at the color, location, and feel of the defect. Stain bleeding usually falls into one of four buckets.
Amber or brown stains under paint
Amber, tea-colored, or brown discoloration showing through white or light paint is usually tannin bleed. Tannins are water-soluble extractives found naturally in many woods. Cedar, redwood, mahogany, oak, walnut, and knotty pine are common troublemakers. End grain, knots, and checks bleed more aggressively than flat, clear boards because they move more moisture.
Exterior tannin bleed often means water is involved. Rain, sprinklers, roof leaks, missing back-primer, exposed end grain, trapped moisture behind trim, or poor drainage can move tannins to the surface. If you repaint without solving the water path, the stain can return.
#1 Best Overall
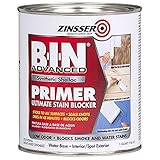
- Superior odor sealing
- Ultimate stain blocking
- High hiding bright white
- Excellent adhesion
- Seals knots, sap and tannin
Dark circles or streaks at knots
Dark knots, yellow rings, or tacky spots around knots usually point to resin or sap. Knotty pine trim, cedar siding, and softwood boards can continue pushing resin through ordinary primer. Severe knots often need shellac spot-priming, not just another coat of wall primer.
Old color lifting into a new finish
If a previous red, brown, or black stain seems to migrate into a new clear coat or lighter stain, you may be dealing with dye or pigment bleed from the old finish. This is common on cabinets, furniture, trim, doors, and unknown older finishes. A solvent wipe and test patch matter here because some old coatings soften when new solvent-based products hit them.
Sticky streaks, shiny patches, or color transfer
If the surface feels tacky or leaves color on a rag after the listed dry time, the issue may be excess stain. Penetrating stain is not paint. It needs to soak in and then have excess wiped off within the manufacturer’s window, often within 5 to 15 minutes depending on the product and weather. Heavy application can leave uncured pigment and binder on the surface, which later smears, transfers, or contaminates the next coat.
Recommended Free Tools
Know which woods are most likely to bleed
Some woods demand a more careful coating system from the start. Cedar and redwood are high-risk exterior woods because they contain extractives that can migrate through water-based primers and light paint. Mahogany, oak, and walnut can also discolor light finishes. Knotty pine is a frequent interior problem because knots carry resin that can punch through standard primer.
Blotch-prone woods are a related but different issue. Pine, fir, birch, maple, and other unevenly porous woods may absorb stain at different rates, creating dark patches that homeowners often call bleeding. That is usually absorption control, not tannin bleed. The fix is uniform sanding, clean dust removal, pre-stain conditioner, gel stain, or a carefully built sample system.
End grain deserves special attention. On exterior trim, decking, rail posts, fence boards, and siding, the cut ends absorb moisture faster than the face of the board. If the ends are unsealed, water enters, carries tannins outward, and stains the surface. On painted exterior work, our crews prime cut ends before installation whenever access allows. On stain-grade exterior work, we seal all exposed cuts according to the coating manufacturer’s system.
Prep is the difference between a permanent fix and a temporary cover-up
Most stain bleed problems are decided before the finish can is opened. A good coating cannot make wet, dirty, glossy, mildewed, or chemically unstable wood behave.
Quick wins for a faster PC:
Fix the driver behind crashes, sound loss and screen glitchesFind Drivers →Repair Windows errors before they cause bigger problemsFix Now →Scan for outdated or missing drivers - takes under a minuteDriver Scan →Dry the wood first
Do not stain or prime wet wood. For exterior work, use a moisture meter when the job matters. Many coating systems want wood near 12 to 15 percent moisture content before finishing, but the exact number depends on the product and exposure. If the board was recently pressure washed, rained on, or installed green, one sunny afternoon is not enough. Deck boards may need 24 to 72 hours of dry weather after washing, and longer in cool, shaded, humid, or poorly ventilated areas.
Interior trim and cabinets can also carry moisture from plumbing leaks, condensation, or recent patching. If staining appears near a window, sink, exterior door, bathroom wall, or basement trim, investigate the moisture source before coating.
Clean to a stable surface
For decks and exterior wood, remove dirt, mildew, gray UV-damaged fibers, failing coating, and mill glaze. A deck cleaner followed by a wood brightener is common after stripping or heavy cleaning. Rinse thoroughly and let the deck dry within the product’s limits before sanding or staining.
For interior wood, clean grease, wax, polish, smoke film, and hand oils before sanding. Cabinet doors near ranges and pulls often look clean but carry enough residue to interfere with stain or primer. Use a cleaner/degreaser compatible with the next coating and allow full drying.
Sand uniformly
Uneven sanding changes how stain absorbs. If one area is sanded to 80 grit and another to 180 grit, the color can shift noticeably. On trim, doors, and cabinets, sand through a consistent grit sequence and vacuum thoroughly. For many interior stain projects, stopping around 150 to 180 grit works well, but follow the stain manufacturer’s recommendation. For decks, over-polishing the wood can reduce penetration, so many penetrating deck stains perform better when the surface is not sanded too fine.
After sanding, vacuum and wipe with a tack cloth or clean microfiber cloth. Do not leave dust in corners, profiles, or open grain. Dust can muddy stain and weaken adhesion.
Use the right primer, sealer, or conditioner
The product that stops one type of bleed can fail on another. Here is the practical compatibility breakdown we use when deciding the coating system.
| Product | Best use | Where it can fail | Job-site note |
|---|---|---|---|
| Shellac-based primer | Severe knots, resin stains, spot-blocking dark bleed before paint | Not a deck stain; strong odor; check ventilation and topcoat compatibility | For bad knots, spot prime, let dry, sand lightly, and spot prime again if discoloration returns. |
| Alkyd or oil-based primer | Cedar, redwood, exterior trim, tannin-rich wood under paint | May be restricted by VOC rules; longer dry times in cool weather | Often a strong choice before light exterior paint on tannin-rich wood. |
| Waterborne stain-blocking primer | Interior stains and some tannin-blocking applications when label specifically allows | Ordinary latex primer may not block cedar, redwood, or knots | Use only products labeled for tannin or stain blocking, not general-purpose primer. |
| Wood conditioner | Pine, fir, birch, maple, and blotch-prone interior woods before stain | Does not block active tannin or resin bleed under paint | Apply and stain within the product window so absorption stays even. |
| Gel stain | More controlled color on blotch-prone wood or vertical surfaces | Can sit on top if applied too heavily; compatibility matters over old finishes | Useful when penetrating stain grabs too dark in soft grain. |
| Penetrating exterior stain | Deck boards, fences, siding, railings where natural grain should show | Will not hide unstable old coatings, wet wood, or mill glaze | Apply thinly, back-brush, and wipe or redistribute puddles. |
| Clear topcoat | Protecting interior stained wood after color coat has dried | Can pull dye from uncured stain or soften incompatible old finish | Test the full stain-and-topcoat schedule before coating a visible run. |
Prevent bleed under paint on trim, siding, and cabinets
Painted wood needs a true stain-blocking layer when the substrate is prone to bleed. Standard latex primer directly over cedar, redwood, knotty pine, or stained wood is a common failure path unless the primer is specifically rated for stain and tannin blocking.
Do these 3 things before closing this tab:
1Clear out junk files and repair common Windows errors2Scan for outdated or missing drivers - takes under a minute3Repair Windows errors before they cause bigger problemsFor cedar or redwood exterior paint
First, fix water entry. Check sprinklers hitting siding, missing caulk at vertical joints, open end grain, failed flashing, wet mulch against trim, and boards that stay shaded and damp. Wash existing stains and let the wood dry thoroughly. Scrape loose paint, sand feathered edges, and remove chalky or gray fibers.
Then prime with an alkyd/oil primer or a manufacturer-approved tannin-blocking primer. If the surface will be painted white or another light color, do not skip the primer just because the paint says it has primer in it. Paint-and-primer products can be useful on sound repaint work, but tannin-rich bare wood is a different condition.
For knots in trim or cabinets
Spot prime knots with shellac-based primer. Let it dry as directed, sand lightly so the spot does not telegraph through the finish, then inspect. If the discoloration appears again, spot prime a second time. After the knots are blocked, prime the full board or full cabinet part if uniform sheen matters. Otherwise, spot-primed areas can flash through topcoat under certain lighting.
For old stained cabinets or trim
Assume unknown finishes can react until proven otherwise. Clean, sand lightly, and test a hidden spot with the primer and topcoat system. Give the test patch at least overnight, and longer if the coating label requires it. Look for color bleed, wrinkling, softening, poor adhesion, or ambering. On a full kitchen, this test can save several days of stripping and repainting.
Rank #2

- Shellac‐base primer‐sealer
- For interior and spot exterior use
- Greatest stain sealer
- Seals knots and sap streaks
- Seals pet, smoke and musty odors
Prevent blotching and color bleed when staining bare wood
When the goal is a stained wood finish rather than paint, the job changes. You are not blocking the wood completely; you are controlling absorption.
Sand the entire piece consistently. On flat cabinet parts, doors, shelves, and trim, a random-orbit sander can help, but edges and profiles still need hand work. Do not leave cross-grain scratches, because stain will highlight them. Vacuum thoroughly and wipe down before applying conditioner or stain.
Use pre-stain conditioner on pine, fir, birch, maple, and other blotch-prone woods. Conditioner partially seals soft, thirsty areas so they do not grab stain too dark. Follow the timing on the label. Some conditioners require stain within a short window, often within about 2 hours, while others allow more time.
Apply stain in thin, controlled coats. Work in manageable sections: one cabinet door, one trim length, or a few deck boards at a time. Keep a wet edge. Wipe excess within the product’s stated window. If the stain is still sitting shiny on top after the wipe period, remove more. More stain left on the surface does not mean deeper quality; it often means sticky cure problems and later color transfer.
Free tools Windows power users keep installed
One-click scans. No signup required.
For blotch-prone or vertical surfaces, gel stain can provide better control because it sits more on the surface and penetrates less aggressively. That does not eliminate prep. Gel stain still needs a clean, scuffed, compatible surface and proper dry time before topcoat.
Prevent bleeding and lap marks on decks
Decks fail differently than interior wood because sun, water, foot traffic, and temperature swings are constant. For a deck, bleeding, blotching, lap marks, and peeling are often prep failures.
Clean the deck with the correct cleaner for the condition. Dirt, mildew, barbecue grease, old coating residue, mill glaze, and gray UV-damaged fibers all prevent even penetration. If the previous coating is failing or forming a film, cleaning alone may not be enough. Stripping or sanding may be required before the new stain can bond or penetrate.
After cleaning or stripping, brighten the wood when the stain system calls for it. Brightener helps neutralize some cleaners and restores a more even color, especially on cedar and pressure-treated lumber. Rinse well. Let the deck dry fully before staining.
Windows Errors? Fix Them Before They Spread
Repair common Windows errors and clear accumulated junk for a smoother, more stable PC - no reinstall needed.Free scan · no reinstallOutdated Drivers Are Slowing You Down
One free scan finds every outdated or missing driver and matches the right update for your exact hardware.Free scan · exact hardware matchStain in shade when possible and stay inside the product’s temperature range. Many exterior stains are applied in roughly 50 to 90 degree Fahrenheit conditions, but the label controls. Avoid direct hot sun. Fast solvent flash can leave lap marks, uneven penetration, and dry edges before you can back-brush. Also avoid staining when rain, dew, or heavy humidity will hit before the coating has had enough cure time.
Work board-by-board when practical. Do not stop in the middle of a board. Back-brush or back-wipe to even out puddles, rail details, and end grain. Railings and spindles take much longer than flat decking; a 300-square-foot deck with heavy rails can consume more labor than a larger simple platform.
Costs to prevent or fix stain bleeding in 2026
Preventing bleed costs less than correcting a failed finish. A stain-blocking primer, conditioner, extra sanding, or test panel may add a few hours and materials, but repainting a room, cabinet run, or deck after bleed-through is far more expensive.
For professional deck staining in the United States, 2026 averages commonly land around $2 to $5 per square foot. Many 300 to 400 square foot decks fall between about $550 and $1,900, with national average ranges around $873 to $1,897 and an average near $1,281. More intensive strip, sand, and re-stain projects often run about $750 to $2,450 depending on coating buildup and deck condition. High-cost labor markets, second-story decks, tight access, rail-heavy layouts, weather delays, and specialty compliant products can push pricing toward $5 to $6 or more per square foot.
The Tool Desk
Outbyte Driver Updater FREEScan for outdated or missing drivers - takes under a minuteDriver Scan →Outbyte PC Repair FREERepair Windows errors before they cause bigger problemsFix Now →| Project | Typical 2026 cost range | What drives the price |
|---|---|---|
| DIY interior spot blocking | Often under $75 to $150 in materials | Shellac primer, sandpaper, brushes, masking, PPE |
| DIY cabinet or trim stain control | About $100 to $400+ in materials | Cleaner, conditioner, stain, topcoat, abrasives, applicators |
| Professional deck clean and stain | About $2 to $5 per sq ft | Deck size, rails, access, stain type, local labor |
| 300-400 sq ft deck staining | About $550 to $1,900 | Condition, railing complexity, prep level, weather |
| Full strip and re-stain | About $750 to $2,450+ | Old coating buildup, sanding, disposal, board condition |
DIY material costs vary by the surface: stain, cleaner, brightener, sandpaper, brushes, pads, masking, rags, conditioner, primer or sealer, and PPE. The stain-blocking step adds cost, but it is cheap insurance. On a repaint, skipping a $25 to $60 quart or gallon of the right primer can turn into repainting an entire elevation or room.
Safety, VOC, lead, and permit notes
Oil-based stains, oil primers, and some solvent-borne coatings have safety and regulatory issues that should not be treated casually. Store and use them with ventilation, ignition control, gloves, and eye protection. Local VOC rules can affect which primers, stains, and solvents are available or legal to use. If your preferred product is not sold in your area, do not assume the substitute behaves the same. Read the label and technical data sheet.
Oily rags are a fire risk. Rags wet with oil stain, wiping varnish, or similar combustible products can heat as they cure and can ignite if piled together or thrown into a trash bag. Spread them flat outdoors to dry in a safe area, or place them in a metal container with water and a tight-fitting lid according to local disposal guidance. Do not leave oily rags in a pile on a deck, garage floor, or job-site trailer.
For homes built before 1978, painted surfaces may involve lead-based paint. Sanding, scraping, or stripping can trigger lead-safe work requirements. If you are disturbing old paint on trim, siding, windows, doors, railings, or built-ins, check the applicable renovation rules before starting. Professional lead-safe containment adds cost, but uncontrolled dust is not acceptable.
What’s actually slowing this PC down?
Pick the symptom - the matching free tool is one click away.
Staining a deck usually does not require a permit when it is purely maintenance. But if boards, guards, stairs, ledgers, posts, or railings are deteriorated and the work becomes structural repair or replacement, local permit rules may apply. Many jurisdictions treat changes to deck framing, guards, stairs, and attachments differently from cosmetic coating. If a railing is loose or framing is soft, solve that before stain.
Independent reader supportYour contribution helps us test, update, and keep practical guides available for everyone.When to DIY and when to hire a pro
DIY is reasonable when the problem is small, the wood is accessible, and you can test before committing. Spot-blocking a few knots, conditioning new pine shelves, staining a small unfinished project, or refreshing a simple ground-level deck can be a good homeowner job if you follow the coating system closely.
Hire a pro when bleed covers large exterior areas, the moisture source is unknown, the house is pre-1978 and painted surfaces will be disturbed, the deck has deteriorated boards or railings, or old coatings require stripping. Also bring in help for cabinet refinishing if the kitchen has an unknown finish, heavy grease exposure, or a high-value sprayed finish. The labor is not just brushing product on wood; it is diagnosis, containment, surface preparation, drying time management, and compatibility testing.
On our projects, the decision often comes down to risk. If a failed finish would be a $100 inconvenience, DIY can make sense. If failure means repainting a full exterior wall, replacing a deck coating system, or redoing a kitchen cabinet run, the testing and prep discipline of a professional crew is usually worth it.
Rank #3

- Designed for large jobs with 10" tall fan spread for professional spray equipment results and 4X faster project completion
- Shellac-based primer formula seals deep stains and odors; perfect for disaster restoration jobs
- Dries to the touch 15 minutes and covers 20-24 sq. ft. per can
- Ultimate stain blocker primer works as a wood sealer and blocks water stains, knots, sap and more
- B-I-N Turbo Spray can be painted after 30 minutes and sands easily to a powder when dry
A practical step-by-step prevention plan
Use this sequence before painting or staining wood that might bleed.
1. Identify the material and finish history
Find out whether the wood is cedar, redwood, oak, walnut, mahogany, knotty pine, pressure-treated lumber, or a blotch-prone softwood. Determine whether you are working over bare wood, paint, penetrating stain, film-forming stain, clear coat, wax, or an unknown finish.
2. Check for moisture
Look for leaks, sprinkler spray, condensation, damp soil, failed caulk, open end grain, and shaded areas that dry slowly. For exterior wood and suspect interior areas, use a moisture meter. Do not coat until moisture is within the product’s acceptable range.
3. Clean and remove unstable material
Remove grease, mildew, dirt, loose paint, failed stain, gray fibers, and sanding dust. Use deck cleaner, brightener, degreaser, scraper, sander, vacuum, and microfiber wipes as appropriate. The surface should be clean, dull, dry, and sound.
Quick wins for a faster PC:
Fix the driver behind crashes, sound loss and screen glitchesFind Drivers →Clear out junk files and repair common Windows errorsFree Scan →Scan for outdated or missing drivers - takes under a minuteDriver Scan →4. Choose the correct control layer
Use shellac primer for severe knots and resin. Use alkyd/oil primer or a rated tannin-blocking primer for cedar, redwood, and other tannin-rich wood under paint. Use wood conditioner or gel stain for blotch-prone interior wood that will be stained. Use a compatible penetrating stain for decks and exterior wood where grain will remain visible.
5. Test the complete system
Do not test only the stain. Test cleaner, sanding level, conditioner or primer, stain, and topcoat together. Use a hidden section, scrap from the same lumber, the back of a cabinet door, or an inconspicuous deck board. Let the sample dry and cure long enough to reveal bleed, adhesion problems, sheen differences, and color shift.
6. Apply thin coats and respect timing
Follow the label for temperature, humidity, dry time, recoat time, and wipe-off window. Keep stain coats thin. Wipe excess. Avoid hot direct sun on decks. Do not rush topcoat over stain that has not cured. In cool or humid weather, allow more time than the optimistic end of the label range.
Common mistakes that cause stain bleed
The most common mistake is coating wet wood. Moisture is the engine behind many tannin problems, especially outdoors. If the board is still wet inside, the new finish can trap moisture and encourage more staining.
The second mistake is using ordinary latex primer where a stain blocker is needed. Tannin-rich woods and knots need primers labeled for that job. A regular drywall or multipurpose primer may look fine on day one and fail after rain, humidity, or cure time.
Skipping a test patch is another expensive shortcut. Old stains, dyes, clear coats, waxes, and exotic woods can react unpredictably. A 12-inch test area behind a door or under a cabinet is better than discovering color bleed across 20 doors.
Heavy stain application also causes trouble. Penetrating stain should not be left like paint. Excess material can dry sticky, collect dirt, transfer color, and interfere with the next coat. Thin coats and proper wiping are more reliable than trying to force color in one pass.
Finally, do not ignore structural or safety clues. A deck with soft boards, loose guards, or failing stairs is not a staining project yet. A pre-1978 painted surface is not ordinary sanding work until lead-safe requirements are addressed.
Free tools Windows power users keep installed
One-click scans. No signup required.
The bottom line
Preventing stain bleed is not about one magic product. It is about matching the fix to the cause. Tannins need moisture control and a real stain-blocking primer. Knots often need shellac. Blotchy softwoods need uniform sanding and conditioner or gel stain. Old finishes need compatibility testing. Decks need clean, dry, sound wood and careful application in the right weather.
If you remember one rule, make it this: test the entire system before coating the whole surface. A small sample can reveal tannin bleed, resin staining, dye lift, adhesion failure, blotching, lap marks, and cure problems before they become a full-scale repair.
Frequently Asked Questions
Why is stain bleeding through my paint?
The most common causes are tannins from woods like cedar, redwood, oak, walnut, or mahogany; resin from knots; moisture moving extractives through the coating; or old dye and pigment lifting from a previous finish. The fix is to dry and clean the surface, solve moisture problems, and use a true stain-blocking primer before repainting.
What primer stops tannin bleed on cedar, redwood, or knots?
For cedar and redwood under paint, use an alkyd/oil primer or a waterborne primer specifically labeled for tannin blocking. For severe knots and resin stains, shellac-based primer is usually the strongest spot-blocking choice. Ordinary latex primer is often not enough.
Can I use water-based primer to stop wood stain bleed-through?
Yes, but only if the product is specifically rated for stain or tannin blocking and is approved for the surface. A general-purpose water-based primer may not block cedar, redwood, knots, or old dye. Always test a hidden area before coating the full surface.
How do I stop wood stain from looking blotchy?
Sand uniformly, remove all dust, use pre-stain conditioner on blotch-prone woods such as pine, fir, birch, and maple, and apply thin coats. Gel stain can also help because it gives more controlled color on unevenly porous wood.
Do I need to sand or strip old stain before restaining?
If the old stain is sound, clean, and compatible, light sanding and cleaning may be enough. If it is peeling, glossy, sticky, uneven, or film-forming, stripping or deeper sanding may be needed. Always test adhesion and color compatibility first.
How do I safely dispose of oily stain rags?
Do not pile oily rags or throw them straight into a trash bag while wet. Lay them flat outdoors to dry safely, or place them in a metal container with water and a tight-fitting lid according to local disposal rules. Oily rags can self-heat while curing and start a fire.
Quick Recap
Product prices and availability are accurate as of the date/time indicated and are subject to change. Any price and availability information displayed on Amazon at the time of purchase will apply.