The Tool Desk
Outbyte Driver Updater FREEFix the driver behind crashes, sound loss and screen glitchesFind Drivers →Outbyte PC Repair FREEClear out junk files and repair common Windows errorsFree Scan →A good compost bin does not need to be fancy. It does need to be the right size, easy to load, easy to turn, protected from pests, and placed where it will not create drainage, odor, or neighbor problems. For most homes, the sweet spot is a bin close to 3 feet by 3 feet by 3 feet, or about 1 cubic yard. That is large enough to hold heat when managed well, but still small enough for a homeowner to turn with a garden fork.
Composting is managed aerobic decomposition: leaves, grass clippings, garden debris, and appropriate food scraps break down with the help of oxygen, moisture, and microorganisms into a stable soil amendment. The bin is just the structure that keeps that process contained and workable.
On our job sites, the best outdoor systems are rarely the most complicated. They are the ones with clear access, a lid or cover when food scraps are involved, airflow on the sides, drainage at the bottom, and enough room in front for a wheelbarrow. Below are 31 DIY compost bin ideas, with realistic 2026 cost ranges and the build details that matter.
Quick Comparison: Best DIY Compost Bin Ideas by Budget and Yard Type
| Compost bin idea | Typical 2026 cost | Best yard size | Pest control | Difficulty | Best use |
|---|---|---|---|---|---|
| Wire hoop bin | $15-$70 | Medium to large | Low unless lined | Easy | Leaves and yard waste |
| Lidded trash-can composter | $15-$80 | Small to medium | Medium to high | Easy | Food scraps plus browns |
| Pallet compost bin | $0-$150 | Medium to large | Medium with mesh | Easy to moderate | Budget backyard composting |
| Wood-and-hardware-cloth bin | $100-$250 | Small to medium | High | Moderate | Tidy visible areas |
| Three-bin system | $175-$600+ | Large | Medium to high | Moderate to hard | Active gardeners |
| DIY barrel tumbler | $50-$200 | Small | High if sealed | Moderate | Fast, contained batches |
| Purchased budget tumbler benchmark | $49-$290+ | Small | High | No build | When DIY is not cheaper |
| Concrete-block bay | $75-$250+ | Medium to large | Medium | Moderate | Permanent garden station |
If you compost mostly leaves, start with wire. If you compost kitchen scraps, choose something lidded and rodent-resistant. If you garden heavily, build two or three chambers so fresh scraps do not keep getting mixed into nearly finished compost.
#1 Best Overall

- Twin chambers: Two separate chambers allow one side to finish composting while leaving the other side available to add fresh wastes; Constant alternation of the two sides will create an uninterrupted stream of nutritious compost
- 360⁰ Tumbling Design: The rotating design prevents you from digging or mixing the pile by hand; And the deep fins on eight panels make it easier to turn the compost bin
- Excellent Aeration: Air vents can make the air fully circulate and will not cause an explosion due to excessive internal pressure; Deep fins can better break the clumps, which is conducive to the full fermentation of oxygen
- Sturdy & Durable Construction: Constructed of premium metal frame and high-quality pp plastic body, this tumbling composter is corrosion-resistant, weathering-resistant, sturdy, and durable for long-lasting service life
- Garden Gloves Included: The gloves that not only protect your hands from injury, but are also waterproof, making them easy to clean; With 4 durable ABS plastic claws for easy digging, planting and other gardening work
Before You Build: Size, Placement, Materials, and Local Rules
Size the bin to the waste stream
A 3-foot cube is the standard backyard target because it gives the pile enough mass to heat while staying manageable. That equals 27 cubic feet, or 1 cubic yard. Smaller bins can still compost, but they usually act more like cold composters and may take 1 to 2 years. A well-managed hot pile with enough volume, moisture, oxygen, and the right brown-to-green balance can finish much faster.
For a two-person household with light yard waste, a 30- to 45-gallon lidded bin or small tumbler may be enough. For a family with fall leaves, lawn clippings, vegetable beds, and weekly kitchen scraps, plan on at least one 3-foot cube, and preferably two chambers.
Pick the right location
Place the bin on soil, not a sealed slab, unless you are using a tumbler or contained worm system. Soil contact helps drainage and gives organisms access. Choose a partly shaded spot with decent drainage, close enough to water that you can wet dry browns, but not so close to the house that odors or insects become a nuisance.
Check city, county, and HOA rules before building a permanent structure. Backyard composting is often exempt from solid-waste facility permitting, but local rules may still regulate setbacks, odors, pests, container type, height, and prohibited materials. Many neighborhoods care more about appearance and placement than the composting itself.
Build for access
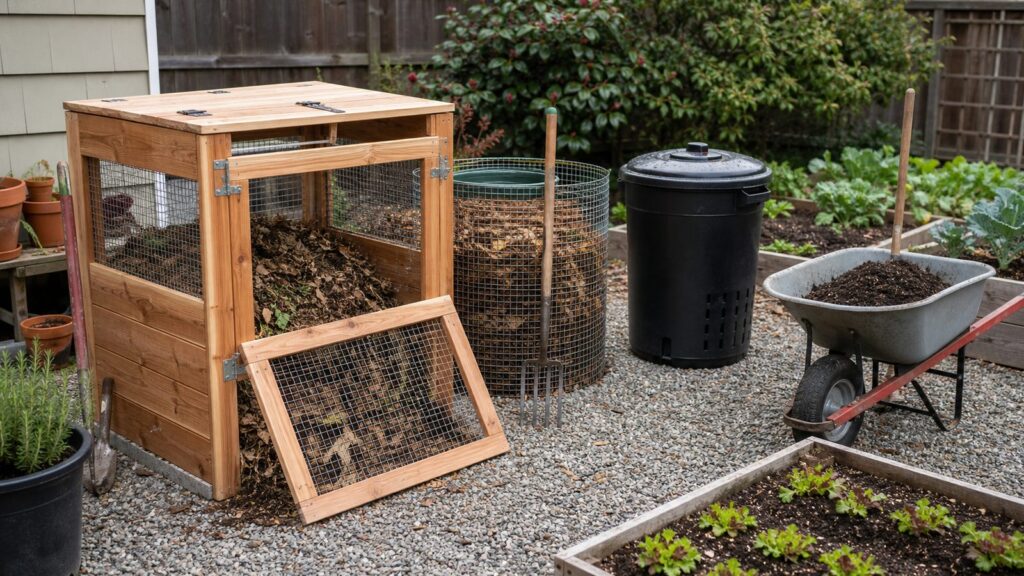
The mistake we see most often is a bin that looks tidy on day one but cannot be emptied without dismantling it. Give yourself a removable front panel, hinged gate, lift-out slats, or a wide opening. Leave at least 30 inches of working space in front. If you plan to use a wheelbarrow, keep the route firm enough to use after rain.
Protect against pests
For food scraps, use 1/4-inch hardware cloth on the bottom and lower openings, secure the lid, and cover each fresh addition with several inches of browns such as shredded leaves, cardboard, straw, or wood chips. Do not leave fruit peels, rice, bread, or vegetable scraps exposed on top.
31 DIY Compost Bin Ideas
1. Wire hoop leaf bin
Cost: $15-$70. Best for: leaves, garden debris, and large yards.
This is the fastest useful compost bin you can build. Make a cylinder from welded wire, hardware cloth, or fencing, overlap the ends by 6 to 12 inches, and fasten them with wire, zip ties, or hog rings. A 10-foot length of fencing forms a bin roughly 3 feet across. Use 36- to 48-inch-tall wire for good volume.
Quick wins for a faster PC:
Fix the driver behind crashes, sound loss and screen glitchesFind Drivers →Repair Windows errors before they cause bigger problemsFix Now →It is excellent for leaf mold and yard waste, but not ideal for exposed kitchen scraps unless you add a lid and line the lower section with 1/4-inch hardware cloth.
2. Hardware-cloth cylinder bin
Cost: $30-$90. Best for: compact yards with moderate pest pressure.
A cylinder made from 1/4-inch or 1/2-inch galvanized hardware cloth gives better containment than loose fencing. Hardware cloth sold in 2-foot by 25-foot rolls often costs more than basic wire, but the tighter mesh helps keep rodents out. For a taller bin, use 36-inch or 48-inch material if available.
Stake it with three or four metal T-posts or wood stakes so it does not deform when the pile gets heavy.
What’s actually slowing this PC down?
Pick the symptom - the matching free tool is one click away.
3. Basic pallet cube
Cost: $0-$80 with free pallets; $30-$150 with hardware and lid. Best for: budget backyard composting.
Stand three pallets upright for the back and sides, then use a fourth as a removable front or hinged gate. The finished footprint is usually close to 40 inches square, which is near the ideal 1-cubic-yard size. Use exterior screws, corner brackets, or wire to tie the corners together.
For vegetable gardens, use pallets marked HT for heat-treated. Avoid pallets with chemical spills, oily stains, strong odors, or unknown industrial residue.
4. Three-bin pallet system
Cost: $0-$200 depending on hardware. Best for: gardeners with steady yard waste.
Use seven pallets to create three side-by-side bays: one active pile, one curing pile, and one empty or brown-storage bay. This solves the common problem of adding fresh scraps to compost that is almost finished.
Add removable front boards or hinged pallet fronts. If food scraps are included, staple hardware cloth to the lower interior and add lids.
5. Lidded trash-can composter
Cost: $15-$80. Best for: small yards and tidy containment.
Use a 32- to 45-gallon plastic trash can with a locking or bungee-secured lid. Drill 1/4-inch to 1/2-inch holes around the sides, lid, and lower wall for airflow. Add several drainage holes in the bottom and set it on soil or gravel.
Rank #2
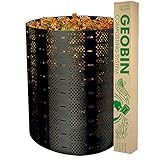
- Large capacity—expandable to 3.75 feet (237 gallon)
- Easy to assemble with closure keys. Easy to move. Easy to reassemble.
- The best value composting bin on the market.
- Excellent ventilation.
This is one of the best beginner bins for kitchen scraps because the lid helps control pests. Keep a 2:1 or 3:1 supply of browns nearby and cover every food layer.
6. Metal trash-can composter
Cost: $35-$100. Best for: rodent-prone areas.
A galvanized steel trash can is tougher than plastic and harder for rodents to chew. Drill ventilation holes and cover larger openings from inside with 1/4-inch hardware cloth. Metal heats up in direct sun, so place it in partial shade in hot climates to avoid drying out the pile.
7. Storage-tote compost bin
Cost: $15-$60. Best for: renters, patios, and test runs.
A heavy-duty storage tote can handle small-batch composting. Drill holes in the lid, sides, and bottom, then set the tote inside a shallow tray or directly on soil. Choose a dark, rigid tote rather than a brittle clear one.
Do these 3 things before closing this tab:
1Clear out junk files and repair common Windows errors2Fix the driver behind crashes, sound loss and screen glitches3Repair Windows errors before they cause bigger problemsThis is not a high-volume system. Treat it as a starter bin or overflow container for browns.
8. Stackable tote worm bin
Cost: $25-$90. Best for: indoor, garage, or balcony composting.
Use two or three nesting totes. Drill drainage and migration holes in the upper bins, keep bedding moist like a wrung-out sponge, and use red wigglers rather than ordinary garden worms. Worm bins are excellent for vegetable scraps, coffee grounds, and shredded paper.
Skip meat, dairy, oily food, and large citrus loads. A healthy worm bin smells earthy, not sour.
Free tools Windows power users keep installed
One-click scans. No signup required.
9. Milk-crate vermicompost bin
Cost: $10-$50. Best for: tiny spaces and small food-scrap volume.
Line stackable milk crates with breathable landscape fabric or mesh, then add bedding and worms. The airflow is good, but moisture can escape quickly, so this works best in a shaded, protected spot.
10. Cedar slat compost bin
Cost: $150-$300. Best for: visible side yards and garden edges.
Cedar costs more than pine but resists decay well outdoors. Build a square frame with 2×2 or 2×4 corner posts and horizontal slats spaced 1/2 inch to 1 inch apart for airflow. Use stainless or exterior-rated screws.
Recommended Free Tools
Add a hinged front or removable slats. A fixed front looks cleaner but makes unloading miserable.
11. Pressure-treated pine bin
Cost: $100-$250. Best for: durable budget construction.
Modern pressure-treated lumber is common in outdoor construction, but many homeowners prefer untreated cedar, rot-resistant species, or a liner when compost will be used on vegetable beds. If you use treated lumber, keep cut ends sealed and avoid using visibly deteriorating scraps.
Use ground-contact-rated posts where wood touches soil.
Crashes, No Sound, or Screen Glitches?
Random freezes, missing sound and display glitches usually trace back to one bad driver. Find and replace yours safely.Free scan · under a minuteWindows Errors? Fix Them Before They Spread
Repair common Windows errors and clear accumulated junk for a smoother, more stable PC - no reinstall needed.Free scan · no reinstall12. Wood-and-hardware-cloth rodent-resistant bin
Cost: $150-$300. Best for: food-scrap composting near houses.
Frame the bin with 2x4s, wrap the sides and bottom in 1/4-inch galvanized hardware cloth, and add a solid or framed mesh lid with a latch. Keep openings under 1/4 inch at the lower 12 to 18 inches.
This is one of the best all-around DIY builds for suburban yards because it balances airflow, access, and pest control.
13. Hinged-front wood bin
Cost: $125-$275. Best for: homeowners who want easy unloading.
Rank #3

- ✅Speed Up Composing Process: More advanced models use rotating to bring oxygen to the center of the bin and paddles inside the chamber to help mix and aerate the composting materials when turned. These improvements or modifications are designed for one reason: to speed the composting process.
- ✅How do Compost Tumblers work? Simple. You load them with green and brown waste from your yard and kitchen. When full, you give them time to work, in other words, heat up. Turning a compost pile mixing the organic materials and the organisms it contains with heat-producing oxygen is the traditional method of keeping the process going full steam. By turning the tumbler, the organic materials are mixed and infused with fresh oxygen.
- ✅Easy to Access Finished Compost: Just Slide the door open and take the organic fertilizer out when the compost is ready. When a check reveals the compost is complete —and this can happen in a matter of weeks —the same access that allowed you to fill the tumbler lets you empty it. Now is the time to spread the results.
- ✅Dual-Bin Design: The dual bin design takes a different approach to the continuous-use composted concept, Two bins are set side-by-side into a single rotating chamber. Thickly insulated compartments conserve the heat generating by the decaying matter, and this greatly speeds the process. This design also allows you to add food waste to one chamber while the other is composting.
- ✅Totally Organic and Money-Saving: If you're looking for a fast, convenient way to compost your kitchen throw-outs, grass clippings, and organic yard waste, our outdoor kitchen compost bin is just right for you! The Compact Compost Tumbler quickly recycles it into nutrient-rich compost.
Build the front as two small barn-style doors or one lift-off panel. Use strap hinges, a gate latch, and diagonal bracing so the door does not sag. A 36-inch-wide front opening is enough for a shovel and small wheelbarrow.
14. Removable-slat compost bin
Cost: $100-$250. Best for: simple wood construction.
Install vertical channels at the front using 1×2 cleats, then slide horizontal boards down into the channels. As compost builds, add slats. When it is time to unload, lift the slats out one by one.
This design avoids hinge alignment problems and is easy to repair.
15. Concrete-block compost bay
Cost: $75-$250+. Best for: permanent garden zones.
Dry-stack concrete blocks into a three-sided bay, leaving the front open or fitted with removable boards. Standard 8-by-8-by-16-inch blocks are heavy, durable, and fireproof. Set the first course level on compacted gravel if you want a cleaner permanent installation.
Leave gaps between some blocks for airflow, or turn blocks sideways where appropriate.
16. Cinder-block three-bin station
Cost: $200-$600+. Best for: high-volume composting.
This is the masonry version of the three-bin system. It is long-lasting but labor-heavy. Plan each bay at about 3 feet wide, 3 feet deep, and 3 feet tall. A full three-bin layout can run 9 to 10 feet wide once dividers and end walls are included.
What’s actually slowing this PC down?
Pick the symptom - the matching free tool is one click away.
Check drainage before building. A permanent masonry station in a low spot can become a wet, anaerobic mess.
17. Straw-bale temporary bin
Cost: $40-$120. Best for: seasonal gardens.
Arrange straw bales into a U-shape or square, then fill the center with compost materials. The bales insulate the pile and eventually break down themselves. This is useful for a one-season garden expansion or temporary soil-building area.
Keep it away from siding and fences because bales hold moisture.
18. Livestock-panel compost bin
Cost: $40-$120. Best for: large leaf piles and rural properties.
Cut or bend a livestock panel into a large circular or square enclosure. The openings are too large for food scraps, but the structure works well for leaves, vines, corn stalks, and garden cleanup.
Line the lower half with hardware cloth if you need better containment.
19. Wire-and-wood portable bin
Cost: $75-$180. Best for: rotating garden beds.
Build four light wood frames and staple welded wire or hardware cloth inside each frame. Bolt or latch the corners so the panels can be moved. This lets you compost in one garden area for a season, then relocate the bin after harvesting finished material.
20. Rotating barrel tumbler
Cost: $50-$200. Best for: contained composting in small yards.
Use a food-grade plastic barrel mounted on a steel pipe or heavy wood stand. Add a latched access door, ventilation holes, and internal fins or baffles to help mix material when the barrel turns.
DIY tumblers are worth building when you already have a clean barrel and hardware. If you need to buy everything new, compare against 2026 retail tumblers. Small 18.5-gallon models can be around $49, and many 43-gallon dual-chamber models run roughly $53-$70, with heavier units often $100-$290+.
21. Dual-chamber DIY tumbler
Cost: $100-$250. Best for: batch composting.
A dual-chamber tumbler lets one side cook while the other side receives fresh scraps. Build it from two smaller barrels or a divided larger drum. The stand must be rigid because wet compost is heavy. A 55-gallon drum filled with damp material can be difficult to rotate if the axle and frame are undersized.
22. Repurposed rain-barrel composter
Cost: $40-$150. Best for: homeowners with an unused barrel.
Recommended Free Tools
Rank #4

- Twin chambers: Two separate chambers allow one side to finish composting while leaving the other side available to add fresh wastes; Constant alternation of the two sides will create an uninterrupted stream of nutritious compost
- 360⁰ Tumbling Design: The rotating design prevents you from digging or mixing the pile by hand; And the deep fins on eight panels make it easier to turn the compost bin
- Excellent Aeration: Air vents can make the air fully circulate and will not cause an explosion due to excessive internal pressure; Deep fins can better break the clumps, which is conducive to the full fermentation of oxygen
- Sturdy & Durable Construction: Constructed of premium metal frame and high-quality pp plastic body, this tumbling composter is corrosion-resistant, weathering-resistant, sturdy, and durable for long-lasting service life
- Garden Gloves Included: The gloves that not only protect your hands from injury, but are also waterproof, making them easy to clean; With 4 durable ABS plastic claws for easy digging, planting and other gardening work
An old rain barrel can become a stationary composter or tumbler if it is clean and food-safe. Remove any spigot that clogs easily, drill vents, and create a large access hatch. Do not use barrels that held chemicals, fuel, pesticides, or unknown liquids.
23. Bokashi bucket plus outdoor soil factory
Cost: $30-$120. Best for: kitchens with limited outdoor space.
Bokashi is a fermentation pre-composting method, not finished compost. After the bucket ferments, the material still needs to be buried or added to an outdoor soil factory, which can be a lidded tote with soil and browns.
This setup is useful for households that want to handle more food scraps neatly, but it requires a second step.
24. In-ground digester
Cost: $20-$100. Best for: discreet food-scrap handling.
Use a perforated lidded bucket or pipe sunk into the soil with only the lid exposed. Food scraps go inside, and soil organisms break them down over time. Drill side holes below grade, but keep the lid secure above grade.
This is not the same as producing shovel-ready compost quickly. It is more of a low-visibility disposal and soil-feeding method.
25. Trench composting bed
Cost: $0-$20. Best for: vegetable gardens.
Dig a trench 10 to 12 inches deep, add chopped kitchen scraps and garden residue, cover with at least 8 inches of soil, and let it break down underground. Mark the area so you do not disturb it too soon.
Free tools Windows power users keep installed
One-click scans. No signup required.
Keep this away from tree roots, utility lines, and areas where pets dig.
26. Under-deck compact bin
Cost: $50-$180. Best for: tight yards with hidden utility space.
A low-profile lidded tote or framed wood-and-wire bin can work under a deck if there is ventilation, drainage, and access. Do not place wet compost against posts, beams, siding, or lattice. Keep clearance for inspection and pest control.
If the deck framing is already moisture-prone, choose a sealed tumbler nearby instead.
The Tool Desk
Outbyte Driver Updater FREEFix the driver behind crashes, sound loss and screen glitchesFind Drivers →Outbyte PC Repair FREERepair Windows errors before they cause bigger problemsFix Now →27. Balcony worm bin
Cost: $40-$150. Best for: apartments and townhomes.
Use a contained worm bin with a drainage tray and tight lid. Keep it shaded and insulated from extreme heat and cold. A balcony worm bin should handle small weekly additions, not full household yard waste.
Check lease and HOA rules before placing any compost system on a balcony.
28. Rodent-proof enclosed wood bin
Cost: $200-$400. Best for: urban and suburban food composting.
Crashes, No Sound, or Screen Glitches?
Random freezes, missing sound and display glitches usually trace back to one bad driver. Find and replace yours safely.Free scan · under a minutePC Slower Than It Used to Be?
A free scan shows the junk files, broken settings and background clutter dragging Windows down - then fixes them in one click.Free scan · Windows 10 & 11Build this like a small outdoor cabinet: framed walls, hardware-cloth ventilation, a latched lid, a hardware-cloth bottom, and no gaps larger than 1/4 inch near the base. Add a removable front panel for unloading.
This is the build to choose when neighbors are close and pests are a real concern.
29. Leaf-mold cage
Cost: $15-$70. Best for: fall leaves.
Leaf mold is made by decomposing leaves separately from food scraps. A simple wire cage works well. Shred leaves first with a mower if possible, moisten them, and let them sit. Expect months to more than a year depending on leaf type, moisture, and turning.
30. Compost screen and sifter add-on
Cost: $20-$80. Best for: improving finished compost.
Quick wins for a faster PC:
Fix the driver behind crashes, sound loss and screen glitchesFind Drivers →Clear out junk files and repair common Windows errorsFree Scan →Scan for outdated or missing drivers - takes under a minuteDriver Scan →Best Value
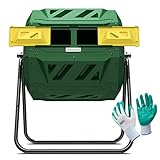
- ✅Speed Up Composing Process: More advanced models use rotating to bring oxygen to the center of the bin and paddles inside the chamber to help mix and aerate the composting materials when turned. These improvements or modifications are designed for one reason: to speed the composting process.
- ✅How do Compost Tumblers work? Simple. You load them with green and brown waste from your yard and kitchen. When full, you give them time to work, in other words, heat up. Turning a compost pile mixing the organic materials and the organisms it contains with heat-producing oxygen is the traditional method of keeping the process going full steam. By turning the tumbler, the organic materials are mixed and infused with fresh oxygen.
- ✅Easy to Access Finished Compost: Just Slide the door open and take the organic fertilizer out when the compost is ready. When a check reveals the compost is complete —and this can happen in a matter of weeks —the same access that allowed you to fill the tumbler lets you empty it. Now is the time to spread the results.
- ✅Dual-Bin Design: The dual bin design takes a different approach to the continuous-use composted concept, Two bins are set side-by-side into a single rotating chamber. Thickly insulated compartments conserve the heat generating by the decaying matter, and this greatly speeds the process. This design also allows you to add food waste to one chamber while the other is composting.
- ✅Totally Organic and Money-Saving: If you're looking for a fast, convenient way to compost your kitchen throw-outs, grass clippings, and organic yard waste, our outdoor kitchen compost bin is just right for you! The Compact Compost Tumbler quickly recycles it into nutrient-rich compost.
Build a rectangular frame from 2x4s and staple 1/4-inch or 1/2-inch hardware cloth to it. Size it to sit over your wheelbarrow, commonly about 24 by 36 inches. Use it to screen sticks, avocado pits, corn cobs, and unfinished material before top-dressing beds.
31. Safely decommissioned freezer or fridge shell
Cost: $0-$150. Best for: niche reuse only.
This is not our first recommendation, but some homeowners ask about it. Only use an appliance shell if it is safely decommissioned: doors removed or modified so no child entrapment risk exists, refrigerant handled legally by a qualified party, electrical components removed, and ventilation added. A sealed appliance without airflow is a bad compost bin.
In most yards, a wood-and-wire bin or tumbler is safer, cleaner, and easier to explain to an HOA.
Independent reader supportYour contribution helps us test, update, and keep practical guides available for everyone.Four High-Value Builds With Practical Cut Notes
$25-$70 wire bin
Use a 10- to 12-foot length of 36- or 48-inch welded wire or hardware cloth. Form a cylinder, overlap the ends, fasten every 6 inches, and stake it in three places. Target diameter: about 3 to 4 feet. This is the fastest way to handle fall leaves.
Do these 3 things before closing this tab:
1Clear out junk files and repair common Windows errors2Scan for outdated or missing drivers - takes under a minute3Repair Windows errors before they cause bigger problems$40-$80 trash-can composter
Use a 32- to 45-gallon lidded can. Drill 1/4-inch to 1/2-inch ventilation holes every 6 inches around the sides and several drainage holes in the bottom. Add a bungee or latch if wildlife is active. Put 4 to 6 inches of browns in the bottom before adding food scraps.
$150-$250 wood-and-hardware-cloth bin
Build a 36-by-36-by-36-inch frame from exterior-rated 2x4s. Skin the sides with 1/4-inch hardware cloth or wood slats with mesh behind them. Add a hinged lid, removable front, and hardware-cloth bottom. This is the best single-bin choice when food scraps are part of the plan.
$300-$600 three-bin station
Plan for three bays, each roughly 3 feet wide, 3 feet deep, and 3 feet tall. Use ground-contact posts, exterior screws, removable front slats, and lids if adding food scraps. Expect the total footprint to be about 10 feet wide by 3 to 4 feet deep. This is a small outdoor structure, so take leveling and drainage seriously.
What to Put in a Compost Bin, and What to Keep Out
Good compost needs browns, greens, water, and oxygen. Browns include dry leaves, shredded cardboard, straw, wood chips, and small twigs. Greens include fruit and vegetable scraps, coffee grounds, fresh grass clippings, and green garden waste.
Keep out meat, bones, dairy, grease, pet waste, diseased plants, glossy coated paper, invasive weeds with seed heads, and anything treated with chemicals you do not want in your soil. Bury or cover food scraps with several inches of browns every time. If the bin smells rotten, it is usually too wet, too compacted, or too heavy on greens. Add dry browns and turn it.
DIY Compost Bin Cost Calculator
Use this simple way to estimate your real cost before buying materials:
- Footprint: a 3-by-3-by-3-foot bin needs about 27 cubic feet of capacity.
- Structure: salvaged pallets may be free; new lumber for a durable single bin often lands around $100-$250.
- Mesh: basic wire is cheaper, but 1/4-inch hardware cloth is better for pests and commonly pushes small builds toward $30-$80+ just for the roll.
- Hardware: budget $15-$60 for exterior screws, hinges, latches, brackets, staples, and bungee cords.
- Tools: if you already own a drill, snips, stapler, saw, and level, DIY stays affordable. Buying tools for one bin can erase the savings.
- Site prep: gravel, pavers, edging, or a framed pad can add $50-$300+ before labor.
For a simple bin, DIY usually wins. For a tumbler, compare carefully because budget retail models can cost less than the parts for a homemade version. For a permanent three-bin station, material quality and site prep drive the price more than the composting function itself.
When to DIY vs. When to Hire a Pro
DIY makes sense for wire bins, pallet bins, trash-can composters, storage totes, worm bins, and basic wood boxes. These are low-risk projects where minor imperfections do not affect the house, drainage, or structure.
Hire a pro or bring one in for part of the work when the compost area becomes part of a larger landscape build. That includes retaining walls, grading changes, drainage corrections, paver pads, fence integration, shed-adjacent structures, masonry bays, or any installation visible enough to trigger HOA design concerns.
A contractor-grade compost station is still simple, but it should be level, drain correctly, resist rot, open cleanly, and not trap moisture against fences, siding, or deck framing. If the project touches those systems, it is no longer just a bin.
Common Compost Bin Mistakes to Avoid
- Building too small: tiny piles rarely heat well and often take 1 to 2 years.
- Sealing the bin: compost needs oxygen. A sealed box becomes wet and sour.
- Skipping the browns: food scraps need dry carbon material over them to control odor and pests.
- Ignoring access: if the front does not open, finished compost is hard to remove.
- Putting it in a wet low spot: poor drainage leads to anaerobic conditions.
- Using unsafe salvaged materials: avoid stained pallets, chemical barrels, and unknown containers.
- Forgetting local rules: setbacks, appearance, and pest language vary by city and HOA.
Bottom Line
The best DIY compost bin is the simplest one that fits your waste volume and pest risk. For leaves, build a wire hoop. For kitchen scraps, use a lidded trash can, tumbler, or rodent-resistant wood-and-hardware-cloth bin. For serious gardening, build a two- or three-bin system so active, curing, and finished compost stay separate.
Spend money on the parts that matter: access, airflow, drainage, a secure lid, and 1/4-inch hardware cloth where pests are likely. A compost bin is not complicated construction, but the details determine whether you keep using it after the first month.
Quick wins for a faster PC:
Scan for outdated or missing drivers - takes under a minuteDriver Scan →Repair Windows errors before they cause bigger problemsFix Now →Frequently Asked Questions
What is the cheapest way to build a compost bin in 2026?
The cheapest practical option is a wire hoop bin or pallet bin. If you already have salvaged materials, the cost can be $0-$30. With new wire, screws, hinges, or hardware cloth, expect about $25-$150 depending on the design.
What size should a backyard compost bin be?
A good target is 3 feet by 3 feet by 3 feet, or about 1 cubic yard. That size holds enough mass to heat when managed properly but is still manageable for turning and unloading.
Do I need a permit for a compost bin in my yard?
Most ordinary backyard compost bins do not need solid-waste facility permits, but local city rules and HOAs may regulate setbacks, odors, pests, height, and container type. Check those rules before building a permanent or visible station.
How do I make a compost bin rodent-proof?
Use 1/4-inch galvanized hardware cloth on the bottom and lower openings, add a secure lid with a latch, keep gaps small, and cover every food-scrap addition with several inches of dry browns such as leaves, shredded cardboard, or straw.
Do these 3 things before closing this tab:
1Clear out junk files and repair common Windows errors2Scan for outdated or missing drivers - takes under a minute3Repair Windows errors before they cause bigger problemsAre pallet compost bins safe for vegetable gardens?
Use only clean pallets marked HT, which means heat-treated. Avoid pallets with chemical stains, oil, odors, pesticide exposure, or unknown industrial use, especially if the finished compost will go into vegetable beds.
Is it cheaper to DIY a compost tumbler or buy one?
Not always. A DIY barrel tumbler can cost $50-$200 if you already have a clean food-grade barrel. Budget retail tumblers in 2026 can start around $49-$70, so buying may be cheaper if you need to purchase all parts new.
Quick Recap
Product prices and availability are accurate as of the date/time indicated and are subject to change. Any price and availability information displayed on Amazon at the time of purchase will apply.