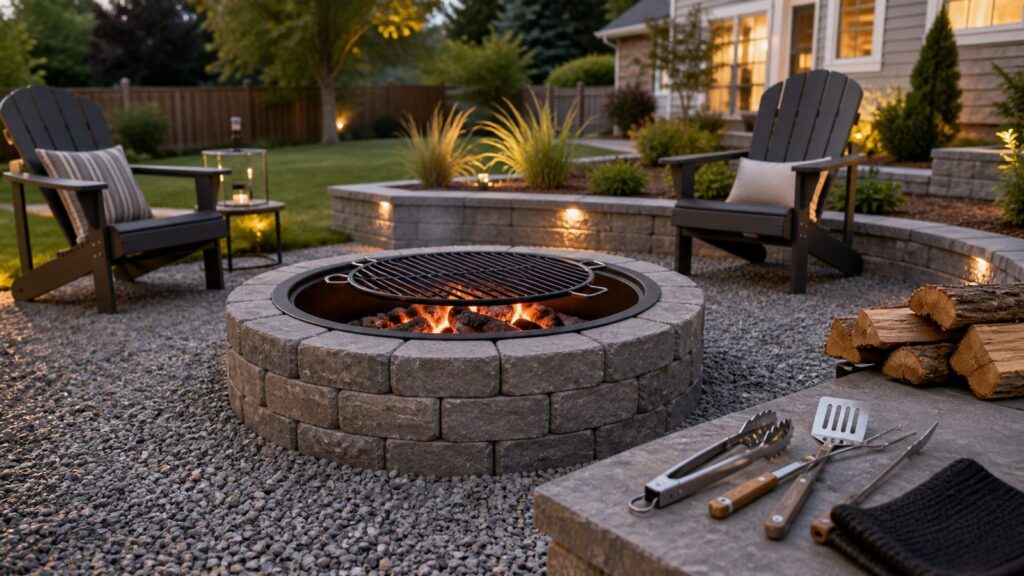
A good BBQ fire pit is not just a pretty ring of blocks with a flame in the middle. If you plan to cook over it, the pit needs a stable grate, a way to manage coals, enough airflow, drainage, a noncombustible work surface, and safe clearance from the house, fence, trees, and seating.
For most homeowners, the easiest DIY BBQ fire pits fall into the $150 to $600 range: a block or paver ring, a steel liner or fire brick, 3/4-inch crushed stone, a food-safe grill grate, and a few basic tools. Very simple salvage builds can land around $50 to $150. Once you add a paver patio, seating area, drainage improvements, capstones, delivery, or a gas system, the project can move quickly into the $600 to $2,500 DIY or semi-pro range. Professionally installed masonry fire pits commonly run $2,000 to $8,000, and high-end outdoor fire features can exceed $10,000 to $25,000.
On our job sites, we separate fire pits into two categories: temporary cooking setups and permanent hardscape features. Temporary pits can be a weekend project. Permanent pits, especially those tied into patios, seat walls, outdoor kitchens, or gas lines, need more planning because code, drainage, heat damage, insurance, and long-term masonry performance all matter.
Before You Build: Safety, Permits, and Cooking Layout
Start with the boring part because it prevents expensive mistakes. Check your city, county, HOA, and fire district rules before buying materials. Some places allow small recreational fires with no permit. Others require a permit, limit burn days, ban wood fires during dry conditions, or set larger setbacks than generic online advice.
Recommended Free Tools
#1 Best Overall

- Larger Cooking Area: The large cooking area of 36 x 36-inch makes our fire pit cooking grate perfect for family or friend gatherings. It can hold up to 25 pounds of food for 8 people. It can sit right above the fire with no assembly and allows you to sear steaks, fish, kebabs, ribs, pizzas, sausages, oysters, and various vegetables.
- Foldable & Portable: Thisfire pit grill grate boasts a foldable design, making it easy to transport anywhere. It can be folded in 5 seconds, which is 12 lbs weight only. It is easy to add charcoal with this design.
- High-Quality Steel: The fire pit grate is made of heavy-duty steel with a coat of paint on the surface, which is durable, food-grade, rust-proof, and high-temperature heat resistant. It can stand temperatures up to 572℉ / 300℃ without deformation and cracking.
- Diamond-Shaped Mesh: The cooking grate is designed with a high-density mesh grill, which can transfer heat efficiently and distributes heat evenly. You won't worry about dropping food if you want to cook bacon, eggs, toast, steaks, pancakes, sausages, or even pineapple slices.
- Multi-Purpose Use: Designed for use with outdoor cookware, frying pans, skillets, and pots, for cooking over an open fire and widely used outdoors such as camping, hiking, picnic, traveling, backpacking, climbing, fishing, and other outdoor activities.
As a baseline, the U.S. Fire Administration advises keeping fire pits at least 10 feet from homes and anything combustible. Some local ordinances require 15, 20, 25, or even 50 feet depending on the fire type and location. Jurisdictions using stricter fire code guidance may require outdoor fires to be 50 feet from structures. Local rules win every time.
If you dig for an in-ground pit, patio base, drainage trench, posts, or a gas line, call 811 first. Even shallow work can find irrigation, low-voltage lighting, utility laterals, or old site improvements.
Cooking Layout That Actually Works
For a BBQ fire pit, plan five zones:
- Fire zone: where logs or charcoal burn down.
- Coal zone: where you rake embers for steady heat.
- Grate zone: where food sits safely and level.
- Landing zone: a noncombustible surface for tongs, trays, gloves, and hot lids.
- Traffic zone: clear space so people are not walking through smoke or behind the cook.
A 30- to 44-inch inside diameter works for most backyard cooking pits. Smaller pits are easier to control for grilling. Oversized pits waste fuel and can push guests too close to heat. For seating, keep movable chairs at least 30 to 36 inches from the pit edge, with more room where people need to pass behind them.
2026 DIY BBQ Fire Pit Cost Guide
Installed fire pit averages in the U.S. cluster around $830 to $850, with common installed ranges around $200 to $3,000 depending on source, region, size, fuel, materials, and site prep. DIY can be much cheaper, but only if the site is simple and you avoid rebuilding it twice.
Free tools Windows power users keep installed
One-click scans. No signup required.
| Build Type | Typical 2026 Cost | Best For | DIY Difficulty |
|---|---|---|---|
| Salvaged stone, block, or simple metal ring pit | $50-$150 | Temporary wood or charcoal cooking | Easy |
| Basic block or paver BBQ fire pit | $150-$600 | Weekend backyard grilling pit | Easy to moderate |
| Fire-brick or lined masonry pit | $300-$900 | Better heat durability and frequent cooking | Moderate |
| DIY pit with paver pad and seating area | $600-$2,500 | Finished backyard entertaining space | Moderate to advanced |
| Professionally installed masonry fire pit | $2,000-$8,000 | Permanent hardscape integration | Hire a pro |
| Custom gas, fireplace, or outdoor kitchen feature | $10,000-$25,000+ | Premium outdoor living projects | Hire licensed trades |
Permit-related costs are local. A practical planning range is $20 to $500, though some recreational-fire permits are free and gas, masonry, patio, or inspection fees may be separate.
Best Materials for a DIY BBQ Fire Pit
The biggest material mistake is using decorative concrete block as the direct firebox. Many blocks and pavers look strong but are not made for repeated direct flame. They can crack, spall, or fail early. The better approach is simple: let the visible exterior provide shape and appearance, and let fire-rated materials handle direct heat.
Use fire brick, a steel fire ring, or a steel liner inside decorative block. Use 3/4-inch crushed stone under the pit for drainage. Avoid river rock, pea gravel inside the firebox, wet stone, treated lumber, painted wood, construction scraps, and non-fire-rated adhesives near direct heat. If adhesive is used for capstones, keep it outside the direct flame path and choose a product rated for the conditions.
For cooking, use a food-safe steel or cast-iron grate. A removable grate is better than a fixed one because you can add wood, rake coals, clean ash, and change heat zones. For serious BBQ, an adjustable grate or Santa Maria-style lift is one of the best upgrades you can make.
Do these 3 things before closing this tab:
1Repair Windows errors before they cause bigger problems2Fix the driver behind crashes, sound loss and screen glitches3Clear out junk files and repair common Windows errors27 Easy DIY BBQ Fire Pit Ideas
1. Retaining-Wall Block Ring With Steel Insert
This is the classic weekend build for a reason. Set a level gravel base, stack two or three courses of retaining-wall block, and drop in a steel fire ring. Add a 30- to 36-inch cooking grate. Expect $200 to $600 depending on block choice, liner size, and grate quality. Plan one full day for layout, digging, base prep, and stacking.
2. Fire-Brick Square BBQ Pit
A square pit is easier to cook over because rectangular grates fit cleanly. Build a fire-brick inner box about 32 by 32 inches inside, then add decorative block or brick outside if desired. This usually costs $300 to $900. It is a better choice than bare concrete block if you cook often.
3. In-Ground Gravel-Lined Pit
For a low-profile camp-style pit, excavate a shallow bowl, line the bottom with compacted crushed stone, and use a steel ring or fire brick at the edge. Keep it shallow enough for airflow and cooking access. Call 811 before digging. This can cost $75 to $300, but drainage matters more than appearance here.
4. Cinder-Block Temporary BBQ Pit
Dry-stack concrete masonry units in a U shape, set a heavy grate across the top, and use charcoal or a small wood coal bed. This is cheap, usually $60 to $200, and useful for occasional cookouts. Do not treat standard blocks as a long-term direct-flame firebox. Inspect for cracking and keep the setup temporary.
5. Paver Patio Fire Pit With Cooking Grate
If you already have a paver patio, a lined fire pit can sit within a protected area, but heat can damage pavers and polymeric sand. Use a steel insert, keep flame off the patio field, and consider a heat shield or dedicated stone base. Budget $250 to $900 for the pit alone, more if you build the patio pad.
Rank #2
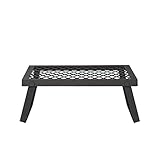
- DURABLE CONSTRUCTION: Heavy-duty welded steel frame with steel-mesh grill top provides long-lasting performance for outdoor cooking
- PORTABLE DESIGN: Legs angle outward for stability and fold underneath for compact storage and easy transport
- VERSATILE USE: Perfect for camping cookware including cast iron pots and pans over open fires (not intended for direct food contact)
- STABLE SETUP: Size measures 19.5" x 12.2" x 6.5" (LxWxH) with angled legs for enhanced stability
- IN THE BOX: Includes 1 portable camping grill grate with user manual
6. Metal Fire Ring Kit With Swing-Away Grate
A steel ring kit with a swing-away grate is one of the simplest cooking-focused options. The swing grate lets you move food off heat fast, which is useful for flare-ups. Expect $150 to $500. Set it on compacted crushed stone or a noncombustible pad, not grass.
7. Smokeless-Style Masonry Pit
A smokeless-style pit uses lower intake gaps and upper secondary-air holes to improve combustion. It is not smoke-free, especially with wet wood or an overloaded fire, but it can burn cleaner. Keep openings deliberate and modest. Oversized lower gaps can make the fire hard to control in wind. Budget $250 to $800.
8. Washing-Machine Drum Fire Pit
A stainless washing-machine drum makes a surprisingly effective portable fire pit because it already has airflow holes. Mount it on sturdy steel legs or set it on a noncombustible base, then add a grate that cannot slide. Cost can be $50 to $200 if you source the drum cheaply. Remove plastics, coatings, and residues before use.
What’s actually slowing this PC down?
Pick the symptom - the matching free tool is one click away.
9. Tractor-Rim BBQ Pit
A heavy steel tractor rim or similar salvaged ring can make a rugged fire pit. Use only clean, unpainted or properly stripped metal. Add a level grate and stable base. This is usually $50 to $250 depending on salvage pricing and metalwork. Sharp edges and unknown coatings are the main concerns.
10. Half-Barrel Charcoal Pit
A clean steel barrel cut lengthwise can become a large charcoal BBQ pit. Add legs, ventilation, a grate, and a way to manage ash. This is more metalworking than masonry, but it cooks well for groups. Budget $100 to $400. Never use a barrel that held fuel, chemicals, or unknown materials.
11. Keyhole Fire Pit
A keyhole pit has a round fire area and a rectangular cooking channel. You burn wood in the round section, then rake coals under the grate in the narrow section. It is one of the smartest low-tech cooking layouts. Build it with fire brick or stone and expect $150 to $700 depending on finish.
12. Two-Zone Block BBQ Pit
Build a rectangular block pit with one side for active fire and one side for coals. A 24-by-48-inch inside footprint works well for small gatherings. Use fire brick or a steel liner where flames hit. This design gives better heat control than a round pit and usually costs $250 to $800.
13. Raised Knee-Height Grill Pit
Low campfire pits are cozy but awkward for cooking a full meal. A raised pit with the rim around knee height is easier on your back and keeps the grate at a usable working height. Use a stable masonry base, fire-rated liner, and capstones outside the flame path. Budget $400 to $1,200.
14. Fire Pit With Removable Santa Maria Grate
The grate upgrade can matter more than the pit itself. A Santa Maria-style adjustable grate lets you raise food away from flames or lower it over coals. Add one to a square or rectangular masonry pit. Expect $250 to $900 for the grate system alone, plus the pit.
15. Compact 30-Inch Urban Patio Pit
For smaller yards, keep the inside diameter around 30 inches and use a removable grate. Smaller pits use less fuel, produce less radiant heat, and are easier to control. Clearances still apply, and some dense neighborhoods prohibit open burning. Budget $150 to $500.
16. 44-Inch Gathering Pit With Half-Grate
A larger 40- to 44-inch pit works well when you want both fire ambiance and cooking. Use a half-grate so part of the pit remains open for tending wood. This prevents the common problem of trapping the entire fire under a fixed grate. Budget $300 to $900.
Outdated Drivers Are Slowing You Down
One free scan finds every outdated or missing driver and matches the right update for your exact hardware.Free scan · exact hardware matchPC Slower Than It Used to Be?
A free scan shows the junk files, broken settings and background clutter dragging Windows down - then fixes them in one click.Free scan · Windows 10 & 1117. Dry-Stack Stone Pit With Steel Liner
Natural stone looks good, but the liner should take the heat. Build a stable dry-stack exterior, then install a steel ring inside. Avoid river rocks and wet stones near flame. Depending on stone source, this can run $100 to $800. Stability matters; wobbly stone and hot food do not mix.
18. Brick Patio Corner BBQ Pit
A corner pit can work if it does not trap smoke or crowd fences. Maintain local setbacks from property lines, structures, and combustibles. Use fire brick inside and leave working room on at least two sides. Budget $300 to $1,000, not including patio changes.
Rank #3

- 【Large Area】- 24 inches diameter; Ground spike is 33 inches. Sturdy cooking grate is large enough to hold meat and vegetables to have a good BBQ, and you can grill your favorite food as you want.
- 【Stainless Steel Material】- Designed with stainless steel cooking grate, which can use Spring handles to adjust the height of grill. Durable and reliable in performance.
- 【A Multi-functional Hook】- It can be removed from the fire when not in use or when cooking . which can be used with cooking pot, water bottle, camping light, dutch pot, etc. Two grills of different lengths can boil water and grill at the same time.
- 【Multipurpose Cooking Equipment】- The Swivel grill grate is easy place in the ground, and can be disassembled in seconds. Easy for storage and portability, can be used with any kind of open fire.
- 【Easy to Install】- Install it in less than 10 minutes, assembled and disassembled without any tools. Convenient and fast, Giving you the best camping barbecue experience.
19. Fire Pit With Built-In Ash Cleanout
For frequent use, include a removable ash pan or cleanout opening. Wet ash smells bad, holds moisture, and can stress masonry during freeze-thaw cycles. A cleanout adds cost, usually $50 to $200 in parts, but saves time over the life of the pit.
20. Gravel Pad Fire Pit Zone
Instead of building only the pit, build the fire area. Excavate the seating zone, install landscape fabric where appropriate, add compacted base, and finish with gravel. This creates a noncombustible area around the pit and improves drainage. A simple gravel zone can cost $300 to $1,500 depending on size.
Quick wins for a faster PC:
Repair Windows errors before they cause bigger problemsFix Now →Scan for outdated or missing drivers - takes under a minuteDriver Scan →21. Fire Pit With Stone Landing Shelf
Add a noncombustible landing surface beside the cooking grate. A 16- to 24-inch-deep stone or concrete surface gives you a place for trays, gloves, thermometers, and tools. This is a small detail that makes the pit feel professional. Budget $100 to $500 extra.
22. Portable Bowl Pit With Grill Bridge
If local rules or rental restrictions make permanent work difficult, use a portable steel bowl pit with a grill bridge. It is not as durable as masonry, but it is flexible and easy to store. Expect $100 to $500. Use it only on approved noncombustible surfaces and follow manufacturer clearances.
23. Dakota-Style Cooking Pit for Occasional Use
A Dakota-style pit uses a fire hole and an air intake tunnel. It is efficient but involves digging and is better for occasional rustic cooking than a finished backyard. Call 811 first, avoid roots, and restore the area properly. Cost is minimal, but site suitability is everything.
24. Charcoal-Only Paver BBQ Station
If wood burning is restricted, a charcoal-only masonry station may be easier to manage. Build a lined rectangular pit sized for standard grates and ash removal. Charcoal gives predictable heat and less flame height. Budget $150 to $700.
25. Fire Pit With Seat-Wall Integration
This looks simple online but is usually a pro-level project. Seat walls need proper base prep, drainage, layout, and clearances so people are not locked too close to heat. Expect $2,000 to $8,000 or more when professionally integrated into a patio.
26. Propane Fire Pit Table With Grill Accessory
Propane is convenient, but cooking over gas fire features depends on the appliance rating. Many decorative gas fire tables are not designed for grease, food, or cookware. Use only manufacturer-approved cooking accessories. Budget $300 to $1,500 for consumer units, more for built-ins.
27. Natural-Gas Masonry BBQ Fire Pit
This is not a casual DIY job. Natural gas adds burner sizing, ventilation, shutoff valves, permits, inspections, and manufacturer clearances. Hire a licensed gas fitter or qualified contractor. Costs vary widely, but permanent gas fire features often move into the $2,000 to $8,000 range before outdoor kitchen upgrades.
Independent reader supportYour contribution helps us test, update, and keep practical guides available for everyone.How to Build a Simple Block BBQ Fire Pit
For a reliable weekend build, choose a 36-inch inside diameter block pit with a steel liner and removable grate. Most homeowners can complete this in one to two days if the site is flat and materials are on hand.
Materials
- Retaining-wall blocks or concrete fire pit blocks for two or three courses
- Steel fire ring or liner sized to fit the inside diameter
- 3/4-inch crushed stone for base and drainage
- Fire brick if the design does not use a steel liner
- Food-safe 30- to 36-inch cooking grate
- Capstones, if desired
- Heat-appropriate adhesive for capstones outside the firebox
- Metal spark screen, ash can with lid, gloves, and extinguisher or hose
Basic Steps
- Confirm local rules, burn restrictions, and setbacks.
- Call 811 before digging.
- Mark a level circle with enough room for seating and circulation.
- Excavate 4 to 6 inches for the base, removing grass and organic material.
- Add and compact crushed stone so the first block course sits level.
- Dry-fit the first course carefully. This course controls the whole build.
- Stack the remaining courses, staggering joints.
- Install the steel liner or fire brick interior.
- Add capstones if they do not interfere with the grate.
- Set the cooking grate so it is stable, removable, and accessible.
- Test airflow with a small fire before hosting a full cookout.
Slope surrounding hardscape away from the pit so rainwater does not sit in the firebox. If water collects inside, add more drainage stone or a drain path before finishing the seating area.
Common DIY Fire Pit Mistakes to Avoid
The most common failure we see is copying a picture without checking setbacks, burn bans, HOA rules, or permit triggers. The second is using the wrong materials inside the firebox. Decorative block can be part of the structure, but fire brick or steel should handle direct heat.
Do not build directly on grass, wood decking, or compacted soil with poor drainage. Do not use found river rocks or wet stones in the firebox. Do not make the pit so deep that airflow suffers or so wide that the cook has to lean over heat to reach the center. Do not install a fixed grate that blocks access to the fire. And do not ignore wind. Smoke blowing into doors, windows, neighboring yards, or the main seating area will make the pit unpleasant no matter how good the masonry looks.
Rank #4

- Crafted from high-quality coated steel, this compact & portable folding campfire grill is built to last many seasons. The unique folding design is all about space-saving convenience. RVers and campers will love this for their outdoor adventures!
Fuel matters too. Use dry seasoned firewood or charcoal. Avoid treated lumber, painted wood, trash, construction scraps, lighter fluid abuse, and accelerants. Keep a metal spark screen nearby for wood fires, store ashes in a lidded metal can, and confirm ashes are fully cold before disposal.
The Tool Desk
Outbyte Driver Updater FREEScan for outdated or missing drivers - takes under a minuteDriver Scan →Outbyte PC Repair FREEClear out junk files and repair common Windows errorsFree Scan →When to DIY vs. When to Hire a Pro
DIY is a good fit for portable wood pits, simple steel-ring kits, dry-stack block rings, small charcoal pits, gravel fire zones, and removable cooking grates. These projects are usually low-risk if you follow local rules, maintain clearances, use fire-rated materials, and keep the pit away from structures and combustibles.
Hire a pro when the fire pit becomes part of a larger construction system. That includes gas lines, permanent masonry near structures, retaining walls, seat walls, paver patio integration, drainage corrections, outdoor kitchens, electrical lighting, built-in appliances, or properties in wildfire-prone areas. A contractor can coordinate grade, base depth, water movement, material compatibility, inspections, and code requirements before the work is buried under stone.
The DIY question is not whether you can stack blocks. Many homeowners can. The better question is whether the pit will still be level, safe, drainable, serviceable, and code-compliant after five seasons of heat, rain, ash, and freeze-thaw cycles.
Final Builder Advice
If you want the easiest useful BBQ fire pit, build a 30- to 36-inch lined block pit on a crushed-stone base with a removable grate, a spark screen, and a noncombustible landing area. Keep seating at least 30 to 36 inches back, verify local setbacks, and leave yourself a way to manage coals and clean ash.
If you want the fire pit tied into a patio, seat wall, outdoor kitchen, gas system, or drainage plan, get a local quote before buying materials. Those are the details that determine whether the finished space feels like a permanent outdoor room or a weekend project that needs repair after the first hard season.
Frequently Asked Questions
Do I need a permit to build a backyard BBQ fire pit?
Sometimes. Temporary wood or charcoal pits may not need a permit in some areas, while permanent masonry pits, gas fire features, patios, and recreational fires may trigger local permits or inspections. Check your city, county, HOA, and fire district before building.
How far should a fire pit be from a house or fence?
Use 10 feet as an absolute starting point, but many local rules require 15, 20, 25, or even 50 feet from structures, fences, property lines, trees, or combustibles. Follow the stricter local requirement.
Can I use regular concrete blocks or pavers for a fire pit?
Regular blocks or pavers can be used as the exterior structure, but they should not be the direct firebox for repeated high heat. Use fire brick or a steel liner inside the pit to handle direct flame.
Recommended Free Tools
What size fire pit is best for grilling?
A 30- to 44-inch inside diameter works for most backyard BBQ fire pits. Smaller 30- to 36-inch pits are easier to control for grilling, while larger pits work better for groups if you use a half-grate or adjustable grate.
Is wood or gas better for a backyard BBQ fire pit?
Wood and charcoal are cheaper and easier for DIY cooking pits. Gas is convenient but adds burner sizing, ventilation, shutoff valves, permits, inspections, and manufacturer restrictions. Many decorative gas fire features are not designed for cooking.
When should I hire a contractor instead of building it myself?
Hire a pro for gas lines, permanent masonry, patio integration, seat walls, outdoor kitchens, drainage corrections, electrical work, or wildfire-prone properties. Simple portable pits and basic lined block rings are more DIY-friendly.
Quick Recap
Product prices and availability are accurate as of the date/time indicated and are subject to change. Any price and availability information displayed on Amazon at the time of purchase will apply.




