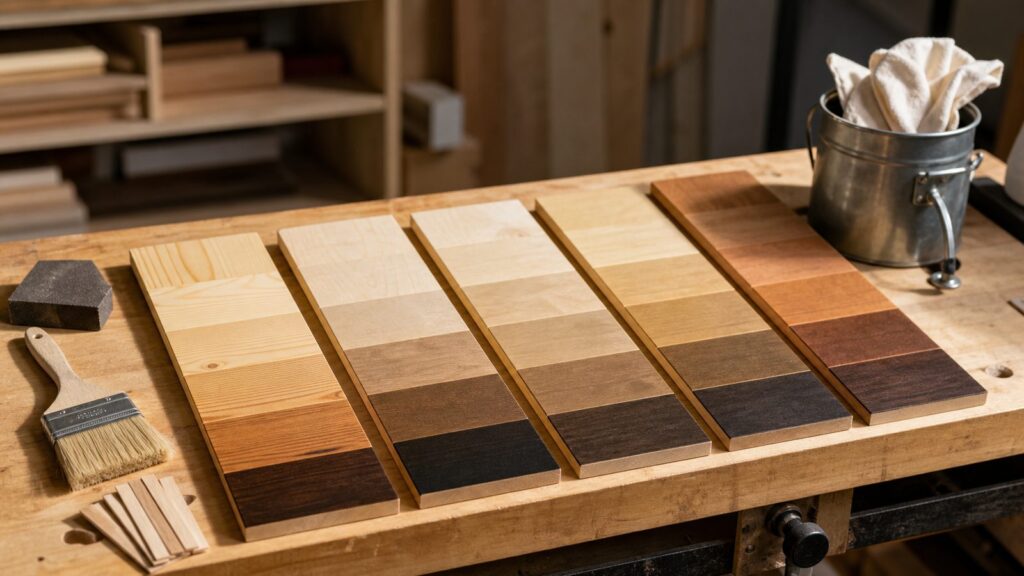
Getting consistent stain on pine, fir, poplar, alder, birch, maple, cherry, and many plywood veneers comes down to controlling absorption. These woods do not take stain evenly by default. Soft earlywood drinks color, dense latewood resists it, end grain goes dark fast, and figured areas can turn muddy or blotchy before you realize what happened.
On our job sites, we treat staining as a finishing system, not a one-can decision. The reliable workflow is simple: identify the wood, sand every piece the same way, test on matching scraps, control absorption with conditioner or a washcoat where needed, build color in thin steps, then lock it in with a compatible clear coat or exterior stain system.
| # | Preview | Product | Price | |
|---|---|---|---|---|
| 1 |

|
Varathane Pre-Stain Wood Conditioner | $18.29 | Buy on Amazon |
| 2 |

|
Varathane Pre-Stain Wood Conditioner | $22.99 | Buy on Amazon |
| 3 |

|
Varathane Wood Conditioner | $21.55 | Buy on Amazon |
The realistic goal is consistent, not identical. Natural wood has grain, growth rings, color bands, mineral streaks, and age differences. A good stain job makes those variations look intentional instead of accidental.
Why Some Woods Stain Blotchy
Stain looks uneven when different parts of the board absorb different amounts of color. Pigment stain is especially sensitive because pigment particles lodge in open pores, soft growth zones, scratches, sanding swirls, and end grain. Dense wood, burnished areas, mill glaze, glue spots, and compressed fibers reject more stain.
The Tool Desk
Outbyte PC Repair FREERepair Windows errors before they cause bigger problemsFix Now →Outbyte Driver Updater FREEFix the driver behind crashes, sound loss and screen glitchesFind Drivers →#1 Best Overall
- Pre-stain wood conditioner preps wood for even color
- Easy to use, water-based formula dries fast for quick project completion
- Low odor wood conditioner prevents blotching on soft woods and ensures a high quality finish
- Cleans up with soap and water; great for use on furniture, cabinets, trim, wood floors and more
- Apply to bare wood before Varathane Wood Stain for best results
That is why two boards from the same lumber rack can finish differently. One pine board may have wide, soft earlywood bands that turn dark brown. The next may have denser latewood lines that stay pale. Maple may look clean while bare, then show cloudy patches after stain. Poplar may flash green, gray, tan, and brown across one shelf. Cherry may look mild at first, then darken naturally over months as light hits it.
More forgiving woods include oak, ash, walnut, and mahogany because their grain structure accepts pigment more predictably. Even then, end grain still absorbs faster than face grain, so stair treads, rail ends, trim returns, door edges, and deck board cuts need extra attention.
The Job-Site Workflow for Even Stain
Before staining visible work, we want three things controlled: the wood surface, the absorption rate, and the color build. If any one of those is random, the final color will be random too.
1. Identify the wood before choosing the stain
Do not pick stain color from the label alone. The same can of walnut stain can look warm on oak, dirty on poplar, orange on pine, and weak on maple. For built-ins, stair parts, doors, mantels, beams, cabinet panels, and repair boards, first confirm the species or at least the likely species group.
If you are matching an existing surface, also consider age. A 12-year-old cherry mantel, sun-faded deck board, or UV-aged pine stair skirt is not the same color as fresh lumber, even if the species matches. Matching new boards to old boards is rarely solved by one stain can.
2. Sand every visible part through the same schedule
Uneven sanding is one of the most common causes of uneven stain. A board sanded to 120 grit will usually absorb more stain than one burnished to 220 grit. A random-orbit swirl can become a dark crescent as soon as pigment hits it.
For most interior trim, shelves, doors, and built-ins, a practical schedule is 120 grit, then 150 grit, then 180 grit. For blotch-prone softwoods, we usually stop around 180 grit before conditioner or gel stain. For dense maple or birch, 180 or 220 may be appropriate depending on the finish system, but the key is consistency across every part.
Vacuum thoroughly, then wipe with a clean microfiber cloth or tack cloth compatible with your finish. Avoid oily shop rags unless the finish system calls for them. Glue squeeze-out, silicone residue, drywall dust, and hand oils can all show up as light patches.
Free tools Windows power users keep installed
One-click scans. No signup required.
3. Treat end grain separately
End grain acts like a bundle of straws. It absorbs stain faster and darker than face grain. On trim returns, exposed shelf ends, stair nosings, handrail ends, door edges, beam cuts, and deck board ends, untreated end grain can look like dark caps.
Two reliable fixes are sanding end grain one or two grits finer than the face grain or sealing it lightly before staining. For example, if the face grain is sanded to 180 grit, sand the end grain to 220 or 320. On interior work, a light washcoat or conditioner on the end grain can also slow absorption.
4. Test the full system, not just the stain
A useful sample includes the same species, same sanding schedule, same conditioner or sealer, same stain, same wipe-off timing, and same topcoat. The clear coat matters. Polyurethane, waterborne acrylic, oil-based varnish, lacquer, and exterior sealers can all shift color and sheen.
For repairs, hold the sample next to the existing finished surface after the clear coat dries. A stain that looks right before topcoat can turn too amber, too gray, too shiny, or too dark once sealed.
Windows Errors? Fix Them Before They Spread
Repair common Windows errors and clear accumulated junk for a smoother, more stable PC - no reinstall needed.Free scan · no reinstallCrashes, No Sound, or Screen Glitches?
Random freezes, missing sound and display glitches usually trace back to one bad driver. Find and replace yours safely.Free scan · under a minuteBest Stain Strategies by Wood Species
The right method depends on the wood. Some species need absorption control. Others need a different coloring method altogether.
| Wood | Common Problem | Best Starting Strategy | What to Watch |
|---|---|---|---|
| Pine, fir, spruce | Strong blotching; soft growth bands go dark | Pre-stain conditioner, gel stain, or light washcoat before stain | Conditioner often makes the final color lighter, so test a darker stain if needed |
| Poplar | Green, gray, tan, and brown color variation | Consider paint, toner, gel stain, or opaque finish | Poplar is often paint-grade; clear stain may not hide color bands |
| Alder | Blotches and uneven absorption | Conditioner or washcoat, then controlled gel stain | Can mimic cherry tones, but needs samples |
| Birch and maple | Dense areas resist pigment; cloudy or weak color | Dye stain, toner, or gel stain rather than thin pigment stain alone | Dye is less forgiving for beginners and can need a toner step |
| Cherry | Blotching plus natural darkening over time | Washcoat, light stain, or clear finish with planned aging | Fresh cherry may look pale, then deepen significantly with light exposure |
| Plywood veneer | Thin face veneer, glue effects, mixed absorption | Light sanding, conditioner, gel stain, or toner | Do not sand aggressively; veneer can be very thin |
Conditioner, Washcoat, Gel Stain, Dye, and Toner: What Each One Does
Most blotch problems are absorption problems, but different products solve that problem in different ways.
Pre-stain conditioner
Commercial wood conditioner partially seals soft or porous areas so they do not grab as much pigment. It is useful on pine, fir, spruce, alder, birch, and some plywood veneers. The tradeoff is color strength. Conditioned wood often stains lighter because the surface absorbs less stain overall.
Follow the product window exactly. Some conditioners require stain within a short period after application. If you miss that window, absorption can change and your sample may no longer predict the actual work.
In 2026, common retail pricing for small stain and conditioner containers is roughly $10 to $25 for an 8-ounce to quart-size container, depending on brand and formulation.
Dewaxed shellac washcoat
A washcoat is a very thin sealing coat. Finishers often use dewaxed shellac because it dries quickly and is compatible under many finish systems when used correctly. It can reduce blotching on cherry, pine, alder, and birch while still letting color build over the surface.
The key is restraint. Too heavy a washcoat blocks too much stain. For visible built-ins or stair parts, test different washcoat strengths on offcuts before committing.
Rank #2
- Pre-stain wood conditioner preps wood for even color
- Easy to use, water-based formula dries fast for quick project completion
- Low odor wood conditioner prevents blotching on soft woods and ensures a high quality finish
- Cleans up with soap and water; great for use on furniture, cabinets, trim, wood floors and more
- Apply to bare wood before Varathane Wood Stain for best results
Gel stain
Gel stain is thicker than thin penetrating stain. It sits more on the surface, which gives you more control on blotchy woods and vertical surfaces such as doors, newel posts, stair skirts, cabinet sides, and fireplace mantels.
Do these 3 things before closing this tab:
1Scan for outdated or missing drivers - takes under a minute2Clear out junk files and repair common Windows errors3Fix the driver behind crashes, sound loss and screen glitchesGel stain can improve uniformity, but it may obscure some grain and it requires careful wipe-off timing. Leave it too heavy and it can look painted or streaky. Wipe too aggressively and you may pull color out of corners and profiles. In 2026, many gel stains run about $20 to $40 per quart.
Dye stain
Dye stains color wood fibers more directly and can work better than pigment stains on dense woods such as maple and birch. They can produce clear, even color, especially when followed by a toner or glaze for depth.
Dye is less forgiving. Lap marks, over-application, and uneven sanding can show fast. For a homeowner staining one shelf or one door, gel stain is often easier. For a cabinet-grade maple built-in, dye plus toner may be the professional route.
Toner and glaze
Toner is color carried in a finish layer, often sprayed. Glaze is color manipulated between finish coats. These methods are common when matching new wood to old trim, blending cabinet repairs, or evening out multiple boards in a built-in. They add control but also require practice, ventilation, masking, and compatible products.
Interior Process for Trim, Built-Ins, Doors, and Cabinets
For interior work, the best process is controlled and repeatable. Do not experiment on the installed face of a built-in or the front edge of a stair tread.
- Make samples. Use offcuts from the same material whenever possible. Sand them with the exact schedule planned for the project.
- Clean the surface. Vacuum dust from corners, profiles, and pores. Wipe with a finish-compatible cloth.
- Condition or seal if needed. For pine, alder, cherry, birch, and similar woods, test conditioner or a washcoat.
- Apply stain in thin, controlled coats. Work with the grain. Keep a wet edge. On vertical parts, start with less material to avoid runs.
- Wipe consistently. If your sample was wiped after 5 minutes, do not leave the real piece for 15 minutes.
- Let it dry fully. Dry time varies by oil versus water base, temperature, humidity, and ventilation. Overnight is common, but the label controls.
- Apply the topcoat from the sample. Do not switch from water-based poly to oil-based poly after approving a sample unless you retest.
Water-based conditioner and water-based stain can raise the grain. A pro approach is to pre-raise the grain with clean water, let it dry, sand back lightly with 220 grit, then continue with the water-based color system. That extra step can save you from a rough, fuzzy surface after color goes on.
Exterior Wood: Decks, Fences, Beams, and Replacement Boards
Exterior staining has two jobs: improve appearance and protect the wood from water and UV exposure. Consistency still matters, but exterior wood also deals with sun, rain, mildew, foot traffic, temperature swings, and previous coatings.
For decks and fences, start with cleaning. Gray fibers, mildew, dirt, and old failing coatings will prevent consistent absorption. Many deck systems call for cleaning and brightening before stain. Replace failed boards before staining, not after. Let the wood dry according to the stain manufacturer’s requirements; moisture limits and dry times vary by product.
What’s actually slowing this PC down?
Pick the symptom - the matching free tool is one click away.
Opacity is your biggest visual control. Transparent and semi-transparent stains show grain, board variation, patches, sanding marks, and old-versus-new differences. Semi-solid and solid stains hide more variation but change the look and future maintenance cycle.
On large surfaces, work board-by-board and avoid stopping mid-board. Maintain a wet edge. On railings and spindles, plan your sequence so drips from upper parts do not land on finished lower boards.
What It Costs in 2026
Interior stain work can be inexpensive as a DIY project, but color matching and repairs can become labor-heavy. The material cost is usually not the expensive part. The sanding, masking, testing, drying time, and touch-up work are what determine the result.
| Project Type | Typical 2026 Cost | Cost Drivers |
|---|---|---|
| DIY interior stain materials | About $10-$25 for many 8 oz to quart stain or conditioner containers | Brand, oil versus water base, tint, opacity, and whether conditioner is separate |
| DIY gel stain | About $20-$40 per quart | Color, brand, coverage, number of coats, and wipe-off waste |
| DIY exterior stain/sealer | About $35-$60+ per gallon | Opacity, VOC-compliant formula, oil versus water base, and coverage rate |
| DIY tools and consumables | About $35-$150 | Sandpaper, brushes, applicators, rags, gloves, masking, cleanup supplies |
| Sander purchase or rental | About $40-$120 | Random-orbit sander, detail sander, discs, pads, and rental duration |
| Professional deck staining | Common benchmarks run about $2-$6 per square foot | Washing, brightening, railings, stairs, sanding, repairs, access, and coating removal |
| Typical deck staining project | Often about $550-$1,900 nationally | Deck size, railing count, condition, local labor, weather, and number of coats |
For professional interior touch-up, trim staining, or a small built-in, many contractors price the work as a minimum-service visit. Expect several hundred dollars minimum, with higher costs for color matching, stripping, dust control in an occupied home, custom stain mixing, or blending clear coat across a larger area.
Quick wins for a faster PC:
Scan for outdated or missing drivers - takes under a minuteDriver Scan →Repair Windows errors before they cause bigger problemsFix Now →Fix the driver behind crashes, sound loss and screen glitchesFind Drivers →How to Match New Wood to Existing Wood
Repair matching is where homeowners get surprised. A new stair tread, deck board, cabinet rail, or section of baseboard may be the same species as the old work and still look different because the original has aged under finish, light, cleaning products, and wear.
Start by deciding whether you need a close architectural match or a perfect furniture-grade match. A closet shelf repair and a front stair landing do not deserve the same budget.
For interior repairs, make at least three samples: one lighter than target, one close, and one slightly darker. Apply clear coat before judging. Look at the samples in morning light, evening light, and under the room’s actual fixtures. Sheen matters as much as color; a satin repair next to semi-gloss trim will read wrong even if the stain color is close.
For decks, new boards rarely match old boards with transparent stain. If the difference is strong, use a semi-solid or solid stain, blend boards across a larger area, or accept that new boards will weather in over time. Severe mismatch, water damage, or mixed species may call for replacement or a more opaque coating instead of another stain attempt.
Recommended Free Tools
Can You Fix Blotchy Stain After It Dries?
Sometimes. The right fix depends on how deep the problem is and what products are already on the wood.
If the stain is still wet, wiping back evenly may solve it. If it has dried but no clear coat has been applied, you may be able to lighten dark areas with solvent appropriate for the stain, lightly sand, then use a gel stain, glaze, or toner to even the surface. If a clear coat is already applied, the fix usually means scuffing and adding color in a finish layer, or stripping and starting over.
Rank #3
- Ideal for use on interior wood furniture, cabinets, doors, trim, floors and paneling
- Oil-based formula penetrates deep into wood to provide better appearance after staining
- Dries to the touch in 1-2 hours and covers between 110-220 sq. ft. per quart
- Wood sealing provides allows for an even, deeper stain
- Works with any oil-based stain
Be cautious with veneer. Cabinet panels, plywood shelves, and hollow-core doors may have a very thin face layer. Aggressive sanding can cut through the veneer and create a worse repair than the original blotch.
Independent reader supportYour contribution helps us test, update, and keep practical guides available for everyone.When Not to Stain
Stain is not always the right finish. We would rather tell a homeowner that early than sell a process that cannot deliver the expected result.
Do not rely on stain alone when the wood species are severely mismatched, the veneer is too thin to sand, the old finish is unknown and contaminated, the lumber is truly paint-grade, or water damage has changed the fibers. Poplar with heavy green and brown variation, mixed plywood patches, construction-grade pine, and old deck boards beside fresh replacements may need paint, solid stain, toner, or replacement.
Also avoid staining damp exterior wood or wood with active mildew, failing coating, or mill glaze. The color may look acceptable for a week and then fail early because the stain never bonded or penetrated correctly.
Safety, Cleanup, VOC Rules, and Permits
Staining is a cosmetic project, but the materials deserve job-site discipline. Oil-based stains, solvents, and oily rags can create fire hazards if handled casually. Lay oily rags flat outdoors to dry according to local guidance, or store them in a sealed metal container filled with water until disposal. Do not pile wet stain rags in a trash can, garage corner, or work van.
Many stain and finish products are household hazardous waste when leftover or solvent-based. Disposal rules vary by city and county, so use your local household hazardous waste program for leftover stain, solvents, and contaminated materials. Keep products away from ignition sources, maintain ventilation, and wear gloves and eye protection.
PC Slower Than It Used to Be?
A free scan shows the junk files, broken settings and background clutter dragging Windows down - then fixes them in one click.Free scan · Windows 10 & 11Outdated Drivers Are Slowing You Down
One free scan finds every outdated or missing driver and matches the right update for your exact hardware.Free scan · exact hardware matchVOC rules also vary by state and air district. Some areas require lower-VOC architectural coatings, and product availability can differ by region. Buy stain intended for your location and follow the label for temperature, humidity, dry time, recoat windows, and cleanup.
Staining a deck, fence, cabinets, trim, or interior woodwork usually does not require a building permit by itself. Repairs can change that. Structural deck work, guardrail replacement, stair rebuilding, major fence changes, or exterior alterations governed by an HOA or historic district may require approval. When the work moves beyond finish maintenance, check before you start.
When to DIY vs. When to Hire a Pro
DIY staining makes sense when the project is small, the wood is replaceable, the finish expectations are flexible, and you can make samples first. A pine shelf, garage workbench, closet built-in, single interior door, or small deck with a forgiving semi-transparent or solid stain can be a good homeowner project.
Hire a pro when the work is highly visible, expensive to replace, or difficult to match. Stair parts, front doors, cabinet faces, fireplace mantels, exposed beams, built-ins in finished rooms, and deck restoration with old coating removal all carry more risk. A professional finish may involve sanding controls, washcoats, gel stain, dye, toner, spray equipment, dust containment, and multiple site visits around dry times.
The key question is not “Can I apply stain?” Most homeowners can. The better question is “Can I control the surface, color, dry time, topcoat, and repair blend well enough for where this piece lives?”
Common Mistakes That Cause Uneven Stain
- Skipping test samples and applying stain directly to visible trim, cabinets, stair parts, or deck boards.
- Assuming conditioner makes wood darker. It often makes the final color lighter by reducing absorption.
- Sanding different boards or profiles to different final grits.
- Ignoring end grain on trim returns, rail ends, tread nosings, and deck board cuts.
- Using thin penetrating pigment stain on dense maple or birch and expecting deep, even color.
- Staining over mill glaze, glue spots, old finish, dust, mildew, or gray exterior fibers.
- Judging a sample before the clear coat is applied.
- Stopping mid-board on decks, doors, shelves, or long trim runs.
- Trying to match old and new boards with one transparent stain when opacity or toner is needed.
The Bottom Line
Consistent stain on problem woods is earned before the can is opened. The best results come from uniform sanding, absorption control, realistic species expectations, tested samples, and a topcoat that matches the sample. Pine, fir, poplar, alder, birch, maple, cherry, and veneers can all be finished well, but they need different strategies.
If the wood is blotch-prone, start with conditioner, a washcoat, gel stain, dye, or toner instead of forcing a thin pigment stain to do everything. If the project is a repair, judge the match only after clear coat. If the project is exterior, clean and dry the wood first, then choose opacity based on how much variation you need to hide.
Frequently Asked Questions
Why does pine stain blotchy?
Pine has soft earlywood and denser latewood that absorb stain at different rates. The soft areas drink more pigment and turn dark while dense areas stay lighter. Conditioner, a washcoat, or gel stain can slow absorption and make the color more even.
What’s actually slowing this PC down?
Pick the symptom - the matching free tool is one click away.
Should I use wood conditioner before staining?
Use conditioner on blotch-prone woods such as pine, fir, alder, birch, and some veneers, but test first. Conditioner usually improves consistency, but it can make the final color lighter because the wood absorbs less stain.
Is gel stain better for problem woods?
Gel stain is often better for blotchy woods and vertical surfaces because it sits more on the surface than thin penetrating stain. It gives more control, but it can obscure grain and must be wiped consistently.
How do I stain end grain so it does not turn dark?
Sand end grain one or two grits finer than the face grain, or seal it lightly with conditioner or a washcoat before staining. End grain absorbs much faster than face grain, so it needs separate control.
Why did my stain look even until I added polyurethane?
Clear coats change color depth, warmth, and sheen. Oil-based topcoats can amber the wood, while water-based finishes usually stay clearer. Always judge samples after the same topcoat planned for the actual project.
Do these 3 things before closing this tab:
1Clear out junk files and repair common Windows errors2Fix the driver behind crashes, sound loss and screen glitches3Repair Windows errors before they cause bigger problemsCan new deck boards be stained to match old boards?
Sometimes, but not perfectly with transparent stain. New boards and UV-aged boards absorb and reflect color differently. Semi-solid or solid stain, blending across a larger area, or allowing new boards to weather may be the better approach.
Quick Recap
Product prices and availability are accurate as of the date/time indicated and are subject to change. Any price and availability information displayed on Amazon at the time of purchase will apply.