Garden bugs thrive because most homeowners look too late and too broadly. By the time leaves are curled, fruit is scarred, or stems are sticky with honeydew, the insect that caused the damage may be hidden under a leaf, disguised as bark, covered in wax, or already gone. Camouflage is not a novelty in the garden. It is one of the main reasons pests survive long enough to damage vegetables, ornamentals, shrubs, and turf edges.
The practical answer is not to spray first. The better approach is to scout, identify, decide, treat only where needed, and recheck. That is the core of integrated pest management, or IPM, and it works well for homeowners because it avoids wasting money and avoids killing the beneficial insects that are already doing part of the work.
On our job sites, we think about insect pressure the same way we think about water, grading, access, and materials: conditions drive outcomes. A dense bed with poor drainage, thick mulch against stems, overhead irrigation, and no inspection path will hide pests better than a spaced, well-drained planting bed with clean edges and drip irrigation. The insects matter, but the built environment around the garden matters too.



How Insect Camouflage Works in a Home Garden
Most garden camouflage is simple and effective. A green caterpillar disappears against a cabbage leaf. Brown squash bugs tuck into dry stems and soil-colored mulch. Scale insects flatten themselves against twigs and look like part of the plant. Mealybugs hide at leaf joints under a white waxy coating. Spider mites are so small that the damage is usually easier to see than the insect.
Camouflage usually falls into five categories:
- Color matching: green cabbageworms on brassicas, green aphids on tender new growth, brown insects along woody stems.
- Shape mimicry: scale insects that look like bark bumps, eggs that look like dust or plant residue, larvae that resemble debris.
- Hiding behavior: squash bugs moving under leaves when disturbed, aphids clustering on protected new growth, pests sheltering in dense plantings.
- Waxy coatings: mealybugs and some scale insects protected by white, cottony, or shell-like coverings.
- Life-stage changes: insects that look harmless as eggs, damaging as larvae, and completely different as adults.
That means identification should not depend only on spotting the insect. You should read the plant. Chewed holes point toward caterpillars, beetles, grasshoppers, slugs, or snails. Stippling, curling, sticky leaves, honeydew, and sooty mold point toward sucking pests such as aphids, scale, mealybugs, lace bugs, whiteflies, and spider mites.
A Practical 15-Minute Scouting Routine
A homeowner can do useful pest scouting in 15 minutes once or twice a week during active growing season. In spring and early summer, check every 5 to 7 days. During hot, dry spider mite weather or when vegetables are producing, inspect every 3 to 4 days. After treatment, recheck in 3 to 7 days depending on the product and pest.
#1 Best Overall
Tools Worth Keeping in the Shed
You do not need a commercial setup. A basic scouting kit usually costs less than one professional service visit:
- 10x hand lens: $10 to $40
- Yellow sticky cards for monitoring: $8 to $20
- Bright flashlight: $10 to $30 if you do not already have one
- Insecticidal soap or horticultural oil: $10 to $30
- Bt caterpillar control: $10 to $25
- Row cover: $15 to $40
- Basic sprayer: $20 to $80 or more depending on capacity and quality
Where to Look First
Start with the spots insects choose because they are protected, shaded, or hard for birds and people to reach. Inspect leaf undersides, new growth, stem joints, veins, mulch edges, shaded plant interiors, and dense plantings. For vegetables, look under the lowest leaves and around the crown. For shrubs, check the shaded side and the branch crotches. For raised beds, inspect corners, trellis bases, and the gap between bed walls and soil.
Use this sequence: look at the whole plant, inspect damage, flip leaves, check stems, inspect the mulch line, then photograph anything suspicious. A clear phone photo gives you something to compare later and helps avoid treating a beneficial insect as a pest.
Pest or Beneficial? A Visual Checklist
The most expensive garden mistake is killing the insects that were already helping you. Many beneficial insects are small, fast, odd-looking, or camouflaged themselves. A few aphids on a plant can feed lacewing larvae and lady beetle larvae. That does not mean you ignore a growing infestation, but it does mean you should not treat every insect sighting as an emergency.
Common Camouflaged Pests
- Cabbageworms: green larvae on cabbage, kale, broccoli, and other brassicas. Look for ragged chewing holes and dark frass on leaves.
- Aphids: green, black, gray, or yellow clusters on new growth and leaf undersides. Watch for curling, sticky honeydew, and sooty mold.
- Scale: flat or raised bumps on stems and leaf undersides. They may look like bark, plant scars, or small shells.
- Mealybugs: white waxy clusters at leaf joints, veins, and protected crevices.
- Squash bugs: brown insects that hide under squash and pumpkin leaves. Eggs are often laid in neat clusters on leaf undersides.
- Spider mites: tiny pests that cause stippling, bronzing, fine webbing, and leaf decline, especially during hot, dry weather.
Beneficial Insects That Deserve Protection
- Lacewing larvae: small predatory larvae that eat aphids, scale, whiteflies, thrips, and other soft-bodied pests.
- Lady beetle larvae: dark, alligator-shaped larvae that look more alarming than the adult beetles but are strong aphid predators.
- Assassin bugs: ambush predators that feed on many garden pests. Do not handle them; their bite can be painful.
- Parasitic wasp signs: aphid mummies, which look like swollen tan aphid shells, show that tiny wasps are already controlling aphids.
When we walk a planted area before hardscape or drainage work, we pay attention to whether the garden has predator habitat. A sterile planting with one repeated shrub species gives pests a straight path. A mixed bed with herbs, native flowers, staggered bloom times, and open airflow is harder for pests to dominate and easier to inspect.
Use IPM Before You Reach for a Spray
Integrated pest management is a decision process, not a product. The order matters: identify the pest, monitor the population and damage, set a threshold, use cultural or mechanical controls first, protect beneficial insects, and reserve pesticides for targeted use when damage exceeds your tolerance.
Recommended Free Tools
A good threshold is specific. A few aphids on one milkweed or pepper plant may be acceptable if lady beetle larvae are present. Severe curling on new growth, distorted flowers, honeydew on patio furniture, or measurable crop loss is different. One cabbageworm can be hand-picked. A row of brassicas being stripped every night may justify Bt or row cover.
Low-Impact Controls That Work
- Prune out heavily infested tips when damage is localized.
- Use a firm water spray to knock aphids from sturdy plants.
- Hand-pick cabbageworms, squash bug adults, and egg clusters where practical.
- Use floating row cover before pests arrive, especially on brassicas and squash starts.
- Remove weeds that act as pest bridges between beds.
- Reduce excess nitrogen fertilizer, which can push tender growth that aphids favor.
- Switch to drip irrigation where overhead watering keeps foliage damp and dense.
If you use insecticidal soap, horticultural oil, Bt, or another pesticide, read the label. The label is the legal direction for use, including the crop or site, rate, timing, protective gear, pollinator restrictions, and environmental hazards. More product is not better; it can burn plants, harm beneficial insects, or create runoff problems.
Pollinator-Safe Control Is Not Optional
Pollinator protection belongs in every garden pest plan. Bees, butterflies, and other pollinators can be harmed when sprays land on flowers, drift onto blooming weeds, or are applied while pollinators are active. Good practice is straightforward: do not spray flowers directly, avoid treatment when pollinators are visiting, mow blooming weeds before treating nearby turf if the label allows that use, and apply in the evening when appropriate.
Always check the pesticide label sections for Environmental Hazards and Directions for Use. Some products have specific bee warnings, bloom restrictions, wind limits, reentry intervals, or crop harvest intervals. For edible gardens, confirm the product is labeled for the specific crop and pest. For ornamental beds, confirm it is labeled for ornamental use and suitable for the plant species.
Do these 3 things before closing this tab:
1Repair Windows errors before they cause bigger problems2Scan for outdated or missing drivers - takes under a minute3Clear out junk files and repair common Windows errorsBeneficial insects are part of the control system. Broad spraying can remove predators and leave the next pest generation with fewer natural enemies. That is why spot treatment usually makes more sense than blanket spraying, especially around mixed plantings and flowering beds.
How Yard Design Helps Hidden Pests Thrive
Construction details influence insect pressure more than many homeowners expect. A garden is not just plants and bugs. It is drainage, grade, soil containment, irrigation, lighting, edges, access, and airflow. When those pieces are poorly built, pests get better hiding places and plants become easier targets.
Drainage and Standing Water
Standing water weakens roots, encourages weeds, and creates habitat for nuisance insects. A bed that stays wet for 24 to 48 hours after normal rainfall needs attention. Correcting drainage may involve regrading, adding surface swales, installing area drains, rebuilding compacted beds, or routing downspouts away from planting zones. In many yards, a 2 percent slope, or about 1/4 inch per foot, is enough to move surface water without making the area feel steep.
Mulch, Stems, and Siding
Mulch should conserve soil moisture, not bury plant crowns or bridge insects to siding. Keep mulch 2 to 3 inches deep in most planting beds, pull it several inches back from stems and trunks, and avoid piling it against wood siding or trim. Thick mulch against stems creates protected, damp space where pests can hide and diseases can start.
Rank #3
Raised Beds and Hardscape Edges
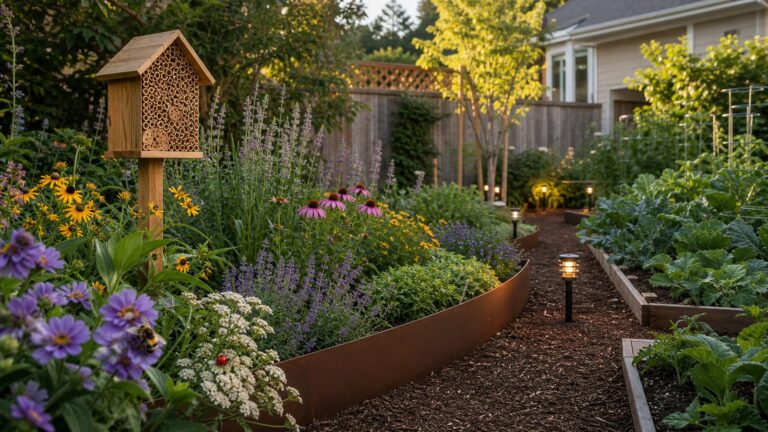
Raised beds make scouting easier when they are built with access in mind. A 30- to 36-inch path lets most homeowners kneel, carry tools, and inspect plants without stepping into the bed. Beds that are 3 to 4 feet wide are easier to reach from both sides. If a bed is against a fence or wall, keep it closer to 2 feet deep unless there is access from the back.
Clean hardscape edges also matter. Overgrown paver joints, loose timbers, and unmanaged gaps between walls and soil create protected corridors for insects and weeds. Durable edging, compacted base, and serviceable access make maintenance faster and pest scouting more consistent.
Irrigation, Lighting, and Airflow
Overhead irrigation can keep foliage wet and hide pests in dense growth. Drip irrigation or targeted micro-spray zones often work better for vegetables, shrubs, and mixed beds. Separate turf and planting beds into different irrigation zones because grass and ornamentals rarely need the same watering schedule.
Lighting also changes insect activity. Bright fixtures aimed into planting beds can attract night-flying insects and concentrate activity near entries, patios, or flowering plants. Use shielded fixtures, warm color temperatures where appropriate, and place lights for walking safety without blasting the canopy of shrubs.
Quick wins for a faster PC:
Repair Windows errors before they cause bigger problemsFix Now →Fix the driver behind crashes, sound loss and screen glitchesFind Drivers →2026 Cost Guide: DIY, Garden Labor, and Pest Control
Most camouflaged garden pest issues start as low-cost monitoring problems and become expensive when damage spreads or the landscape conditions are wrong. In 2026, homeowners can still build a useful DIY scouting kit for roughly $50 to $150. Professional help varies widely because a simple general pest visit is not the same as diagnosing pests across dense ornamentals, edible beds, drainage issues, and irrigation problems.
| Service or Material | Typical 2026 Cost | Best Use |
|---|---|---|
| Hand lens and sticky cards | $18 to $60 total | Monitoring aphids, whiteflies, fungus gnats, and small insects |
| Insecticidal soap or horticultural oil | $10 to $30 | Targeted soft-bodied pest control when label allows |
| Bt caterpillar control | $10 to $25 | Cabbageworms and other susceptible caterpillars |
| Row cover | $15 to $40 | Preventing pests before they reach crops |
| Basic sprayer | $20 to $80+ | Spot treatments and labeled garden products |
| General pest control visit | $135 to $200 commonly; about $171 average in one benchmark | Basic inspection and treatment for common household or yard pests |
| One-time pest treatment | $150 to $500; more involved visits can run $300 to $550 | Larger infestations, difficult access, or broader treatment needs |
| Recurring pest service | $40 to $70 monthly, $100 to $150 quarterly, or $400 to $950 annually | Ongoing monitoring and treatment |
| Gardener or landscape labor | $20 to $150 per hour; monthly service often $130 to $400 | Pruning, weeding, bed cleanup, and plant maintenance |
| Routine lawn care | Mowing about $42 to $68 per visit; basic lawn care about $55 per visit | Maintenance visits where early pest issues may be noticed |
Pricing changes with region, yard size, plant density, infestation severity, ladder access, organic versus synthetic preferences, edible crop restrictions, repeat visits, and whether the fix includes construction work such as grading, drainage, irrigation repair, pruning access, or bed rebuilding.
Higher-cost triggers include termites, rodents, wasp or yellowjacket nests, tree injections, large ornamental plantings, commercial-grade restricted-use pesticides, and structural or hardscape work needed to correct moisture or habitat problems.
When to DIY and When to Hire a Pro
DIY is reasonable when the plant is accessible, the pest is easy to identify, the infestation is small, and the treatment is low-risk. Hand-picking cabbageworms, pruning one infested stem, washing aphids off sturdy plants, or installing row cover are all normal homeowner tasks. Expect to spend 15 to 30 minutes per inspection round for a small garden and 1 to 3 hours for a larger property with multiple beds.
The Tool Desk
Outbyte Driver Updater FREEScan for outdated or missing drivers - takes under a minuteDriver Scan →Outbyte PC Repair FREERepair Windows errors before they cause bigger problemsFix Now →Hire a licensed pest control professional when the pest is unidentified, the infestation is spreading quickly, the treatment requires restricted-use products, the plants are large or hard to access, stinging insects are involved, or the problem is near a structure. Federal standards require applicators using restricted-use pesticides to be certified. States may also have their own licensing rules for commercial applicators, ornamental treatments, turf applications, and structural pest work.
Hire a landscape or construction professional when the insect problem is being driven by site conditions. If beds stay wet, mulch is piled against siding, plantings are too dense to inspect, irrigation oversprays the wrong zones, or retaining walls and edges are failing, spraying alone will not solve the root problem. That is where Bettesworth Construction fits best: drainage corrections, grading, hardscape edges, raised beds, access paths, irrigation coordination, and durable outdoor details that make pest management easier year after year.
Independent reader supportYour contribution helps us test, update, and keep practical guides available for everyone.Permit and Safety Notes for Landscape Fixes
Simple garden scouting and basic hand maintenance usually do not require permits. Larger landscape corrections sometimes do. Permit triggers vary by city and county, but homeowners should check before building retaining walls, changing drainage patterns, adding substantial hardscape, modifying public right-of-way areas, tying into storm systems, or doing work that affects slopes, easements, utilities, sidewalks, or structures.
As a practical rule, ask before you build if a retaining wall approaches local height thresholds, if grading will redirect runoff, if drainage work connects to a municipal system, or if hardscape changes affect access and impervious surface area. Some jurisdictions regulate drainage discharge, floodplain work, right-of-way work, and retaining wall construction closely. The permit question is cheaper to answer before excavation than after a neighbor, inspector, or utility conflict stops the job.
What’s actually slowing this PC down?
Pick the symptom - the matching free tool is one click away.
Safety is just as practical. Wear gloves and eye protection when pruning or spraying. Do not spray in wind. Keep children and pets away until the label says the area is safe. Do not mix products unless the label allows it. Store pesticides in original containers. For edible gardens, observe harvest intervals exactly.
A Better Garden Layout for Fewer Hidden Pest Problems
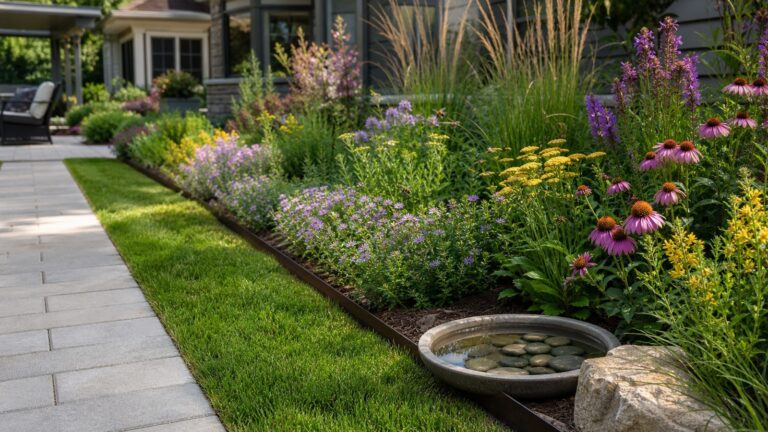
The best garden for pest management is not sterile. It is inspectable, diverse, drained, and maintainable. Use mixed plantings instead of large monoculture beds. Interplant herbs and flowers. Include native plants where they fit the site. Stagger bloom times so beneficial insects have food across the season. Keep plants spaced for mature size, not just the day they come home from the nursery.
Best Value
For new beds, plan access first. A 30-inch minimum path is workable; 36 inches is better where wheelbarrows, kneeling pads, or maintenance carts are used. Keep vegetable beds narrow enough to reach across without stepping into soil. Use drip irrigation where appropriate. Keep mulch at 2 to 3 inches, not 5 or 6. Leave room behind shrubs for inspection instead of planting them tight to fences, siding, or retaining walls.
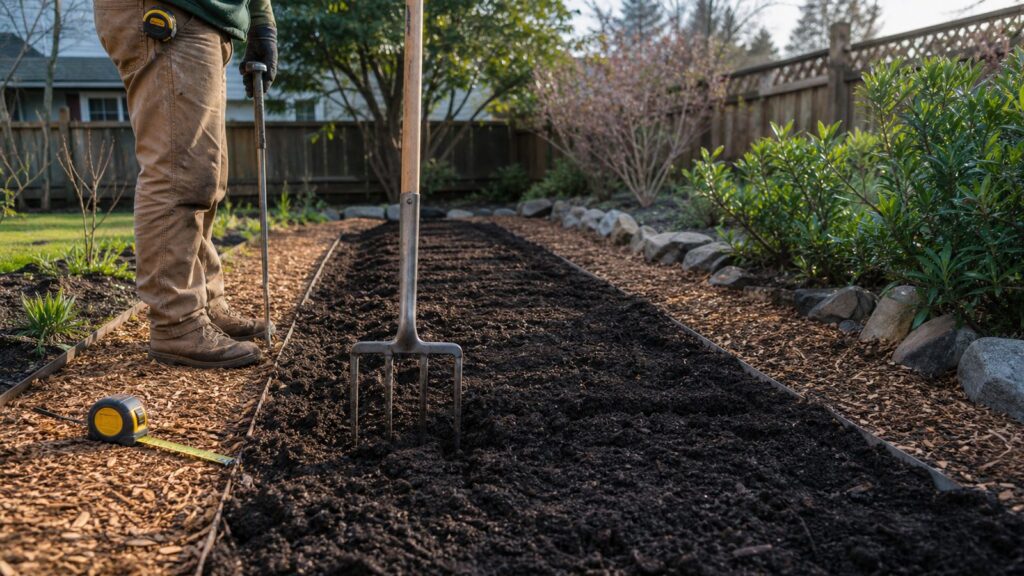
For existing beds, start with cleanup and visibility. Remove debris piles, thin overcrowded growth, pull mulch away from stems, repair irrigation overspray, and create a repeatable inspection route. A garden that can be inspected in 15 minutes will be inspected. A garden that requires crawling through wet foliage and overgrown edges will be ignored until the damage is obvious.
Crashes, No Sound, or Screen Glitches?
Random freezes, missing sound and display glitches usually trace back to one bad driver. Find and replace yours safely.Free scan · under a minuteWindows Errors? Fix Them Before They Spread
Repair common Windows errors and clear accumulated junk for a smoother, more stable PC - no reinstall needed.Free scan · no reinstallThe Bottom Line
Camouflaged insects thrive because they use the garden’s own structure against you: leaf undersides, shaded stems, dense foliage, waxy coverings, bark-colored bodies, and cluttered bed edges. The answer is not constant spraying. The answer is a steady routine: scout, identify, decide, treat only where needed, and recheck.
Build the landscape so that routine is easy. Good drainage, proper grading, raised beds with access, clean hardscape edges, thoughtful irrigation, plant diversity, and correct spacing all reduce the hiding places that let pests get ahead of you. That combination protects plants, saves money, and keeps beneficial insects working in your favor.
Frequently Asked Questions
Why are garden bugs so hard to see?
Many garden insects use color matching, bark-like body shapes, hiding behavior, waxy coatings, or tiny eggs on leaf undersides. Often the damage is easier to spot than the insect.
Which camouflaged garden bugs are harmful and which are beneficial?
Harmful pests include cabbageworms, aphids, scale, mealybugs, squash bugs, and spider mites. Beneficial insects include lacewing larvae, lady beetle larvae, assassin bugs, and parasitic wasps.
Free tools Windows power users keep installed
One-click scans. No signup required.
How do I inspect plants for hidden insects?
Check leaf undersides, new growth, stem joints, veins, mulch edges, and shaded dense growth. Use a 10x hand lens, flashlight, yellow sticky cards, and phone photos for comparison.
What is the safest way to control camouflaged garden pests?
Use IPM: identify the pest, monitor damage, set a threshold, try cultural or mechanical controls first, protect beneficial insects, and use labeled spot treatments only when needed.
How much does garden pest control cost in 2026?
DIY scouting and treatment supplies often cost $50 to $150. Professional general pest visits commonly run $135 to $200, with one-time treatments often ranging from $150 to $500 or more.
Do I need a permit or licensed applicator for garden insect control?
Basic homeowner scouting and hand maintenance usually do not require permits. Restricted-use pesticides require certified applicators, and landscape fixes such as retaining walls, grading, and drainage changes may require local permits.
Quick Recap
Product prices and availability are accurate as of the date/time indicated and are subject to change. Any price and availability information displayed on Amazon at the time of purchase will apply.