The Tool Desk
Outbyte Driver Updater FREEFix the driver behind crashes, sound loss and screen glitchesFind Drivers →Outbyte PC Repair FREEClear out junk files and repair common Windows errorsFree Scan →A home-brew wipe-on finish is one of the most forgiving ways to protect interior wood without brush marks, heavy drips, or a sprayed-finish setup. The standard recipe is simple: mix 1 part oil-based polyurethane or varnish, 1 part boiled linseed oil or tung oil, and 1 part mineral spirits. Wipe it on thin, let it soak briefly, wipe off the excess, and build the finish in several coats.
That recipe works well for interior trim, doors, shelves, mantels, handrails, furniture, and small repairs where you want a warm, hand-rubbed look. It is not the right shortcut for floors, wet locations, exterior exposure, or food-contact surfaces unless every product in the system is specifically rated for that use. On our job sites, we treat homemade wipe-on finish as a controlled interior finish, not as a universal coating.
The difference between a good result and a sticky mess usually comes down to four things: the right ratio, clean surface prep, thin coats, and safe rag handling. The finish is inexpensive, but the safety rules are not optional. Oil-soaked rags can heat up and ignite if they are wadded in a pile, and solvent fumes need real ventilation.
What a Home-Brew Wipe-On Finish Actually Is
A wipe-on finish is a thinned oil-and-varnish blend that leaves a very thin protective film on the wood. The oil helps the finish wet the grain and add warmth. The polyurethane or varnish adds film protection. The mineral spirits lower the viscosity so the finish can be wiped instead of brushed.
Recommended Free Tools
Commercial wipe-on polyurethane is the same general idea: polyurethane thinned enough to apply with a cloth. A homemade blend gives you more control over oil content, working time, build rate, and appearance. It also puts more responsibility on you to test compatibility and follow the labels for every component.
#1 Best Overall

- DURABLE SATIN FINISH – Minwax Wipe-On Poly is a high-quality, durable oil-based polyurethane finish that provides protection with a classic, hand-rubbed look.
- PROTECT YOUR WOOD PROJECTS – The hard, clear polyurethane finish protects wood against water, household chemicals, food stains, and wear.
- EASY TO APPLY – Easily apply the wipe on polyurethane satin finish. Just wipe it on with a clean cloth, removing the need to worry about drips or brush marks.
- QUICK DRYING – The polyurethane wipe-on finish is dry to recoat in only 2-3 hours and is dry for light use in 24 hours.
- A BRAND YOU CAN TRUST – Minwax is America’s leading brand of wood finishing and wood care projects. Since 1904, we have been inspiring consumers to Keep on Finishing. We offer consumers a complete line of products to meet every wood finishing need.
For most interior hardwoods, the finish gives a warm amber tone. Boiled linseed oil and oil-based polyurethane both deepen color, and that ambering increases slightly over time. If you want the clearest possible finish on maple, birch, white oak, or painted-adjacent trim, a water-based commercial product may be a better choice.
The Basic Recipe and Useful Variations
Start small. A 12-ounce test batch is plenty for sample boards, shelves, a handrail, or a small furniture repair. Mix in a clean glass or metal container with a tight lid. Label it with the date, ingredients, sheen, and ratio.
Classic oil-varnish blend
Use this for a warm, easy-to-control finish on trim, doors, mantels, furniture, and built-ins:
- 4 ounces oil-based polyurethane or varnish
- 4 ounces boiled linseed oil or tung oil
- 4 ounces mineral spirits
This is the 1:1:1 blend most homeowners mean when they ask for a homemade wipe-on finish. It penetrates well, wipes easily, and leaves a soft sheen after several coats.
More protective blend
For high-touch surfaces like stair handrails, cabinet face frames, or shelves that see regular handling, increase the film-forming part of the recipe:
- 8 ounces oil-based polyurethane or varnish
- 4 ounces boiled linseed oil or tung oil
- 4 ounces mineral spirits
This 2:1:1 blend builds faster and gives better protection than the classic mix. It is still not a floor finish, but it is a better choice where hands, bags, books, and cleaning cloths will regularly touch the surface.
First-coat sealer blend
For the first coat on dry or open-grain wood, a little more solvent can help the finish flow and wet the surface. A practical first-coat ratio is 1 part polyurethane, 1 part oil, and 1.5 parts mineral spirits. Do not keep thinning every coat. Once the wood is sealed, move back to the classic or protective blend so you build some film.
Quick wins for a faster PC:
Clear out junk files and repair common Windows errorsFree Scan →Fix the driver behind crashes, sound loss and screen glitchesFind Drivers →Stir every component before measuring, especially satin or semi-gloss products. Flattening agents settle at the bottom of the can. If you pour without stirring, the first batch may be too glossy and the last batch may be cloudy.
Materials, Tools, and 2026 Cost Expectations
A homemade wipe-on blend is inexpensive compared with professional finishing, but it is not free once you count rags, gloves, abrasives, masking, and safe disposal. In 2026, a realistic DIY material budget for a quart-size mixed batch is about $12 to $25 depending on whether you buy quarts or gallons. If you buy all three ingredients in quart containers, expect roughly $45 to $60 before consumables, which can yield about 3 mixed quarts.
Rank #2

- DURABLE SATIN FINISH – Minwax Wipe-On Poly is a high-quality, durable oil-based polyurethane finish that provides protection with a classic, hand-rubbed look.
- PROTECT YOUR WOOD PROJECTS – The hard, clear polyurethane finish protects wood against water, household chemicals, food stains, and wear.
- EASY TO APPLY – Easily apply the wipe on polyurethane satin finish. Just wipe it on with a clean cloth, removing the need to worry about drips or brush marks.
- QUICK DRYING – The polyurethane wipe-on finish is dry to recoat in only 2-3 hours and is dry for light use in 24 hours.
- A BRAND YOU CAN TRUST – Minwax is America’s leading brand of wood finishing and wood care projects. Since 1904, we have been inspiring consumers to Keep on Finishing. We offer consumers a complete line of products to meet every wood finishing need.
Current national retail benchmarks put a quart of premixed wipe-on polyurethane at about $21. A quart of boiled linseed oil is about $15.48, odorless mineral spirits are about $9.98 per quart, and mineral spirits by the gallon commonly run about $16.48 to $18.48. A gallon of oil-based polyurethane can be around $49.98. Buying gallons lowers the per-ounce cost, but it also creates storage and disposal obligations.
| Item | Typical 2026 Cost | Notes |
|---|---|---|
| Premixed wipe-on polyurethane, 1 quart | About $21 | Convenient; often listed around 75 sq. ft. per quart per coat under ideal conditions |
| Boiled linseed oil, 1 quart | About $15.48 | Adds amber warmth and working time; do not substitute raw linseed oil |
| Odorless mineral spirits, 1 quart | About $9.98 | Thins the finish for wiping; still requires ventilation |
| Oil-based polyurethane, 1 gallon | About $49.98 | Better value if you have multiple projects and can store it properly |
| Consumables | About $15 to $60 | Rags, gloves, sandpaper, tack cloth, tape, drop cloths, mixing cups, and oily-waste container |
Coverage varies. A quart of commercial wipe-on poly may be listed around 75 square feet, but real coverage drops on open-grain woods, end grain, detailed profiles, and multi-coat schedules. For a 3-coat schedule, a 12-foot handrail might use only a few ounces. A room full of stained built-ins can use a quart or more once you count waste, rags, sample boards, and extra coats.
Where This Finish Works Best
Use a homemade wipe-on finish on interior wood that needs moderate protection and a natural feel. Good candidates include window stools, base cap, chair rail, interior doors, shelving, mantels, stair handrails, furniture, unfinished trim repairs, and built-in details that are already sanded clean.
It is especially useful on installed trim because wiping gives better control around profiles than brushing. A thin rag can work into beads, coves, and small edges without leaving heavy runs. On our trim work, we mask adjacent painted walls, painted casing returns, and caulk lines first because wipe-on finish can creep into corners and leave shiny smears where it does not belong.
Open-grain woods such as oak, ash, and walnut need careful final wiping. After you wipe with the grain, finish by wiping lightly across the grain to pull excess finish out of the pores. If you leave puddles in those pores, they can cure as glossy specks. Maple, cherry, pine, and birch need test boards because they can blotch, especially if stain is part of the schedule.
Where Not to Use a Homemade Blend
Do not use this blend over wax, silicone furniture polish, greasy kitchen residue, uncured stain, damp wood, construction dust, or factory prefinished material without a compatibility test. If the surface repels the finish, wrinkles, fisheyes, or stays tacky after a reasonable dry time, stop and solve the surface problem before coating the whole piece.
Skip homemade oil-varnish blends for floors. Floors need abrasion resistance, predictable cure, and product-system compatibility. The same goes for stair treads, shower-adjacent millwork, exterior doors, and heavy-wear countertops. A handrail can often be wiped successfully; the stair treads below it should usually get a dedicated floor finish.
Kitchen cabinets are a judgment call. A small touch-up on unfinished trim or a low-wear cabinet end panel may be fine. A full cabinet refinishing job in an occupied kitchen usually belongs in a professional finishing process with controlled sanding, dust management, degreasing, and a more durable coating system.
Surface Prep: The Part That Decides the Result
For most interior hardwoods, sand evenly through 180 to 220 grit. Do not jump from 80 straight to 220 and expect stain or finish to hide the scratches. A common sequence is 120, 150, then 180 or 220. End grain may need one extra grit step because it absorbs more finish and darkens faster.
Rank #3

- Excellent Durability
- Ultra Fast-Drying
- Low Odor
- Easy Water Clean-Up
- Packaging may vary
Vacuum the surface thoroughly. Then wipe with a clean tack cloth or a lint-free rag lightly dampened with mineral spirits if the product labels allow it. Do not soak the wood. The goal is dust removal, not washing the piece.
What’s actually slowing this PC down?
Pick the symptom - the matching free tool is one click away.
Make a sample board from the same wood and, if possible, the same sanding and stain schedule. A good test board is at least 6 by 12 inches. For trim, use an offcut with the same profile. Apply the full planned finish schedule to the sample: stain if used, dry time, first coat, scuffing, second coat, and final coat. One wet coat tells you very little about the final color and sheen.
How to Apply the Finish
Work at moderate room conditions if you can. Many finish labels assume around 70 degrees F and roughly 50 percent relative humidity. Cool rooms, high humidity, thick coats, closed windows, and oily exotic woods can stretch dry times dramatically.
Pour only what you need into a small working cup and keep the main container capped. Oxygen starts curing the finish as soon as it is exposed. Small batches reduce skinning, contamination, storage risk, and waste.
Step-by-step application
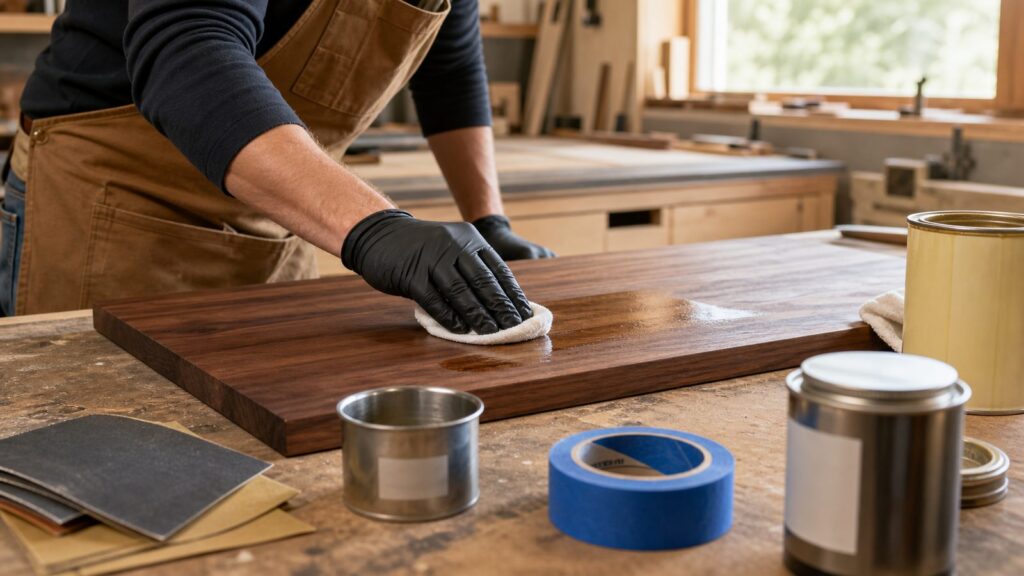
- Put on nitrile gloves and open ventilation before you open the finish.
- Fold a lint-free cotton rag into a flat pad. Do not use a fuzzy towel.
- Wet the pad with finish and wipe a thin, even coat with the grain.
- Let the finish sit briefly, usually 5 to 15 minutes depending on temperature and porosity.
- Wipe off every bit of excess before it turns tacky.
- Let the coat dry until it can be scuffed without gumming the abrasive.
- Scuff with 320-grit sandpaper or a synthetic pad, then remove dust.
- Repeat for 3 to 5 coats for light-to-moderate wear.
The most common homeowner mistake is leaving too much finish on the surface. Wipe-on finish is not paint. A thick wet film can wrinkle, attract dust, cure unevenly, or stay sticky for days. If the surface looks wet after your final wipe, you probably left too much.
If your sandpaper loads up, the finish is not ready. Give it more time. Recoating too soon traps solvent and oil under the next layer. That is how a finish that looked fine on day one becomes soft, smeary, or fingerprint-prone on day three.
Coat Schedule, Sheen, and Color Control
For light-use trim or decorative woodwork, 3 thin coats may be enough. For shelves, doors, handrails, and built-ins, plan on 4 to 5 thin coats. High-touch surfaces may need more protection or a commercial polyurethane system.
Use gloss for build coats if maximum clarity matters, then use satin or semi-gloss only for the final coat. Satin and semi-gloss products contain flattening agents that reduce shine. Multiple coats of satin can make the finish look slightly cloudy, especially on darker woods.
Oil-based blends amber the wood. That can be beautiful on walnut, cherry, mahogany, red oak, and many traditional trim packages. It can be a problem on pale maple, white oak, ash, or modern light-toned interiors where the design calls for a clearer finish. If the sample board looks too yellow after two coats, do not assume it will improve after five.
Outdated Drivers Are Slowing You Down
One free scan finds every outdated or missing driver and matches the right update for your exact hardware.Free scan · exact hardware matchPC Slower Than It Used to Be?
A free scan shows the junk files, broken settings and background clutter dragging Windows down - then fixes them in one click.Free scan · Windows 10 & 11Dry Time, Cure Time, and Indoor-Air Planning
Dry time and cure time are different. A coat may be dry enough to scuff in several hours or overnight, but the finish can take days or longer to harden fully. Product labels control the actual recoat window, and the slowest component in your blend matters.
Rank #4

- PROTECT WOOD SURFACES: SENVEN Polyurethane Protective Finish protects and adds beauty to your interior wood projects, including woodwork, furniture, doors and cabinets. The clear top coat protects against scratches, spills, dirt and more.
- CRYSTAL CLEAR & NON-YELLOWING: Preserves Wood's True Beauty Unlike conventional oil-based polyurethane that ambers over time, our advanced clear coat maintains exceptional clarity and is specially formulated to resist yellowing, even on light woods like maple, oak, and pine. It enhances the wood's natural grain without altering its original color.
- EXTREME FAST DRY & RECOAT: Complete Projects in Half the Time with SENVEN’s accelerated drying technology, our polyurethane is dry to the touch within 20 minutes and ready for recoating in just 1–2 hours—significantly faster than typical oil-based (4–6 hours) or even some water-based finishes. This allows you to apply multiple coats in a single day.
- ENVIRONMENT & USER-FRIENDLY: Low VOC, Low Odor, Easy Cleanup. Our eco-conscious formula contains low VOCs, emits minimal odor during application, and cleans up easily with soap and water. It’s safe for indoor use in well-ventilated spaces, making it ideal for homes, schools, and commercial projects where comfort and air quality matter.
- UNIVERSAL APPLICATION & TRUSTED PERFORMANCE: One Finish for All Projects. SENVEN Polyurethane is engineered for universal use over all types of wood, stains, and existing finishes. Whether you’re refinishing floors, protecting furniture, or sealing doors and trim, this reliable, professional-grade finish delivers consistent results and lasting beauty—backed by SENVEN’s commitment to quality and innovation in wood care.
In an occupied home, plan the work around odor and access. Mineral spirits and oil-based polyurethane release volatile organic compounds, commonly called VOCs. VOCs can affect indoor air quality, and sensitive occupants may react to odor at very low levels. Open windows when weather allows, use exhaust fans that discharge outdoors, isolate the room, and keep children, pets, and unnecessary traffic out until odor drops and the finish has hardened.
Do not finish built-ins in a closed bedroom at 9 p.m. and expect the room to be comfortable that night. For occupied homes, we prefer scheduling solvent-based finish work before travel, during a workday when the room can be isolated, or when temporary ventilation can run without pulling fumes into the rest of the house.
VOC, Fire, and Disposal Rules
VOC rules vary by state, county, and air-quality district. Some areas restrict the sale or use of certain solvent-based coatings and thinners. Southern California, for example, has strict architectural coating limits under local air-quality rules. Always buy compliant products for your location and follow the product label. Do not assume a recipe found online is legal or appropriate in every jurisdiction.
Rag safety is the bigger immediate hazard. Rags wet with boiled linseed oil, oil-based finish, or solvent can generate heat as they oxidize. If they are crumpled together, that heat can build until the rags ignite.
Handle used rags one of three ways: lay them flat outdoors to dry fully in a safe, noncombustible area; submerge them in water inside a lidded metal container until disposal; or use a listed oily-waste can. Follow your local household hazardous waste rules for disposal. Do not throw wet oily rags in a plastic trash bag, job-site debris box, cardboard box, or garage trash can.
Store leftover finish in a labeled, sealed container away from flame, pilot lights, heaters, and children. Mineral spirits and oil-based coatings are combustible liquids. Keep containers closed when not in use, and do not smoke or create sparks near the work area.
Independent reader supportYour contribution helps us test, update, and keep practical guides available for everyone.DIY Cost Versus Hiring a Professional
For a small project, DIY is economical. A homeowner who already owns sandpaper, tape, gloves, and rags may finish a handrail, shelf, or small table with $20 to $40 in new materials. Starting from scratch, the more realistic cost is $60 to $120 once you buy finish components, abrasives, gloves, drop cloths, mixing cups, and a proper rag container.
Do these 3 things before closing this tab:
1Fix the driver behind crashes, sound loss and screen glitches2Repair Windows errors before they cause bigger problems3Scan for outdated or missing drivers - takes under a minuteProfessional finishing labor varies widely by region, project size, masking burden, repairs, sanding needs, and whether the piece can be removed to a shop. Small touch-ups may be priced as a minimum service call. Doors, stairs, cabinets, and large built-ins can move into several hundred to several thousand dollars because most of the work is prep, protection, dust control, and controlled curing time.
Good DIY candidates
- A small unfinished shelf, mantel, or furniture piece
- A stair handrail that can be isolated from traffic during curing
- Interior trim touch-ups where the surrounding paint is protected
- Sample boards for a larger design decision
- Low-risk built-in parts before final installation
Call a pro when the stakes are higher
- Floors, stair treads, or large traffic surfaces
- Kitchen cabinets or bathroom built-ins
- Large stained millwork packages in an occupied home
- Exterior doors or sun-exposed woodwork
- Any job where odor, dust control, warranty, or schedule matters
The biggest hidden cost is a failed finish. Sticky coats, blotching, fisheyes, or a bad color match can require sanding, stripping, or replacing parts. On expensive millwork, the cheapest path is often a tested professional finish schedule before anything is installed.
Common Problems and How to Fix Them
If the finish stays sticky, it was likely applied too thick, applied over contamination, or recoated too soon. Give it more time first. If it remains soft, wipe with mineral spirits according to the product label and test whether the uncured layer can be removed. Severe cases may need sanding or stripping.
If you see shiny dots in oak, ash, or walnut pores, too much finish was left in the grain. On the next coat, wipe across the grain at the end and use less finish. If the dots are already cured, scuff lightly and continue with thinner coats.
Free tools Windows power users keep installed
One-click scans. No signup required.
Best Value

- Bluebird’s high-performance Top Coat acts as a protective barrier, safeguarding Furniture, Chalk Paint, Acrylics, and Oil paintings from dust, dirt, scratches, and abrasion. It enhances the vibrancy of colors, adds depth to the painting, and gives it a professional, finished appearance. This Coat can be applied with a roller or brush. Apply no more than 1-2 thin coats as thick applications may result in cloudiness when dry.
- Our Clear Coat also acts as a shield, guarding against scratches, moisture, and UV damage, thereby prolonging the life of the wood, and maintaining its natural beauty. It provides a gloss finish, while also highlighting the wood's grain patterns and color.
- Bluebird Solvent – Free Top Coat fast dries to the touch (30 minutes), allowing recoating after 2 hours. If necessary, you can dilute it with water up to a maximum of 10-15%.
- Bluebird exhibits strong Chemical Resistance and delivers Excellent Film Performance.
- This Coat can be applied with a roller or brush. Apply no more than 1-2 thin coats as thick applications may result in cloudiness when dry.
If the sheen is uneven, the finish may not have been stirred, the surface may have absorbed unevenly, or the coat thickness varied. Stir thoroughly, scuff uniformly, clean the dust, and apply one very thin final coat. If you used satin for every coat and the wood looks cloudy, switch to gloss for any additional build and reserve satin for the last pass.
If the color is too amber, stop. More coats will usually add more warmth, not less. Let the sample cure, then compare it in the actual room under daylight and artificial light. If it still reads too yellow, move to a clearer water-based product or a different finish system.
Our Job-Site Takeaway
A homemade wipe-on finish is a good tool when the project is small enough to control and the surface does not need floor-grade durability. Mix small batches, test the full schedule, wipe off more than you think you need to, and give every coat enough time to harden before scuffing.
For a homeowner, the sweet spot is interior wood with moderate wear: trim, doors, shelves, mantels, handrails, and furniture. For floors, stair treads, cabinets, wet areas, exterior wood, or expensive built-ins, use a professional-grade finish plan. The material cost of doing it right is modest; the cost of removing a bad finish is not.
What’s actually slowing this PC down?
Pick the symptom - the matching free tool is one click away.
Frequently Asked Questions
What is the best homemade wipe-on finish recipe?
A reliable starting recipe is 1 part oil-based polyurethane or varnish, 1 part boiled linseed oil or tung oil, and 1 part mineral spirits. For more protection, use 2 parts polyurethane, 1 part oil, and 1 part mineral spirits.
Can I make wipe-on polyurethane from regular polyurethane?
Yes. Oil-based polyurethane can be thinned with mineral spirits to make it wipe more easily. A simple wiping mix is equal parts polyurethane and mineral spirits, or you can add boiled linseed oil for a warmer oil-varnish blend.
How many coats of wipe-on finish does wood need?
Most interior trim, shelves, doors, and furniture need 3 to 5 thin coats. High-touch surfaces like handrails may need additional coats or a more durable commercial finish system.
Is boiled linseed oil and polyurethane safe indoors?
It can be used indoors when labels allow it, but ventilation and rag safety are critical. Solvent-based finishes release VOCs, and oil-soaked rags can ignite if piled up. Isolate the room, exhaust fumes outdoors, and dispose of rags safely.
Quick wins for a faster PC:
Repair Windows errors before they cause bigger problemsFix Now →Fix the driver behind crashes, sound loss and screen glitchesFind Drivers →Clear out junk files and repair common Windows errorsFree Scan →Can I use a homemade wipe-on finish on floors or cabinets?
Do not use a homemade wipe-on blend on floors or stair treads. Cabinets depend on the scope: a small low-wear touch-up may be fine, but full kitchen cabinet refinishing usually needs a professional-grade coating system.
What is better for wipe-on finish: tung oil or boiled linseed oil?
Boiled linseed oil is common, affordable, and gives strong amber warmth. Tung oil can be a good choice when you want a different feel or color response, but drying behavior depends heavily on the exact product. Test both on the same wood before committing.
Quick Recap
Product prices and availability are accurate as of the date/time indicated and are subject to change. Any price and availability information displayed on Amazon at the time of purchase will apply.