Do these 3 things before closing this tab:
1Repair Windows errors before they cause bigger problems2Fix the driver behind crashes, sound loss and screen glitches3Clear out junk files and repair common Windows errorsFor most DIY cargo trailer camper conversions in the U.S. in 2026, the best all-around insulation is 1 to 1.5 inch rigid foam board, usually XPS or polyiso, cut tightly between the metal ribs, bonded to the trailer skin, taped at the seams, and sealed at the edges with compatible canned foam. That assembly gives you useful R-value in a shallow wall, resists moisture, keeps weight reasonable, and remains repairable if you ever need to chase wiring or fix a damaged skin panel.
Closed-cell spray foam is the performance leader. It can deliver roughly R-5.6 to R-8 per inch, air-seal irregular cavities, and reduce condensation risk when installed correctly. The tradeoff is cost, safety precautions during installation, future repair difficulty, and contractor minimum charges. A small 6×12 or 7×14 trailer can still cost $1,000 to $2,500 or more for professional spray foam because setup and mobilization are fixed costs.
Fiberglass batts are usually the weakest choice for a mobile metal trailer. They are cheap on paper, but vibration, air movement, compression, and hidden moisture can reduce real-world performance. We use fiberglass and mineral wool in building cavities all the time, but a cargo trailer is a small moving metal building, not an attic or 2×4 wall. The details matter more than the label on the bag.
Start With the Trailer, Not the Insulation Aisle
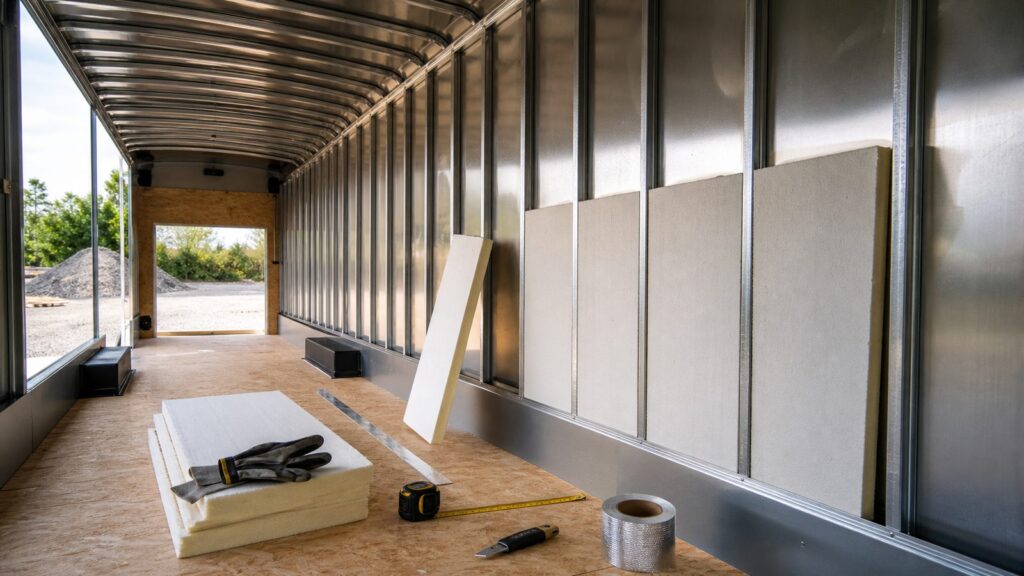
A cargo trailer conversion has a few constraints that change the insulation decision. Wall cavities are shallow, often only about 1 to 1.5 inches deep between the interior face of the skin and the inside plane of the ribs. The shell is metal, so it conducts heat quickly. The roof sees direct sun. The rear ramp and side door leak more air than most people expect. The floor is exposed to road spray, cold air, and fastener penetrations. And the entire build has to stay within gross vehicle weight rating, axle rating, and tongue-weight limits.
Free tools Windows power users keep installed
One-click scans. No signup required.
#1 Best Overall

- Dual-Layer Insulation Design: Double-layer foam panels help reduce gaps around window vent openings and support airflow through the vent kit.
- Helps Limit Heat, Light and Noise: The 2-layer foam can help reduce heat transfer, reduce light entry, and lower outside noise.
- Adjustable Length up to 50 in: Includes 3 foam panels that can be combined up to 50 in, suitable for many sliding window vent panels
- Easy to Cut and Install: Trim the foam panels to match your window sealing plates; install using the included double-sided tape.
- Wide Compatibility: Works with many portable AC window vent kits, dryer vent kits, and other window ventilation systems for sealing around vent openings.
On our job sites, we think in assemblies, not single materials. A good cargo trailer wall is not just R-6 foam. It is sealed exterior skin, bonded insulation, taped seams, sealed penetrations, a thermal break over metal ribs if space allows, protected wiring, durable interior paneling, and planned ventilation. Miss one of those pieces and the advertised R-value does not mean much.
Use case also matters. A weekend gear hauler used in mild weather may only need 1 inch foam in the walls and roof, door gaskets, and a roof vent fan. A four-season camper needs better floor insulation, a more continuous thermal break, controlled ventilation, and a realistic heating plan. A mobile office needs comfort during long stationary hours, quieter interior finishes, and dependable cooling. A contractor trailer needs durability first: washable wall panels, protected wiring, impact-resistant lower walls, and insulation that will not absorb water or slump behind shelving.
Quick Recommendation by Build Type
If you want the short answer, here is how we would specify cargo trailer insulation in most real projects:
- Best all-around DIY choice: 1 to 1.5 inch XPS rigid foam board in walls and ceiling, sealed with foam-safe adhesive, foil or HVAC tape, and canned foam at gaps.
- Best premium performance: closed-cell spray foam at 1 to 2 inches, especially in roof curves, nose sections, corners, and irregular cavities.
- Best hybrid approach: rigid foam board on flat wall and ceiling fields, with closed-cell spray foam or canned foam at ribs, corners, roof radius areas, and hard-to-cut voids.
- Best budget-only option: EPS rigid foam board, carefully sealed, understanding it is less durable and lower R-value per inch than XPS or polyiso.
- Usually avoid: loose fiberglass batts directly against metal trailer skin unless you have a complete air-control, vapor-control, and retention plan.
For a typical 6×12 trailer, plan on roughly 300 to 450 square feet of insulated surface area when you include walls, ceiling, floor, front wall, rear door, and waste. A 7×14 trailer often lands around 400 to 550 square feet. Those numbers are more useful than guessing by trailer length because height, ramp design, roof shape, cabinets, windows, and floor inclusion all change the total.
Insulation Comparison: R-Value, Cost, and Best Use
The table below uses broad 2026 U.S. cost ranges from current insulation market benchmarks. Trailer pricing varies by region, access, thickness, prep work, and whether a contractor applies a minimum charge.
| Insulation Type | Typical R-Value Per Inch | 2026 Cost Range | Best Use in Cargo Trailers | Main Watchout |
|---|---|---|---|---|
| XPS rigid foam board | About R-5 per inch | Material often about $0.75-$2.00 per sq ft depending on thickness; full DIY trailer budget commonly $300-$900 | Walls, ceiling, floor panels, ramp doors, DIY camper builds | Must seal edges and seams; ribs still bridge heat |
| Polyiso rigid foam board | About R-5.6 to R-6.5 per inch in favorable conditions | Usually higher than EPS and often comparable to or above XPS | Thin high-R walls and ceilings, especially moderate climates | Cold-weather performance can drop; protect facers and edges |
| EPS rigid foam board | About R-4 per inch | Often the lowest-cost foam board option | Budget builds, low-risk interior panels, thicker available cavities | Lower R-value per inch and less durable than XPS |
| Closed-cell spray foam | About R-5.6 to R-8 per inch | Often $2.00-$5.00+ per sq ft installed; small trailer minimums often $1,000-$2,500+ | Premium air sealing, curved roofs, noses, corners, four-season builds | Requires masking, PPE, ventilation, cure time, and makes future access harder |
| Open-cell spray foam | About R-3.6 per inch | Often $1.00-$2.50 per sq ft in broader building markets | Rarely our first choice against trailer skins | More vapor-permeable and lower R per inch |
| Fiberglass or mineral wool batts | Varies by product and compression | Broad material/installed benchmarks often about $0.40-$1.50 per sq ft | Selective interior partitions or protected framed cavities | Air washing, vibration, moisture, slumping, and compression |
Rigid board gives the best balance for most owners because it is predictable. You can see the fit, tape the seams, replace a section, and keep the cost under control. Closed-cell spray foam gives the best envelope when installed correctly, but the installer has to understand vehicles, metal skins, masking, wiring plans, and access needs.
Why R-Value Alone Can Mislead You
A 1 inch foam board rated around R-5 sounds modest compared with a house attic, but a cargo trailer does not have attic-depth cavities. You are usually choosing between 1 inch, 1.5 inches, and maybe 2 inches if you are willing to give up interior width or add furring. In that setting, air sealing and continuity often beat chasing another half inch of nominal R-value.
The biggest hidden loss is thermal bridging. Steel or aluminum ribs conduct heat around the insulation. If you cut perfect R-5 foam panels between every rib but then screw plywood directly to cold metal ribs, those ribs become stripes of heat loss in winter and heat gain in summer. You may even see condensation lines on interior paneling where ribs are located.
What’s actually slowing this PC down?
Pick the symptom - the matching free tool is one click away.
When interior space allows, add a thin continuous thermal break over the ribs before paneling. That can be a thin foam layer, a compatible isolation strip, or wood furring that separates interior finish panels from the metal frame. Even a modest break can improve comfort because it interrupts the most conductive path. On higher-end builds, we prefer a hybrid: foam between ribs plus a continuous layer over the ribs, then furring and interior finish. In a compact trailer, that may cost you 1/2 to 1 inch per side, so weigh comfort against interior clearance.
Condensation Is the Real Enemy
Warm interior air holds moisture from breathing, cooking, wet clothing, pets, propane combustion, and outside humidity. When that air reaches cold metal skin, water condenses. Hidden condensation can stain plywood, corrode fasteners, feed mold, and make the trailer smell musty long before you see an obvious leak.
The best defense is to keep moist interior air from reaching cold metal. Rigid foam bonded tight to the skin, taped seams, sealed corners, and carefully sealed penetrations help create that air-control layer. Closed-cell spray foam does this very well because it adheres to the metal and fills irregular spaces. Fiberglass does not stop air movement, so if warm air can pass through it and hit the cold skin, the insulation becomes part of the moisture problem.
Ventilation is not optional in a camper conversion. A sealed trailer without ventilation behaves like a cooler with people living inside it. At minimum, plan for a roof vent fan and a controlled passive intake. If you cook inside, dry wet gear inside, or camp in cold weather, use a small dehumidifier when shore power is available and crack ventilation even when heating. Insulation reduces temperature swings; it does not remove moisture.
Best Option 1: Rigid Foam Board
Rigid foam board is the material we would point most DIY builders toward first. XPS is durable, moisture-resistant, readily available, and usually a good fit for walls and floors. Polyiso gives high R-value per inch and often comes with foil facers that make taping easier, but it can lose some performance in colder conditions. EPS is cheaper and workable, but it is lower R per inch and more fragile.
Rank #2

- Perfect design: The window air conditioner insulated foam panels board is designed with aluminum foil, which can reflect the sun and heat well, maintain the indoor temperature, and play a waterproof role at the same time.
- Quality materials: Window foam for air conditioner for window units made High quality EVA foam, It features great insulation and is dust-proof, environmentally friendly, and durable.
- Save energy noise reduction: Window air conditioner insulation keep cool air summer and keep warm air winter, help reduce noise, and eliminates cold drafts and light. improve comfort and energy efficiency.
- EASY install: Suitable for window air conditioner units from 5000 to 22000 btu.Measure the area you want to seal, cut the foam block according the size you need for better sealing.
- Satisfaction Guarantee: If you have any questions after receiving our products, please feel free to contact our customer service support, and we will give you a satisfactory solution.
A practical wall assembly is 1 inch or 1.5 inch foam board cut between ribs, foam-safe construction adhesive or compatible spray adhesive on the metal skin, taped seams, canned foam at small gaps, and a thin thermal break or furring layer before interior panels. Do not rely on friction fit alone. Trailers flex and vibrate. Bond the foam where appropriate, restrain it mechanically with furring, and seal the perimeter.
Use foam-safe adhesive. Some solvents attack foam board. Test a scrap before committing to the whole wall. Keep gaps small, ideally 1/8 inch or less where you can, then seal the edges. Oversized gaps filled with canned foam are better than open air paths, but neat cuts make the finished assembly stronger and easier to panel.
For floors, rigid foam can go above or below the subfloor. Above-floor insulation is easier to protect and inspect, but it raises the finished floor height. Underfloor insulation saves interior height but must be protected from road debris, water, fasteners, and splash. If insulating below the floor, use durable panels, mechanical retention, sealed edges, and a protective layer appropriate for road exposure. Do not leave delicate foam exposed to gravel and standing water.
Windows Errors? Fix Them Before They Spread
Repair common Windows errors and clear accumulated junk for a smoother, more stable PC - no reinstall needed.Free scan · no reinstallCrashes, No Sound, or Screen Glitches?
Random freezes, missing sound and display glitches usually trace back to one bad driver. Find and replace yours safely.Free scan · under a minuteBest Option 2: Closed-Cell Spray Foam
Closed-cell spray foam is the highest-performance insulation for many cargo trailer shells because it provides insulation and air sealing in one pass. It also bonds to the metal skin and works around curves, ribs, wiring penetrations, nose cones, and roof transitions. In a 1 inch cavity, getting R-5.6 to R-7 or more with excellent air sealing is a strong result.
The downsides are real. Professional spray foam commonly runs about $1.50 to $5.00 per square foot installed across broader insulation work, with closed-cell often around $2.00 to $5.00 or more per square foot depending on thickness and market. Small trailers can be expensive because many contractors have minimum job charges around $1,000 to $2,000. Once cured, spray foam can also make wiring changes, dent repair, and skin replacement harder.
Safety is another reason to hire carefully. Spray polyurethane foam installation can involve chemical exposure during application. The trailer should be vacated during spraying, the installer should use proper PPE and ventilation, and re-entry should follow the product manufacturer and installer guidance. Do not sleep in a freshly sprayed trailer because it feels dry to the touch. Ask the contractor for product data, recommended reoccupancy timing, ventilation instructions, and ignition or thermal barrier requirements.
We like closed-cell spray foam most in selective use: curved roof edges, front nose sections, corners, ribs, and odd voids where rigid board would leave too many gaps. Flat wall fields can still be rigid board. That hybrid approach controls cost while solving the details that usually fail first.
Why Fiberglass Batts Usually Disappoint in Trailers
Fiberglass and mineral wool are not bad materials. In properly framed building cavities with good air barriers, correct density, and dry conditions, they can perform well. A cargo trailer is a harsher application. The cavities are shallow, the metal skin gets cold, the shell moves, and the wall assembly is often interrupted by ribs, screws, lights, seams, and doors.
Fiberglass loses performance when compressed. It also needs still air to work well. If air leaks through the cavity, heat moves with that air and the batt is effectively bypassed. In a trailer, vibration can also cause loose batts to slump unless they are restrained. Moisture against the metal skin can wet the material or the adjacent paneling, and drying paths are limited once the wall is closed.
If you already have fiberglass and must use it, keep it away from direct metal contact where possible, fill the cavity without compression, add a true air barrier on the warm side, restrain it mechanically, and provide ventilation. By the time you add netting, furring, vapor control, and replacement risk, the apparent savings often shrink.
How to Estimate Material Quantity and Cost
Start by measuring surface area. For a box trailer, calculate both side walls, the front wall, ceiling, floor, and rear door. A 6×12 trailer with a 6.5 foot interior height has two side walls at about 78 square feet each, a front wall around 39 square feet, a ceiling around 72 square feet, and a floor around 72 square feet. Before doors, curves, and waste, that is roughly 339 square feet. Add the ramp or rear doors, then subtract large windows or openings only after you add a waste allowance.
Quick wins for a faster PC:
Scan for outdated or missing drivers - takes under a minuteDriver Scan →Repair Windows errors before they cause bigger problemsFix Now →Fix the driver behind crashes, sound loss and screen glitchesFind Drivers →A 7×14 trailer with a 6.5 foot interior height has two side walls at about 91 square feet each, a front wall around 45.5 square feet, a ceiling around 98 square feet, and a floor around 98 square feet. That puts the base area around 423.5 square feet before rear door details and waste. In real ordering, 400 to 550 square feet is a reasonable planning range.
For DIY rigid foam, a small-to-mid trailer commonly lands around $300 to $900 for boards, compatible adhesive, foil or HVAC tape, canned foam, blades, furring strips, and fasteners. If you add a continuous thermal break, finished wall panels, insulated flooring, and upgraded door seals, the total envelope cost rises. That is still usually less than full professional closed-cell spray foam.
Rank #3
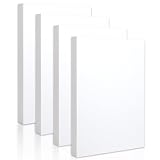
- High-Quality Material and Construction: The high-density white XPS foam is made of white pure polystyrene particles, free of impurities and pigments, non-toxic, peace lf mind to use,can be safely used for various applications.33kg/m3 density provides lightweight construction with excellent structural integrity, making it resistant to damage and easy to operate. Widely used in handicraft production, building insulation, plant cultivation, package applications and other fields
- Superior Rigidity and Durability: Our foam sheets feature excellent rigidity and thickness with pressure resistance up to 300kpa. Suitable for school DIY art projects, party decoration, cosplay props, building models, poster board, sculptures, pin board, and more to achieve your creative vision. This foam board is durable and does not deform, and unlike EPS foam, it will not produce particles that are easily broken and flying everywhere
- Waterproof and Thermal Insulation Properties: The foam board is waterproof closed cell foam with superior 034 level thermal insulation performance and can reduce certain noise effect. Very suitable for wall insulation and sound insulation, floor heating and attic. It can also be used as a moisture-proof backboard, leveling and height increasing, and for plant cultivation. You may also use it to make outdoor cabins and provide warm shelter for animals
- Easy to Customize and Paint: White polystyrene foam board with smooth surface can easily be painted in various colors. Free adhesion of various materials allows you to create your own designs, beautify your family spaces, and enhance party decorations to showcase your vision
- Simple Cutting and Shaping: You can easily cut the foam board with an art knife or a hot melt machine for your projects. Please pay attention to safety when working with cutting tools
For spray foam, do not multiply only the visible square footage by a low advertised rate. Ask about minimum charges, masking, travel, prep, thickness, trimming, ventilation, and whether the floor and doors are included. A 6×12 trailer may have enough square footage to look like a small job, but the contractor still has to mobilize equipment, protect surfaces, and clean up.
Installation Sequence That Prevents Expensive Mistakes
The right sequence is simple: seal first, rough-in second, insulate third, panel last. Many trailer problems come from insulating too early and then cutting holes through the finished envelope for wiring, fans, windows, or cabinets.
Recommended Free Tools
First, inspect the empty trailer in daylight. Look at roof seams, marker lights, side doors, ramp hinges, screw penetrations, floor-wall joints, and any factory caulk. Water-test suspect areas before insulating. Repair leaks with compatible sealants and fasteners. A leak hidden behind foam and paneling is far more expensive later.
Second, plan wiring, conduit, pull strings, backing plates, and service chases. Install blocking for cabinets, beds, shelves, batteries, water tanks, heater mounts, and tie-down points before closing walls. Photograph every wall and ceiling bay with a tape measure visible. Label wire routes. Future you will be grateful when you need to mount something without hitting a wire.
Third, install insulation. Cut boards tight, bond them where appropriate, tape seams, seal gaps, and keep the assembly continuous at corners. Use low-expansion canned foam around small gaps so you do not bow thin skins or distort trim. Keep weep paths and intentional drainage details open if the trailer design relies on them.
Fourth, add the thermal break and interior finish. Plywood, composite panels, washable wall board, or other finishes should be chosen by use case. A contractor trailer needs tough lower walls. A camper may prioritize weight and cleanability. A mobile office may need acoustic control and a smoother finished surface.
Doors, Roof Vents, and Floors Are Common Weak Points
Many trailers are insulated in the walls and ceiling but remain uncomfortable because the ramp door, side door, roof vent, and floor are underbuilt. These areas can dominate real-world comfort.
Ramp doors are large metal panels with perimeter gaps. Add rigid foam to the interior face where hardware allows, protect it with thin plywood or composite panel, and upgrade weatherstripping and sweeps. Check latch compression. If the door does not pull evenly against the gasket, cold air and dust will find the gap.
Side doors need the same attention. Weatherstrip the jamb, seal the threshold, insulate the door panel, and use a sweep that can survive road grit. For roof vents, frame the opening properly, seal the flange, insulate the curb area, and use an insulated vent insert during extreme weather.
The floor matters more than many first-time builders expect. Cold air moving below the trailer pulls heat out quickly. In hot climates, road heat and radiant gain can also come through the floor. A 1 inch XPS layer above the factory floor with a protected plywood overlay can noticeably improve comfort, though it raises the floor. Underfloor insulation preserves headroom but needs serious protection.
Fire Safety, Codes, and Registration Notes
Foam insulation is combustible and usually needs to be protected from the occupied space by an approved thermal or ignition barrier depending on the product, use, and applicable code path. Do not leave exposed foam where people will live, cook, sleep, weld, grind, or store fuel. Cover it with an appropriate interior panel and follow the insulation manufacturer’s fire-rating and covering requirements.
If you are converting a trailer into a camper or RV, understand that registration rules vary by state. Some states distinguish utility trailers, travel trailers, park trailers, trailer coaches, and homemade or modified recreational vehicles. Documentation, weight tickets, inspections, VIN requirements, and equipment rules can differ. California and Texas, for example, treat trailer and recreational vehicle classifications through state-specific DMV or motor vehicle procedures. Before you invest in permanent systems, check your state’s registration path.
Electrical, propane, heating, and sleeping arrangements add safety responsibilities. Use proper wire gauge, fuse protection, strain relief, ventilation, carbon monoxide alarms, smoke alarms, and listed equipment. If you are installing shore power, an inverter, propane heater, mini split, or rooftop AC, this is where a licensed electrician, qualified RV technician, or experienced conversion builder earns their fee.
Rank #4

- Reflective Window Insulation: Our rv window insulation is well-made, which is weight of 200 g / 10.76 sqft. It is of good material and long-lasting
- Aluminum foil roll: Foil insulation roll is the ideal solution for you to beat the heat, reflective insulation roll can stay cool in summer heat and keep your house warm in winter, making you feel comfortable, available in multiple sizes to meet your all need
- Good Material: Reflective insulation roll is made of reflective double aluminum foil and bubble type material, its reflective surface helps to block out the sunshine effectively keep the heat out from the windows, insulation summer,not easily scratched, which can be used for a long time
- Good Performance: Window insulation kit for summer heat not only blocks the sun but it avoid heat loss window insulation summer,and keeps the room cool. This reflective insulation also acts as a barrier insulation summer heat and protects your privacy with its opaque foil surface
- Wide Application: Our insulation roll can be used for a variety of spaces, you can use aluminum insulation roll in windows insulation, garage insulation, rv window insulation,house insulation,roof insulation, window heat blocker, garage door and etc
When to DIY and When to Hire a Pro
DIY rigid foam insulation makes sense if your trailer is structurally sound, you are comfortable measuring and cutting accurately, and you can take the time to seal details. A careful DIY builder can insulate a 6×12 or 7×14 trailer over a long weekend, though a full build with wiring, fan installation, furring, and paneling usually takes several weekends. Expect the insulation-only work to take 12 to 30 labor hours depending on complexity.
The Tool Desk
Outbyte Driver Updater FREEFix the driver behind crashes, sound loss and screen glitchesFind Drivers →Outbyte PC Repair FREEClear out junk files and repair common Windows errorsFree Scan →Hire a pro for spray foam if you want closed-cell foam across large areas, if the trailer has complicated curves or cavities, or if you do not have the PPE, ventilation setup, and product knowledge to handle foam safely. Also hire help if you are adding major electrical service, propane appliances, structural roof penetrations, or HVAC equipment.
A hybrid approach is often the smartest budget. Have a pro spray the roof radius, nose, corners, and hard voids, then install rigid foam board yourself on the flat areas. Or do the whole insulation package yourself but hire an electrician for shore power and battery protection. Spend professional money where mistakes are expensive or dangerous.
Our Practical Specification for a Reliable Camper Conversion
For a typical 6×12 or 7×14 camper conversion intended for three-season use with some cold nights, our baseline would be 1 inch XPS or polyiso between wall ribs, 1 to 1.5 inches in the ceiling, 1 inch XPS at the floor if headroom allows, sealed ramp and side doors, a roof vent fan, and a thin thermal break over metal ribs before interior paneling. In hot climates, we would strongly prefer a white or light-colored trailer exterior because reducing solar heat gain lowers the cooling load before insulation even starts working.
For colder or more demanding use, step up to 1.5 inch wall insulation where cavity depth allows, improve the continuous thermal break, insulate the floor carefully, and use closed-cell spray foam in irregular areas. Pair that with intentional ventilation and appropriately sized heat. A small electric heater can maintain comfort in a well-sealed trailer on shore power, but off-grid heating requires careful energy planning and combustion safety.
For jobsite or contractor use, we would sacrifice a little R-value for durability before we would build a delicate wall. Nonabsorbent insulation, protected wiring, tough lower panels, washable surfaces, secure shelving, and fire-conscious material choices matter more than squeezing every last R into the cavity.
Bottom Line
The best cargo trailer insulation is the one that fits the shallow shell, blocks air movement, manages condensation, limits thermal bridging, and survives vibration. For most DIY conversions, that means XPS or polyiso rigid foam board with sealed seams and a thoughtful thermal break. For premium builds, closed-cell spray foam is hard to beat, especially in irregular cavities and roof transitions. Fiberglass is cheap, but in a mobile metal trailer it usually asks too much from the rest of the assembly.
Do the boring details well: seal leaks, plan wiring before foam, photograph the walls, insulate doors and floors, protect exposed materials, ventilate the living space, and keep the whole build within the trailer’s weight limits. That is what turns a cargo trailer from a hot metal box or cold tin shell into a usable camper, office, or work trailer.
Frequently Asked Questions
What is the best insulation for a cargo trailer conversion?
For most DIY cargo trailer conversions, 1 to 1.5 inch XPS or polyiso rigid foam board is the best all-around choice. It fits shallow cavities, offers roughly R-5 to R-6.5 per inch, resists moisture, and can be sealed well with tape and canned foam.
Is spray foam worth it in a cargo trailer?
Closed-cell spray foam is worth it when budget allows or when the trailer has many curved, irregular, or hard-to-seal cavities. It performs very well, but professional installation can cost $2.00 to $5.00+ per square foot and small trailers often trigger $1,000 to $2,500 minimum charges.
Should I use fiberglass insulation in a cargo trailer?
Fiberglass is usually not the best choice against metal trailer skins. It can lose performance from vibration, compression, moisture, and air movement. If used, it needs a complete air barrier, restraint, and moisture-control plan.
How much does it cost to insulate a 6×12 cargo trailer?
A DIY rigid foam insulation package for a 6×12 cargo trailer commonly runs about $300 to $900 for boards, tape, adhesive, canned foam, blades, furring, and fasteners. Professional closed-cell spray foam may cost $1,000 to $2,500+ because of contractor minimums.
Do I need a vapor barrier in a cargo trailer?
You need condensation control more than a generic plastic vapor barrier. The priority is keeping warm, moist interior air from reaching cold metal skin. Air-sealed foam, taped seams, sealed penetrations, and planned ventilation are usually the better approach.
What’s actually slowing this PC down?
Pick the symptom - the matching free tool is one click away.
Should I insulate the floor of a cargo trailer camper?
Yes, if comfort matters. Floors lose heat to cold air moving below the trailer and can gain heat from hot pavement. A 1 inch XPS layer above the factory floor with a protected plywood overlay is a common solution, while underfloor insulation needs protection from water and road debris.
Quick Recap
Product prices and availability are accurate as of the date/time indicated and are subject to change. Any price and availability information displayed on Amazon at the time of purchase will apply.




